


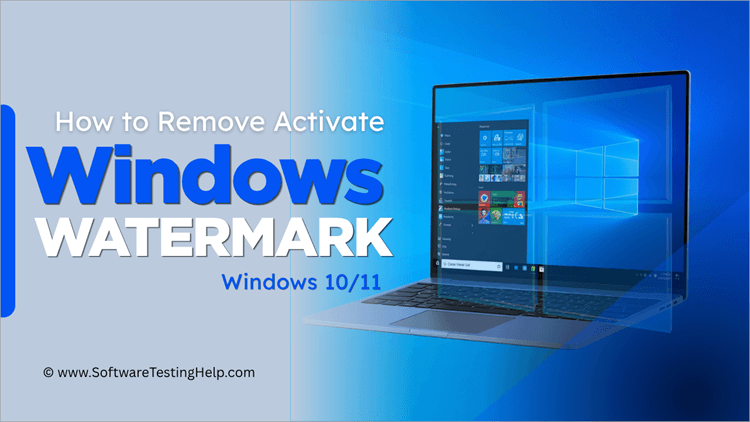
Easy and Quick Steps to fix the “Activate the Windows” watermark on the Windows screen and the reasons why it appears on the Windows screen.
Do you notice the “Activate Windows” watermark on your Windows 10 or 11 in the right corner of your screen? This issue can be very annoying, especially if it covers applications or messes with screenshots. This normally occurs due to license issues or some error in the activation process.
In the following tutorial, I have discussed the causes of the Activate Windows watermark sign and provided safe solutions to fix it permanently from the Windows 10 and 11 screens.
How to Remove the Activate Windows Watermark
To remove the “Activate Windows” watermark from Windows 10 or 11,
- Open Command Prompt as Administrator
- Type taskkill /F /IM explorer.exe
- Press Enter, then
- Type explorer.exe and Press Enter.
For a permanent fix, you have to edit the Registry, which is discussed in the following section.

Table of Contents:
- Why Does the “Activate Windows” Watermark Appear?
- Why Get Rid Of Activate Windows Watermark
- How to Remove Activate Windows Watermark Permanently in Windows 10
- Fix Activate Windows Watermark After Hardware Change
- Activation Error Codes That Trigger the Watermark
- Activate Windows Watermark vs Temporary Fixes (Comparison Table)
- Is It Safe to Remove Activate Windows Watermark Without Activation?
- Frequently Asked Questions
- Conclusion
Why Does the “Activate Windows” Watermark Appear?
Watermark is used by Microsoft as a “push” for their customers to use only the original copy of the Windows Operating System.
Whenever the Windows Activation Technologies (WAT) fails to authenticate the digital license or the 25-digit product key on the Microsoft server, the watermark feature gets activated automatically on your PC screen.
The following are a few reasons why the ” Activate Windows” watermark appears on your screen
#1) Common Reasons It Suddenly Appears: In some cases, a watermark may also appear when your Windows is activated.
It mainly happens because of:
- No Sync with Server: In case your PC is unable to sync with the Internet to update its status with the Microsoft KMS (Key Management Service).
- Digital License Expired: If you had obtained the activation keys as a trial or organizational key that has expired.
#2) Software Corruption: Corruption in the sppsvc.exe (Software Protection Service) can also cause the system to “forget” its activation status.
#3) Expired Evaluation Period: When downloading either a Windows Insider Preview or Evaluation ISO from the Microsoft Evaluation Center, these versions have a “hard” expiry date.
After the expiration date passes, the watermarked status remains permanently, and in the future, the system could start shutting down every hour until a retail license is provided.
#4) Changing Computer Hardware (Motherboard and CPU Swap): Windows licenses frequently rely on the Hardware ID (HWID), which is related to the motherboard. Whenever you swap out the motherboard or CPU for whatever reason, the licensing servers will consider your computer to be a “new” one.
#5) Improper Installation of Windows Version: This is an often-encountered case of “information gain.” Users mistakenly install Windows 10 Pro, even if their license code belongs to the Windows 10 Home variant.
- As the license and the installed version do not correspond, the watermark will not disappear.
- Solution: You cannot “downgrade,” as the proper procedure requires verifying that your current installation matches the license key. Enter winver into the search bar to check.
Why It Sometimes Disappears Then Returns
The watermark can vanish momentarily after restarting the computer or the Windows Explorer process, but it will appear again once Windows refreshes its desktop environment or conducts license validation during an update session.
Why Get Rid Of Activate Windows Watermark
The most important thing is, why do you need to get rid of the Activate Windows Watermark if it is only a watermark?
The watermark, which is placed at the bottom right of the screen, is a source of distraction for most of the users. Also, the watermark signifies your Windows is not activated, and unactivated Windows does not have the following features:
- Windows Defender/Security Features: The unactivated Windows does not offer the security firewall and Windows Defender safety.
- Enable Microsoft Office to be installed: You cannot install Microsoft Office on unactivated Windows, and thus, there are various other software applications that you can not use on unactivated Windows.
- Install Security Updates: You cannot install the latest updates and bug fixes on the system to make it more efficient and useful if Windows is not activated.
- Personalize Desktop: You cannot change the desktop settings, nor can you change the wallpaper if your Windows is not activated.
There are various other features lacking if you have unactivated Windows on your system.
How to Remove Activate Windows Watermark Permanently in Windows 10
There are various ways to fix Activate Windows Watermark, which involve changes in both internal and external files.
Follow any of the methods mentioned below to remove activate Windows watermark:
Method 1: Using Product Key
Whenever a user purchases a licensed Windows, then he/she is provided with a product key that can be further used to reinstall Windows into the system. By using this product key, the user can go to Settings to activate Windows.
#1) Open Settings or press Windows + I from the keyboard and click on “Update & security” as shown in the image below.

#2) Click on “Activation” as shown in the image below and then click on “Change product key.”

#3) A dialog box will open. Enter the product key and click on “Next”.

Locate Windows 10 and install it on the system, restart the system, and Activate Windows Watermark issue will be fixed.
Method 2: Using Ease of Access
Windows provides its users with a feature called the Ease of Access Center, which allows users to make necessary changes to the system wherever needed. But the user must have pre-requisite knowledge of the feature before using it.
Follow the steps mentioned below to know how to remove Activate Windows watermark:
#1) Open Settings or press ”Windows+I” from the keyboard and search for “Ease of Access Center” in the search bar, as shown in the image below.

#2) A dialog box will open. Click on “Make the computer easier to see”.

#3) Click on the checkbox titled “Remove background images (where available),” and then click on “Apply” and then on “OK” as shown in the image below.

After following the steps mentioned above, the Windows Activation Watermark will no longer trouble you.
Method 3: Disabling Windows 10 Tips
You can avoid this error by simply disabling the Windows 10 tips provided by the system. Follow the steps mentioned below to disable Windows 10 tips:
#1) Open Settings or press Windows +I from the keyboard, and a window will open as shown in the image below. Click on “System”.

#2) Now, click on “Notification & action” as shown in the image below and turn off the slider titled “Get tips, tricks and suggestions as you use Windows” and the one below it.

Now the system will deactivate the tips and tricks for Windows and fix this error.
Method 4: Using Script
The Windows Explorer is responsible for reminding the user about the Activation of the Windows watermark. By using a script and saving it in batch format, and running the file as Administrator, you can override this reminder.
Follow the steps mentioned below to perform this task:
#1) Click on the Windows button and search for Notepad, as shown in the image below.

#2) Type the text written below in the file as shown in the image below.
“@echo off
taskkill /F /IM explorer.exe
explorer.exe
exit”

#3) Save the file as Active.bat and select the file as All Files, as shown in the image below.

#4) Locate the file and right-click on it; now click on “Run as Administrator” as shown in the image below.

Now, restart your system, and Activate Windows watermark issue will be fixed.
Method 5: Using Third-Party Tools
There are various third-party tools that you can use to fix this watermark issue. Follow the steps mentioned below to install the watermark disabler tool on your system:
=> Click here to install watermark disabler tool
Download the software from the link mentioned above, unzip the downloaded file, and install the exe file present in the zip folder. Now an installer window will open, as shown in the image below.

Install the software and restart the system, and the error will be resolved.
Method 6: Using Windows PowerShell
The Windows PowerShell will allow you to make changes directly to the core files of the system as it provides special access to all files. Follow the steps mentioned below to fix Activate Windows watermark using Windows PowerShell:
#1) Press the Windows button and search for Windows PowerShell. Right-click on “Windows PowerShell” and click on “Run as administrator” as shown in the image below.

#2) A window will open. Type “slmgr /renew”and press Enter.

Now restart your system, and the issue will be fixed.
Method 7: Using Regedit
This method involves serious risk, so only a person with a good knowledge of the system personalization should try this method to remove activate Windows watermark. The method involves making changes in Regedit files, which directly affect the core files of the system.
#1) Press Windows + R from the keyboard and type “regedit” in the search bar, and click on “OK,” as shown in the image below.

#2) Enter the mentioned address in the search bar HKEY_CURRENT_USER\Control Panel\Desktop and navigate to “Desktop” as shown in the image below. Now, click on “Paint Desktop Version.”

#3) A dialog box will open. Change the value data to “1”.

Restart the system, and Activate the Windows Watermark issue will be fixed.
Fix Activate Windows Watermark After Hardware Change
The installation of a new motherboard, for instance, is the most likely cause why a former “Genuine” edition of Windows begins showing the activation watermark.
When installing a new motherboard, Windows considers it a totally new computer system, making your current license invalid.
Issues with Motherboard Installation: When you install a new motherboard, you may begin seeing the watermark since your hardware identification no longer matches that in Microsoft’s database for activation. OEM licenses typically cannot be transferred to a different motherboard, but retail licenses might.
Recover Digital License: In case your license key of Windows is tied to your Microsoft account, you might get the activation back after making changes to your hardware by logging into the same account and clicking on Settings > Update & Security > Activation . Look for “Windows is activated with a digital license linked to your Microsoft account.”
Activation Error Codes That Trigger the Watermark
Whenever Windows cannot verify your license key, it usually generates a unique hexadecimal error code. These codes are the way Windows communicates to you the reason for the watermark.
Knowing the error code will help you find the quickest solution to your problem.
Fix Error 0xC004F213
- What it means: Windows tells you that there is no product key present in the system.
- The Cause: This issue usually happens when you replace the motherboard or buy a “barebone” computer without an operating system license in its BIOS.
- The Fix:
- Go to Start menu > Settings > Update & Security > Activation.
- Click “Change product key,” then input your 25-digit product key.
- Without a product key, you can buy a digital license in the Microsoft Store to get rid of the watermark.
Fix Error 0x803F7001
- What it means: There is no valid license for your hardware.
- The Cause: This is the most frequent generic activation error. It can be caused by server overload, an unstable internet connection, or a mismatch between digital entitlement and hardware ID.
- The Fix:
- Run the Troubleshooter: Navigate to Settings > Update & Security > Activation and choose Troubleshoot.
- Phone Activation: In case the internet method does not work, press Win + R, enter slui 4, and proceed through the process.
Fix Error 0xC004C003
- What it means: The product key used is either expired or blocked by the server.
- The Cause: Common causes include using a “grey market” key (inexpensive keys from eBay/other retailers) or trying to activate a Windows Pro with a Windows Home key.
- The Fix:
- Ensure correct edition: Press the Windows key + S and type winver to confirm the version/edition installed matches the key you’ve bought.
Contactseller: If your purchase was a retail product key and you get an error code, it means your key has been used too many times. You’ll need to get a new key from your retailer.
Activate Windows Watermark vs Temporary Fixes (Comparison Table)
Before you start editing system files, it is crucial to understand the difference between hiding the watermark and activating your OS. While hacks can clear the screen; they do not grant you full access to Windows features.
Use the table below to decide which path is right for your technical needs and safety requirements
| Feature | Official Activation | Registry / CMD Hacks |
|---|---|---|
| Watermark Status | Permanently Removed | Hidden (until update) |
| Difficulty Level | Very Low | Moderate |
| Personalization | Unlocked (Wallpaper, Colors) | Locked |
| System Stability | 100% Stable | Risk of System Errors |
| Security Risk | Zero | Low (if manual) |
| Persistence | Survives all updates | May reset after update |
Is It Safe to Remove Activate Windows Watermark Without Activation?
Although there are some temporary ways to hide the watermark, such as resetting the Windows Explorer or applying some display settings, they will not resolve the problem with the activation of your computer. These ways might become ineffective if you restart your computer or install new updates.
There are also several ways that involve changing some registry settings or running scripts from unknown websites; however, it might lead to some problems with your computer’s stability or even become a risk for its safety. The only way that guarantees no problems with your computer is to activate it properly.
Frequently Asked Questions
1. How do I remove Activate Windows watermark permanently?
• You can remove Activate Windows watermark permanently very easily by simply editing the Registry
• Press Win + R, type regedit, and hit Enter.
• Navigate to the following path: Computer\HKEY_LOCAL_MACHINE\SYSTEM\CurrentControlSet\Services\svsvc
• In the right pane, find the entry named Start.
• Right-click Start, select Modify, and change the Value Data to 4.
• Click OK and Restart your computer.
2. Why did Activate Windows watermark suddenly appear?
The watermark gets displayed if Windows Software Protection Service detects that your computer isn’t licensed properly. Such a case may occur if:
• Your free trial has ended.
• The machine hasn’t checked its licensing status online for at least 30 days.
• You have made major modifications to your PC’s hardware (for instance, you’ve changed the motherboard).
• An update to Windows has rendered an accepted “grey market” key invalid.
3. Can I remove Activate Windows watermark without a product key?
Yes, you can use registry editor or notepad for creating a batch file for hiding the watermark. It won’t enable the operating system, but it’ll make sure that you won’t see the watermark on your screen.
You won’t be able to customize anything such as wallpapers because there’s no proper key available yet.
4. Why does the watermark appear after replacing motherboard?
Microsoft links your license of Windows with your Hardware ID (HWID), more precisely, the motherboard. The moment you change it, Microsoft will understand that you want to put your license into two PCs.
The Solution: In case you have bought a retail copy, you should visit Settings > Activation Troubleshooter and choose “I changed hardware recently”.
5. Does Windows update cause activation watermark?
An update does not directly cause a watermark to appear, although it can initiate a validation process. If you were using a work-around or an unlicensed activation process, then a large update (such as a Version Update) will overwrite the system files, thereby resulting in the watermark appearing again.
6. Is it safe to use Registry Editor to remove the watermark?
Indeed, it is absolutely safe to do that, as long as you precisely follow the steps in the guide. The use of the svsvc registry fix just blocks the service that generates the overlay.
In contrast to third-party activators, editing the registry manually doesn’t require downloading anything from the Internet. It is always recommended that you create a backup of the registry before you start making any alterations.
7. How do I remove the Windows 10 activation watermark?
There are four easy ways to remove Windows 10 activation watermark:
• Making changes in the registry settings.
• Using Powershell.
• Using script.
• Using Ease of Access center
All these methods are explained in above sections.
8. Why is there an Activate Windows watermark?
The Activate Windows watermark is present in order to ensure the credibility of the Windows operating system and ensuring that nobody exploits.
9. How do I know if my Windows is activated?
A user can easily check if the Windows on the system is activated or not by following the steps mentioned below.
• Open My PC.
• Right-click on the screen and click on “Properties”, a window will open. Check the label titled Windows Activation.
Conclusion
In this guide, we’ve explored the reasons behind the “Activate Windows” watermark and provided you with 7 effective solutions to remove it. Whether you’re dealing with an unactivated Windows copy or troubleshooting issues with your activation, the methods shared here are simple, practical, and easy to follow.
By following these step-by-step fixes, you can permanently remove the watermark and regain a clean desktop experience. If one method doesn’t work, don’t hesitate to try another, and always ensure your Windows activation is valid to avoid future issues.
If you have any further questions or need additional help, feel free to drop them in the comments below.
Research Process
Time taken to research and write the solutions: Approximately 40 hours were spent on comprehensive research, review, evaluation, verification, and final preparation to ensure accurate and reliable information.
For more Windows-related guides, you can explore our range of tutorials below:
- How to Disable or Turn Off Windows Defender on Windows 10/11
- Easy Steps to Fix Windows 10 Start Menu Not Working
- How To Reinstall Windows 10: Reload Windows 10
- How to Fix Windows Update Not Installing for Windows 10/11
Was this helpful?
Recommended Reading
-

In this guide, you will come across step-by-step solutions to factory reset Windows 10 when your PC won’t start. If your Windows 10 PC is running slowly, experiencing errors, or won’t boot properly, performing a factory reset can help restore it to its original state. A reset removes system issues,…
-
Read this detailed review of HitPaw Watermark Remover tool and learn to remove Watermarks from video and images easily: Many times you are in a hurry and urgently want to edit an image or remove unwanted stuff from pictures or videos. In this regard, watermark remover can be a game-changer…
-
This tutorial will help to understand the causes and provides solution for the “UNEXPECTED_STORE_EXCEPTION” (0x00000154) Blue Screen of Death error on Windows 10 and 11. If you are facing the "Unexpected Store Exception error on your Windows 10 or Windows 11 device, then this guide will help you understand its…
-
Here we learn the causes of the Hard Drive Not Showing Up error in Windows 10 and explore various ways to solve hard drive not detected error: The data is the most crucial thing in today's world, and you can understand how frustrating it can be when one day your…


Permanently? Should have used “temporarily”
Well, Powershell and Regedit solutions are temporary. After a few hours the message reappears.