


Here we will discuss multiple effective methods to disable Service Host Sysmain, a Windows service with high disk usage:
A fast and efficient system is one of the crucial things that users need as it allows them to perform at greater efficiency. But how will you feel if you have to wait for about 5- 10 seconds to open an application or a program?
This will surely annoy you, so it is most suitable to monitor your CPU usage and close the program using maximum CPU usage.
So, in this article, we will discuss a service in Windows called Service Host Sysmain. The service utilizes a high CPU usage and therefore we will learn how to disable service host Sysmain’s high disk usage.
Table of Contents:
Service Host Sysmain

Let us understand what is Sysmain and why should you disable it.
If you read about SysMain, you will come around Superfetch, and you will know that both of them are the same service.
Sysmain is a service that contains programs that not only optimize the system but also provide users with efficient results. Besides this, it also allows users to enjoy automated tasks which ease their work.
However some users have reported Sysmain disk usage, so you can disable it if it consumes high CPU usage as it runs various background processes.
Ways To Disable Service Host Sysmain
There are various ways to allow users to resolve server host Sysmain issues, and some of them are discussed below:
Method 1: Scan System
Most malware is responsible for such system failures and CPU usage because they run malicious programs in the background, which allow them to replicate and send more data to their servers. Viruses like Trojans remain connected to malicious servers, so there can be a more excellent hike visible in the data and CPU usage.
Therefore, the first thing that you need to do is scan the system. To scan your system, you can use any antivirus with additional features, as it will make it easier for you to scan the system and find the virus. Once the virus is located, you can quickly fix it, and if malicious files are not found, you can proceed to other steps listed below.
Method 2: SFC Scan
System File Scan is a unique feature of Windows, which allows users to quickly scan their system and locate various errors in the system.
Also, the errors can be categorized into multiple categories based on the output message. You can initiate this scan promptly from the Command Prompt, and once the scan is initiated, it becomes easier for the system to locate the real issue.
So follow the steps listed below to run a system file scan:
Note: Command Prompt (Admin) is required to initiate such commands, so if you are a client machine, you will need server permission to run this scan.
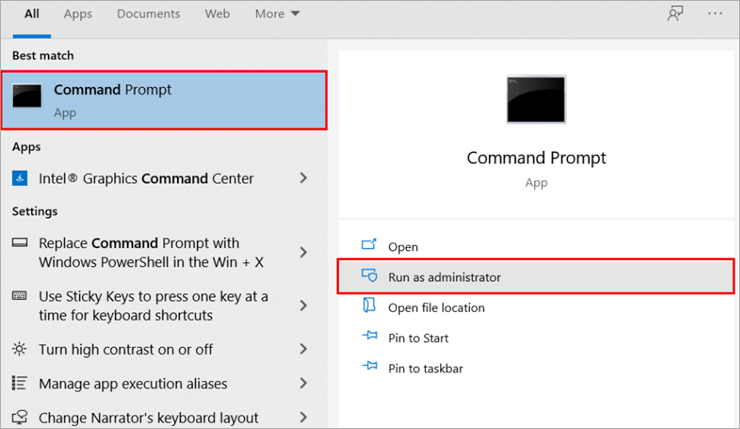
#1) Type Command Prompt in the start menu and click on “Run as Administrator“.

#2) When the Command Prompt opens, type “SFC/scan now” and press Enter. Now the system will run the process as displayed in the image below.

- Windows Resource Protection found corrupt files but could not fix some of them.
- Windows Resource Protection could not perform the requested operation.
- Windows Resource Protection did not find any integrity violations.
- Windows Resource Protection found corrupt files and successfully repaired them.
Once the system File Scan is done, you can restart the system and see if your issue is resolved.
Note that it can take 10-15 minutes to perform the complete system File Scan.
Method 3: Disable Backup Intelligent Device
Backup Intelligent Device is a Service Host Sysmain, which makes it easier for the users to back up their device and save data. But this service runs in the background and consumes high CPU usage, so you must disable this service if your system keeps lagging.
You can easily disable this service with some steps listed below:
#1) Right-click on the Taskbar and a drop-up menu will appear. Click on “Task Manager” as displayed in the image below.

#2) When Task Manager opens, click on “Services” and then click on “Open Services“.

#3) Now locate Background Intelligent Transfer Service and right-click on it. A drop-down menu will appear as displayed below. Click on “Stop”.

Now, you must wait for 4-5 minutes and then restart your system and monitor CPU usage to see if the issue has been resolved.
Suggested Read => Different Effective Methods to Fix WSAPPX High Disk and CPU Usage Issues
Method 4: Disable Superfetch Service
Superfetch is the other name for Solved Service Host Sysmain, and it is a beneficial service as it is a collection of various services bunched up together to provide work ease to the user. But these services require high CPU usage, so you can disable this service host: Sysmain by following the steps listed below:
#1) Click on the Windows button, search for Command Prompt, and click on “Run as administrator“, as displayed in the image below.
#2) Type “net.exe stop superfetch” as displayed in the image and press Enter.

Now you should restart your system, and once your system is up and running, you can monitor CPU usage to see if the issue is resolved.
Method 5: Disable SysMain Using the Service Manager
Service Manager is a program in Windows that allows users to access and disable services in the system. It contains the list of all active and inactive services present on the system.
You can directly disable the Sysmain service from the service by following the steps listed below:
#1) Press Windows + R from the keyboard and then type “services. msc” and press Enter.

#2) Locate SysMain and then right-click on it, and from the list of options, click on “Properties“, as displayed in the image below.

#3) When the properties dialog box opens, then under the label “Startup type:” select Disabled and then click on “Apply” and then click on “OK”.

Now restart the system and see if the issue is resolved.
Method 6: Disable Sysmain Using Command Prompt
Command Prompt is a handy tool in Windows as it allows users to pass the commands in the system through CLI and makes the process easier and more efficient. So, you can disable SysMain on your system by simply typing a few commands in your Command Prompt.
Follow the steps listed below to initiate the process:
#1) Click on the Windows button, search for Command Prompt, and click on “Run as administrator“, as displayed in the image below.

#2) Type “sc stop “SysMain” and press Enter and then type “Scconfig “SysMain” start=disabled”, and press Enter again.

Your SysMain service will be disabled. Now, quickly restart your system and check if the issue is resolved.
Method 7: Clean Boot
Clean Boot is a warm boot in which the system starts only with the essential system files and no other startup applications. This type of Boot makes the system faster and allows users to access system files and disable various services in the system.
So follow the steps listed below to enable clean Boot on your system and fix service host disk usage:
#1) Press the “Windows+R” button from your keyboard and type “MSConfig“.

#2) A window will open, click on “Selective startup” and uncheck “Load startup items“.

#3) Click on “Services” and then click on “Hide all Microsoft services“. Click on “Disable all” to disable all services at the time of Boot.

#4) Now, click on “Startup” and “Open Task Manager” as shown in the image below.

#5) Right-click on all the applications one after another and click on the “Disable” option or click on the “Disable” button at the bottom.

Method 8: Upgrade CPU
If even after following all the methods listed above, you cannot resolve this issue, then there are chances that your system configuration is low.
In such cases, you must opt to reconfigure and upgrade your CPU to switch your hard disk with SSD, as they are faster and more efficient. You can also increase your RAM and processor version, which provides a significant boost to your system.
Method 9: Check Hard Drive
Whenever a user saves a file on the hard drive, it is stored dynamically, which means the memory is allotted for the file when it is saved. But when the file is deleted, that memory location remains static, and the memory does not clear itself.
Therefore, you must clean those memory locations, as the crawler will go through all memory locations whenever you search for anything on your system.
So you must either defragment your hard disk or switch to an advanced version of the hard disk.
Frequently Asked Questions
Is it ok to disable service host Sysmain?
Yes, if SysMain is consuming high CPU usage, you can disable it, but this will disable some automatic programs in the system.
What is service Sysmain?
It is a service from Windows that contains various services that users can utilize, like automatic updates and other programs that run in the background.
Do I need Sysmain?
Sysmain is not a mandated program and disabling it won’t turn out to be a BSoD error. But it is a beneficial service, so it is advisable to keep the service running.
What is the use of the service host Sysmain?
The Service host Sysmain 100 disk does not handle only one process, but various processes are governed by this service, which makes it very useful for the user.
Is the service host a virus?
No, it is not a virus, whereas it is a Windows service that aims to simplify the user’s work and automate numerous processes.
Is Superfetch needed?
Superfetch is the other name for Solved Service Host Sysmain, so yes, it is needed because it has various benefit programs. But if it consumes high CPU usage, you can indeed disable it.
Conclusion
Everyone wants their system to be efficient, which often comes with investing more money. However there are a few services that allow users to optimize their system and make it faster and more efficient to use.
So in this article, we have discussed one such service known as Service Host: Sysmain and have learned various ways to disable it to prevent Sysmain disk usage.
Was this helpful?
Recommended Reading
-

Here we review and compare the Top External Hard Drive with features to guide you to find out the Best External Hard Disk as per your need: Storage spaces have become the epitome of using a laptop or a PC device, and without an external hard disk, it's not possible.…
-
List and comparison of the top free Disk Partition Manager Software to select the best Partition Software for Windows: System partitions play a very important role in modern computer devices. They can store data, keep system files away from user data and install multiple operating systems on the same device.…
-
Review and compare the top Video Hosting Sites with features and video upload specifications to select the suitable paid or free video hosting site: Online video hosting websites allow you to upload and share video content with your online audiences. Video-sharing sites have built-in video players that support adaptive playback…
-
List of the Best Cloud Hosting Service Provider Companies with cost details and feature comparison: What is Cloud Hosting? Cloud hosting is the process of hosting web applications in a cloud computing environment. Organizations outsource the services for computing and storing of resources and that, in turn, is called cloud…
-
Review and compare the top free Website Hosting services with features and technical specifications and decide the best free web hosting service as per your requirements: When you own a business, you make efforts to make it grow. In today's time of digitalization, online marketing is a need for every…
-
Review and compare the top Rust Server Hosting Providers with features, technical specifications, and pricing to select the best Rust Server that suits your requirements: You may have heard about Rust if you enjoy playing video games. Rust is a popular video game that has achieved a lot of success.…
-
A comprehensive list and comparison of the top Web Hosting Services in Canada. Select the best Canadian Web Hosting service from this list: Are you searching for a company that provides the best Website Hosting in Canada? If yes, then you are in the right place. Various Canadian web hosting…
-
This tutorial enlists the top ARK Servers with features, pricing, and comparison to help you select the best ARK server hosting available: The ARK: Survival Evolved game boasts a captivating array of mysteries and multi-player challenges, from taming supernatural beasts to riding dinosaurs and battling for survival. You will get…


