


Quickly Fix Windows 10 Start Menu not working with proven solutions including PowerShell, Registry, SFC, and DISM repairs without reinstalling Windows.
If your Windows 10 Start Menu is not working, freezing, or refusing to open then this is due to corrupted system files, Windows updates, or background service errors. You can resolve it easily and quickly without reinstallation of the Windows Operating system.
In this guide, I’ll walk you through simple and safe steps to resolve the Windows 10 Start Menu not opening or working problem quickly.
Table of Contents:
- How Do You Fix a Windows 10 Start Menu That Isn’t Working?
- Why is the Windows 10 Start Menu Not Working?
- Quick Fixes for Windows 10 Start Menu Not Working Error
- 8 Safe Ways To Fix Windows 10 Start Menu Not Working Error
- Method 1: Fix Taskbar and Start Menu Display Issues
- Method 2: Fix Start Button Not Working Using PowerShell
- Method 3: Run Windows Repair Tools to Fix the Start Menu
- Method 4: Rebuild the Windows Search Index
- Method 5: Windows 10 Start Menu Not Working Registry Fix
- Method 6: Fix Start Menu Problems Caused by Third-Party Software
- Method 7: Advanced Solutions for a Windows Start Menu That Won’t Open
- Method 8: Repair Install Windows 10
- Frequently Asked Questions
- Conclusion
How Do You Fix a Windows 10 Start Menu That Isn’t Working?
A Windows 10 Start Menu that isn’t working can be fixed using any one of the following methods – restarting Windows Explorer, performing system file checks through SFC and DISM scan, restarting Start Menu service or updating Windows to the latest updates. However, if these solutions do not help, create another user profile or repair Windows 10.
Why is the Windows 10 Start Menu Not Working?

The following are some reasons why Windows Start Menu fails to work:
- Windows files that affect the performance of Windows components.
- Windows updates that affect the Windows system and result in the development of bugs in Windows.
- The corruption of Windows user profile which affects the performance of Windows Start Menu.
- Application errors that affect the performance of Windows components.
- The issue with Windows Explorer or Start Menu that affects the responsiveness of the Start Menu.
- Corruption of Windows application data that affects the performance of Windows components.
- The corruption of registry settings or setting configuration which affects the performance of Start Menu.
- Malware infection that affects the performance of Windows components.
In the next section, I have outlined the best ways to fix Windows 10 Start Menu not working problem.
In the section below, I have covered the best method to fix the Windows 10 Start Menu not working quickly.
Quick Fixes for Windows 10 Start Menu Not Working Error
The following are the 3 fastest ways to fix the Windows 10 Start Menu Not Working
1. Restart Windows Explorer (Fastest Fix): Windows Explorer controls the Start Menu, taskbar, and desktop. Restarting it often fixes temporary glitches. This method usually restores the Start Menu immediately.
Steps :
- Press Ctrl + Shift + Esc to open Task Manager
- Find Windows Explorer
- Right-click it and select Restart
Follow the steps listed below to restart explorer:
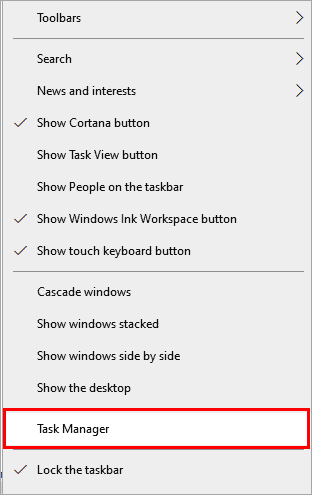
#1) Right-click on the taskbar and then click on “Task Manager”.
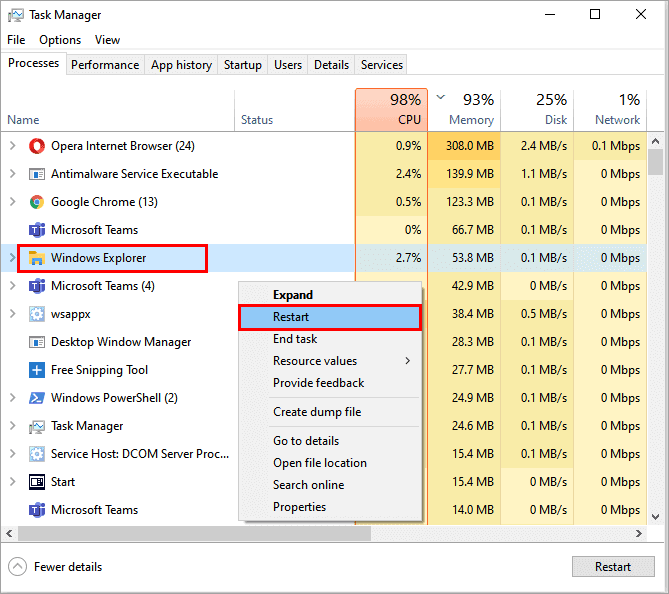
#2) A dialog box will open as displayed in the image below, right-click on “Windows Explorer” and then select “Restart”.
2. Sign Out and Sign Back In: User profile sync issues can prevent the Start Menu from responding.
Steps:
- Press Ctrl + Alt + Delete
- Select Sign out
- Sign back in and test the Start Menu
3. Restart Your PC: If above both methods didn’t work, then the last fastest way to fix it is to restart your PC.
Steps:
- Save your work
- Restart your computer normally
- Check if the Start Menu is working after login
4: Malware Scan
Various errors occur on the system due to infected files, which are called malware. These files slowly infect the system and then cause various service failures in the system. So you must scan your system regularly and make sure that there is no malware present in your system.
5. Update drivers
Drivers play a major role in syncing devices with the system. Therefore, a user must take care that all the drivers are updated to the latest versions because there are chances that the previous versions of drivers are corrupted and so you are facing numerous errors in the system.
Follow the steps mentioned below to update the drivers on your system:
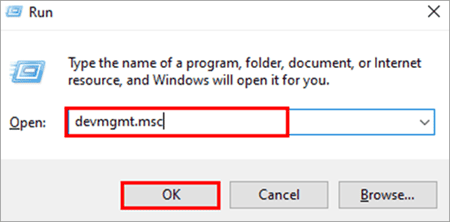
#1) Press Windows +R on the keyboard and then type “devmgmt.msc”. Click on “OK” as displayed in the image below.

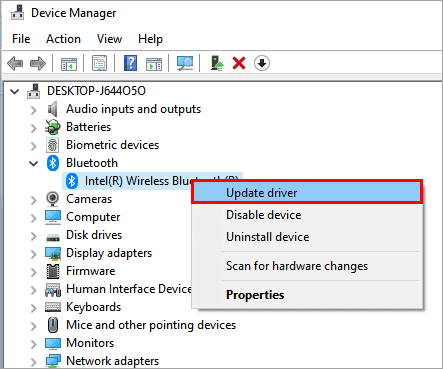
#2) Now, right-click on all the drivers and click on “Update Driver”.
8 Safe Ways To Fix Windows 10 Start Menu Not Working Error
There are various ways to fix this error and some of them are mentioned below:
Note: Use “Windows +I” to open settings and “Windows +R” to open Run, Command Prompt and PowerShell can be opened from Run too.
Method 1: Fix Taskbar and Start Menu Display Issues
You must make sure that the taskbar is locked in the settings, this makes it easier for you to locate the cause of the Windows 10 start button not working error and also fix this error.
Follow the steps mentioned below to lock the taskbar:
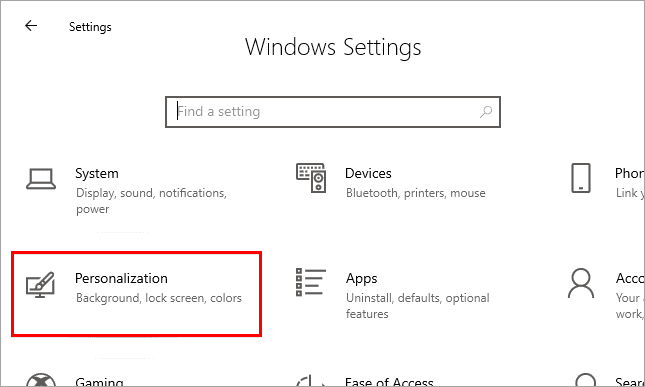
#1) Press Windows + I on the keyboard to open settings. A window will open as displayed in the image below, then select “Personalization”.
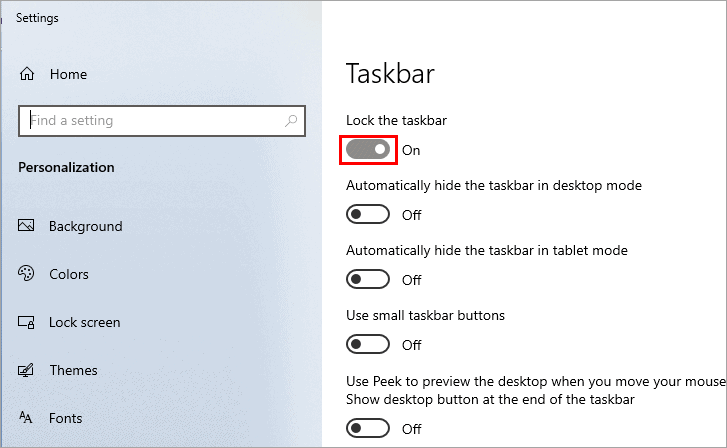
#2) Click on “Taskbar” and then under the heading “Lock the taskbar” toggle the switch to off as displayed in the below picture.
Method 2: Fix Start Button Not Working Using PowerShell
Windows provides its users with a command-line interface called Powershell. The interface makes it easier for the users to change the system files and fix various errors.
Follow the steps listed below to fix this error using Powershell:
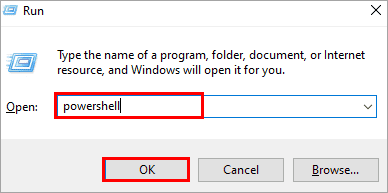
#1) Press Windows + R on the keyboard type “Powershell” and then click on “OK” as presented in the image below.
#2) A blue screen will appear as you can see in the image below, type the text mentioned below and press Enter.
“ Get-AppXPackage -AllUsers | Foreach {Add-AppxPackage -DisableDevelopmentMode -Register “$($_.InstallLocation)\AppXManifest.xml”} “

#3) A process will begin loading and all files will be installed.
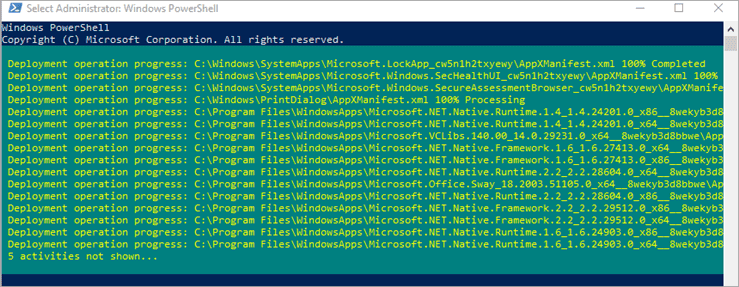
By entering the mentioned command in PowerShell, the system re-installs all the respective system programs. When the programs are installed, then restart the system and the issue will be resolved.
Method 3: Run Windows Repair Tools to Fix the Start Menu
Run System File Checker (SFC)
Windows provides its users with a feature known as System scan, which allows them to locate and fix various errors in the system. Follow the steps mentioned below to run a system scan and locate errors on the system:
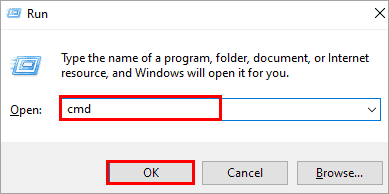
#1) Press Windows + R on the keyboard, Run window will open. Type “cmd” and then click on “Ok”.
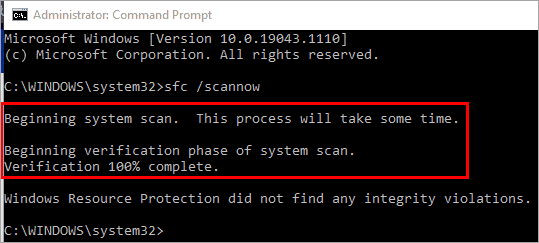
#2) Type “sfc /scannow” and press Enter. The process will begin as depicted in the image below.
Run DISM Repair Commands
In case the above SFC doesn’t work either, try using DISM (Deployment Image Servicing and Management) command-line tool in order to restore corrupted images on Windows system.
- Press Windows+X and choose Command Prompt (Admin) or Windows PowerShell (Admin).
- Type the command and press Enter:
- DISM /Online /Cleanup-Image /RestoreHealth
- Wait until the procedure is done. It can take some time.
- Restart your computer and see if the Start menu is fixed.
And if not, do a System File Checker next:
sfc /scannow
DISM helps fix Windows image, while SFC deals with corrupted files, which makes the combination one of the best ways to fix Windows Start Menu.
Method 4: Rebuild the Windows Search Index
Rebuilding the index in Windows 10 can help you fix Windows 10 start button, not working error. Follow the steps listed below to initiate the rebuild index in Windows 10:
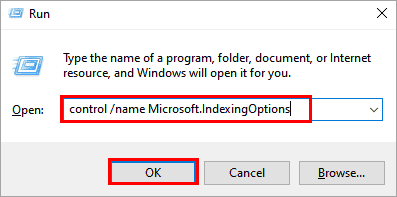
#1) Press Windows + R on the keyboard and type ” control/name Microsoft.IndexingOptions”. Click on “OK”.
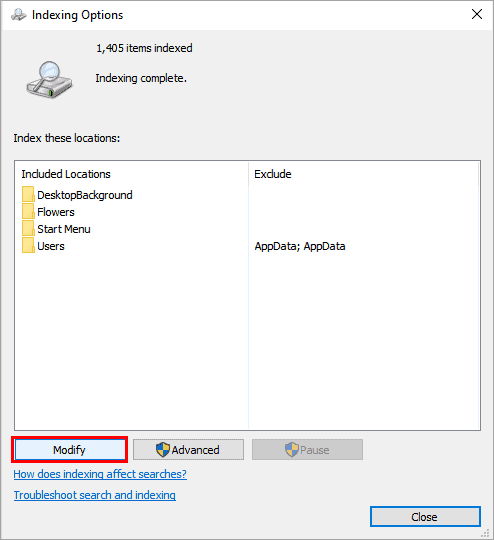
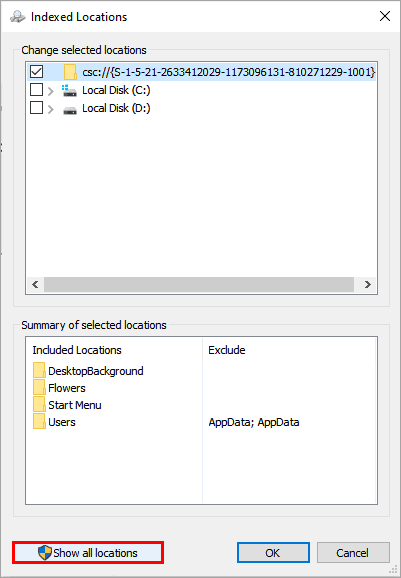
#2) A dialog box will open as displayed in the image below. Click on “Modify”.
#3) Click on “Show all locations”.
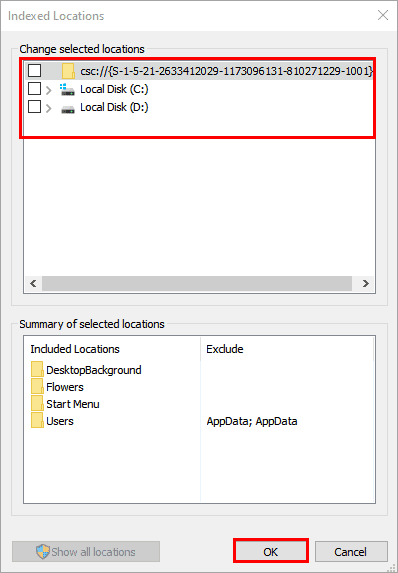
#4) Uncheck all the directories in the column “change selected locations”. Click on “OK”.
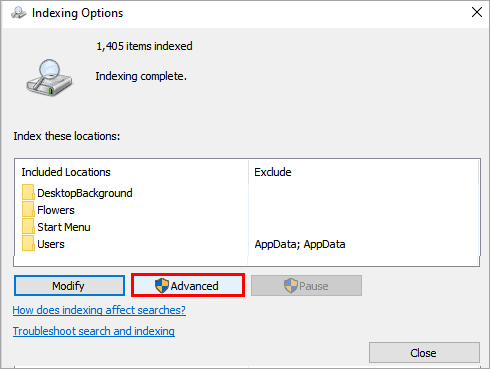
#5) Click on “Advanced” as depicted in the image below.
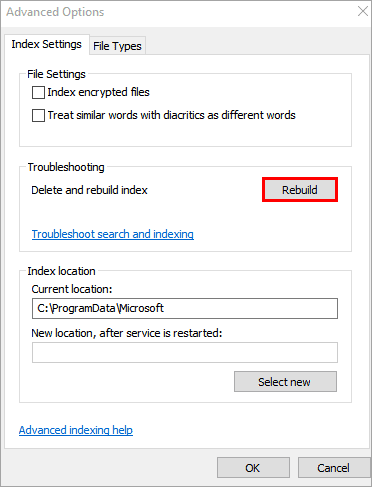
#6) A dialog box will open. Click on “Rebuild”.
Method 5: Windows 10 Start Menu Not Working Registry Fix
Create a New Registry Entry
Adding a new registry for the start menu can fix this error. Follow the steps listed below to create a new registry:
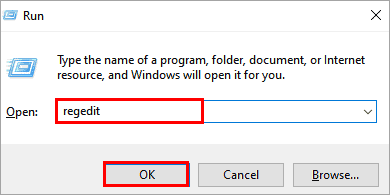
#1) Press Windows + R on the keyboard and type ‘Regedit” as depicted in the image below. Then click on “OK”.
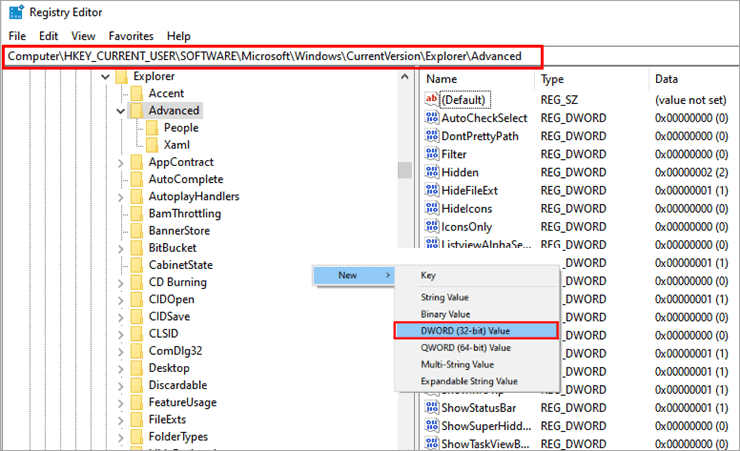
#2) A window will open as shown in the image below. Type “Computer\HKEY_CURRENT_USER\SOFTWARE\Microsoft\Windows\CurrentVersion\Explorer\Advanced”, right-click on the screen and click on “New” and then click on “DWORD(32-bit) value.
#3) Name the new file as “EnableXamlStartMenu” as presented in the image below.
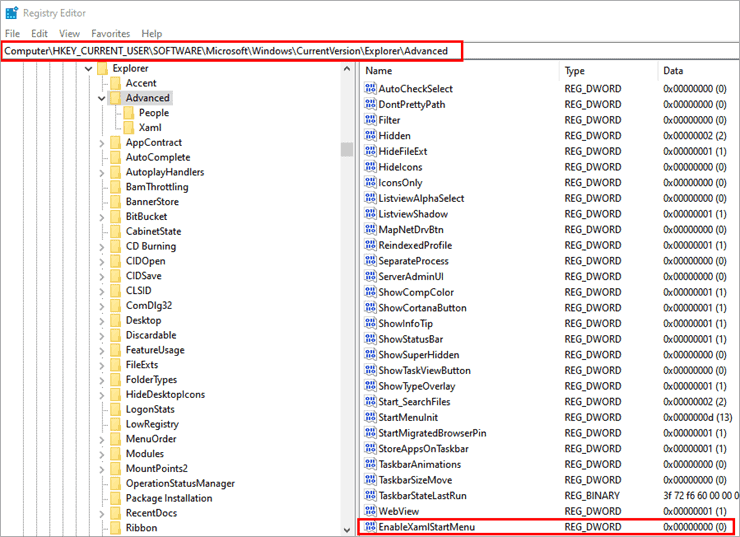
Now Restart the system and the Windows 10 start menu not working error will be resolved.
Back Up the Registry Before Making Changes
It is advisable to back up your registry first so that you have a backup available for restoration if you do not like the changes.
- Press Windows + R key combination, type regedit in the dialog box that pops up, and then press Enter key.
- Open the Registry Editor and go to the File menu on top left and click on Export.
- Choose where to save your backup file.
- Check All under Export Range.
- Click on Save.
To perform restore of the registry file, open the Registry Editor again, go to the File menu on the top left and click Import and browse through the file that you created as backup.
Risks Associated with Registry Fix and Precautions
Fixing the problems in the registry helps resolve problems such as Start Menu. However, wrong changes in the registry will result in system instability and non-working Windows features.
Precautions include:
- Back up the registry before making changes.
- Create a System Restore Point for extra precaution.
- Follow all the instructions related to registry modification and make only those changes that are recommended.
- Dangerous websites are to be avoided if you want to download some registry files.
- Always restart your computer after making registry modifications.
Method 6: Fix Start Menu Problems Caused by Third-Party Software
Uninstall or Repair Dropbox
Sometimes Dropbox becomes a reason for interfering with the taskbar and Start menu. By changing Dropbox settings, we can fix this error.
Follow the steps listed below:
#1) Press Windows + R from the keyboard, a dialog box will appear type “Regedit” and click on “OK” as shown below.

#2) A window will open as depicted in the image below. In the address bar type “Computer\HKEY_LOCAL_MACHINE\SYSTEM\CurrentControlSet\Services\WpnUserService” and click on the file titled “Start”. Enter value data as ”4” and click on “OK”.
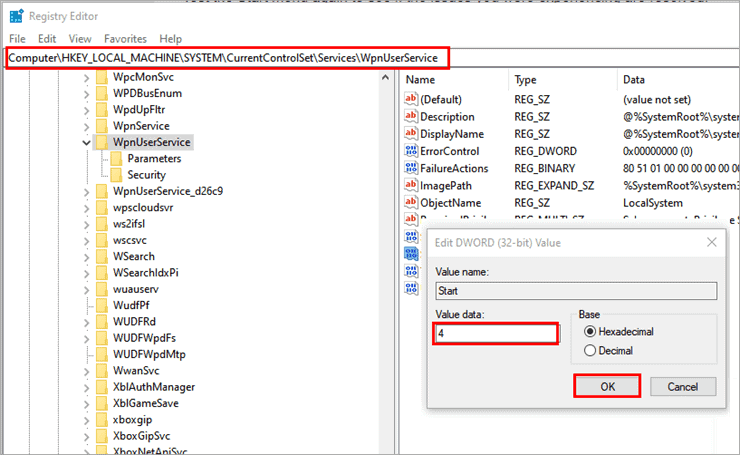
Now restart the system and the start menu issue will be resolved.
Disable Recently Installed Applications
The installation of new software can create conflicts with other processes running in Windows and lead to the unresponsiveness of the Start Menu. To find out whether this is the case, you need to either disable or remove the recently installed software.
- Click on the Windows key + R, enter appwiz.cpl and press the Enter button.
- In Programs and Features, select the “Install Date” option.
- Identify the software installed just before the Start Menu problem emerged.
- Remove or disable the potentially problematic software.
- Reboot your PC and check the Start Menu.
Possible reasons include the software that optimizes your computer, alternatives to the Start Menu, antimalware software, and desktop management software.
Method 7: Advanced Solutions for a Windows Start Menu That Won’t Open
Create a New User Account
Corrupted user profiles can cause the Start Menu in Windows 10 not to work. To find out whether this problem can be fixed by creating another user profile, you should follow the steps below.
- Press Ctrl + Shift + Esc to launch the Task Manager window.
- Go to File > Run new task.
- Typing cmd in the provided space, select Create this task with administrative privileges and click OK.
- Enter the following command, entering the name of the new user and the password for this account in place of NewUser and Password respectively:
– net user NewUser Password /add
- (Optional) Make sure the new user has administrator rights:
net localgroup administrators NewUser /add
- Log off from your current user account and log in using the new account.
See if the Start Menu works in the new account. In case the problem disappears, it proves that your user profile has been corrupted.
Reset Your PC
Windows provides its users with a feature known as Reset. The feature allows the users to return the system to the default settings, making no changes to the data.
Follow the steps mentioned below to reset your system:
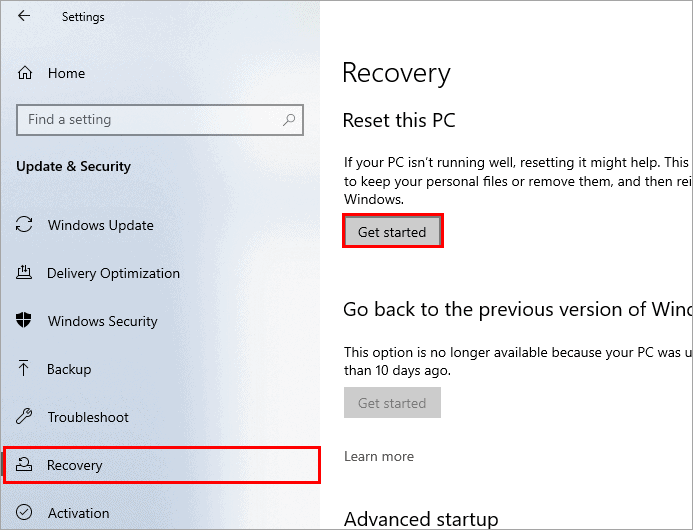
#1) Press Windows +I on the keyboard to open settings. A window will open, as depicted in the image below, click on “Update & Security”.

#2) A window will open as presented. Click on “Recovery” and under the title “Reset this PC” select “Get started”.
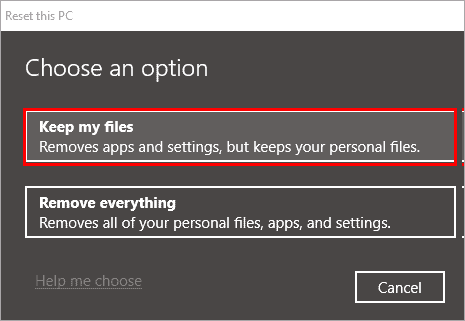
#3) A dialog box will open. Click on “Keep my files”.
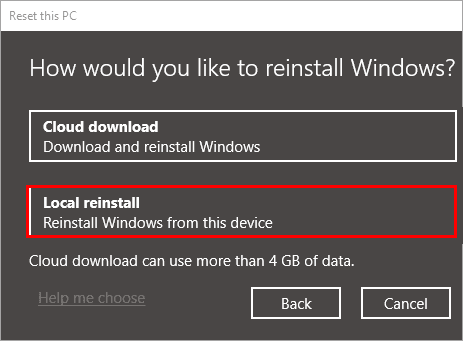
#4) Then click on “Local reinstall” as displayed in the image below.
#5) Click on “Next”.
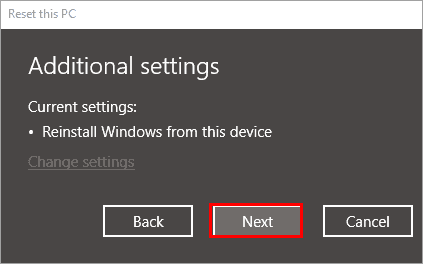
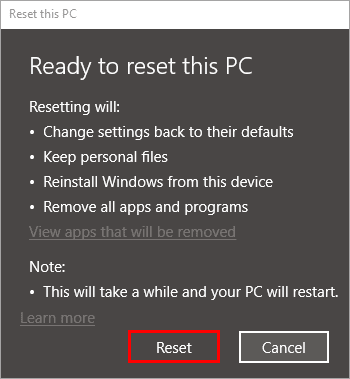
#6) Click on “Reset” to factory reset Windows 10.
Recommended Reading => Do you know how to Start Windows 10 in Safe Mode
Use System Restore
Windows provides its users with a feature known as system restore, which can help you restore the system at the last saved restore point. By restoring the system to that point, the user can fix this error.
Method 8: Repair Install Windows 10
As an alternative, if the above solutions do not succeed, repair installation and upgrade installation will restore your components without loss of your personal information. Below are some steps to follow:
- Download the latest version of Windows 10 installation media from the official website of Microsoft for Windows 10 downloads.
- Run the Media Creation Tool and pick Upgrade this PC now option or mount the ISO file and then launch setup.exe.
- Follow the instructions provided on the screen.
- On the request, select the option to Keep personal files and apps.
- After completing the process, reboot the computer.
Repair installation will update damaged Windows components, registry settings, and system files without losing personal data. Repair installation often works when Start Menu does not function after all other troubleshooting actions.
Suggested reading =>> How to fix Windows 10 Update Stuck
Frequently Asked Questions
How do I fix the start menu in Windows 10?
Various ways can help you fix the Windows 10 start menu and some of them are listed below:
1. Rebuild index.
2. Restart system
3. Create a new registry
4. Update system
5. Update drivers
6. Reset system
Why is the Windows 10 start menu not working?
There can be many reasons which can be responsible for the Windows 10 start menu not working and some of them are listed below:
1. Corrupted drivers
2. Malware
3. Some issues with Windows Explorer
4. Windows update
What happened to my start menu?
You might have tried to click on the start button and even pressed the Windows button from the keyboard but still, the start menu won’t appear, so it means that you are facing the Windows start menu not working error so look for various fixes of this error.
How do I restore my start menu?
The best way to restore the start menu is by simply initiating system restore, which restores the system to the last saved restore point.
How do I show all apps on the start menu in Windows 10?
Your system might face a Windows 10 start menu not working error and therefore your start menu might not be responding. Follow various fixes and changes in the settings discussed in this article to fix this issue.
How to fix a broken Start Menu?
The possible ways to resolve a broken Start Menu issue in Windows 10 include restarting Windows Explorer from Task Manager, running the SFC and DISM repair commands, checking for Windows updates, re-registering Windows apps with the help of PowerShell, or creating a new user account.
When I click on my Start Menu, nothing happens?
It is usually caused by corrupted system files, a corrupt user profile, a frozen Start Menu process, or problems with the latest Windows update.
How do I reset the Start Menu in Windows 10?
Start Menu reset can be done via re-registering Windows apps with the help of PowerShell, restarting the Start Menu process, or creating a new user profile. In case of system file corruption, the sfc /scannow and DISM /Online /Cleanup-Image /RestoreHealth command lines can help to resolve the issue.
Why is the Windows 10 Start Menu not opening after an update?
Faulty or partial Windows update can lead to such problems. One might try restarting his PC, installing the latest updates, performing system repairs, and uninstalling the latest update.
Is there a Windows 10 Start Menu registry fix?
Yes. There are some registry settings which can be modified to solve a certain Start Menu problem in Windows 10 as explained above. But registry modification should be considered only as the last measure. One should always make sure that he makes a backup copy of the registry and creates a System Restore Point.
How do I fix a Windows Start Menu that’s not working in Windows 11?
Most of Windows 11 Start Menu fixes are similar to Windows 10’s. They involve restarting Windows Explorer, running SFC and DISM scans, checking for updates, restarting the Start Menu process, and creating a new user account. If the problem still persists, one should try performing Windows repair install
Conclusion
A Windows 10 Start Menu not working issue can be frustrating, but in most cases, it can be fixed without reinstalling the operating system or losing any data. By following the step-by-step solutions outlined in this guide, right from restarting Windows Explorer to repairing system files, you can quickly identify the root cause and restore normal Start Menu functionality.
If the problem persists, you can adopt the advanced options like creating a new user account or updating Windows, which can provide a reliable long-term fix. If you want to prevent such issues in future, then the best way is to keep your system updated and perform regular maintenance checks.
Further reading =>> What is Compattelrunner.exe and how to disable it?
Research process:
- I have put together this guide by going through official Microsoft resources, learning from real Windows 10 users who faced the same Start Menu problem, and testing the most reliable fixes on actual systems.
- I precisely focused only on methods that are safe, easy to follow, and commonly proven to work, cutting out unnecessary technical steps.
- The aim is simple: help you fix the Windows 10 Start Menu issue quickly, without risking your files or reinstalling Windows.
- Total time taken for research and publish this guide: 40 Hours (Approx)
Was this helpful?
Recommended Reading
-

This step-by-step guide with screenshots will explain the top 5 methods to fix the 'DNS Server Not Responding' Error in Windows 10: The Internet has turned vital for us, as all our daily chores and work depend on it. But have you ever given it a thought that how frustrating…
-
The list and comparison of the top free Registry Cleaner for Windows Systems: Best Windows 10 Registry Cleaner tools to clean, repair and optimize your PC Registry. Several myths we have heard about, why a computer slows down. One common myth is that the hardware slows down itself, which affects…
-
Struggling with performance issues in Windows 10? Read this in-depth guide containing various methods to Optimize Windows 10 performance: If you have a system with the best hardware, including advanced RAM, processors, and SSDs, but still you feel that your system is not performing well or is not fast enough,…
-
Discord won’t open on PC? Find out why Discord won’t open on your PC and resolve the issue in 10 simple step-by-step solutions quickly. If you are experiencing the issue of Discord won’t open on your PC, you are not alone. Many users have reported problems such as the application…
-
Here we learn the causes of the Hard Drive Not Showing Up error in Windows 10 and explore various ways to solve hard drive not detected error: The data is the most crucial thing in today's world, and you can understand how frustrating it can be when one day your…
-
Learn how to Boot Windows 10 from USB by understanding the pre-requisites, method to create bootable USB, etc: Windows is one of the most used operating systems presently available in the market because of the user-friendly interface and the popular features it provides. Windows has a wide user base globally,…
-
In this tutorial, we will understand what is Mouse DPI and learn methods to check and change Mouse DPI in Windows 10: A computer is a collection of various devices that are bind together to perform specific tasks. These devices include a keyboard for providing textual commands, a monitor to…
-
In this guide, you will come across step-by-step solutions to factory reset Windows 10 when your PC won’t start. If your Windows 10 PC is running slowly, experiencing errors, or won’t boot properly, performing a factory reset can help restore it to its original state. A reset removes system issues,…


