


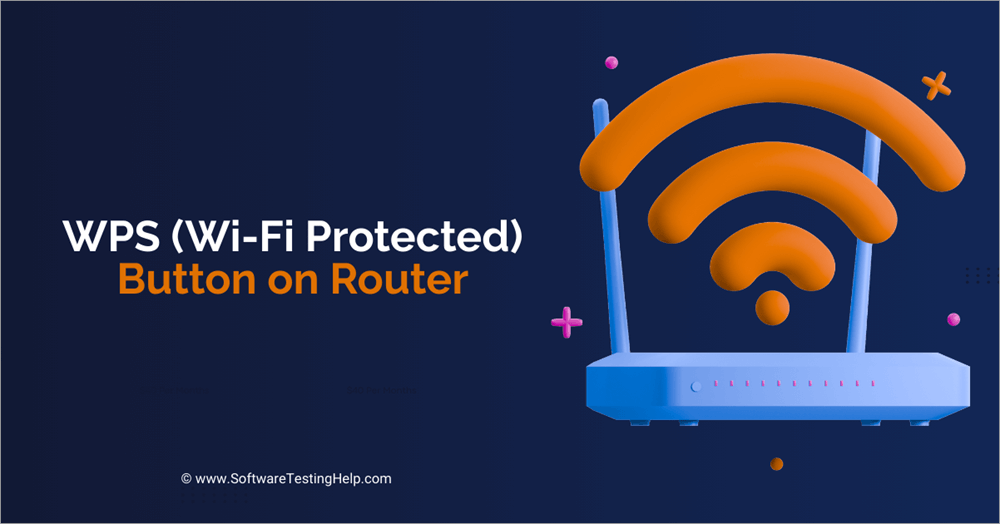
Discover all about the WPS Button on Router along with its security implications. Learn how to use WPS to connect devices to a WiFi network without passwords with just one touch:
WPS stands for Wi-Fi Protected Setup, and it is a push-button available on the Wi-Fi router that allows you to quickly connect Wi-Fi devices to the Wi-Fi router. By simply pushing the WPS button on router and by activating WPS on Wi-Fi devices, all devices get connected to the Wi-Fi router with no need to enter the password.
The WPS button of the router is useful for SOHO (Small Office/Home Office), which makes it easier and faster to connect devices to a Wi-Fi network without remembering and typing long and complex passwords.
Table of Contents:
WPS (Wi-Fi Protected Setup) Button: Complete Guide with Expert Tips
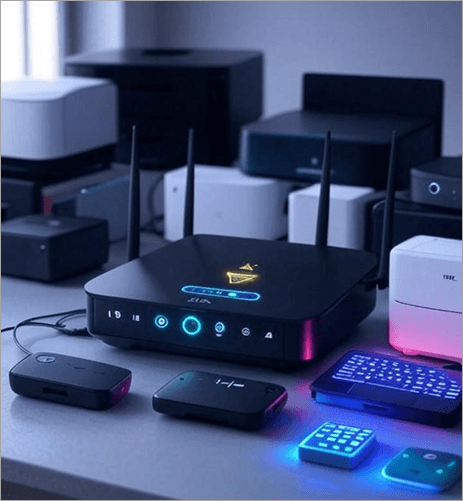
A WPS button is available on almost all Wi-Fi routers, like Spectrum, AT&T, Netgear, Xfinity, etc.
If you are keen to know how to activate and connect WPS, then you can check the video below:
In this article, we will understand how the WPS button on router works, precautions to be taken while operating this button, pros and cons of using it, associated security risks, and benefits of using this button.
What is the WPS Button on My Router?
A WPS button on a Wi-Fi router is used to quickly and easily establish a connection between Wi-Fi devices and the Wi-Fi router. It simplifies connecting Wi-Fi devices to a Wi-Fi network by automating the authentication process.
The WPS button is generally located on the rear or side panel of the router. The image below shows the WPS button on an ASUS router.
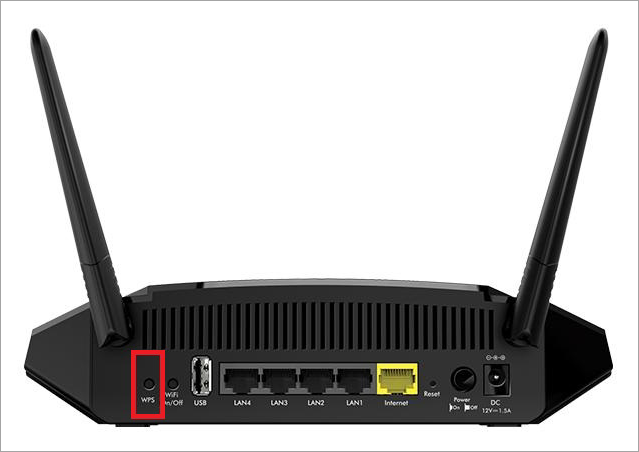
[Via Netgear]
In the process of connection between the WI-FI router and Wi-Fi-enabled devices, once the WPS button is initiated, the router securely shares the Wi-Fi network’s name (SSID) and security key (password) to Wi-Fi-enabled devices like smartphones, smart TVs, and other Wi-Fi-enabled devices to establish a connection with the router.
The most common method of using WPS is the push button, and another method is the PIN entry method. The push button option is more secure than the PIN method, which we will discuss in the following subsections.
Suggested Read => How to fix when Your Connection is not Private Error
How Does the WPS Button on Router Work?
Here’s the step-by-step method to know how a push button works:
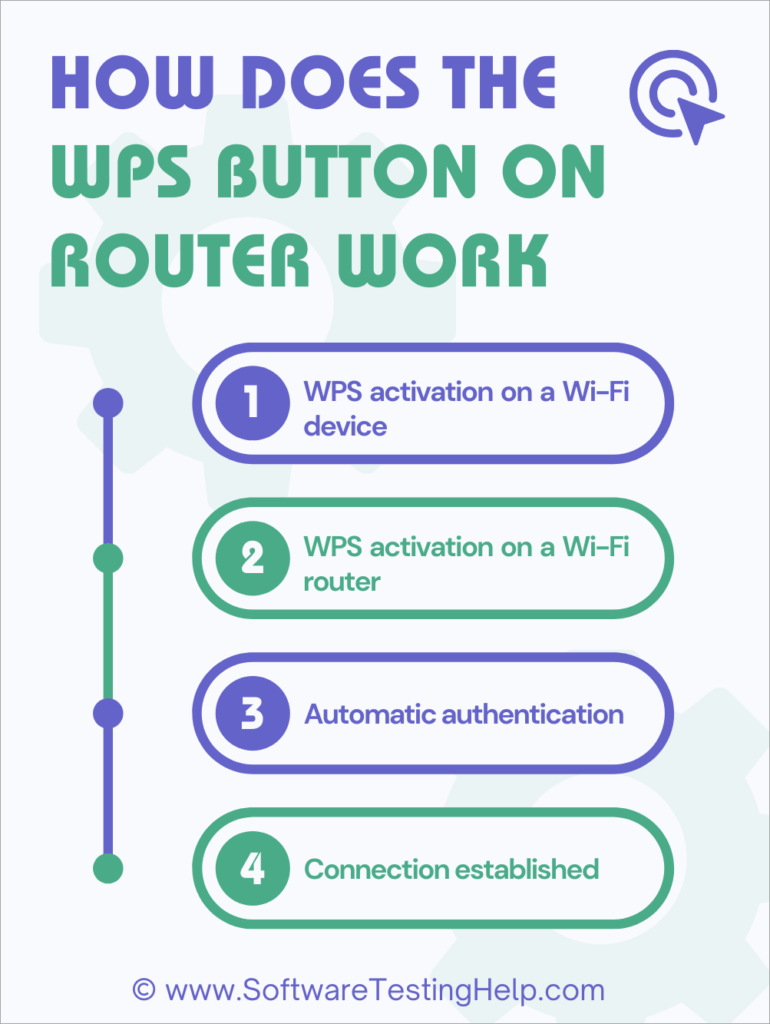
- WPS activation on a Wi-Fi device: On the Wi-Fi device that you want to connect to a Wi-Fi router, you’ll need to initiate the WPS connection process.
- WPS activation on a Wi-Fi router: After activating WPS on your device, you need to press the WPS button on router. There is a light on your router that flashes to indicate this mode is active.
- Automatic authentication: The router and the device will communicate with each other. The router securely sends the Wi-Fi network name (SSID) and password to the device.
- Connection established: The Wi-Fi device will then use the authentication information to connect to the Wi-Fi network. Once handshaking is complete, the Wi-Fi device joins the Wi-Fi network. There is no need for a user to enter a Wi-Fi password. The login happens automatically, and finally, Wi-Fi devices will establish the connection successfully and will join the network.
Also Read =>> Compare top WiFi Extenders
Alternative PIN method
This is an alternative method to push a button
- Router PIN: There is an 8-digit PIN on the router (sticker or web interface) that needs to be entered into the Wi-Fi device to get connected to the Wi-Fi router.
- Device PIN: Some devices generate their 8-digit PIN, which needs to be entered into your router’s web-based settings to establish the connection with the Wi-Fi network.
Both methods (WPS physical button and PIN method) achieve the same goal of connecting devices to with Wi-Fi network automatically.
How to Use WPS Button to Connect a Device to Network
In this section, we will explain a step-by-step process of how to use WPS to connect a device to the router.
Device Readiness: Ensure your device and router support WPS. Nowadays, most modern routers come with a physical WPS button. The location of the WPS button varies based on device, brand, and model. The button may be available at the rear or front panel of the router and may or may not have a curved arrow symbol on it.
The image below is of the Netgear Nighthawk X4 R7500, and its WPS button is on the front panel.
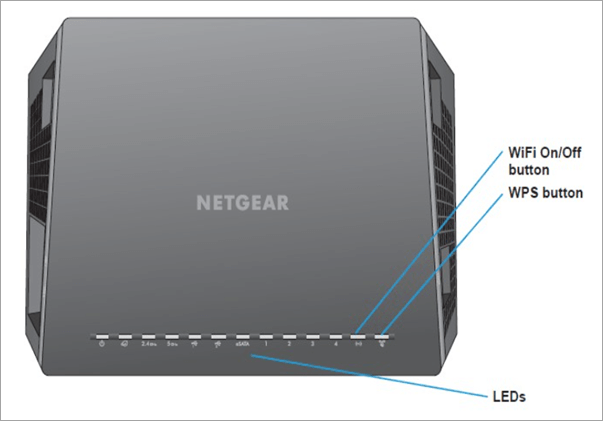
WPS Button on Your Router: To activate WPS on the router, press and hold it for a few seconds until the WPS indicator (located on the front panel of most routers) lights start blinking. This step initiates your router into a search mode, and it starts looking for a WPS-enabled device on your Wi-Fi network to establish a connection.
If the light doesn’t flash, then you need to hit the WPS button once again, as some devices need the button to be pressed twice.
The image below is of the WPS button located on the D-Link DIR-X1560 AX1500 router:
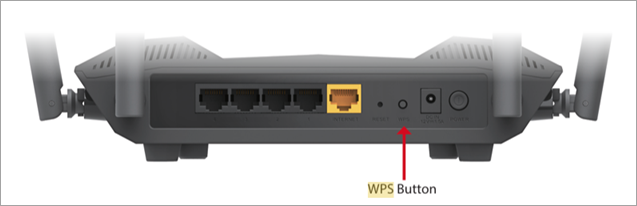
[Via D-Link]
Enable WPS on the device: After activating WPS on the router, enable WPS on a device that you want to connect to the router. The location of the WPS option of the device is either in the network setup or the Wi-Fi settings menu, based on your device. Some devices will have a physical WPS button.
The image below shows the physical WPS button of an IP camera.
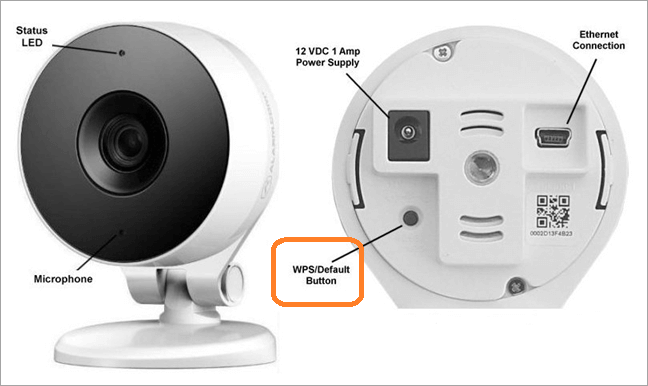
[Via Brinks Home]
Once you press or activate the WPS on the device, it will automatically connect to the Wi-Fi network, without the need for a username and password.
If you have a smart device like an Android smartphone, then you will find the WPS option in Wi-Fi preferences, as shown below.

[Via addictivetips]
Final confirmation: Once the device gets connected to a Wi-Fi network, you may get a notification of a successful connection on your device.
Once your device gets connected to the router, you will have access to the internet.
Also Read => Top Mesh WiFi Systems
WPS Button on a Spectrum Router
Depending on the model of your Spectrum router, locating and using the WPS button might be a little bit different. Aside from the fact that some older Spectrum routers used to have a physical WPS button on any of their sides, their newer technology routers, such as SAX1V1K and SAX1V1R, have removed or disabled the WPS feature as a security measure.
In case your Spectrum router comes with a WPS button, just press it while turning on the WPS option, and simultaneously activating WPS on your Wi-Fi-enabled device should establish connectivity.
If there is no WPS button, then you must connect the devices by typing in the Wi-Fi network name and password, usually found on a sticker on the router or handled through the My Spectrum app.
WPS button on Xfinity Router
The availability of the WPS button is easy on all Xfinity routers, especially on XFi Gateways such as XB6, XB7, XB8, etc. The button is placed either on the top or back of the router and marked as “WPS” or may come with the WPS symbol of two arrows.
To start the WPS process, press and release the WPS button on your Xfinity router, and then activate the WPS connection on your Wi-Fi device for pairing.
Suggested Read => Fix for Xfinity Router Blinking Orange Light
The LED on the Xfinity router starts blinking to indicate it is in the pairing mode and glows steadily once the pairing is successful. The WPS functionality stays active on Xfinity routers, so one should turn it off when not in use.
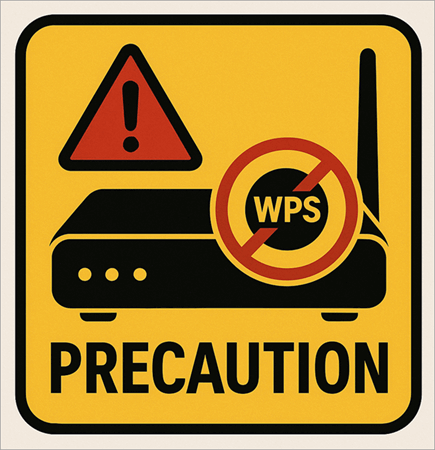
Precautions to be Taken While Using WPS
If WPS is left enabled, then there is a high probability that the network or device could be vulnerable to cyberattacks. We highly recommend disabling WPS when not in use.
- Ensure the router’s WPS PIN sticker isn’t visible to visitors
- Change default router passwords and use strong WPA3 or WPA2 encryption
- PIN is more vulnerable due to its 8-digit PIN that can be cracked in hours through brute-force attacks, so prefer the WPS method.
- Placing the router in a secure location will help prevent unauthorized WPS button access
- Setting up temporary guest networks on the WI-FI network, then using WPS access
- Router logs need to be monitored frequently to check unauthorized devices that attempt to connect to your network.
Pros & Cons of the WPS Button
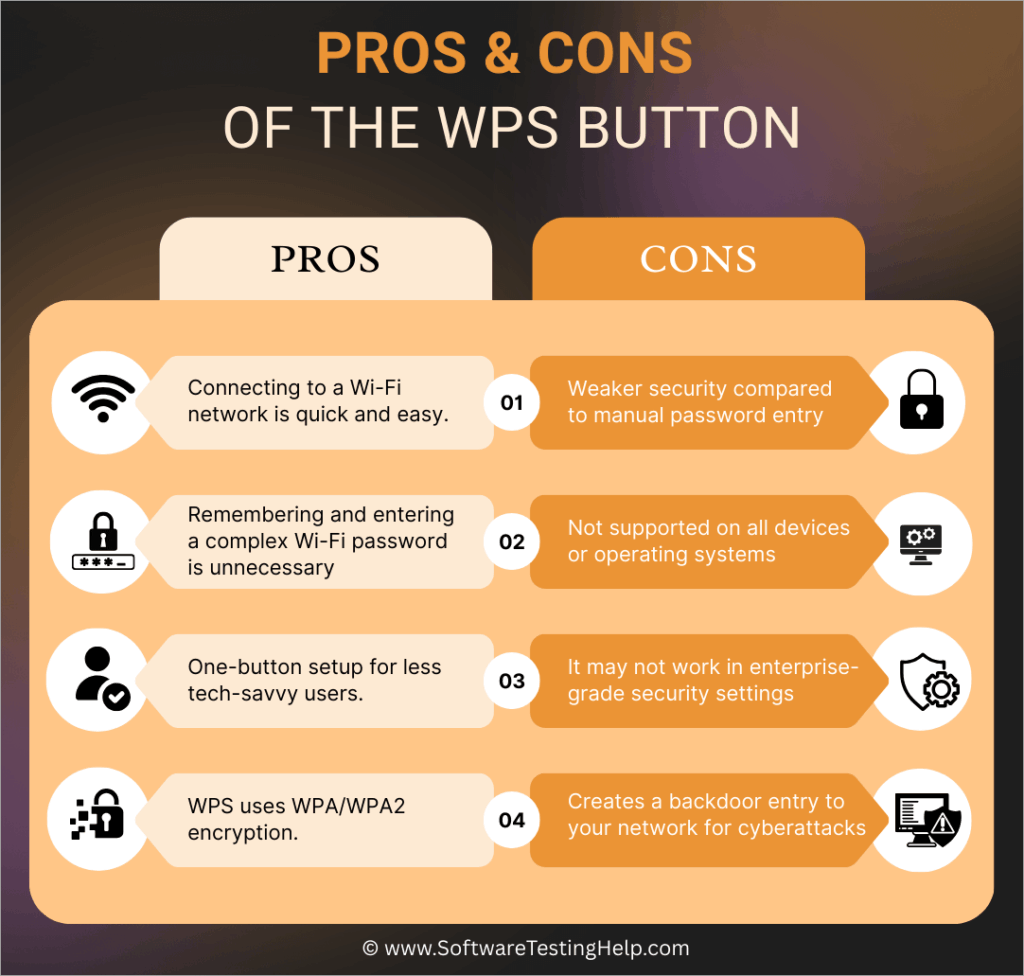
Let’s see the top pros and cons of using the WPS button.
Pros:
- Connecting to a Wi-Fi network is quick and easy.
- Remembering and entering a complex Wi-Fi password is unnecessary.
- One-button setup for less tech-savvy users.
- WPS uses WPA/WPA2 encryption.
Cons:
- Weaker security compared to manual password entry
- Not supported on all devices or operating systems
- It may not work in enterprise-grade security settings
- Creates a backdoor entry to your network for cyberattacks
Recommended Reading => WiFi Keeps Disconnecting: 12 Ways To Fix
Devices Supporting WPS Button on Router
The WPS button has become a standard feature on nearly all of today’s Wi-Fi routers and networking equipment. ISPs such as Spectrum, AT&T, and Xfinity support WPS compatibility when providing routers and gateways for their customers.
Router vendors like Netgear, Linksys, ASUS, TP-Link, and D-Link provide the WPS button on their consumer and small business models.
Taking into consideration its feasibility and ease of use, most of the major companies have extended WPS functionality to cover a wide range of WI-FI devices, such as:
- Wireless printers from HP, Canon, and Epson
- Smart TVs from Samsung, LG, and Sony
- The gaming consoles PlayStation and Xbox
- Smartphones running Android, tablets, and wireless adapters
- IoT devices, like smart home hubs, security cameras, and streaming devices.
Benefits of Using the WPS Button
Using the WPS button to automatically connect to a Wi-Fi network offers various benefits, such as:
- No password typing: No need to manually type the long and complicated Wi-Fi passwords.
- Speedy connection: Connects the device in a few seconds with just a button press, which is best for devices with limited inputs.
- Guest-friendly: WPS allows visitors to connect to the Wi-Fi network without sharing the complicated network password.
- Works all over the place: It works well regardless of router brand or device type because it uses standardized procedures.
- Non-tech-friendly: One-button touch connection helps anybody without having technical skills.
- Makes office work efficient: Allows quick device provisioning in office settings without compromising network security.
Security Risks & Vulnerabilities of WPS Button

Though the use of the WPS (Wi-Fi Protected Setup) button on routers is simple and easy but it comes with several security risks and vulnerabilities.
Below are the top security risks that users may encounter:
- PIN brute-force attacks: The 8-digit WPS PIN can be brute-forced using advanced tools, making it possible to crack it within hours due to its limited complexity.
- Physical access exploitation: If attackers get physical access to the router, then they could press the WPS button to get rogue devices connected and steal the sensitive information from the network.
- Exposure of network credentials: Since WPS-connected devices can access the Wi-Fi password, this poses a network exposure risk if the device gets compromised.
- Issue of alerts: Some routers lack the feature of logging and alerting the WPS connections.
Further Reading => Best Portable Wifi Travel Routers
Should You Disable WPS?
Yes, most cybersecurity experts do highly recommend disabling WPS when not in use.
One of the prime reasons is that cyber attackers will be able to crack your network in hours due to the WPS PIN flaw. Even the physical access to the router can compromise the WPS button easily, and rogue devices can easily get connected to your Wi-Fi network.
Many routers keep this PIN feature active in the background regardless of the setting you use.
To disable, you can access the web interface of the router, and then proceed to the wireless security settings, where both the WPS push-button and PIN methods can be disabled. On some routers, you need to disable WPS altogether, rather than disabling individual methods.
Further Reading => Top Indoor TV Antenna to Look For
Frequently Asked Questions
1. What happens when I press the WPS button on router?
When you press the WPS (Wi-Fi Protected Setup) button on your router, it initiates a process to connect your router to WPS-enabled devices (you need to activate WPS on your WI-FI device) in the network without the need to enter the password manually.
2. How to enable WPS on the router?
There are two methods to enable WPS on a router:
1. The first one is to simply press the WPS button on your router for a few seconds, and the WPS light will start blinking.
2. The second method is to log in to the router settings page. You need to log in to the router’s web interface page through its default IP address (comes with your router purchase) and navigate to the wireless settings page and locate WPS (Wi-Fi Protected Setup), or Push ‘N’ Connect. Toggle the WPS option to “On” or “Enabled.”
3. No WPS button on router.
If your router doesn’t have a WPS button, then you need to enable it through’s web interface. You need to access the router settings page through your default router’s IP address and navigate to the wireless settings section, and look for the WPS option to enable it.
If it is not available in the router settings page, then the only option left is to enter the password and SSID manually. Some routers don’t support WPS.
4. How to disable WPS on the router?
The option to disable the WPS router is available at the router’s settings page. You need to login to the router’s web interface through its default IP address and locate for WPS settings in the wireless settings page. Toggle the WPS option to On or OFF.
The steps to disable and enable WPS may vary depending on your router’s brand and model.
5. WPS mode PBC or PIN.
Wi-Fi Protected Setup (WPS) offers two ways to connect Wi-Fi devices: Push-Button Configuration (PBC) and PIN.
In PBC, the physical button is pressed on the router and client device, whereas in the PIN method, the user has to enter a PIN (usually printed on the router label) under the router’s configuration options through its web interface.
Conclusion
WPS is a modern technology wherein networking sits on the border of convenience versus security. Of course, the process of connecting to the Wi-Fi becomes easier for the average non-technical person and IoT devices, but this system has loopholes with a variety of serious security risks.
In most cases, a compromised network would present a greater security risk than convenience to the average home or business user. When other legitimate alternatives, such as sharing via QR codes or temporary guest networks, offer an equal amount of convenience.
The best resolution is to turn off WPS on the router and connect via the sturdy manual password entry into the network. However, push-button WPS connectivity, in some cases where security is not a big concern, is perhaps the better option for home users. It is also critical to keep the router firmware well-updated.
Finally, a thorough understanding of the complete functioning of the WPS feature of the router will balance between the benefits and risks associated which will help users to make an informed choice.
Was this helpful?
Recommended Reading
-

Selecting a good travel router from the market can be a challenging task. Choose the ideal portable WiFi router from our top-rated options for premium services: Finding a safe and reliable WiFi network when traveling is undoubtedly quite challenging. Apart from other travel-related problems, some areas might even be out…
-
Have you subscribed to Spectrum Internet's high-speed plan but not experienced high-speed internet browsing? The top-rated list of routers for Spectrum gives you the option to select the one that fits your needs: Constant lags during the internet keep on getting a lot frustrating at times. It's time to switch…
-
Step-by-step Guide to Configure and Setup Home or Office Routers: In our previous tutorials, we have studied the basic features, working operation, and application of Routers in the computer networking Systems. But in this tutorial, we will explore the basic configuration commands that are used in making the routers operational…
-

This tutorial explores the top WiFi Router in India with their pricing, features, and comparison to help you select the best WiFi Router: A Wi-Fi router is responsible for the access to wireless Internet to your devices. Having equipped with an Internet connection and having seamless streaming options is surely…


