Below are the easy ways to Authorize your MacBook for the use of Apple Music in minutes. These steps are guaranteed to fix login problems and allow your MacBook to be authenticated.
A lot of users who use Apple Music on their Macs take the login step alone as sufficient. Nevertheless, if you want to enjoy any purchase in the form of songs or any other content in iTunes, then you will have to authorize your Mac using your Apple ID.
This tutorial will show you the exact procedure to authorize a MacBook or a MacBook Pro to use Apple Music and troubleshoot any problem with the authorization process.
Table of Contents:
- How to Authorize a MacBook for Apple Music?
- Authorize MacBook for Apple Music: 2026 Quick Guide
- What Does It Mean to Authorize a MacBook for Apple Music?
- How to Authorize MacBook for Apple Music
- How to Deauthorize a Mac From Apple Music
- Ways to Deauthorize a Computer You Don’t Have Access To
- Steps to Authorize or Deauthorize a Windows PC for Apple Music
- Authorization vs Deauthorization: Quick Comparison
- Quick Fixes for Apple Music Authorization Not Working
- #1) “You Cannot Authorize More Than 5 Computers” Error
- #2) “Your Apple ID or Password is Incorrect” Error
- #3) “This Computer is Not Authorized” Error
- #4) “This Computer Was Used with a Different Apple ID” Error
- #5) “There Was a Temporary Problem Completing Your Request” Error
- #6) “Authorization Prompt Repeating for Every Song Downloaded” Error
- #7) “Authorized Successfully, but Track Still Won’t Play” Error
- Frequently Asked Questions
- Conclusion
How to Authorize a MacBook for Apple Music?
To authorize a MacBook for use with Apple Music follow below steps:
- Launch the Apple Music application on your MacBook/MacBook Pro computer.
- Click on Account in the menu bar of macOS.
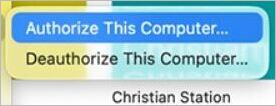
- Hover over the Authorizations option and click Authorize This Computer…
- Enter your Apple ID credentials and authorize your computer.
Authorize MacBook for Apple Music: 2026 Quick Guide
However, if you are someone like me, who occasionally downloads music for offline listening pleasure, you’ll need to get familiar with what we are about to discuss in this article.
Consider this your complete guide on how to easily authorize your MacBook for Apple Music.
Here is the video guide on how to authorize a MacBook for Apple Music
What Does It Mean to Authorize a MacBook for Apple Music?
[Via Apple Support]
Think of authorization as a security process that’s required of all users who’d like to link their Mac devices with an Apple Account. You’ll need to authorize your MacBook to play any file, be it music or a movie, purchased via your Apple Account.
A user is allowed to authorize up to 5 devices at a time. This basically means there is a limit to how many devices a user can authorize at once. Let’s say you wish to authorize a sixth device. That will only be possible by deauthorizing one of your already authorized Mac devices.
Each Mac authorized will be considered a single authorization, regardless of how many times you attempt to authorize it. Once a device is authorized, you can play any song or music you purchased and downloaded from iTunes.
Also, authorization only applies to Macs and PCs. You are not required by Apple to authorize an iPad or iPhone. Now that you know what authorization entails, let’s understand how to authorize your MacBook for Apple Music.
Finally, I would recommend you update your MacOS before authorizing it for Apple Music. Although not mandatory, keeping your MacOS up-to-date will ensure your computer remains secure from new threats that may come with downloaded content.
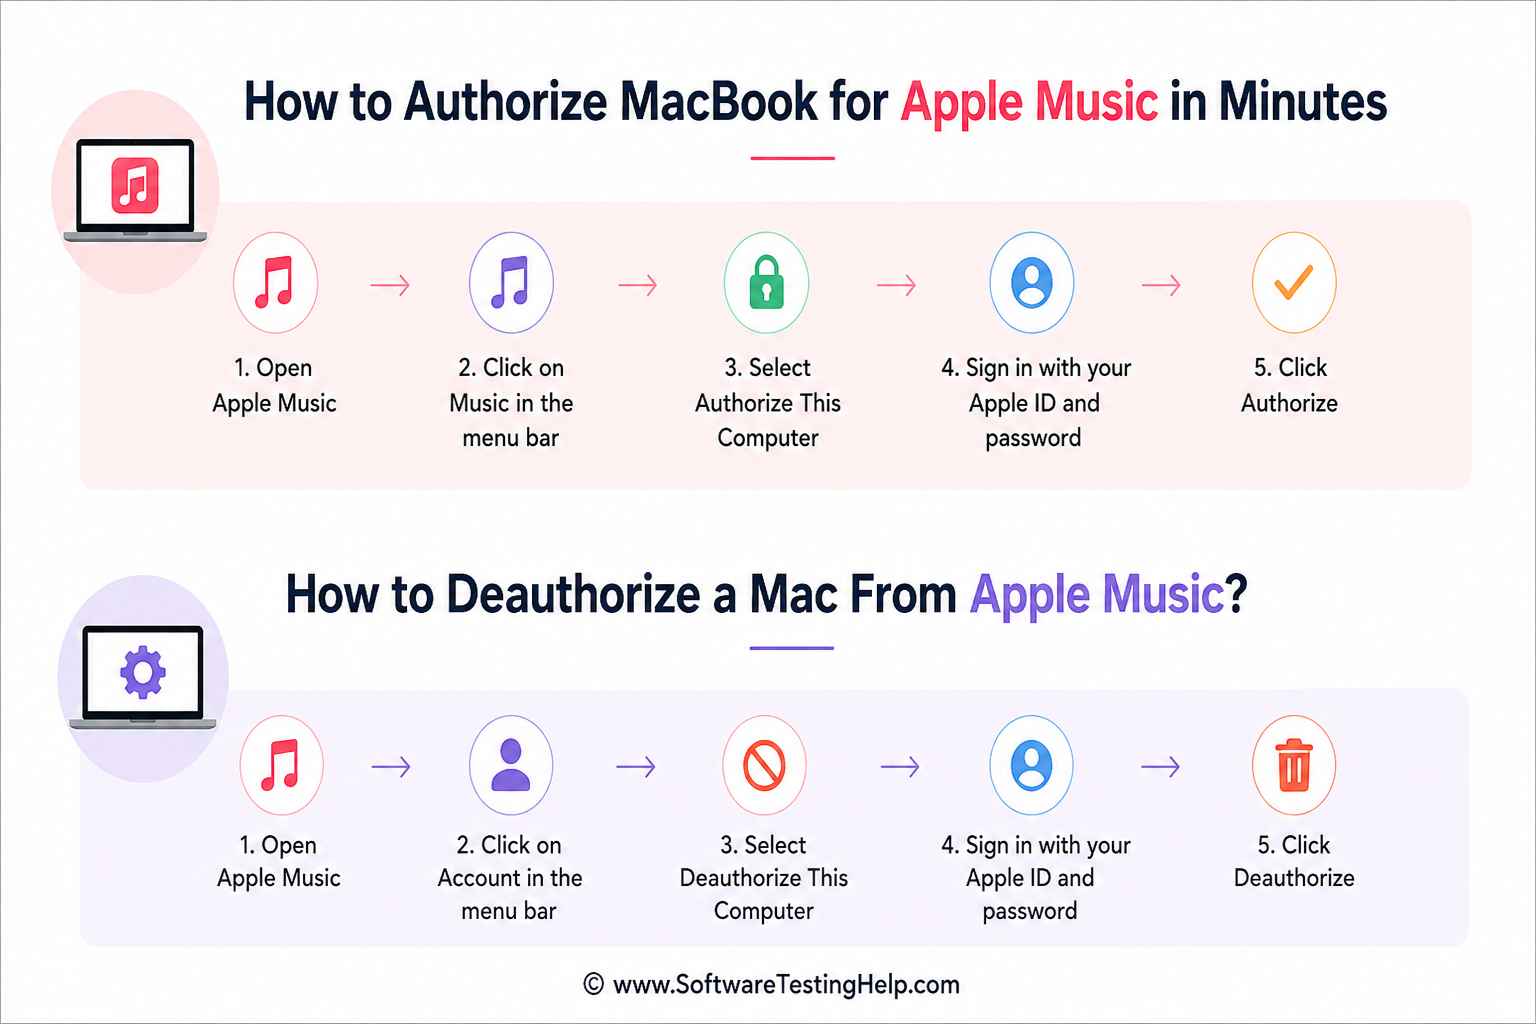
How to Authorize MacBook for Apple Music
Follow the steps below to authorize a MacBook for Apple Music:
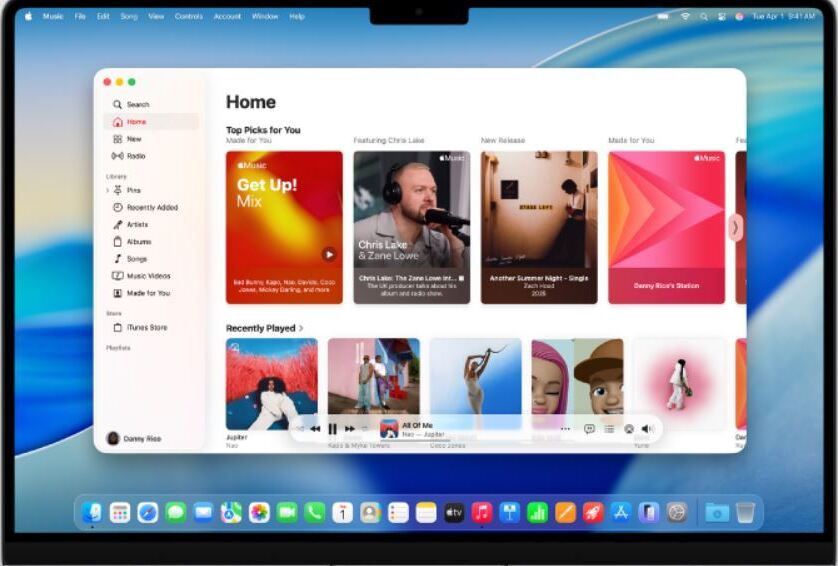
- First, open the Apple Music app on your MacBook.
- In the menu bar above, select “Account”. Make sure you are signed into your Apple Account.
- From the drop-down menu, select Authorization.
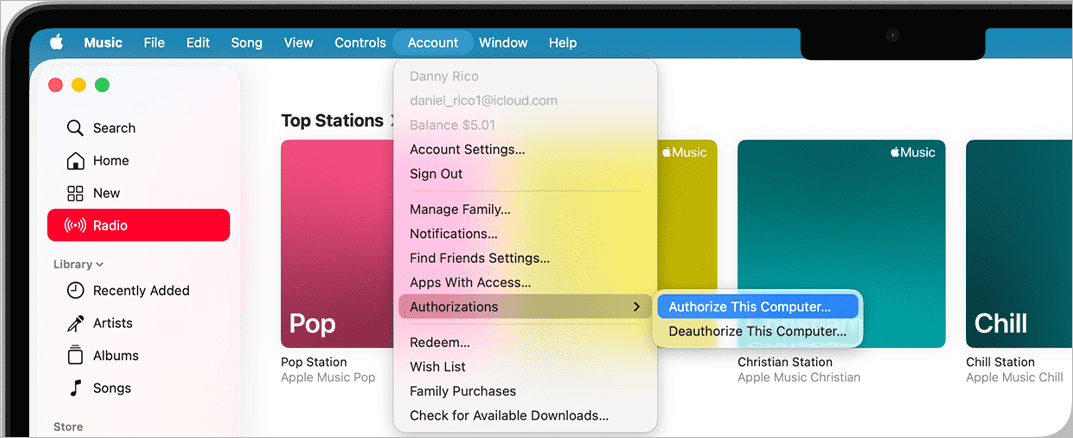
- You’ll now see an option to “Authorize this Computer”. Click on it.
- If not signed in yet, a pop-up will appear asking you to enter your Apple ID credentials.
- Click Authorize to confirm.
Just like that, you’ve successfully authorized your Mac computer for Apple Music.
As I said before, you can only authorize up to 5 computers at a time. So, if you have a 6th device that needs to be authorized, you’ll need to deauthorize one of your computers.
The process remains similar, with only one deviation:
- Open Apple Music on your MacBook.
- Navigate to Account.
- Select Authorizations from the drop-down menu and click on “Deauthorize this Computer”.
- Enter your Apple ID credentials if asked.
- Click on Deauthorize to confirm.
It’s that simple.
Besides authorizing and deauthorizing devices, you’ll also need to periodically check how many of your computers are already authorized.
To achieve this, just complete the subsequent steps.
- Open Apple Music on your computer
- From the above menu, choose Account > Account Settings.
- Sign in with your Apple ID credentials.
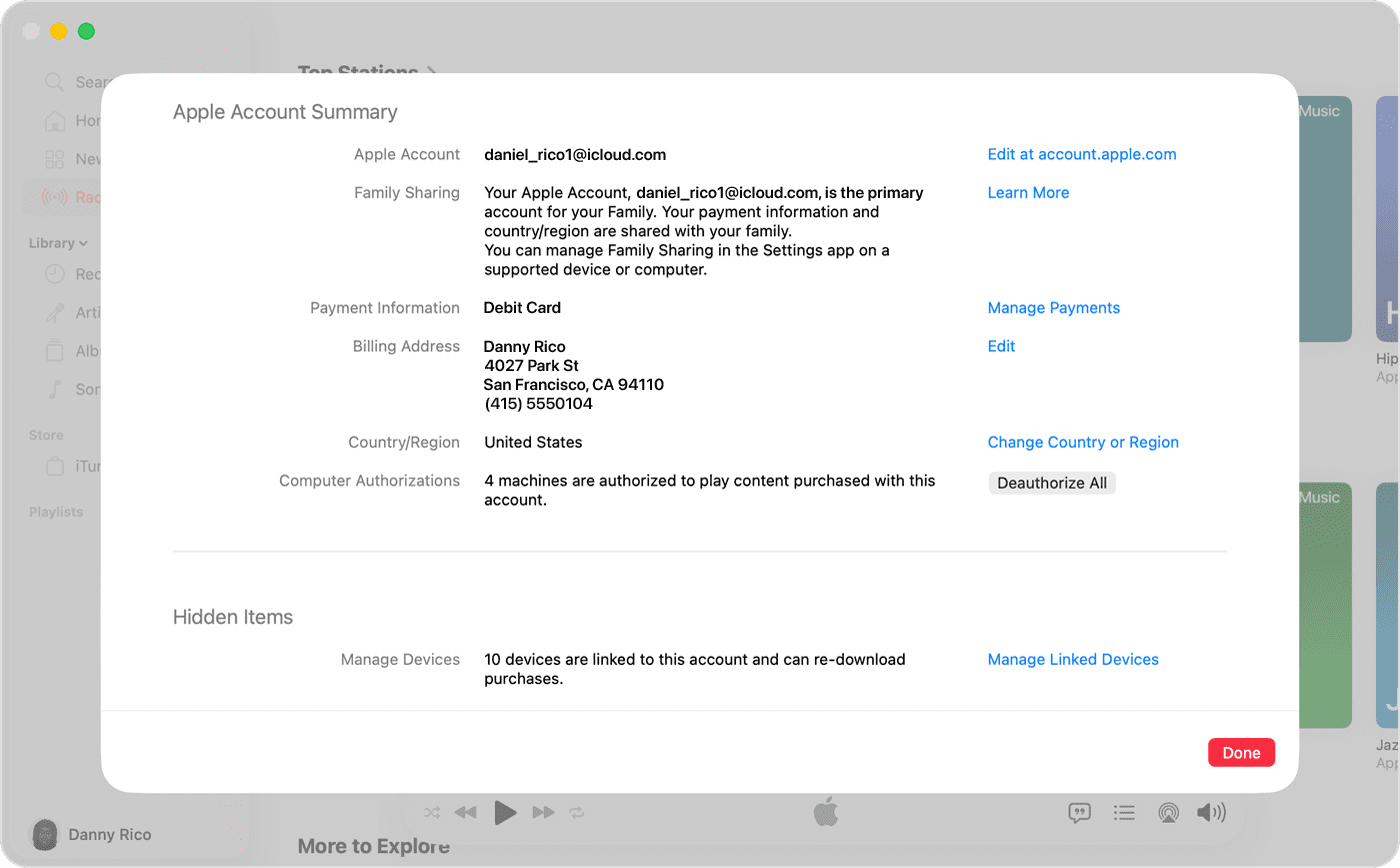
- An Apple Account Summary Page will appear on your screen. Check the information provided right next to the “Computer Authorizations” section to learn exactly how many computers are already authorized.
So far, we’ve talked about how to authorize or deauthorize a computer you have access to. However, what if you want to deauthorize a device that you no longer have access to? Know that it is possible.
All you have to do is follow the steps below:
- Open Apple Music on your computer
- From the above menu, choose Account > Account Settings.
- Sign in with your Apple ID credentials
- An Apple Account Summary page will appear on your screen.

- Go to the “Computer Authorizations” section. You’ll see a button that says “Deauthorize All”. Simply click on it to deauthorize all of your computers. You can later authorize all the computers that you currently have one by one.
You can use Apple Music with your Windows PC. You’ll obviously need to authorize it first to play any downloaded tune.
Here’s how you do it:
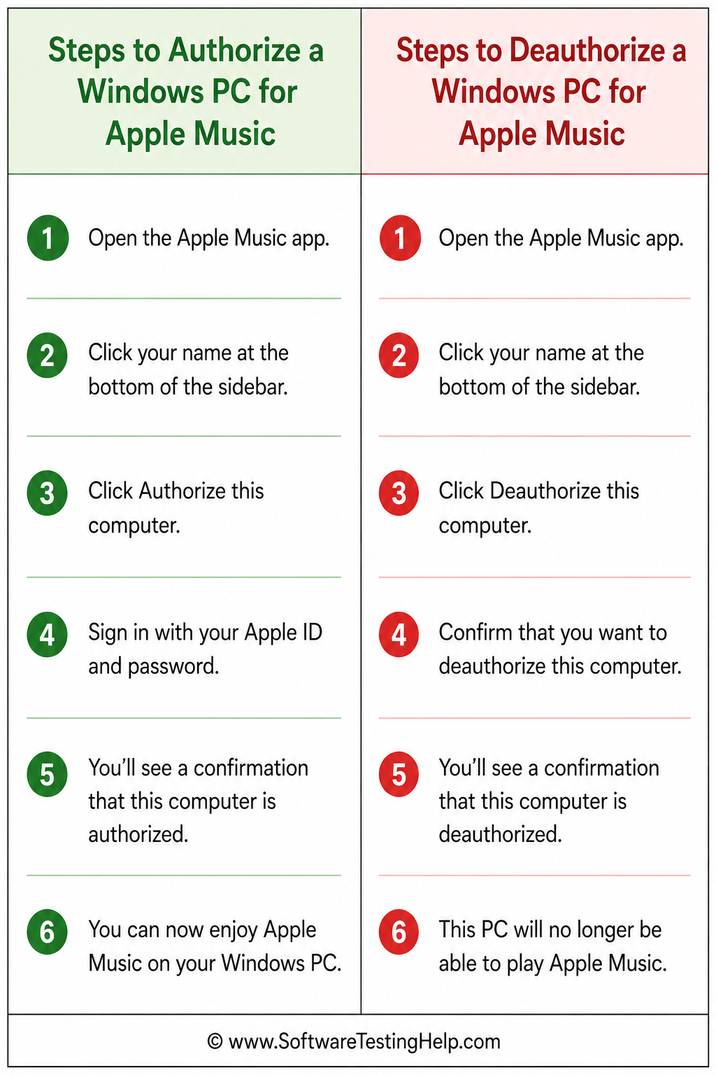
- Open Apple Music on your Windows PC.
- Click on your name that appears at the bottom of the sidebar.
- You’ll be asked to sign in to your Apple Account if you haven’t already.
- From the little menu that pops up, click on “Authorize Machine” or “Deauthorize Machine” depending on your goal.
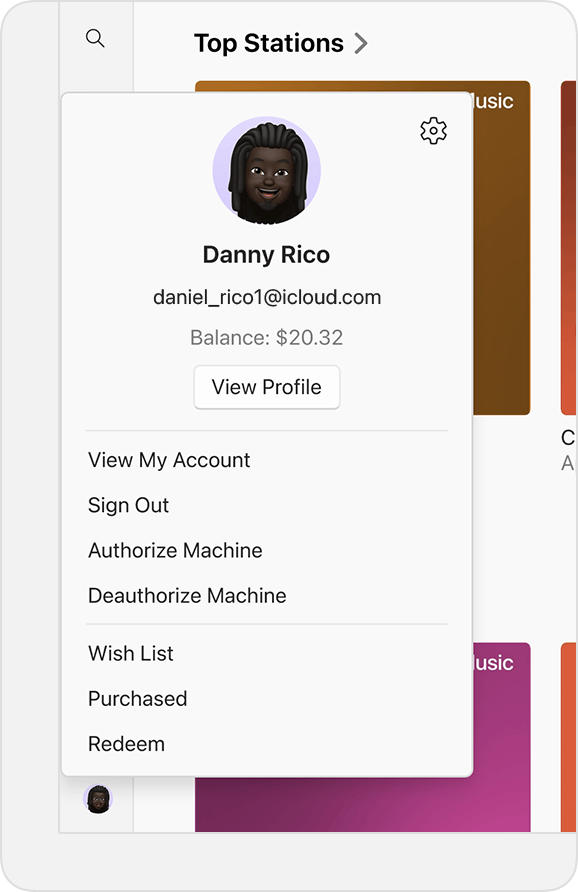
- Click on Authorize or Deauthorize to confirm.
| Feature | Authorization | Deauthorization |
| Access Purchased Music | Yes | No |
| Uses One Device Slot | Yes | No |
| Needed Before Selling Mac | No | Yes |
| Reversible | Yes | Yes |
Quick Fixes for Apple Music Authorization Not Working
You may come across a few issues during the authorization process. Fortunately, dealing with them isn’t complicated.
Simply look out for the following errors:
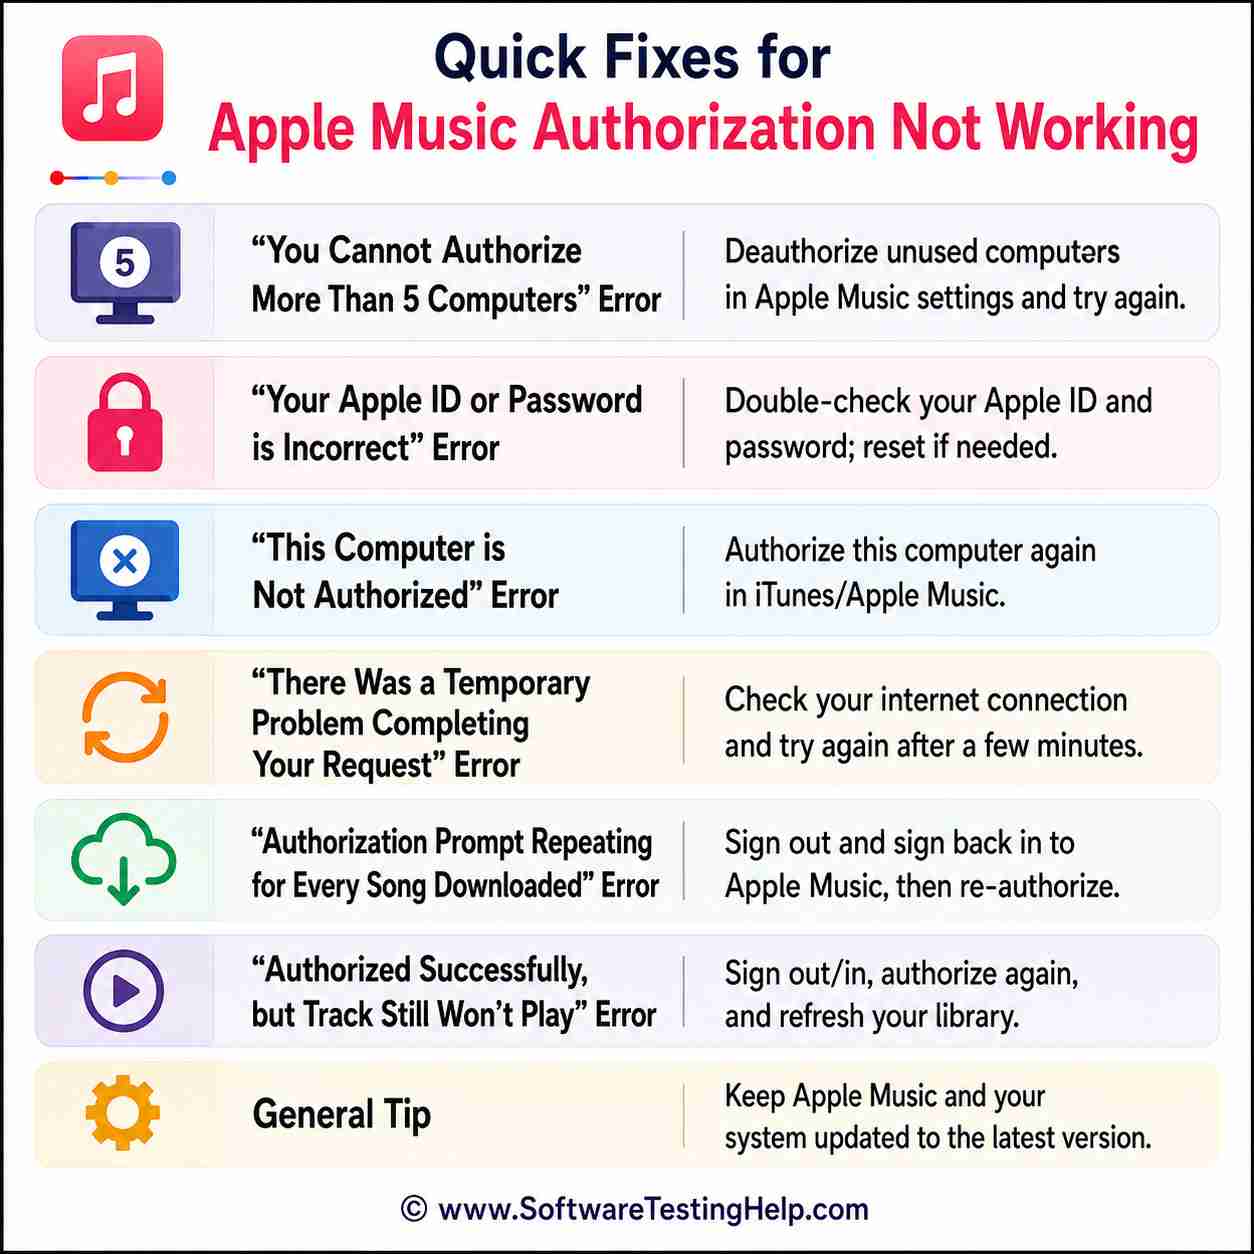
#1) “You Cannot Authorize More Than 5 Computers” Error
Remember, there is a limit to how many computers one can authorize. You cannot authorize more than 5 computers. If you see the above error, that means you’ve already reached this limit. If you must authorize a new computer, do so by first deauthorizing one of your existing devices.
#2) “Your Apple ID or Password is Incorrect” Error
This error will occur if you are entering the wrong login credentials. Make sure you remember your Apple ID or password. If you are absent-minded, note it down on paper and keep it somewhere only you can find.
If you are still getting the message, perhaps it would be wise to reset your password and ID. You can do this by clicking on “Forgot Apple ID or Password”.
#3) “This Computer is Not Authorized” Error
There are multiple things you can do to troubleshoot this error message.
Try any of the options below:
- Log out and log in to your Apple account again.
- Authorize your Computer or deauthorize one.
- Make sure your Apple Music app is updated to the latest version.
#4) “This Computer Was Used with a Different Apple ID” Error
This error occurs when you try to associate a second-hand device with your new Apple ID. If you can be patient, then you could wait for 90 days until the block is lifted. Otherwise, contact Apple Support and see if they can lift this restriction soon.
You could try using a second user account to download your music or content. Also, make sure the Apple ID you’ve entered is spelled correctly.
#5) “There Was a Temporary Problem Completing Your Request” Error
A faulty cache or security flaw within your Music app can trigger this error message. You can hope to overcome this problem by resetting or clearing your Music app’s cache. Also, you could try signing out via your Music app’s “Media and Purchases” option.
Setting your computer’s date and time zone to “automatic” is also known to resolve this problem. Finally, try to reboot your router and see if that makes the error message vanish.
#6) “Authorization Prompt Repeating for Every Song Downloaded” Error
This could happen if your computer is having trouble recognizing the fact that it is already authorized. The first thing you can do to resolve this problem is to follow the instructions I’ve laid out above to deauthorize all devices and reauthorize them.
If that doesn’t work, delete the music file that demands authorization and try to download it again. Also, make sure you are downloading one track at a time instead of multiple files simultaneously.
#7) “Authorized Successfully, but Track Still Won’t Play” Error
If you encounter this error, first make sure your Mac is up-to-date. Follow this by signing out and back into your Music app. Finally, navigate to the Sync Library option (formerly known as iCloud Music Library) within your Music app’s settings and toggle it off and back on.
Sync Library lets you access your entire music library across devices via a single Apple account. Its corruption can trigger this error message. Hence, switching it off and on could resolve the problem.
Frequently Asked Questions
1. Is authorizing a MacBook mandatory for Apple Music?
I wouldn’t say it is mandatory, but you only stand to gain by having your MacBook authorized for Apple Music. Authorization will allow you to play downloaded and purchased music offline on your computer.
On the other hand, authorization is not required if you only stream music on Apple Music or iTunes and do not purchase it.
2. How many devices can you authorize?
Apple allows you to authorize up to 5 computers at a time. Each computer you authorize will count as one authorization. Plus, the authorization process does not apply to iPhones, Apple TV, and iPads. These devices sync automatically with your Apple Music app.
3. Does Apple Music require signing in with an Apple ID on a MacBook?
You can play music on the app without signing in. However, if you wish to purchase or download a tune or buy a subscription to Apple Music, you’ll have to sign in with an Apple ID on a MacBook.
4. Why can’t I use Apple Music on my MacBook?
This could be for several reasons. My advice would be to do the following if you are struggling to play Apple Music on a Mac:
• Check whether your Subscription has expired.
• Clear the Apple Music app’s cache.
• Make sure your Apple Music app is updated to the latest version.
• Clean up your computer’s storage space.
• Try to authorize your Mac if you can’t download or play downloaded music.
5. Why do I need to authorize my computer for Apple Music?
Authorization serves as proof of ownership. It basically entitles you to any tune you’ve paid to download from Apple Music. You are also granted a wider range of access to the app. You can play music offline if your device is authorized. Without authorization, you can only stream music on the app when online.
6. Can I authorize my Mac from my iPad and iPhone?
Authorization for a Mac can only be done on that Mac itself. As such, you cannot authorize one computer from an iPad, iPhone, or another Mac, for that matter.
7. How do I authorize a Mac I no longer have access to?
You can deauthorize and not authorize a Mac that you don’t have access to. The method to deauthorize is simple. Open Apple Music > Account > Account Settings > hit the “Deauthorize All” button. You can later re-authorize the devices you are still using.
8. Why Does My Apple Music Keep Saying “Not Authorized”?
If my Mac is not associated with the right Apple ID, I have hit the maximum limit of authorized computers, or there is a problem with syncing with my account, then I may see the “Not Authorized” message on my Apple Music service. I should sign out of Media & Purchases, sign in again, and authorize my computer using Apple Music.
9. How Do I Authorize a MacBook for Apple TV?
In order to authorize my MacBook for use with the Apple TV, I am required to launch the Apple TV app, sign in with my Apple ID, and then check my purchased items. If requested to do so, I must sign in again using my Apple ID in order to authorize the computer.
10. How Do I Authorize a MacBook for Apple Books?
Launch the Apple Books app and sign in using the Apple ID that was utilized for purchasing. For most people, their books are already associated with their Apple ID. On the other hand, purchases with protection will require you to authorize your Mac with the use of the Media & Purchases settings from your Apple ID.
11. How Do I Authorize a Computer for Apple Music?
If I want to authorize my computer for use with Apple Music, I should start by launching the Music app (on Mac OS) and iTunes (Windows) then select Account > Authorizations > Authorize This Computer and sign in via my Apple ID. In this way, my computer will be able to access all purchases on my account.
12. How Do I Authorize an iPhone for Apple Music?
There is no need for special authorization on your part when connecting your iPhone to Apple Music. You just have to sign in to your account through Settings > Apple ID > Media & Purchases.
Conclusion
So, there you have it, how to authorize a MacBook Pro for Apple Music or any other Mac model, for that matter. It is something that you don’t have to do, especially if you only stream music instead of purchasing it. I would still recommend you do so to get better access to content via your Apple Account.
Think of Authorization as a symbol of your ownership over the media you rightfully purchased from Apple. The process itself is very simple and only takes a couple of seconds out of your time.
You don’t need to bother authorizing our iPhone or iPad for Apple Music. However, if you own a Mac, I hope this guide will help you learn how to authorize your MacBook Air for Apple Music or any other computer out there.
Research Process: The total time involved to complete and publish this article is approximately 43 hours. This content was created through a structured research approach to ensure accuracy and reliability.
For more-related guides, you can explore our range of tutorials below:
- The Best Apple Music to MP3 Converter with Easy Steps
- How to Tell If Your Mac Needs an Anti-Virus? Mac Security Guide
- How To Take Screenshot On Mac [4 Step-By-Step Methods]
- How to Completely Uninstall or Delete Apps on Mac [5 Ways]
- Top MacBook Air Alternatives of the Year
- BEST MacBook Pro Docking Stations (Top Sellers)
Was this helpful?
Recommended Reading
-

For connecting a MacBook to several devices, a reliable Mac docking station is necessary. We have put together a list of the best MacBook Pro Docking Stations: Are you facing difficulty in connecting multiple devices to your MacBook due to limited ports? Preparing for work often requires adding multiple devices…
-

This tutorial explains the security features of Mac and viruses that can affect Mac thereby ultimately answering your concern - Does a MacBook need Antivirus: For a long time, it was a general assumption that Macs were too good to be affected by viruses. It was true for a while,…
-
Reset MacBook Air to Factory settings in minutes with this step-by-step guide. Learn how to Factory Reset MacBook Air to erase and restore your Mac even without a password: Struggling with a slow-running MacBook Air, or perhaps you are thinking of selling it? These are both situations that warrant a…
-
Here is a list of the best MacBook Air Alternatives on the market today. The MacBook Air M2 is one of the best small, thin, and light Apple laptops. However, if you are looking for a non-Apple Windows laptop option, we have compiled a list for you with pricing and…