


Quickly discover Jira Service Management Cloud’s ability in ticket management and task automation. This tutorial will guide you on the aspect of setting up SLAs with step-step screenshots:
In the previous tutorial, we looked at how to set up a Jira Service Management Project and how customers typically use the customer portal to raise requests which will be assigned and resolved by agents.
In this article, we will have a look at a very important aspect of setting up SLAs and how automation can play a role in automating manual steps.
Let’s start!!
Table of Contents:
Jira Service Management Cloud: Quick Start Guide

Setting up SLAs
All of us would like to provide good service to our customers so that they keep coming back and they achieved this through prompt response on resolution to the tickets.
Managing customer issues quickly is very important. Normally, in most customer contracts, Service Level Agreements, or SLAs would be defined.
SLAs track the progress like:
- Time to respond within 2 hours.
- Time to resolution under 4 hours.
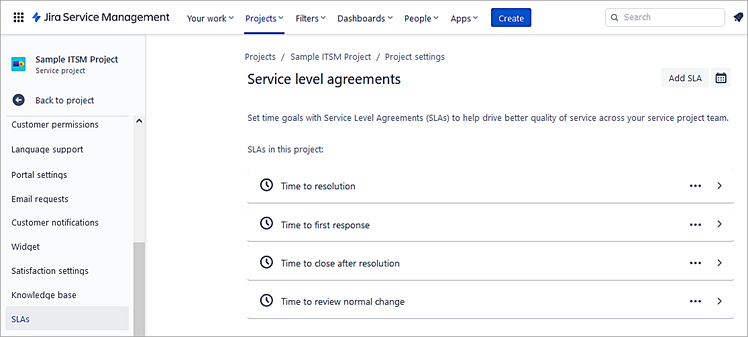
Project admin can set up SLAs in the Jira Service Management project by going to Project settings -> SLAs.
Edit a specific SLA to set up the timelines as per your project needs. Select the first SLA ‘Time to resolution’ and edit it.

Add the time goal for each of the ticket categories and click on Save.

Also note the conditions below the SLAs to measure the time counting start, pause counting time, and finish counting time.
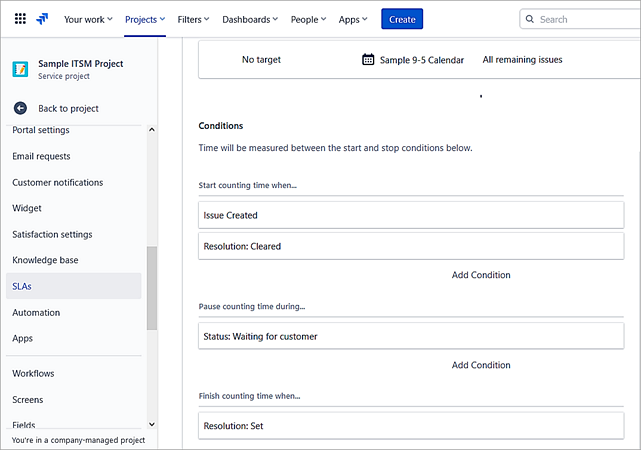
For example, I have added Status: Waiting for Customer for the Pause counting time during the condition for the first SLA.
Every ticket will be measured against these SLAs.
New Custom SLAs can also be added by selecting Add SLA on the right.
Suggested Reading =>> Open Source and Commercial JIRA Alternatives/Competitor
Automation Rules
Sometimes there is a need to automate certain manual repetitive tasks within the process. Jira Service Management allows you to automate actions using rules based on certain criteria.
Let’s see how to create automation rules within Jira Service Management.
Automation rule consists of
- Triggers that invoke the rule.
- Conditions that define the scope of your rule. This must be met for the rule to continue running else it will stop running.
- Actions that perform certain tasks like sending notifications, creating an issue, transitioning an issue to a certain status, etc.
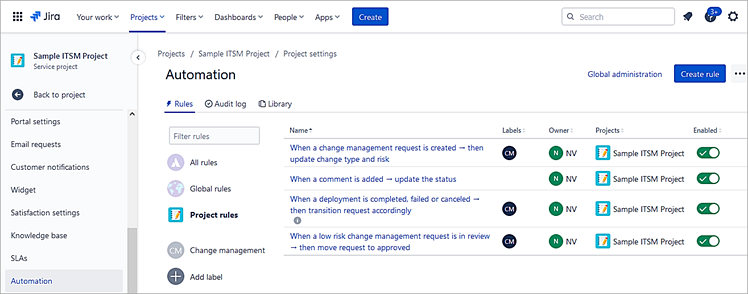
To create Automation rules, go to the Jira Service Management Project Settings -> Automation
Scenario #1: Let’s look at creating a rule that auto-closes the ticket if the resolved ticket is not updated by the customer within 3 days. The rule should run daily as scheduled to check on the condition.
Click on Create rule.
In the New Trigger block search for scheduled and set it to run every 1 day at specified time.

Select the check box “Run a JQL search and execute actions for each issue in the query” and enter the query as project = “Sample ITSM Project” AND status = Resolved and updatedDate <= -3d

Click on Save.
Next, select Add component -> New action
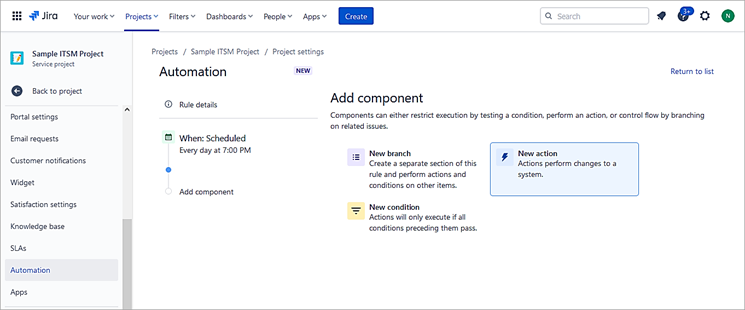
Click on the Transition issue.

Choose Destination status to Closed.
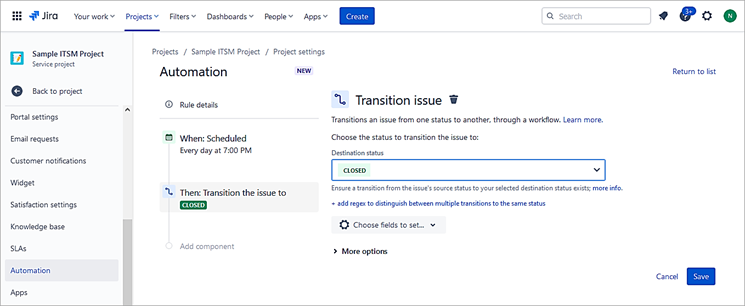
Click on Save.
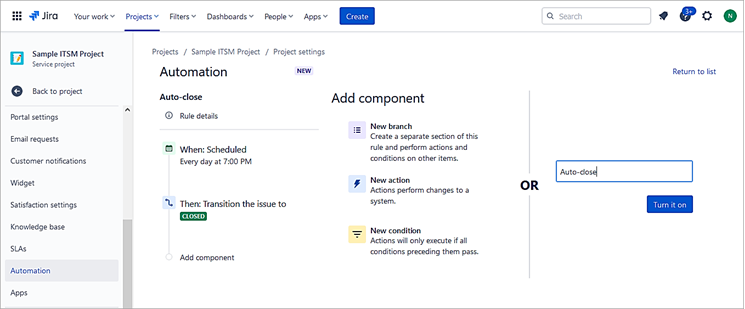
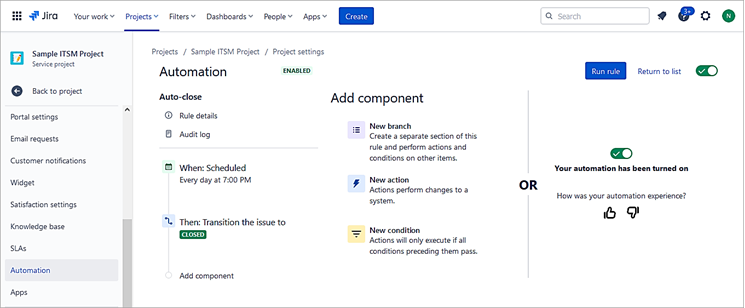
Last, enable the same by clicking Turn it on. Give the rule a name as well.
Scenario #2: Auto-assign when a new issue is created
Normally, when an issue is created, there is no assignee. We will create an automation rule to auto-assign to a specific user. An example is that when a request is created by the customer, it should be auto-assigned to a particular point of contact and he/she will then assign it to the right engineer.
This is an excellent use case, as any requests coming in from customers won’t go unnoticed.
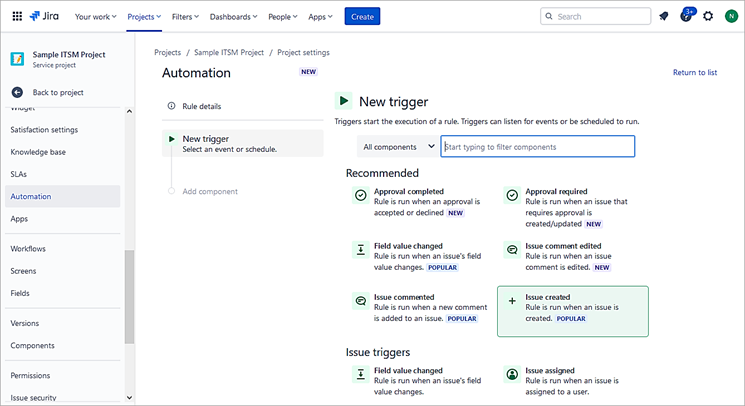
Let’s start by choosing our trigger, which is ‘Issue created’ by selecting Create Rule from Project Settings-> Automation

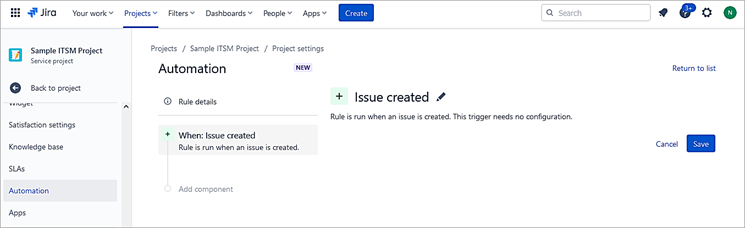
Click Save.
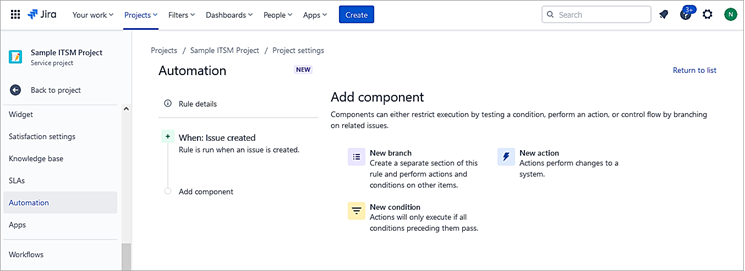
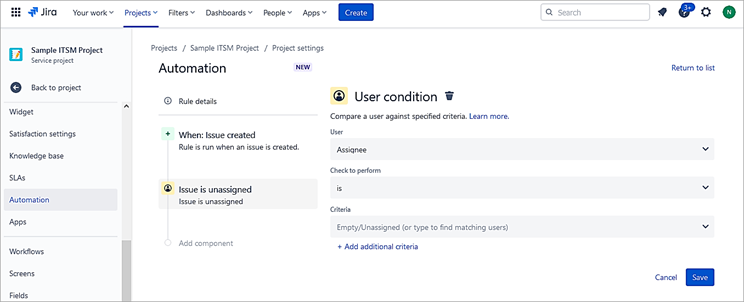
Next, add a New Condition.
Select User Condition
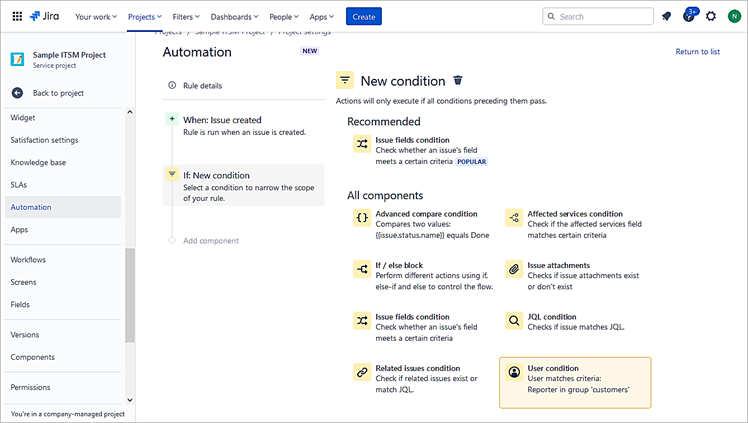
Under User, select Assignee and leave the criteria blank. Click to Save.
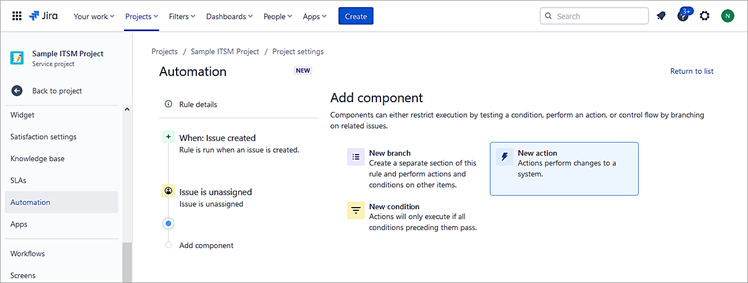
Next, add a New action.
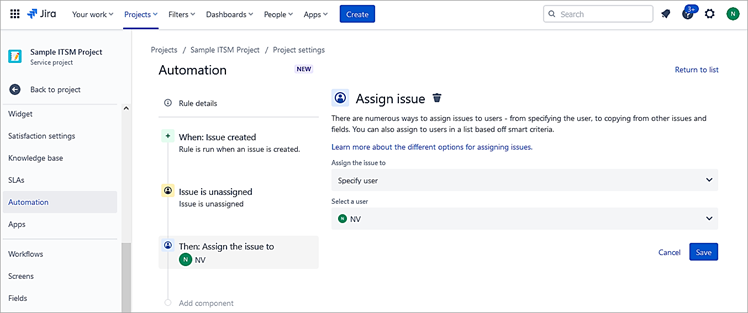
Select Assign issue.

Select the user and click Save.
Publish Rule
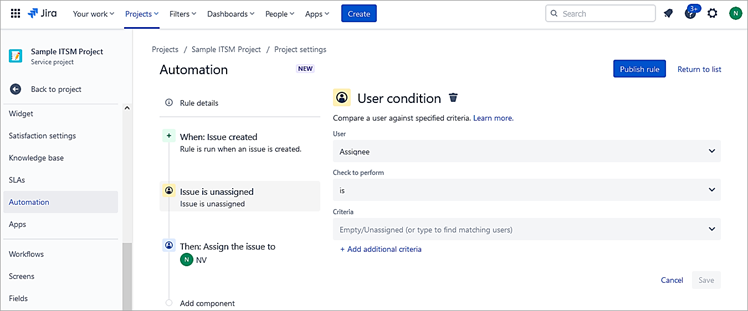
Give it a name and Turn it on

Test the rule
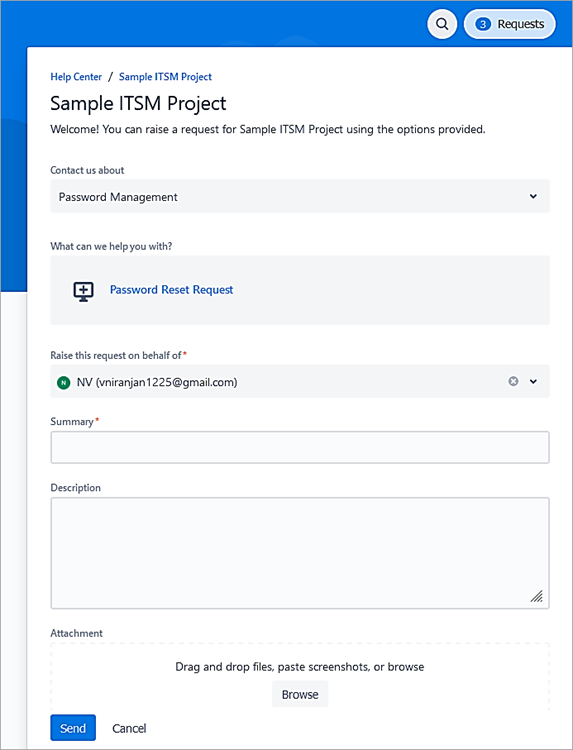
Customer creates a request in the customer portal.

As the request is created, you can see that the issue in the Agent view is auto-assigned.
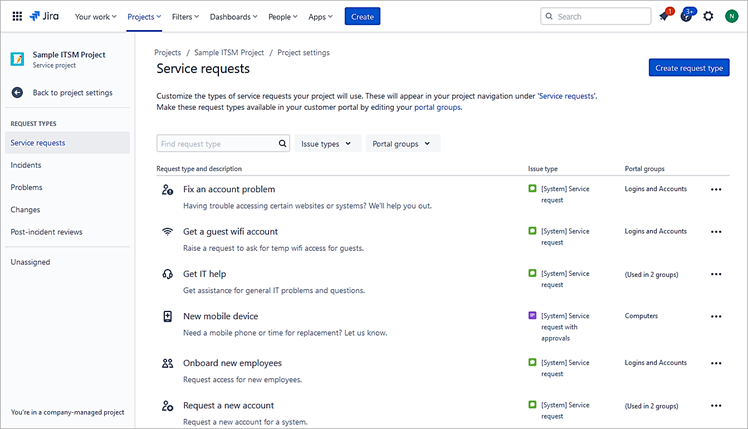
Customization of Request Types
As you are aware, portal groups are a way to group request types, which makes it easy for every customer to find what they need to raise the right type of requests.
Let’s first create a portal group and then create/add an appropriate request type into this portal group.
A project admin can customize to create of these portal groups and request types.
Let’s start by creating Request types. Go to Project Settings -> Request Types
Click on Create request type
Provide a Name and under Use workflow and fields from this issue type select [System] Service request.
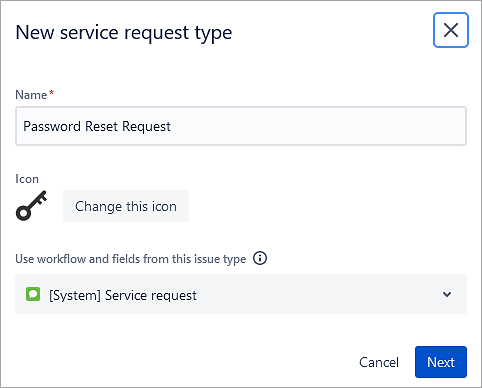
Click Next.
Click on + Create group and enter Password Management.
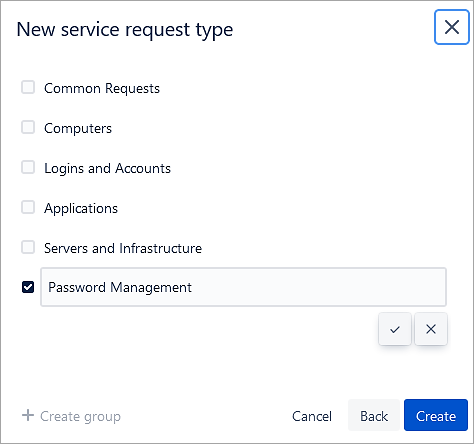
Click on ![]() and Create.
and Create.
The request form opens.

Under Visible fields click on Add a field.
Select the fields and click on Apply.
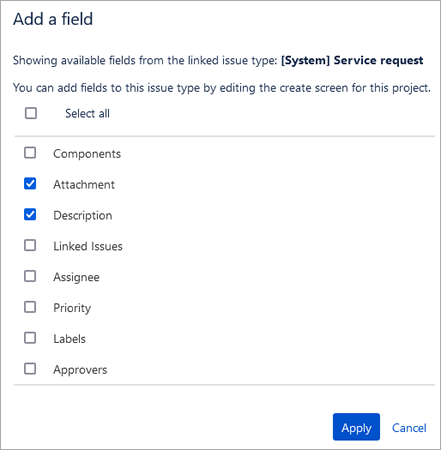

Maybe you could rearrange the fields.
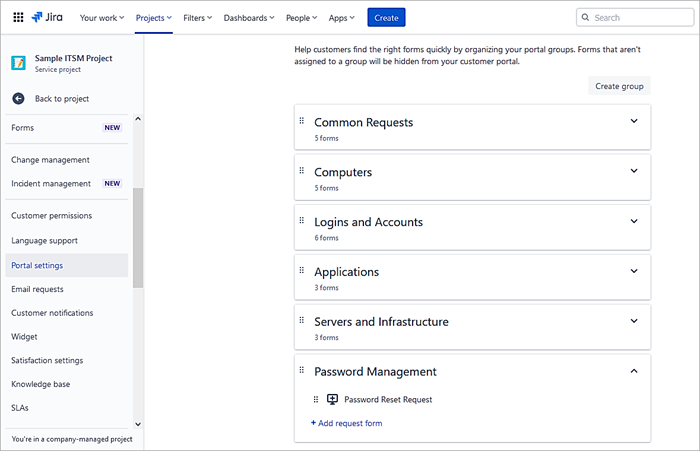
Go to Project Settings -> Portal Settings -> Portal Groups TAB
You should see the newly created Portal Group and the request form.
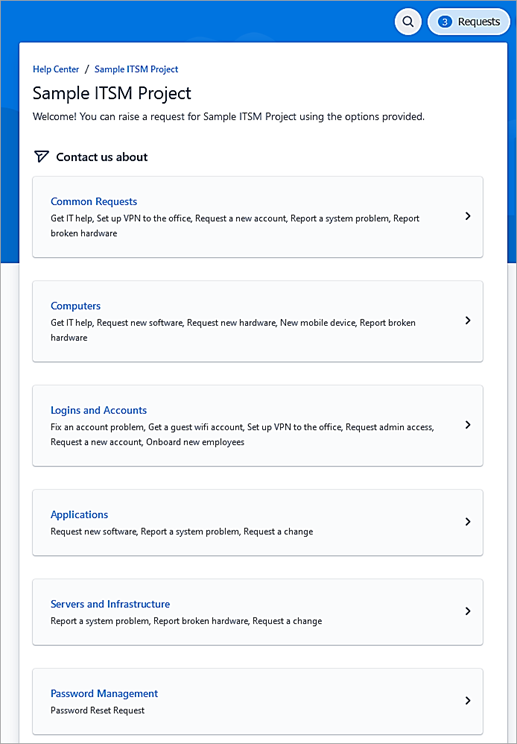
Launch the Customer Portal and you should see the newly created group.
Project Dashboard
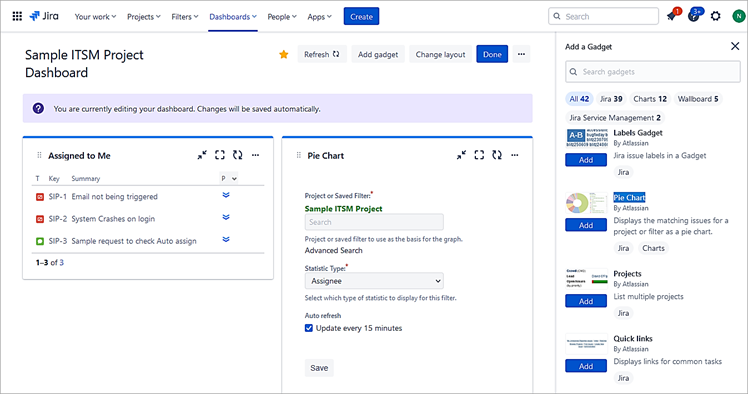
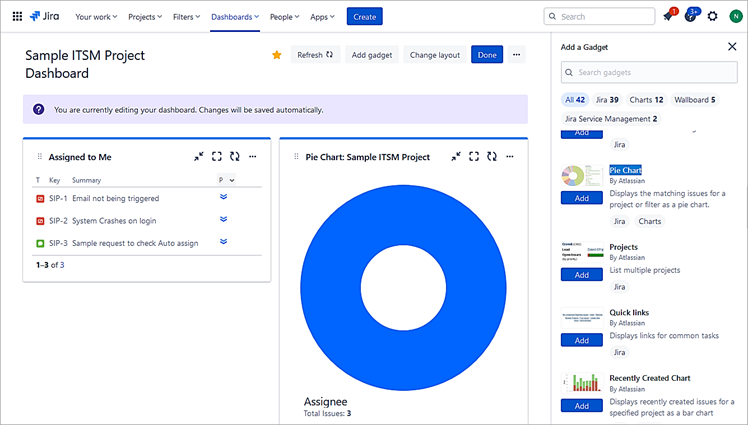
Dashboards are a way to track the issues and their progress. In JSM, you can create personal dashboards and add gadgets to them to keep track of the issues that the project team is working on using charts.
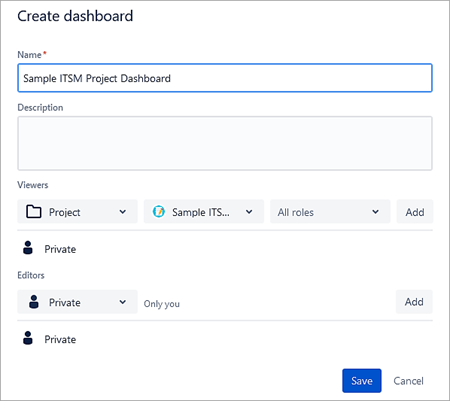
To create a personal dashboard, click on Dashboard -> Create dashboard

Select the viewers with the project option as shown and click on Save.
Click on Gadgets from the right bar and Add.

Add a Pie Chart
Also Read =>> Different Types of Graphs and Charts
Jira Service Management Pricing
Jira Service Management Cloud comes in 4 plans. I have added the pricing for 10 agents on a per-month basis.
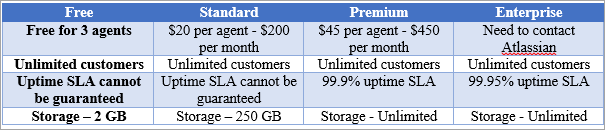
Click here for more details on pricing for the appropriate number of agents.
Also Read => A Comprehensive Guide to Atlassian Confluence Tutorial
Conclusion
To summarize, in this 2-part series, we have seen how Jira Service Management helps customers to raise requests using customer portals and how agents (project team) would view the same in agent view and resolve it within the SLAs.
I haven’t delved into workflows since they’re quite similar to those you’d have customized and used in Jira Software.
Lastly, we did look at how easy it is to customize and add new request types, along with creating a personal dashboard, to view the issues that the project teams are working on.
Overall, a user-friendly tool for ticket tracking.
Was this helpful?
Recommended Reading
-

A Complete Guide to Creating Jira Dashboard Quickly: We explored Scrum Handling in JIRA in our previous tutorial. Jira dashboard displays various gadgets and one can easily track the progress of the tasks/issues collectively on one page. For remote cross-border distributed teams, a dashboard can provide important information about both…
-

Top Free Open Source and Commercial JIRA Alternatives/Competitors: Popular JIRA plug-ins were explained in detail in our previous tutorial. Read through our entire range of tutorials in this JIRA series. JIRA is a bug tracking and project management tool for agile teams. It was developed by Atlassian and is currently used…
-
A Guide to Managing Issues in JIRA, Creating JIRA Workflow and JIRA Reports: JIRA Sub-task was explained in our previous tutorial from the Series of JIRA Tutorials. We have seen the different kinds of issues and how to create them in our earlier JIRA Tutorials. This is the next JIRA…
-

We have provided an extensive, step-by-step guide on how to integrate JIRA with QTest for your benefit. Let's get started. Atlassian Confluence has been explained in very simple terms for your understanding in our previous tutorial. At STH, we believe in sharing best practices, tools, techniques, and processes. We also…
-
Learn Jira Admin Aspects: JIRA Administration and User Management Tutorial We learned about the JIRA workflow in detail in our previous tutorial. We are going to learn all about the JIRA Administration today. This is a unique opportunity to learn the admin aspects of a Project/Incident/Test Management tool. Not all…
-
JIRA Agile Tutorial: Agile Project Management Using Jira Our previous tutorial on JIRA Administration explained about JIRA Admin and User Management. Agile methodology for software development has gained immense popularity in recent years. JIRA Tool supports the Agile Software Development methodologies like Scrum and Kanban. Using JIRA Agile boards and…
-

JIRA Bug Tracking: Defect Life Cycle in JIRA Jira Download and Installation was explained in detail in our previous tutorial. Test teams are always apprehensive about picking up JIRAs for Defect Management. Doubts are warranted. This stems from the fact that though JIRA bug tracking tool is applicable to IT businesses,…
-
This comprehensive guide on Jira Cloud Migration Assistant will help you in migrating Project Data from Jira On-Prem Server to Jira Cloud, including migration steps, project permissions, etc: Cloud Migration Assistants for Jira and Confluence are available as free apps from the Atlassian Marketplace. In this article, we will look…


