


Explore the steps involved in creating a Jira Service Management Cloud Project. Get to understand the ways to effectively use the customer portal for request submission and resolution:
Jira Service Management helps to receive, track, manage, and resolve the requests from customers. These requests could be in the form of bugs, service requests, problems, incidents, changes, etc. Typically, customers use Jira Service Management (JSM) to raise these requests and the project team members work on resolving these requests.
The project team members who work on the requests are Agents and licenses are based on the number of Agents. Customers who submit the requests do not need a license and can log in/access the product for free and communicate through the product or portal itself with the agents.
Table of Contents:
Jira Service Management Cloud: Perfect Ticketing Software

In some JSM projects I’ve worked on, customers use the portal to request services and the team adheres to SLAs to resolve them, as explained in this article.
In this 2-part series, we will see how agents and customers collaborate to manage the requests effectively.
Click here to sign up for a trial of Jira Service Management.
Set up Your First Jira Service Project
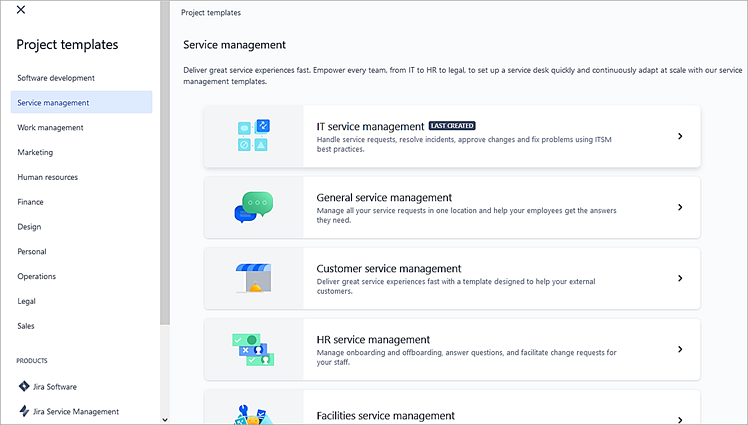
Create your first Jira Service Management project. JSM has project templates to help set up the project quickly. Here is the template for your reference:

Create your project using the IT service management template.
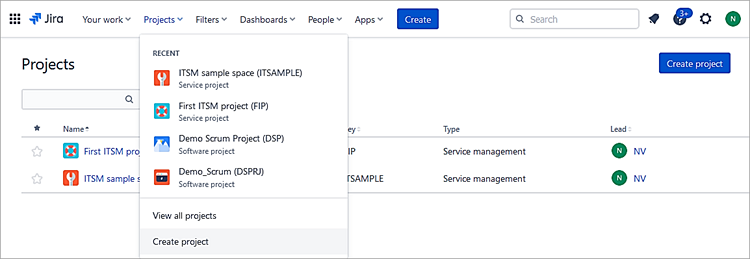
- Select the Projects dropdown on the menu.
- Select Create project.
Click on the IT service management template.
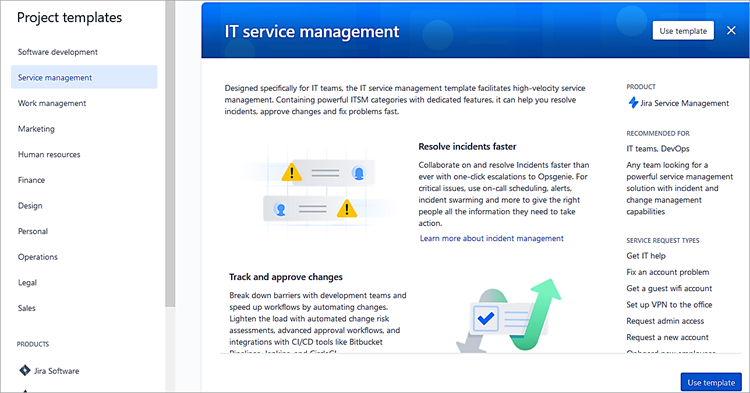
Click on Use template.
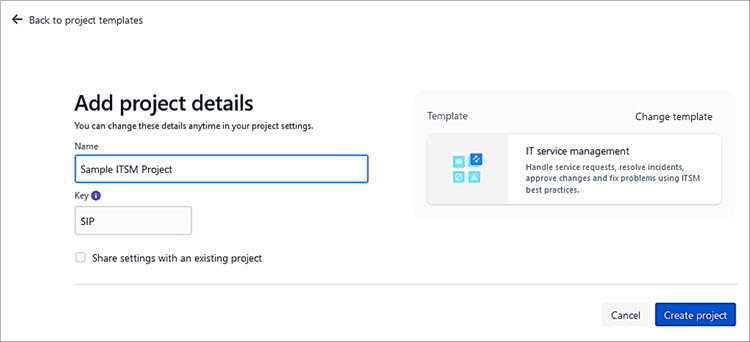
Click Create project.
Add Members to Project (Agents)
Add team members as agents to your service project created.
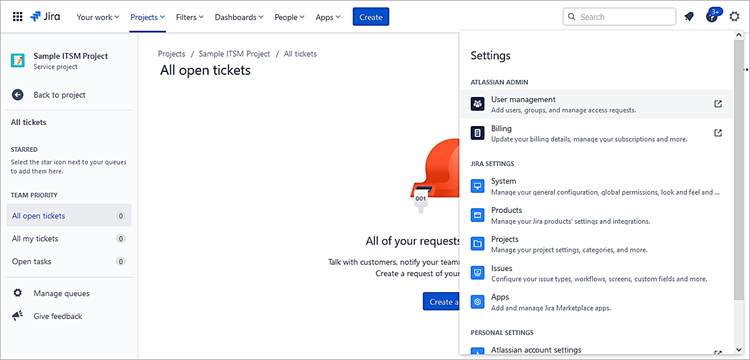
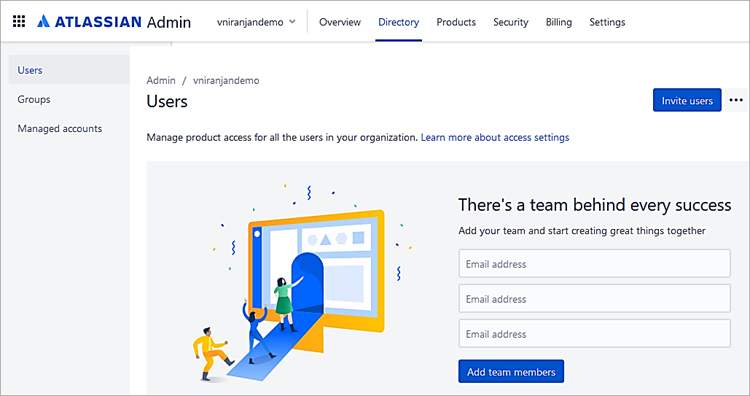
As an Atlassian Admin (the user who signed up for the site access), go to Settings -> User Management.
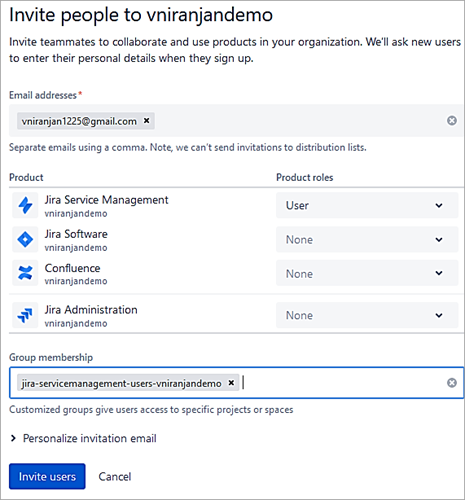
Click on Invite users.
Enter your Email ID and select the group membership of users as shown below.
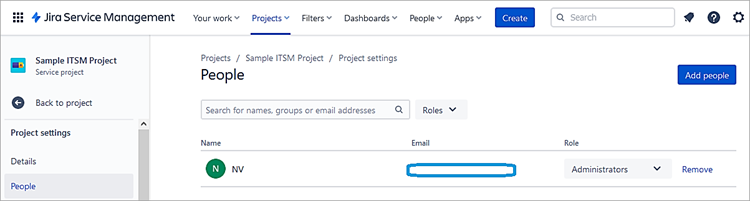
Next, go to Jira Service Management Project settings -> People
- Select Add people.
- Enter the agent’s username or email.
- Choose their role from the dropdown: Administrators (Project), Service Desk Team, or for Customers select Service Desk Customers role.
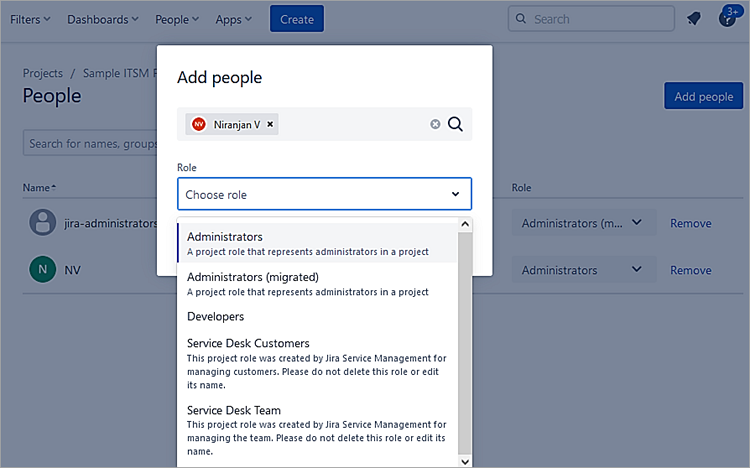
- Select Add
- They’ll get an email with a link to your project to join.
- The users (Agents) added here with the role ‘Service Desk Team’ to the project need a license.
- Click on Back to project.
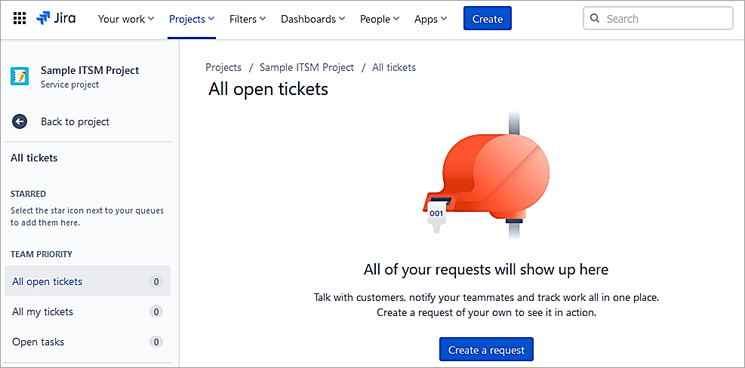
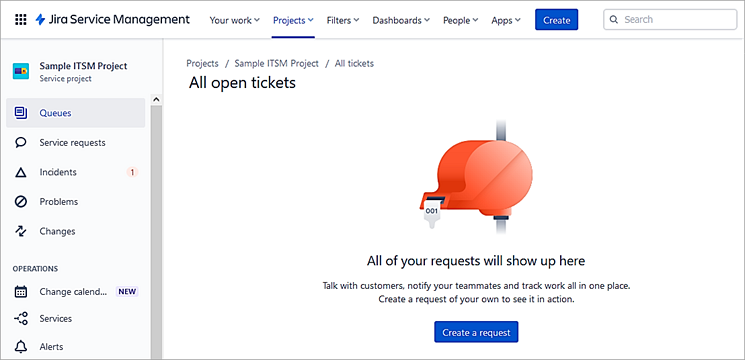
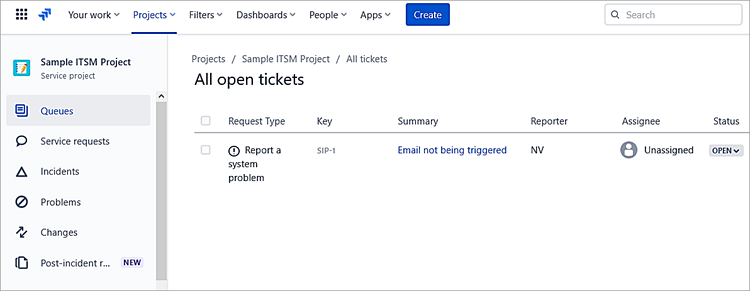
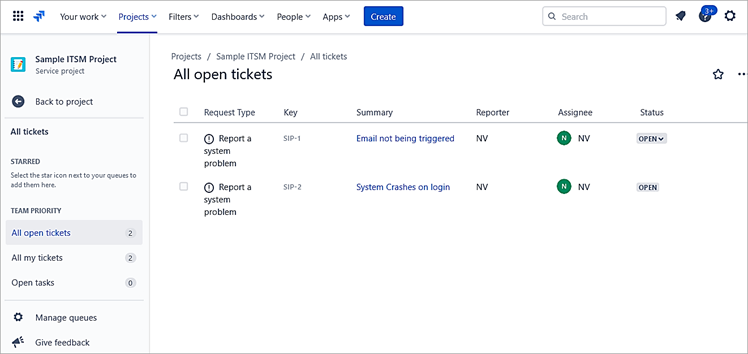
The current view of All open tickets shown below is the agent view for the project team members and is not visible to your customers.
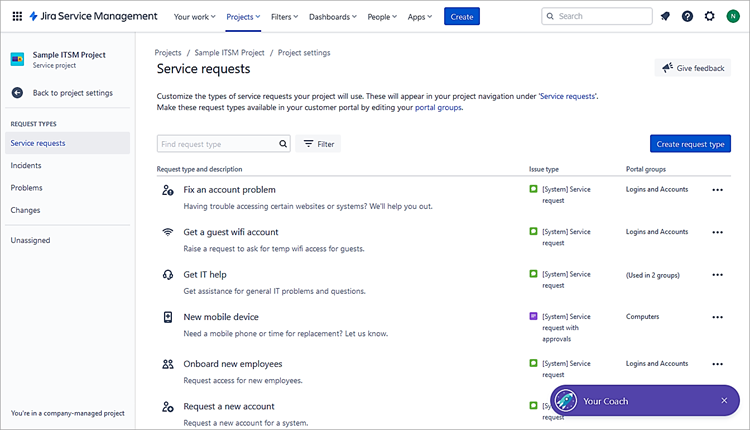
Request Types
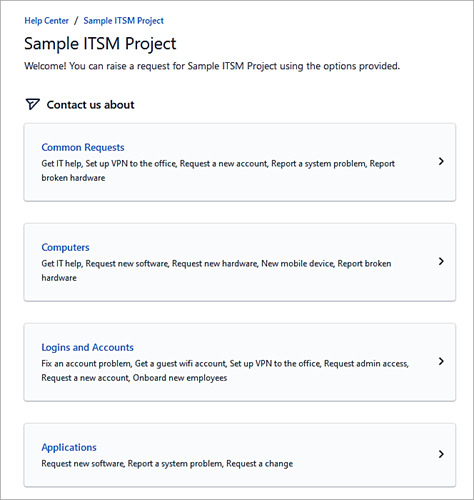
Customers raise requests through the Customer portal. Jira Service Management provides a set of default request types that are configured for very basic IT help desk scenarios. You can configure the default request types or add new ones to suit the needs of your customers and team.
Request types are organized into portal groups to help customers find the appropriate request they need to raise on the customer portal.

Customers can raise the below types of requests in the Customer Portal. Additional request types can be added as well.
#1) Service Requests
#2) Incidents: Unplanned events that disrupt the application, hardware, or network.

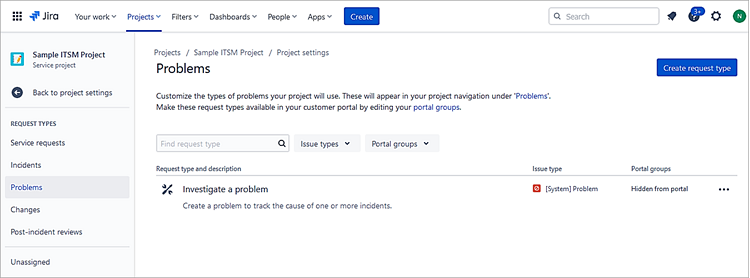
#3) Problems: When Incidents occur, problems cause incidents. The long-term resolution is to fix the problem.
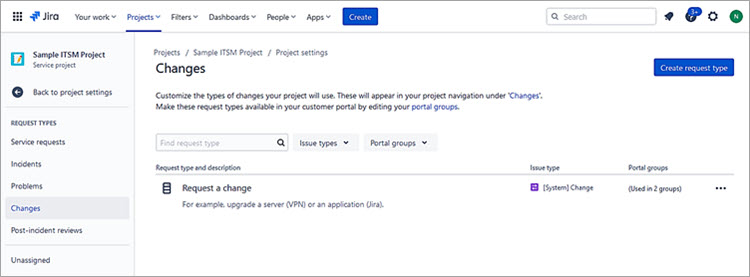
#4) Changes: Adding, modifying, or removing anything that will affect the services.
We will look at how customers can raise requests through the Customer Portal.
To access the Customer Portal, go back to the main project screen. Click on Channels -> Help Center -> Open

This is the portal through which customers will raise their requests.
Customer Portal for Requests and Issues
Customers raise requests through the customer portal and for agents, it is the issues that they look at.

Agents see the issue in the main project view.
Inviting Customers and Adding Organizations
Customers are people who request help. They raise requests where agents look at it as issues.
Organizations are groups of customers. When an organization is added to a project, its members can raise requests for the project and share them with the organization’s members.
Agents can add and remove customers from your service project. Project Admins can as well.
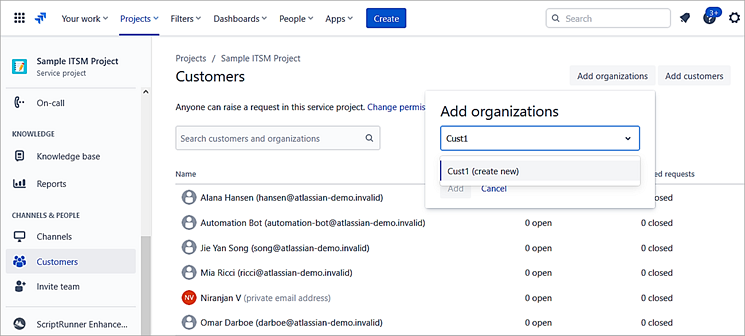
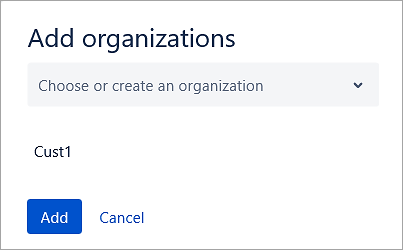
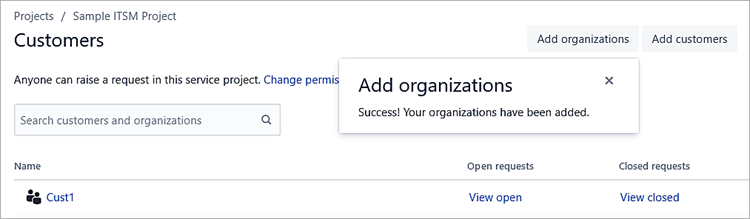
Add an organization to a service project
To add an organization:
- From your service project, go to Customers.
- Select Add Organizations.
- Add a new or existing organization.
- Press Add.
Select Create new.
Add a customer to a service project
Both project administrators and agents can add customers to a service project.
To add a customer:
- From your service project, go to Customers.
- Select Add Customers.
- Enter the customer’s username or email. Separate customers by commas to add more than one at a time.
- Select Add.
There is no limit on the number of customers that can be added to your service project.

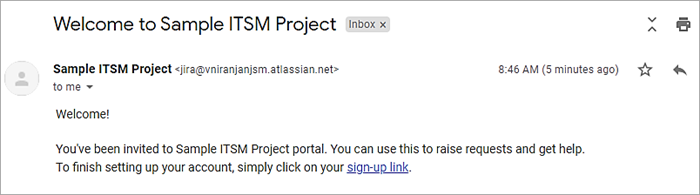
Once the customers are added, they would get a mail to finish the account setup, create a password, and log in to the customer portal in JSM to raise requests.
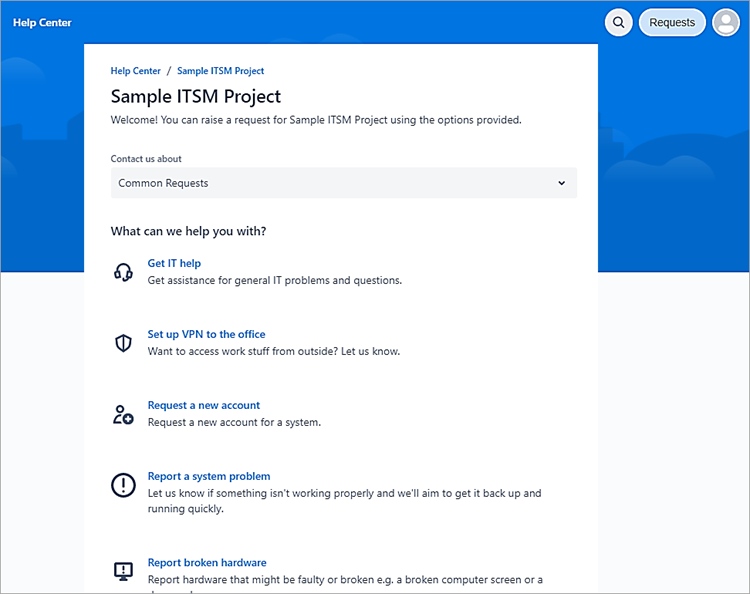
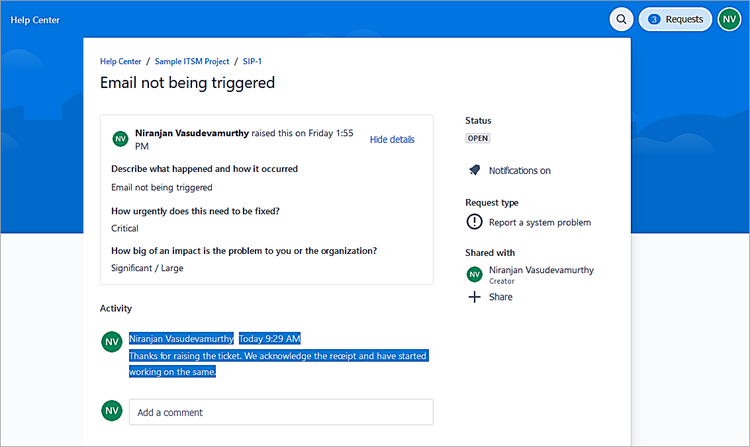
The customer portal comes up as shown after the login for the customers through which they can raise requests.

Agents can launch the customer portal from the Channels.

For customers to raise a request in the customer portal, click on the appropriate option.
For example, Common Requests -> Report a system problem.
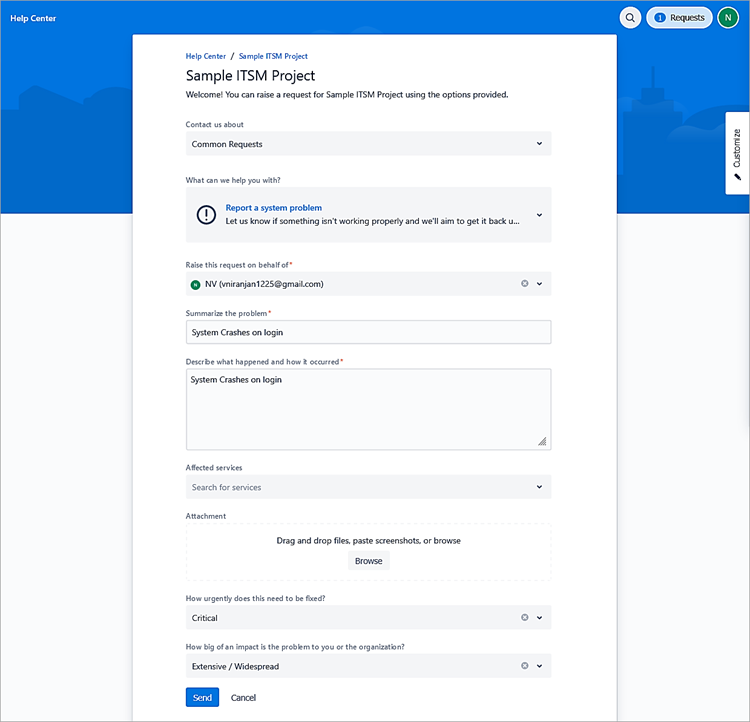
Click on Send.
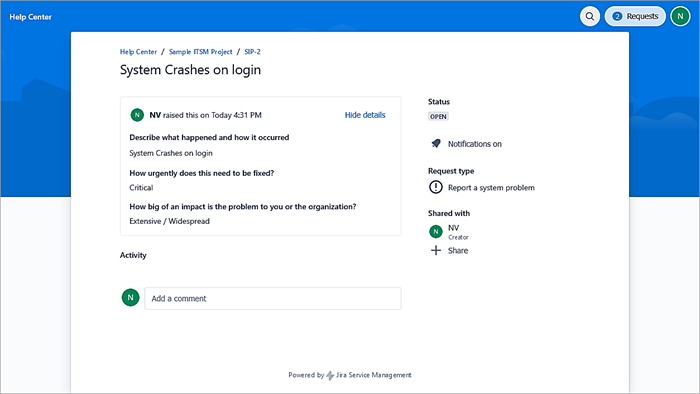
On the top right, click on Requests -> All. This will list all requests raised by a customer.
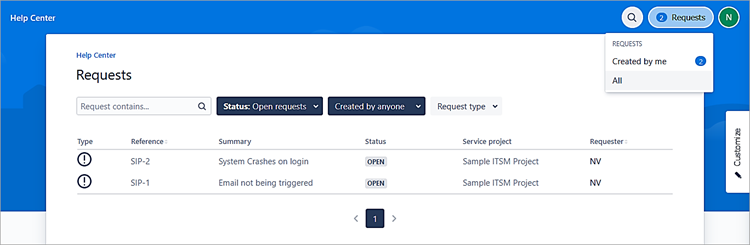
Agent View
The agent can view the tickets and assign the same to the developer on the team for a resolution.

Acknowledgement of ticket received
As customers raise a request, the tickets are visible in the agent view as shown above. The agents can choose to reply back to customers that they are working on the same, which is an acknowledgment of the ticket received.
Open the ticket and below in the comments section click on Reply to customer.

Add a note and save the same.
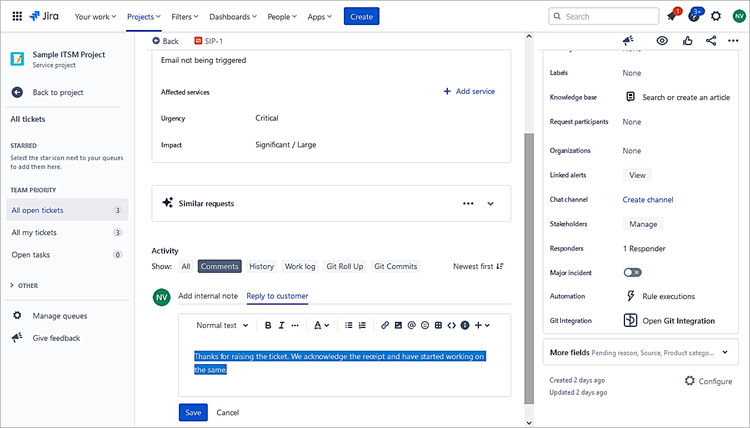
This comment will be visible to the customer in their customer portal.
Managing queues
As mentioned before, customer requests become issues that project team members can view and work on. Jira Service Desk comes with default queues where customer requests are organized. As an agent, you can see how many issues are in each queue.
You can easily navigate to your service desk queues by selecting Queues from your project sidebar.

Click on Manage Queues at the bottom left sidebar.
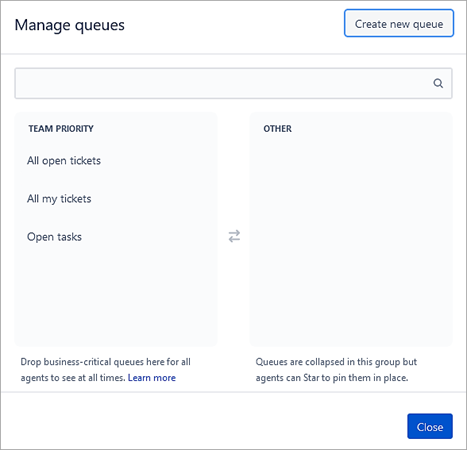
Click on Create new queue.
The JQL will be
resolution = Unresolved AND reporter = <Enter the customer name here>
Provide a name.
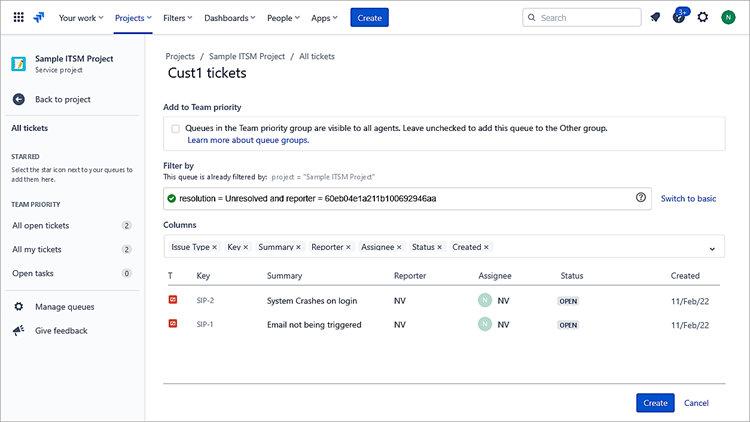
Click on Create. The query is added below the Other category.

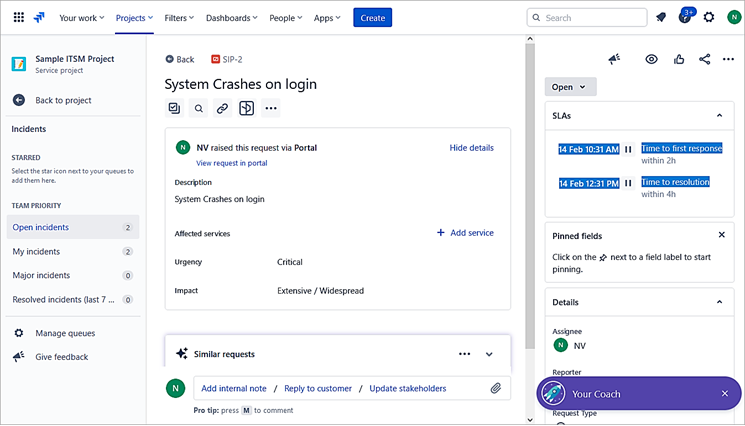
In the sidebar, you can look at the Incident logged since the customers had raised the request which was an incident.

Click on the incident to open it. On the right-hand side, look at the SLAs.
Recommended Reading => Complete JIRA Tutorials Series
Conclusion
This tutorial explained how a Jira Service Management project is set up and how customers utilize the customer portal to submit requests, which are then assigned to agents for resolution.
Overall, the entire collaboration between customers and agents happens through Jira Service Management.
In the next article, we will have a detailed look at SLAs and Automation rules to automate certain manual tasks.
Was this helpful?
Recommended Reading
-

Atlassian Jira and GitLab Integration Tutorial: Installation & Configuration JIRA is a very powerful issue and project tracking tool and is most popularly known by its use for bug tracking as well. The other tools from Atlassian suite which cover the ALM approach and that are tightly integrated with JIRA…
-
Top Free Open Source and Commercial JIRA Alternatives/Competitors: Popular JIRA plug-ins were explained in detail in our previous tutorial. Read through our entire range of tutorials in this JIRA series. JIRA is a bug tracking and project management tool for agile teams. It was developed by Atlassian and is currently used…
-

We have provided an extensive, step-by-step guide on how to integrate JIRA with QTest for your benefit. Let's get started. Atlassian Confluence has been explained in very simple terms for your understanding in our previous tutorial. At STH, we believe in sharing best practices, tools, techniques, and processes. We also…
-

JIRA Agile Tutorial: Agile Project Management Using Jira Our previous tutorial on JIRA Administration explained about JIRA Admin and User Management. Agile methodology for software development has gained immense popularity in recent years. JIRA Tool supports the Agile Software Development methodologies like Scrum and Kanban. Using JIRA Agile boards and…
-
A Step-By-Step Guide to JIRA and Subversion SVN Integration: JIRA is a very powerful issue & project tracking tool and is most popularly known by its use for bug tracking as well. The other tools from the Atlassian suite which cover the ALM approach and that are tightly integrated with…
-

JIRA Bug Tracking: Defect Life Cycle in JIRA Jira Download and Installation was explained in detail in our previous tutorial. Test teams are always apprehensive about picking up JIRAs for Defect Management. Doubts are warranted. This stems from the fact that though JIRA bug tracking tool is applicable to IT businesses,…
-
This comprehensive guide on Jira Cloud Migration Assistant will help you in migrating Project Data from Jira On-Prem Server to Jira Cloud, including migration steps, project permissions, etc: Cloud Migration Assistants for Jira and Confluence are available as free apps from the Atlassian Marketplace. In this article, we will look…


