Can you play Minecraft on Mac? Follow our simple step-by-step guide to learn how to download Minecraft on Mac and install it safely in minutes to start playing right away:
It warms my heart to know that Minecraft is still going strong, even 17 years after it was released. Since then, players have purchased over 300 million copies of the game. It now caters to a monthly active player base of around 212 million worldwide.
As an avid fan of this sandbox game, I am glad that it is still being sought by players wanting to experience it for the first time. I recently came across several queries and questions on online forums, mostly seeking guidance on how to download Minecraft on Mac. Isn’t downloading this game supposed to be easy?
Minecraft For Mac: Quick & Safe Ways To Download
Well, it is, but with regard to macOS, things are a bit complicated.
You see, although the Java edition of Minecraft is Mac-friendly, the Bedrock edition is not. I think what people really want is a comprehensive guide that covers how you can download the Java edition of Minecraft, alongside workarounds for the seemingly impossible installation of the Bedrock edition.
Here is the video guide on how to download Minecraft on Mac:
System Requirements For Minecraft on Mac
Before you download Minecraft on Mac, or any other game for that matter, it is important to check whether your system’s hardware meets the game’s spec requirements.
On July 21st, 2026, Mojang, the company behind Minecraft, announced new system requirements for the Java Edition of the game. Both the minimum and recommended requirements for the game were raised.
The newer version promises you better performance on hardware that’s packing the specs below:
| Minimum | Recommended | |
| OS | macOS 12+ | macOS 14+ |
| Architecture | x64 or ARM64 | x64 or ARM64 |
| Memory | 8 GB with discrete GPU or 12 GB with integrated GPU | 16 GB |
| Processor | Intel Core i3-10100, AMD Ryzen 3 3100, Qualcomm Snapdragon X or Apple M1 (4 physical cores minimum) | Ryzen 5 5600, Apple M2 Pro, and Intel Core i5-12400 |
| Graphics | Vulkan 1.3-capable GPU with at least 2 GB VRAM. Apple M1 or newer | Apple M2 Pro or graphical hardware that’s comparable. |
| Target | 1080p @ 30 FPS, Fast Preset | 1080p @ 60 FPS, Fancy Preset |
Although Mojang announced newer system requirements for the Java edition of Minecraft, that doesn’t mean the game won’t work on lesser hardware. You’ll be able to launch Minecraft on older Mac systems. However, you’ll have to contend with noticeably subpar performance and visual quality.
Minecraft Java Edition vs. Bedrock Edition
I get how these two different editions could end up confounding you, especially if you are new to the game and keen on playing it for the first time. Both are the main versions of the game. However, they differ regarding the experience and features you’ll get to enjoy.
The table below will give you a good idea of the distinction between these two versions.
| Java Edition | Bedrock Edition | |
| Native macOS Support | Yes | No |
| Cross-Platform Compatibility | Cross-Play with Windows, Mac, and Linux | Cross-play with Windows, XBOX, Nintendo, PS5, and Mobile. |
| Mod | Extensive Third-Party Mod support | You’ll need to rely on the in-game marketplace to acquire mods. |
| DLC (Downloadable Content | No | Yes |
| Controller/Touch Support | No | Yes |
| Minecraft Marketplace | No | Yes |
| Shaders | A good third-party shader ecosystem | You’ll have to rely on add-ons and other workarounds. |
| Best for | Mac users and a good mod ecosystem | Mobile and console gaming. |
How to Download Minecraft on Mac
Explore the simple step-by-step process to get Minecraft on Mac on both Java and Bedrock editions.
#1) Java Edition
It should be obvious to you by now, given the table you just read above, that the Java Edition is the only version Mac users should bother downloading.
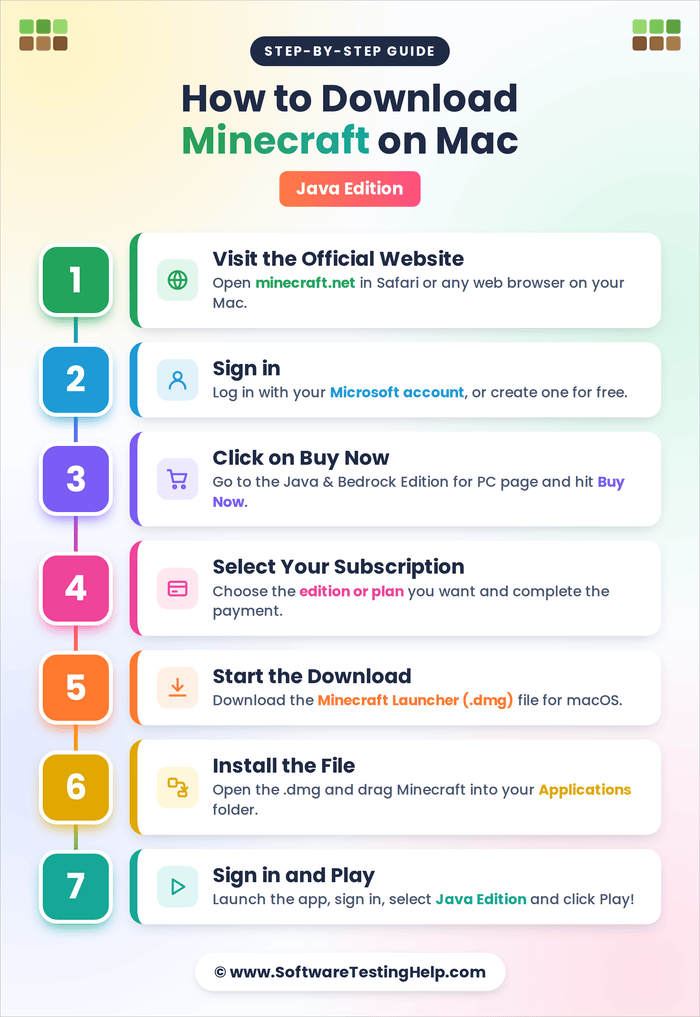
Here’s a step-by-step guide to downloading the game on your Mac (assuming it meets the system requirements I laid out above).
#1) Visit the Official Website
This goes without saying: if you are going to download Minecraft, do so from the official site. Many third-party websites list the “Minecraft launcher” for download. They’ll lure you in with an enticing price tag or no price tag at all.
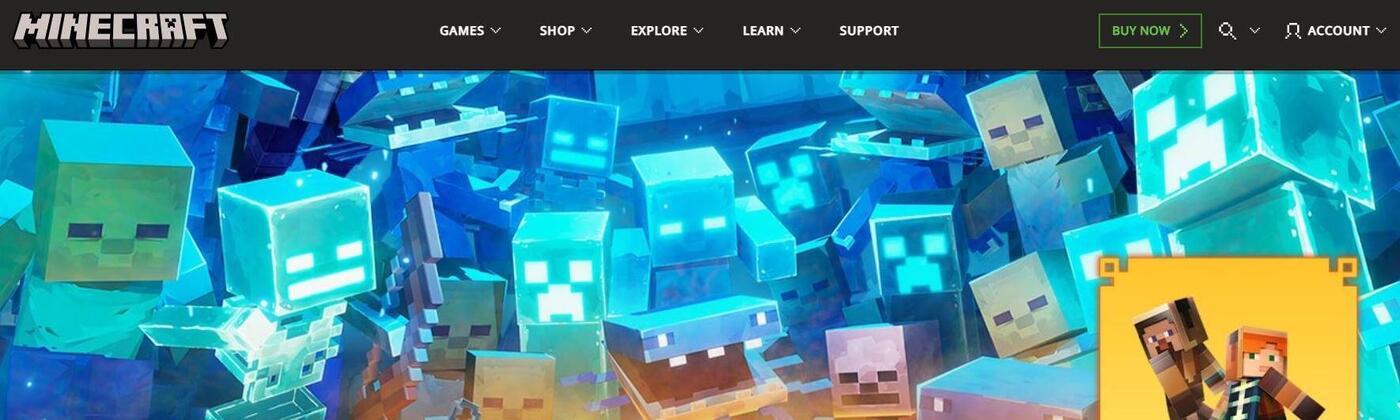
I suggest you be wise and only download from the official website, lest you want to contaminate your system with malware or a virus.
#2) Sign in
Now, the next step is to sign in using your Microsoft account. Mojang has made it mandatory to have a Microsoft account to purchase and play Minecraft.
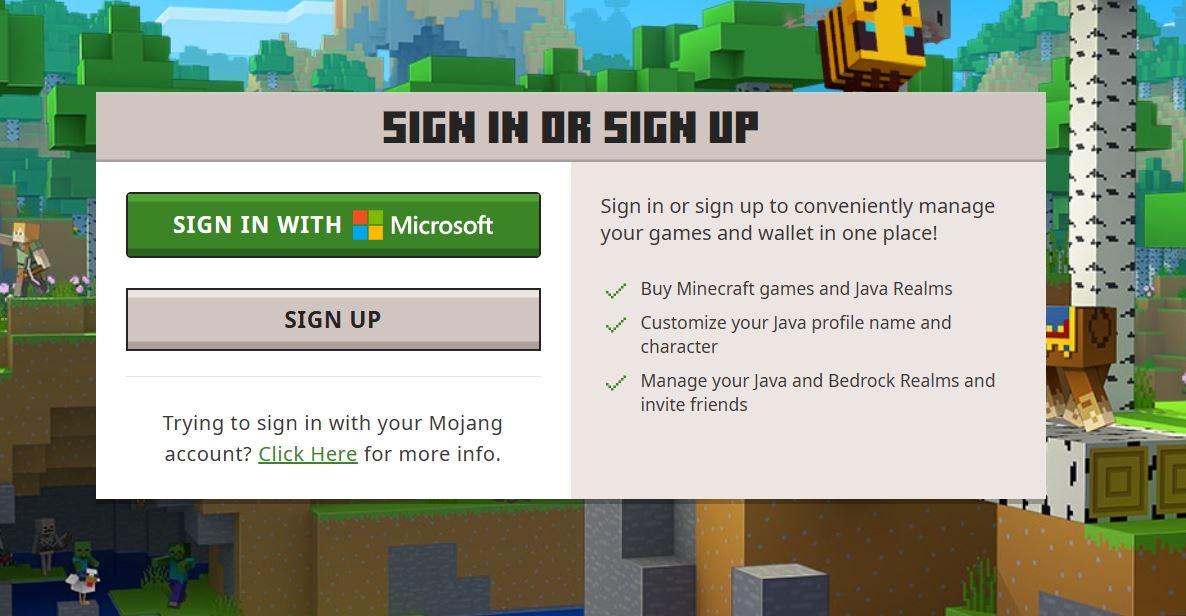
So, sign in using your Microsoft account if you have one, or create a Microsoft account.
#3) Click on Buy Now
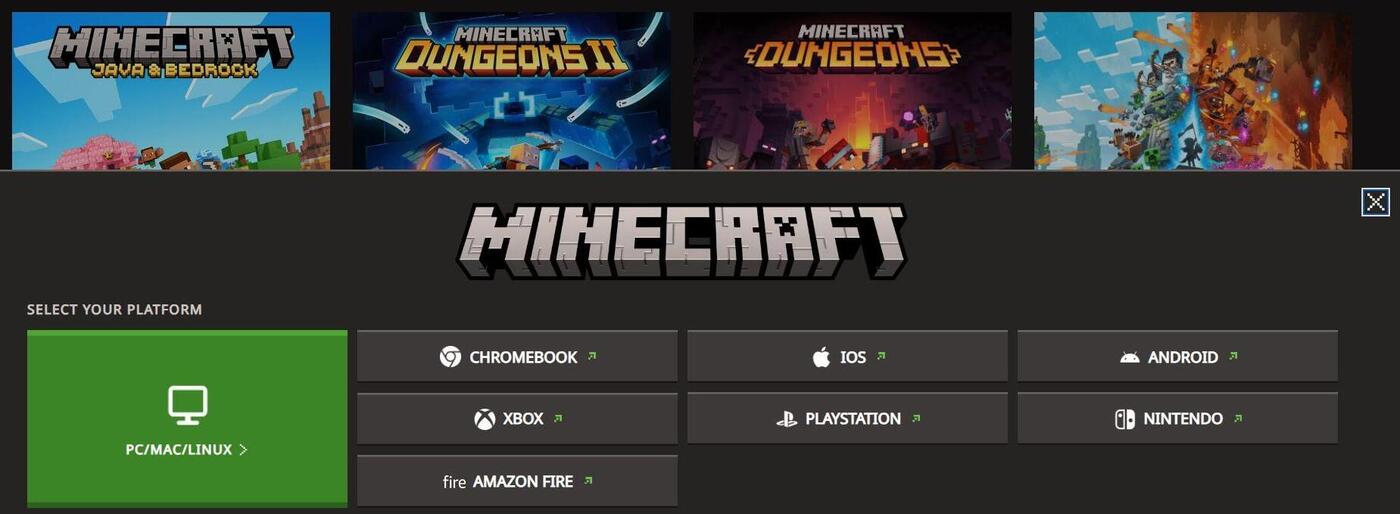
Look in the top-right corner of your screen, and you’ll see the “Buy Now” option. Click on it. Later, click on Minecraft Java and Bedrock, and then select your platform (PC/mac/Linux)
#4) Select Your Subscription
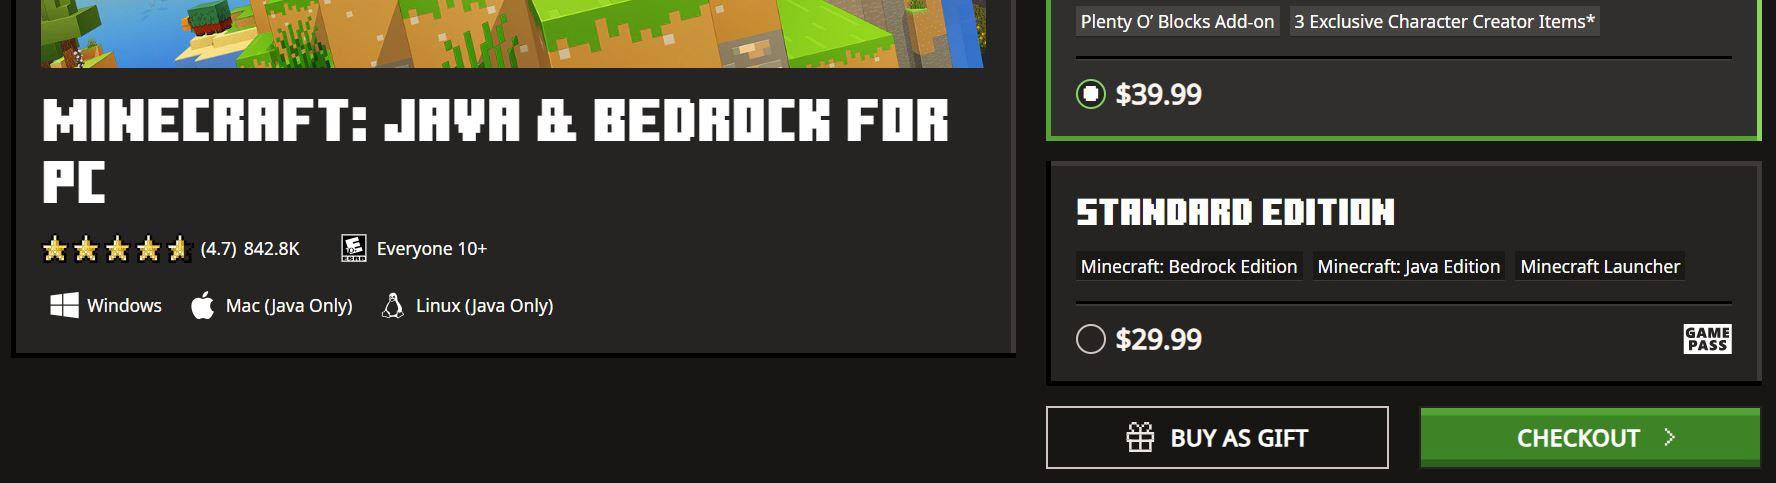
You’ll now find yourself on the plans page. Select your package. For the sake of this guide, I’ll be selecting the Standard edition. Hit the Checkout button after you’ve chosen your plan and pay up.
I went with the Standard Edition because the other, more expensive editions feature content that’s exclusive to the Bedrock Version of the game. You’ll end up paying more for mods, maps, skins, and other in-game content that’s simply incompatible with your macOS system. Standard Edition is the wise option for Mac users.
#5) Start the Download
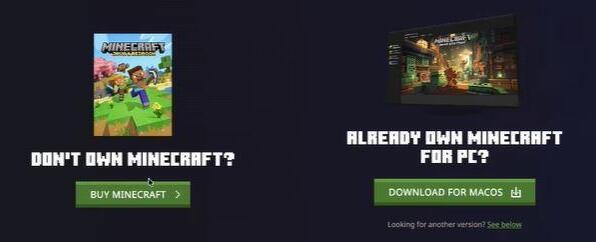
You’ll now see the option to download Minecraft for macOS. Click on it to initiate the download. Wait until the download is over.
#6) Install the file
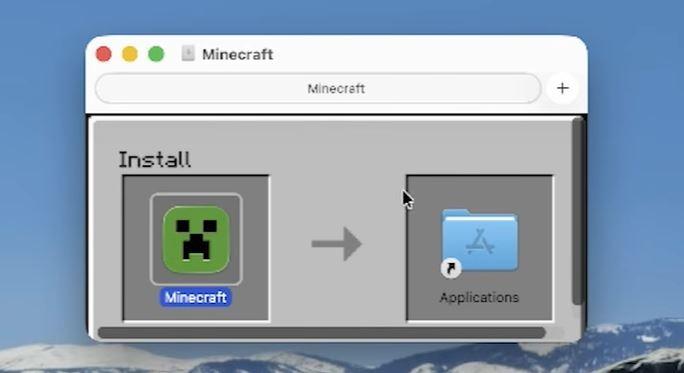
With the file downloaded, you’ll need to install it on your system. So, find the downloaded file on your Mac. Open the Downloads folder, and you’ll see the Minecraft.dmg file.
This will open a small window where you’ll have to drag and drop the Minecraft file from the Install folder to Applications. Double-click the Minecraft application file to start the installation. Follow the instructions being given to you during the installation.
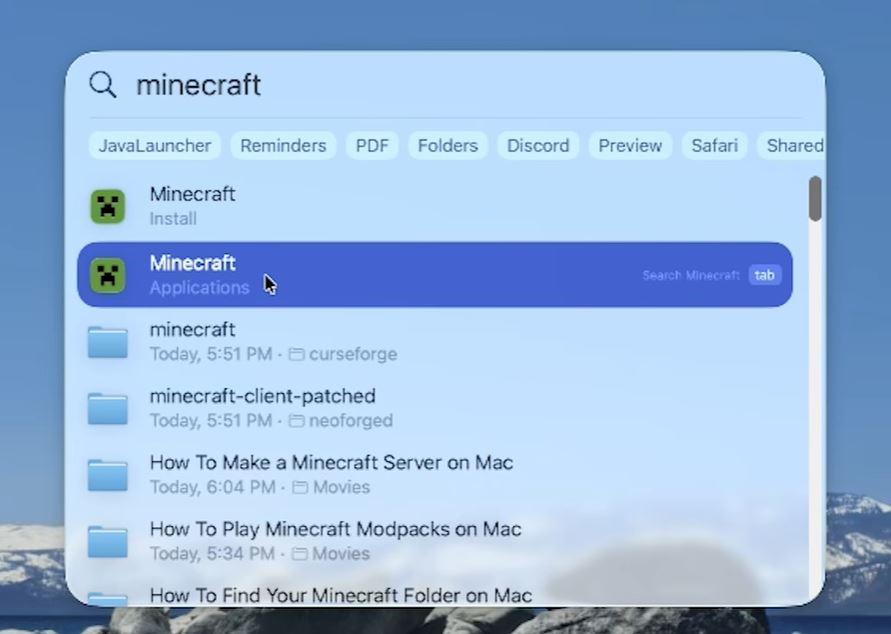
#7) Sign in and Play
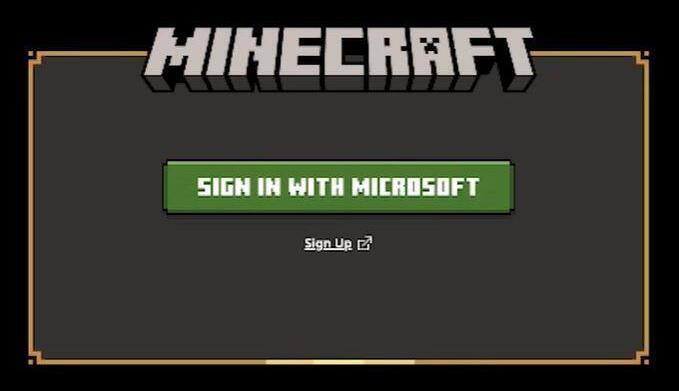
Click on the installed file to launch the game. Sign in using your Microsoft account and either select Single Player or Multi-player to start playing.
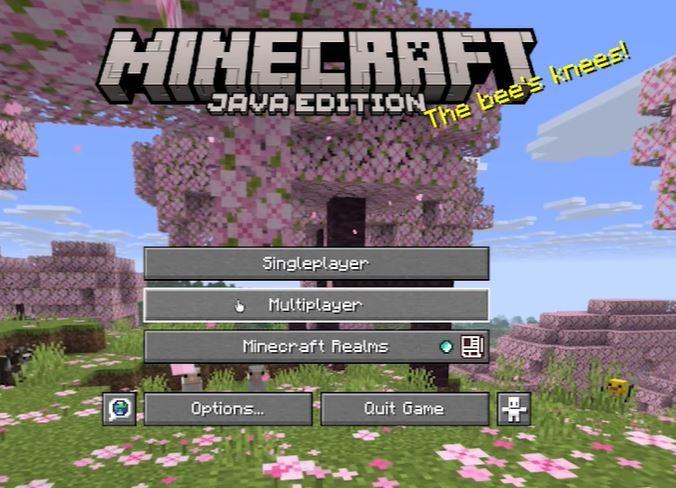
#2) Bedrock Edition
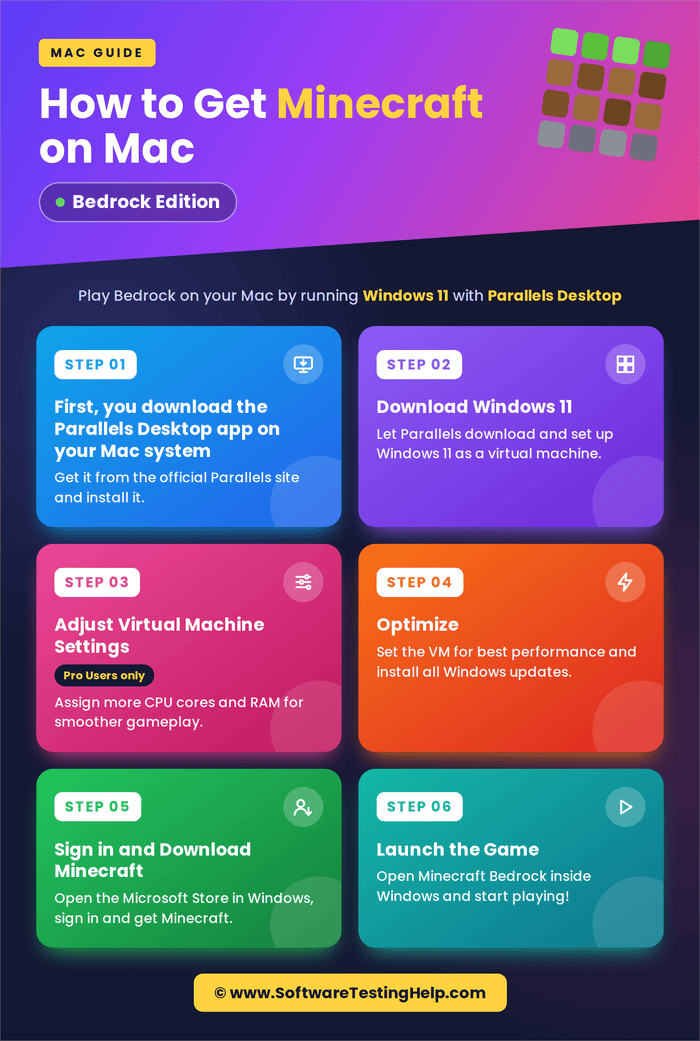
Here comes the tricky part. Minecraft’s Bedrock Edition does not offer native macOS support. Normally, I would just tell Mac users to be satisfied with the Java version.
However, if you must play the Bedrock version on Mac, there is a way to do it, albeit a little complicated. You could play Minecraft’s Bedrock Edition on Mac via an OS virtualization app like Parallels Desktop.
Let me show you how.
#1) First, you download the Parallels Desktop app on your Mac system
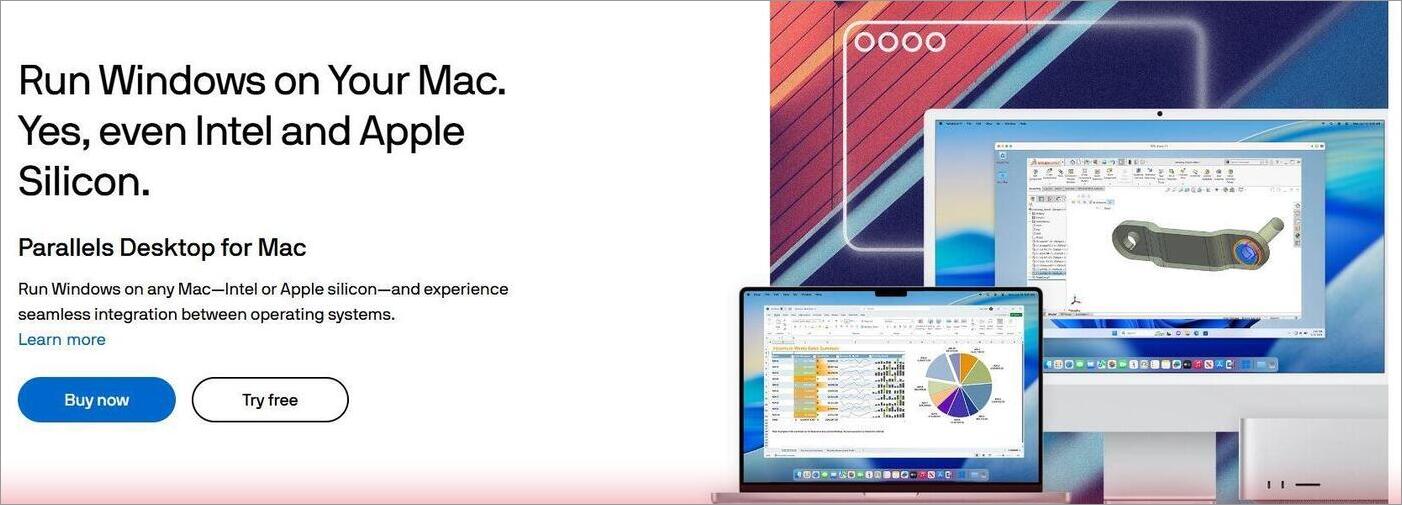
Once the dmg. executable file is downloaded, click on it to launch. Agree to the user agreement and proceed to install the file on your system.
#2) Download Windows 11
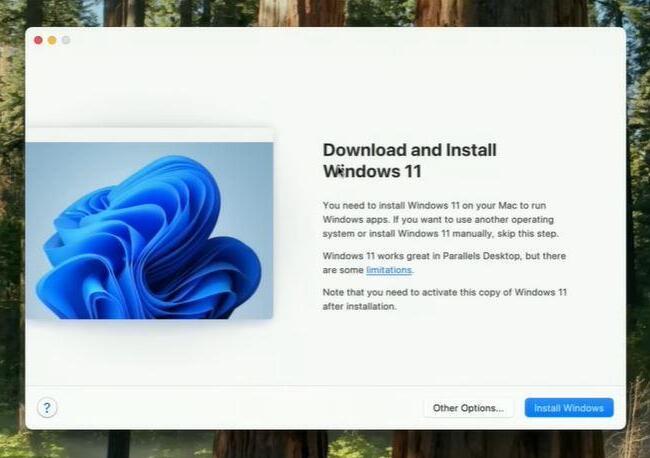
Now, you’ll need to download Windows 11 on your Mac. This is where Parallels Desktop will come into play. Open the Parallels Desktop app on your Mac, navigate to the OS Selection screen, and select Windows 11.
#3) Adjust Virtual Machine Settings (Pro Users only)
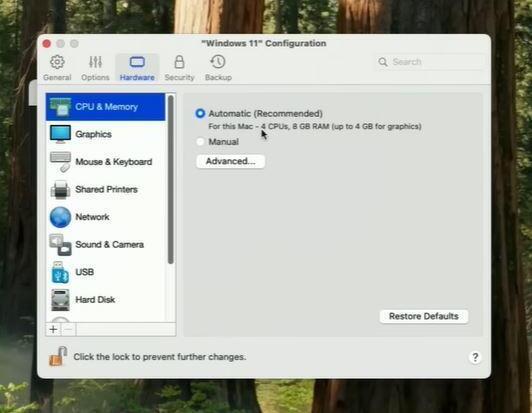
If you’ve purchased the Pro version of Parallels Desktop, you’ll have the privilege of adjusting virtual machine settings. This basically means you can allocate GPU and RAM resources to the game for an optimal experience.
Skip this step if you aren’t a Pro user.
#4) Optimize
In settings, you’ll also see the option to “Optimize for Games”. Enable it. You can also switch to productivity or game-only mode to yield better performance.
#5) Sign in and Download Minecraft
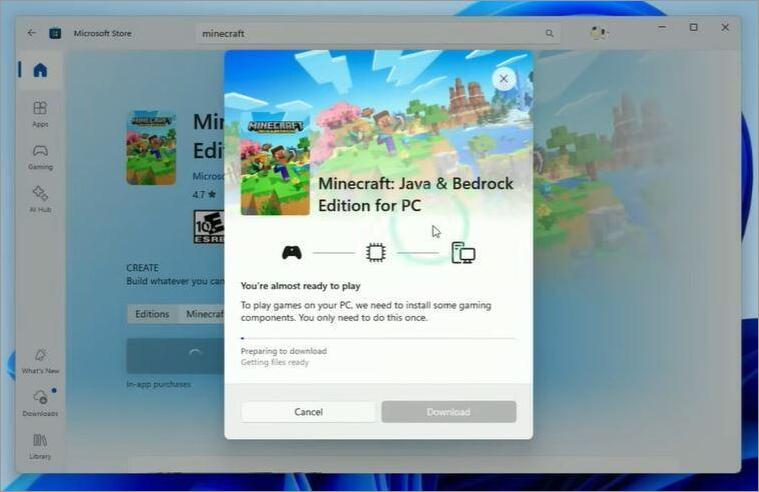
Now, follow the steps I’ve already discussed in the guide on how to download Minecraft Java Edition. Sign in with your Microsoft Account, choose a plan, pay, and download Minecraft for macOS.
#6) Launch the Game
Once the game is launched, open the Minecraft app, and you’ll see a prompt to choose between Java and Bedrock editions. Choose Bedrock and click on Play. Now, choose either opt for single player or a multiplayer experience.
This may seem a bit complicated. Yet, a virtualization app is the only way you can actually play Minecraft Bedrock Edition on a Mac-powered system.
Besides Parallels Desktop, you could also try UTM, which is a free and open-source virtualization platform. UTM can be a great option for gamers who don’t want to spend money on a virtualization platform to use Windows on a Mac.
Fair warning, though: UTM does not support graphics acceleration or DirectX. This means you are sacrificing performance for freemium software.
Boot Camp is yet another tool, introduced by Apple itself, that you can use to run Windows natively on a Mac system. However, Boot Camp only works on Intel-based Macs. So, if you are using an Intel-based Mac, you already have Boot Camp built into it. Just use it to run the Windows OS on your system.
How to Play Minecraft on Mac
So, you’ve successfully installed Minecraft on Mac. It is time to actually experience it. Now, the way I play the game will vastly differ from how other Minecraft veterans out there would choose to do the same.
I think that flexibility makes Minecraft such a charming game. If you are looking for some expert advice on how to spend your first few hours in the game, I can definitely do that.
#1) Choose Single Player First
If you are a beginner, I would suggest starting out with the Single Player Survival mode. This mode entails the basics that you’ll need to survive Minecraft’s world. This includes gathering resources, building yourself a shelter, crafting, foraging for food, exploration, and resource management.
#2) Avoid Caves
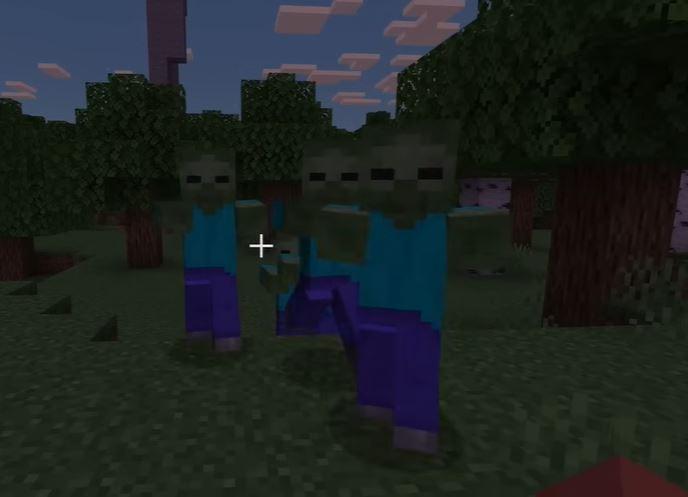
Exploration would be the first thing any player would do as soon as they are dropped into the world. When you are out and about exploring the world, I would strongly advise against entering any caves. You may encounter foes within that you simply aren’t well-equipped or skilled enough to fight off.
#3) Run Basic Errands
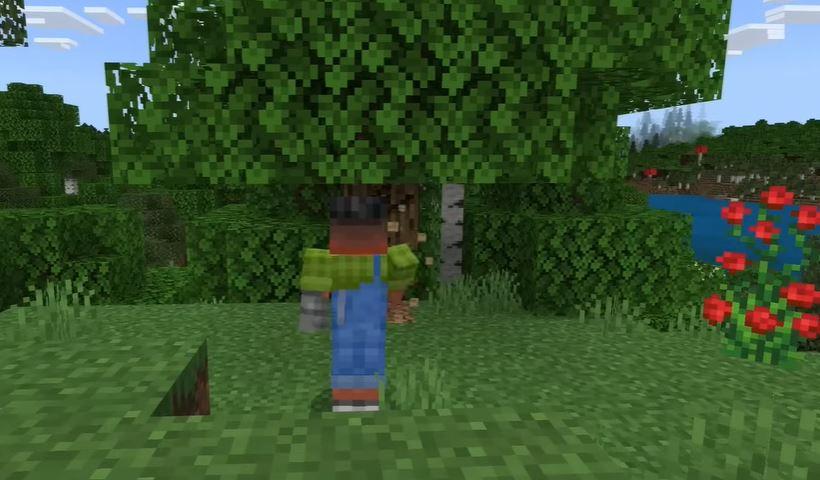
Instead of looking for danger, start by punching the trees you find on your path. I am not telling you to punch trees for fun, although it feels good to do so. Punching trees will help you gather wood.
#4) Craft
The wood you collect is an important crafting resource. Once you’ve gathered enough wood, go to your inventory and start converting these logs into planks. You can now create yourself a crafting table.
#5) Use the Crafting Table
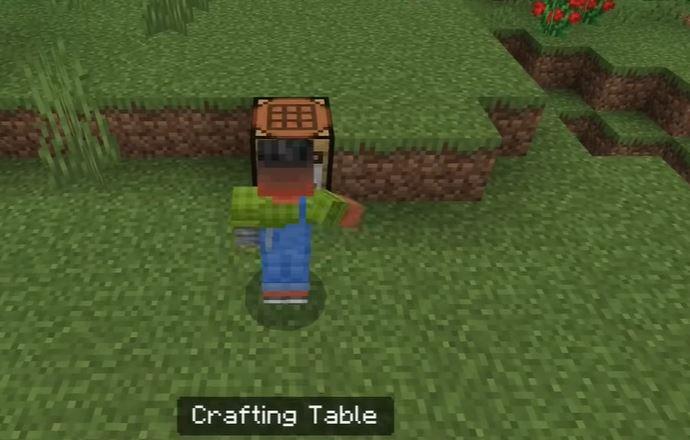
You can rely on your recently created crafting table to create more stuff. I suggest immediately creating a pickaxe. Nothing is going to be more important to you than a pickaxe during the initial segments of the game. This pickaxe will not only help you mine for resources but also help you ward off enemies.
#6) Make a Torch
Besides a pickaxe, I would suggest making yourself torches from the coal and sticks you’ll gather along the way. These torches will come in handy when exploring underground dwellings later on in the game.
#7) Build Yourself a Shelter
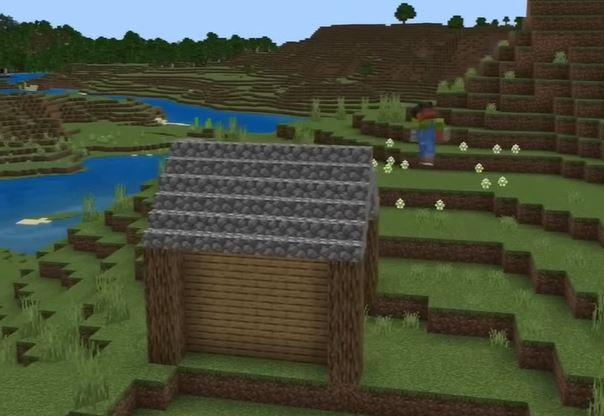
Make yourself a shelter. Nothing fancy for your first night. You can make a simple dirt or wooden house.
#8) Hunt for Food
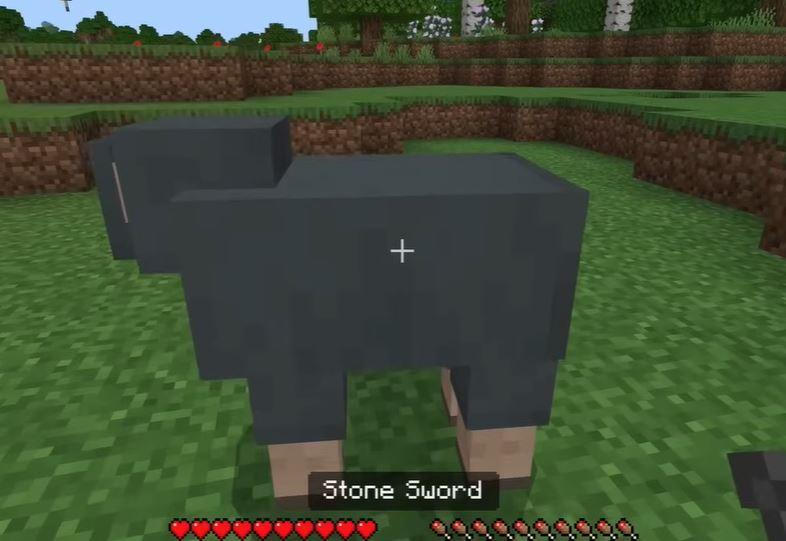
You can starve yourself to death within the game. So, make sure you are well fed. Explore the world to find crops or animals that can serve as your food source.
#9) Always Keep Upgrading
As you spend more time within the game, you’ll learn how to upgrade. Gradually move from wood-based items to stone and eventually metal.
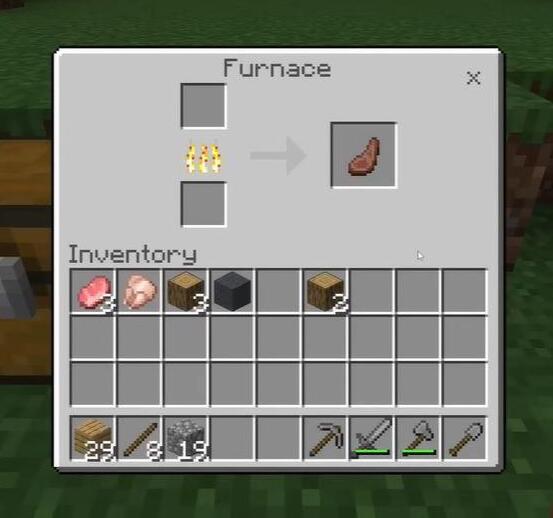
Surviving your first night in the game is critical. Once you’ve successfully done that, you’ll feel more confident in moving to other aspects of the game, which include exploring caves, discovering new villages, and farming.
On Minecraft on Apple Silicon Macs
As I mentioned before, Mojang recently announced new requirements for the Java Edition on Mac. These new requirements favor those who own Apple Silicon-based Mac systems.
For instance, Mojang clearly mentions Apple M1 as a minimum processor requirement and Apple M2 Pro as a recommended processor requirement.
So, if you own a Mac that comes with an M1, M2, or M2 Pro chip, then you won’t have to worry about Minecraft compatibility issues. To check whether your Mac features these chips, click on the Apple icon at the top-left corner of your screen and select About This Mac.
If you see Apple M1, M2, or M3 mentioned in the opening window, then know that you own an Apple Silicon Mac.
Troubleshooting Common Minecraft Download and Installation Issues
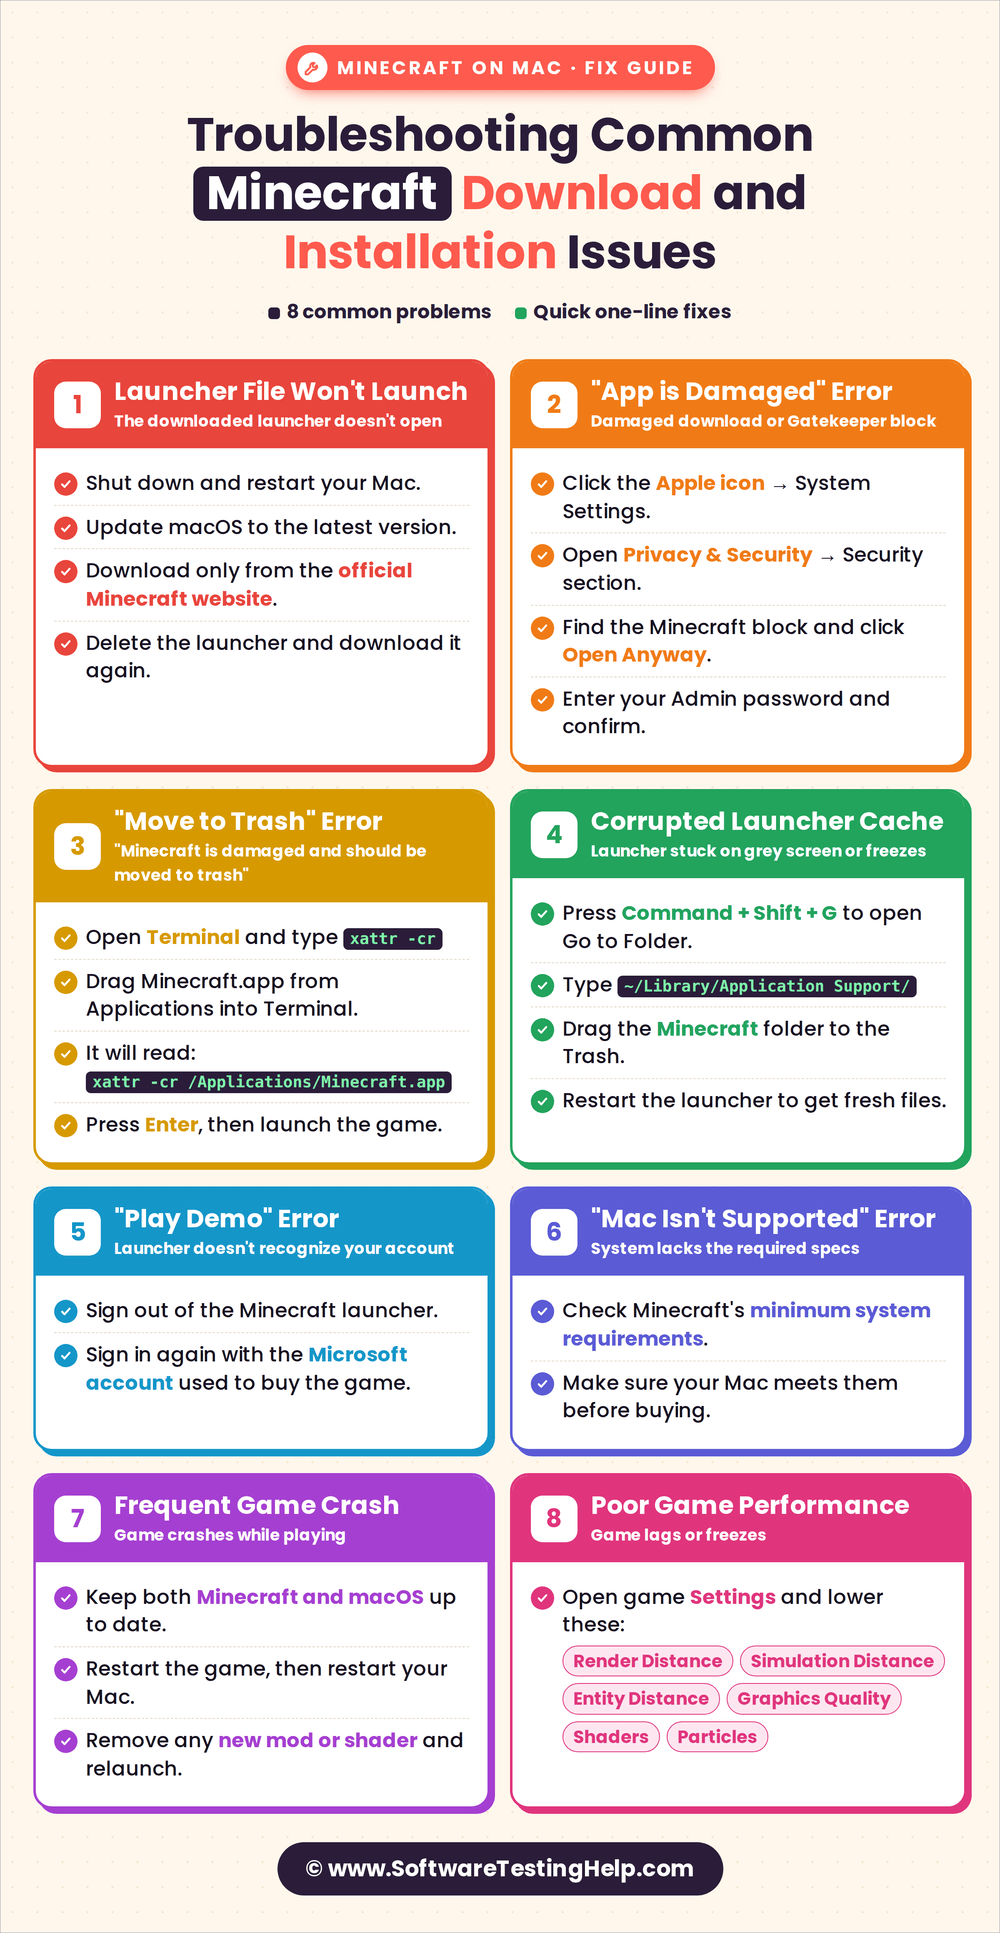
There’s a good chance that you’ll run into trouble when downloading or attempting to install Minecraft on your Mac hardware. Fret not, as most of these issues can be solved very easily.
#1) A Launcher File That Won’t Launch
If the Minecraft launcher file that you just downloaded doesn’t open, I suggest you do the following:
- Shut down and restart your Mac.
- Update your macOS
- Make sure you’ve downloaded the file from the official Minecraft website.
- Delete the launcher and download it again.
#2) The “App is Damaged” Error
You’ll see this error if the Minecraft file was damaged during download or if the macOS Gatekeeper fails to verify the app’s developer.
An easy fix for this entails the following steps:
- Click on the Apple icon and select System Settings.
- Select Privacy and Security and scroll down until you find the Security section.
- Find the message that states Minecraft has been blocked. Click on “Open Anyway”
- You’ll be asked to enter your Admin password. Enter the password and confirm.
#3) “Minecraft is Damaged and Should be Moved to Trash” Error
Try to do the following if you see this error message when attempting to launch the game.
- Open Terminal
- Type the following command: xattr -cr
- Navigate to the Applications folder, find the Minecraft.app file, and drag it into the Terminal window. This action will automatically fill the file path.
- It should look something like this: xatte -cr /Applications/Minecraft.app
- Now, press the Enter button to launch the game.
#4) Delete Corrupted Launcher Cache Folder
I suggest you do this if your launcher gets stuck on a grey screen or simply freezes.
- Press Command+Shift+G. This will open the Go to Folder window.
- Type ~/Library/Application Support/ and hit Enter
- Find the Minecraft folder and drag it into the trash bin.
- Restart the launcher immediately after the cache file has been deleted. This restart will force Minecraft to download a new set of files in place of the corrupted ones.
#5) “Play Demo” Error
This error usually occurs when the launcher file fails to recognize the Minecraft account you used to log in or sign up. So, logic would dictate signing out of the launcher first and trying to sign in again. Make sure you are signing in using the Microsoft account you used to purchase the game.
#6) Mac Isn’t Supported Error
This means the system you are using lacks the specifications required to run Minecraft smoothly. Check the specs I’ve already mentioned above and ensure your hardware possesses them before purchasing the game.
#7) Frequent Game Crash
Games crashing during play is a common occurrence on computers, with a few easy fixes. Just make sure both your Minecraft app and macOS are up-to-date. Stop the game or restart it. Close your Mac and restart it.
A recently installed mod or shader can also cause your game to crash. Try removing this mod temporarily and relaunching the game without this modification.
#8) Poor Game Performance
If the game lags or freezes. I suggest jumping to the game’s settings and lowering the following:
- Simulation Distance
- Entity Distance
- Shader settings
- Graphics Quality
- Render Distance
- Particles.
Take note of the minimum and recommended FPS targets mentioned by Mojang in the new update.
Frequently Asked Questions
1. Is Minecraft on Mac free?
No, it is not. Minecraft is a paid game. That said, you can try its free demo.
Here’s how to download Minecraft for free on Mac:
1. Open the Minecraft free trial page
2. Select your OS version
3. Click on it to download.
4. Install the downloaded file and launch the game to play a free demo.
2. Can a Mac run Minecraft?
Yes, Minecraft is a Mac-friendly game, but only if you are downloading the Java Edition. It doesn’t offer native support for the Bedrock Edition yet, but that may change sometime in the future. You can refer to the guide above to learn how to run Minecraft on your Mac hardware.
3. How expensive is Minecraft for Mac?
It is definitely not as expensive as what most AAA games charge today. The standard edition of the game can be yours for a one-time fee of $29.99. You can access both the Java and Bedrock versions of the game with this standard edition.
4. Why is Minecraft laggy on Mac?
This could be a sign of your hardware’s limited capabilities. Minecraft, after the recent announcement by Mojang, demands higher GPU, Storage, and Memory requirements.
If you are using Minecraft on older hardware, I would suggest lowering graphical settings like the Render Distance, Particles, Simulation Distance, etc., for the game to run smoothly.
5. Is Minecraft on Mac worth it?
Yes, I would say that Minecraft (Java Edition) is worth the price you’ll pay to experience it on a Mac system. You are bound to get better performance, especially if you own an Apple Silicon Mac (M1, M2, M3).
On the other hand, you won’t be able to enjoy the games in Bedrock Edition, at least not via the traditional route.
Of course, you can try using a virtualization app to download Windows on your Mac and then play the Bedrock Edition. It is too much of a hassle, though, and I would recommend you do so if you must.
Conclusion
It is astonishing to me how far Minecraft has come 17 years, and the game still endures and captivates. It is one of my favorite sandbox games and one that you can enjoy across gaming consoles, mobile phones, and computer devices (both Windows and macOS).
Minecraft facilitates native macOS support for its Java Edition. So, you wouldn’t have a tough time downloading and playing the game on your Mac system if that is how you wish to experience the game.
Unfortunately, there is no native support for Bedrock Edition. You can try using a virtualization app like Parallels Desktop if you don’t mind the hassle.
I’ll leave that decision up to you. If you want a comprehensive guide on downloading Minecraft on Mac, I hope the one I’ve shared in this article can help you.
Research Process: The total time involved to complete and publish this article is approximately 34 hours. This content was created through a structured research approach to ensure accuracy and reliability.
For more-related guides, you can explore our range of tutorials below:
- How to Find the Seed of a Minecraft Server
- How To Setup Minecraft Server.Properties File
- Aternos Minecraft Server Review: Is it Safe? Check Alternatives
- 17 Cheapest Minecraft Server Hosting Providers
- Top Minecraft Earth Server List
- How to Download and Host Minecraft Server on Your PC
- Best Rust Server Hosting Providers
- How to Make Terracotta in Minecraft
Was this helpful?
Recommended Reading
-

Free PDF textbooks can be accessed easily by students and people learning on their own and save both money and time. But not all sites are authentic. Here you will find a list of top 10 sites for downloading free pdf textbooks that are legal and safe. Looking for free…
-
Learn how to download and set up a Minecraft server in minutes. This guide covers systemrequirements, installation steps, server setup, and Port forwarding: If you want to play Minecraft on your PC or host your own Minecraft server for friends, the process is easier than it seems. In this guide,…
-
This tutorial explains how to download and run classic Windows 7 Games for Windows 10: In this world filled with Xbox and PlayStation enthusiasts, finding a person who pines over the old classics such as Chess Titans, Spider Solitaire, Solitaire, and Mahjong Titans is admittedly not an easy task. But if you are…
-
In this tutorial, we will learn How To Increase Download Speed and explore various solutions to speed up the Internet on Windows 10: Your network's efficiency depends on the number of megabits downloaded/uploaded which is often referred to as the speed of the internet. If the network has slow internet…