Discover how to edit and setup Minecraft Server.Properties file like a pro with our step-by-step guide. Master simple & advanced tweaks to boost the performance of your smooth gaming environment:
The Server.Properties file plays a crucial role in configuring several key aspects of your Minecraft gameplay. Some of the most prominent configurations and settings would not be possible without this crucial file.
This file handles everything from customizing your world’s aesthetics to controlling your game’s difficulty level. Although important, it is understandable that some players may find it challenging to configure via this file or even access it.
Table of Contents:
- Minecraft Server.Properties: Ultimate Configuration Tutorial
- For Beginners: Basic Setup Guidance
- For Intermediate Users: Specific Configuration Help
- For Advanced Users: Guidance for Performance and Security Optimization
- Troubleshooting Server Properties Issues
- Property Settings That Can Affect How Popular Plugins Function
- Minecraft Server.Properties – Paper & Spigot Specific Considerations
- Difference Between Forge and Fabric
- Frequently Asked Questions
- Conclusion
Minecraft Server.Properties: Ultimate Configuration Tutorial
As an avid Minecraft fan, I believe everyone should have the privilege of enjoying it to the fullest. That means being able to make some benign or major configurations here and there to elevate one’s experience.

[Via Xbox]
Here is a video tutorial explaining how to set up your Server.Properties File on your Minecraft Server:
So, I’ve created this comprehensive guide that explains what the Minecraft Server.Properties file entails and how it works.
What is the Minecraft Server Properties File?
This section explains Minecraft Server Properties, their purpose, and definition.
Server.Properties is a configuration file. It is automatically generated when a Minecraft server is set up. The file entails UTF-8 encoded text and can be edited with the help of text editors like TextEdit, Kate, Nano, Vim, and Notepad.
[Via The Breakdown]
The file contains key settings that determine how the established Minecraft server is supposed to function. Simply put, think of this file as a tool that empowers you to control various crucial elements of Minecraft.
For instance, this file contains settings that can help you adjust the game’s difficulty level, set player limits, and configure other aesthetic and functional aspects of your Minecraft world.
You can also count on this file to optimize your server’s security and performance. For example, you could enhance your server’s security by whitelisting players. You could improve your server’s performance by fine-tuning settings related to tick rate and view distance.
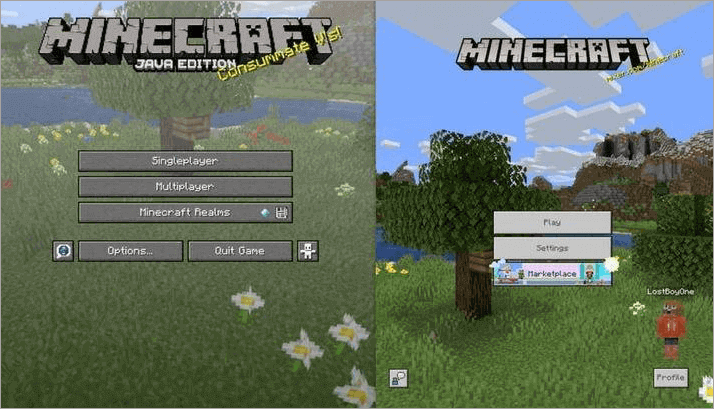
Minecraft Server Properties in Java & Bedrock Edition: Common Differences
You are going to find the server.properties file in both the Java and Bedrock editions of Minecraft. In both versions, it entails UTF-8 encoded text, which can be edited with some of the most popular text editing software, like Notepad and Vim.
That said, you are going to notice some subtle and major changes as you ricochet between both versions.
[Via Reddit]
This table effectively highlights those differences.
| Java | Bedrock | |
| Compatibility | PC | PC, Mobile, Consoles. |
| Customization | Extensive Customization with open source mods and plug-ins | Limited customization |
| Performance | Resource Intensive | Better optimized |
| Combat | Strategic System | Simple, Fast-Paced |
| Server Control | Full Server Control | Restricted Server Control |
| Render Distance | Up to 32 chunks | Max 96 Chunks |
| World Format | LevelDB | Anvil |
| Cauldron Function | Not Available | Highly Customizable |
With the Minecraft Server.Properties explained thoroughly, let’s find out how you can access and edit it.
For Beginners: Basic Setup Guidance
This section elaborates on the essential guidelines that are required for any beginner to set up Minecraft.Server properties.
How to Access Server Properties in Minecraft
To edit and configure the server.properties file, you first need to know where it is located. This is where most people find themselves lost. The file’s actual location will vary depending on where you installed the Minecraft server.
If you have the Minecraft server installed on your computer, I recommend following the steps below to find the Minecraft server properties file location:
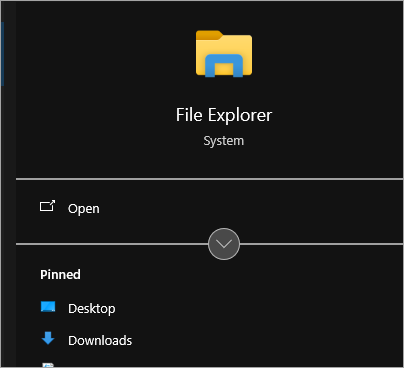
1. Open File Explorer on Windows or Finder if you are using a Mac as shown below.
2. Find the directory where you installed your Minecraft server.
3. Open the folder minecraft_server.jar. You will find the file there.
If you are using a third-party hosting service as a home for your server, then you will find this file within the game panel provided to you by the host. There are a plethora of options at your disposal for Minecraft hosting service providers, with names like Apex and Hostinger.
Regardless of which hosting service you are employing, the process of locating the file will remain the same.
Here’s how to get to server properties in Minecraft via a hosting service’s control panel:
1. Log in to your Minecraft server host’s account.
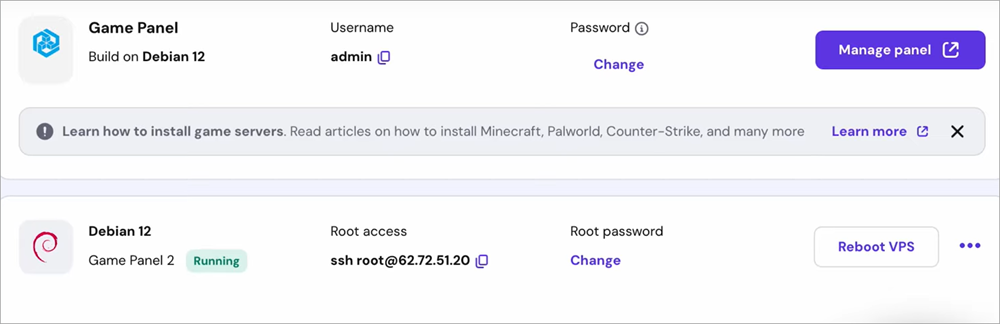
[Via Hostinger Academy]
2. Navigate to the control panel, which will be available to you on the dashboard.
3. From the control panel, navigate to File Manager.
4. Locate the folder with Minecraft’s label on it. You should find the server.properties file here.
There is a third way to locate this file as well, provided you are using an FTP solution like WinSCP or FileZilla.
Here’s how you do it:
- First, launch the FTP software on your system.
- Link this FTP software to your Minecraft server.
- With the connection established, you’ll be presented with a directory featuring all your server files.

[Via Apex Hosting]
4. The server.properties file will be located inside a folder labeled Minecraft.
Common Server Properties Configurations
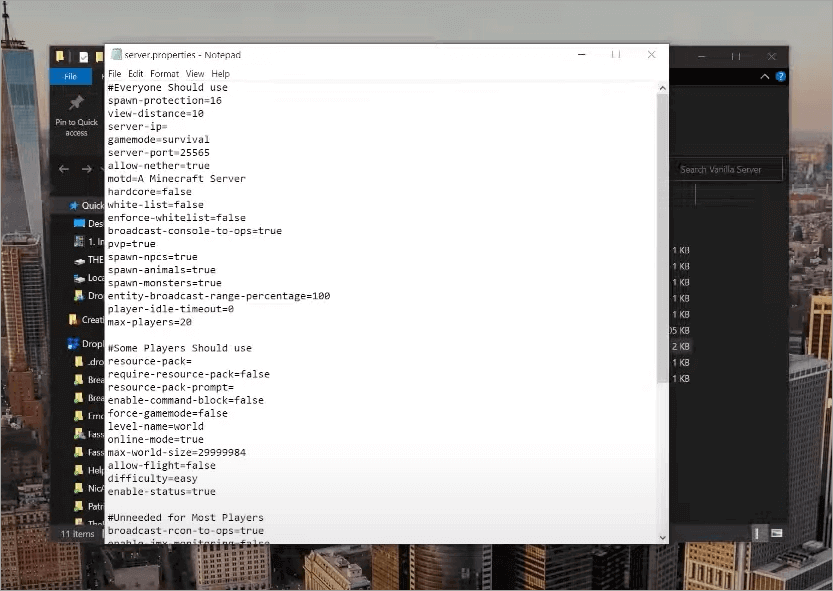
Finding where the server.properties file is only half the battle won. Once you open the file, you’ll be greeted with various key Minecraft server configurations. These configurations or settings will dictate how your game functions.
You must familiarize yourself with some of these configurations before we discuss how you can edit the server.properties file.
As such, below are some of the most prominent configurations and the best Minecraft server properties settings that can impact your gameplay:
1. Difficulty
If you’ve ever played a video game in your life, you already know what this configuration entails. By adjusting the Minecraft server properties’ difficulty, you decide just how challenging your gameplay will ultimately be. You can change the difficulty across 4 modes.
They are:
- Peaceful
- Easy
- Normal
- Hard
2. Max-Players
With this setting, you decide how many players can connect to your server simultaneously. The default player limit is set at 20. However, you can adjust this number depending on how capable and resource-intensive your server is.
3. Allow-Nether
Allow-Nether features a toggle. Switching this toggle will determine whether any player on your server can enter the Nether dimension. I would personally advise against enabling this setting if your game is on a smaller server.
4. White-list
With White-list enabled, access to any player not on your whitelist will be denied. Disabling this option will open access to any player with the right port number and server IP address. Adding or removing players from the whitelist is simple and can be done via the following commands:
- whitelist add [player name] – Adding a Player
- whitelist remove [player name] – Remove a Player
- whitelist list – Show all whitelisted players
5. PvP
This setting will either allow or disable combat between two players. Configuring the setting to “true” will result in players being able to fight each other. On the other hand, switching to “false” will disable fighting between players.
6. Spawn-Protection
With the help of this configuration, you gain control over the radius surrounding your world’s spawn point. You can use this feature to prevent any signs of grieving and ensure your spawn area remains protected for newer players.
Depending on the size of the area you wish to protect, the following configurations will apply:
- 1 – To Protect a 3×3 area
- 2 – To Protect a 5 x 5 area
- 3 – To Protect a 7 x 7 area
- 0 – Disable Spawn Protection.
7. Level – Seed
Players who’d like to customize their World’s aesthetics will find this setting immensely useful. You can use this option to dictate how your Minecraft world should look. By leaving this field blank, you leave it to the server to automatically generate a seed.
Setting the same seed again and again will result in the player generating the same type of world every time.
8. Gamemode
When you launch Minecraft for the first time, the game mode settings will be as follows by default:
- 0 – Survival
- 1 – Creative
- 2 – Adventure
- 3 – Spectator
You can change this setting anytime as a server admin. You can also set a command, which allows one player in adventure mode and the other in survival mode at the same time.
Essential Server Properties Settings & Values
| Settings | Values |
| Difficulty | • Peaceful – 0 • Easy – 1 • Normal – 2 • Hard – 3 |
| Max-Players | Set any number. Set at 20 by default. |
| Allow-Nether | True or False |
| White-List | True or False |
| PvP | True or False |
| Spawn Protection | Set Any Number |
| Gamemode | • 0 – Survival • 1 – Creative • 2 – Adventure • 3 – Spectator |
Other Server.Properties Examples and What They Mean
| Key | Description |
| broadcast-console-to-ops | Send console command outputs to all operators |
| accepts-transfers | Using transfer packets to accept incoming transfers. • False – Transfers are rejected • True – Transfers are allowed |
| bug-report-link | Refers to the URL for the report_bug server link. If the URL is empty, the link has not been sent. |
| enable-command-block | Enable command blocks. |
| enable-query | To get information on the server. |
| enable-status | Whether the server appears as “online” • False: Server appears as “Offline” • True: Server appears as “online” |
| force-gamemode | Whether players will be switched to the default game mode upon joining. • True: Players always join the game mode. • False: Players join the game mode they left in. |
| function-permission-level | Check out the default permission level for functions |
| generate-structures | To generate structures or not True: structure generated in new chunksFale: structure not generated in new chunks |
You can check out a more extensive Minecraft dedicated server.properties list by referring to the following link – https://minecraft.wiki/w/Server.properties
Property Settings Removed from Recent Minecraft Versions
You should know that many settings were removed from the server.properties file and moved into the game rules. This means you can now configure the following settings while the server is still running:
- Allow-nether
- Spawn-monsters
- Enable-command-block
- Pvp
While the above settings were moved, we also saw the addition of some new settings in the server-properties file.
The settings are listed as follows:
- Management-server-port: Lets you control whether to enable the new Minecraft Server Management Protocol.
- Management-server-host: Determines the host with which the new Minecraft Server Management Protocol is initiated.
- Status-heartbeat-interval: Control the interval at which the Management Server can send heartbeat notifications to clients.
For Intermediate Users: Specific Configuration Help
So far, we had a look at the basic setup guidance for beginners; this section offers specific configuration assistance for intermediate users.
How to Edit Server Properties in Minecraft
Knowing where you can locate the server.properties file and familiarizing yourself with the file and all the configurations it facilitates should make the editing part of this guide simpler now.
Here’s how to configure Minecraft server properties:
Via Your Host’s Control Panel:
1. First, directly open the server.properties File from the File Manager section of your control panel as in the image below.
[Via Apex Hosting]
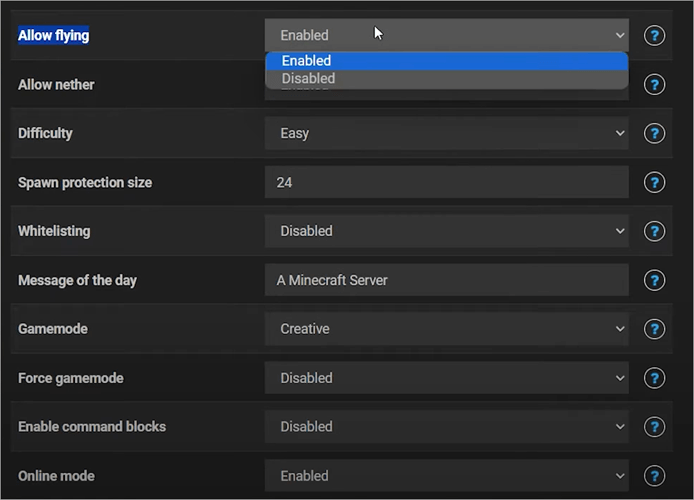
2. Pinpoint the properties you wish to edit. For example, you can change the difficulty of your gameplay by switching between the following options:
- Peaceful
- Easy
- Normal
- Hard
3. Once you’ve made the necessary changes, hit the “Save” button.
Make sure you restart the server for these changes to take effect.
Via FTP File Access
- In your Minecraft server panel, click on FTP File Access.
- Find the server.properties file and click on “Edit”, which is an option you’ll find right beside the file.
- Make the edits and click “Save.”
- Restart your Minecraft server to apply the changes.
Example of a Modified Minecraft Server Configuration
Let’s say you configured your server.properties file, and it looks something like this:
- Gamemode = 0
- difficulty = easy
- Max-players = 20
- pvp = true
- White – list = false
- Spawn-protection = 16
- Allow-nether = true
The configuration here means that the game is set on Survival mode. The difficulty is set at easy. Up to 20 players can join the server, and they can engage in combat with each other. The server is open to everyone as the white-list feature is disabled. Players also have the option to explore the Nether Realm.
Here’s another example:
- Gamemode = 1
- difficulty = normal
- Max-players = 15
- pvp = false
- White – list = true
- Spawn-protection = 14
- Allow-nether = false
In the above case, the game is set on Creative mode with a normal level of difficulty, making the game challenging. Fighting is prohibited, and the server is restricted to players who are on your whitelist. Players also do not have the option of exploring the Nether realm.
Best Tips & Practices to Edit or Modify Minecraft Server Properties
I would suggest keeping the following tips in mind whenever you try to edit the Minecraft server.properties file.
1. Stick to a Few Setting Changes Only: As you first open the server.properties file, you’ll be tempted to play around with all the options at your disposal. No matter how tempting this may be, it will be in your best interest to make a few changes in the beginning. This will help you identify any configuration issues, which you can avoid in the future.
2. Backup Your Files: It is advisable to maintain a backup of your files before you make any edits or modifications. This way, you can revert to the original version of your game if anything goes wrong while configuring.
Backup itself is simple. Here’s how you do it:
Via your Host’s Control Panel:
- Open the Control Panel
- Navigate to File Manager and locate the server.properties file.
- Right-click on this file and select “Download”.
This will create a backup of your file on whatever device you are using.
Via FTP Client
The process is similar here as well:
- Find the server.properties file in your Minecraft directory within the FTP client.
- Right-click on the server.properties file and click on “Download”
This should create a backup, which you can use to restore your game to a previous version.
3. Stay Away from Certain Settings if you are a Beginner: Any adjustments you make to the server.properties file will drastically impact the game’s security and performance. You could end up making an adjustment that results in your game lagging.
I would suggest learning about all possible configurations before you start tweaking them. As a beginner, it is best to stay away from specific performance-enhancing configurations.
For Advanced Users: Guidance for Performance and Security Optimization
So far, we’ve discussed what changes you can make to customize your gameplay and Minecraft world. Besides them, there are other, more advanced configurations you can indulge in to enhance your server’s performance and security.
1. For Performance
Below are some settings that you can adjust for a better, more seamless experience playing Minecraft. You can consider the information below a comprehensive Minecraft Server Properties performance guide.
(i) View-Distance: This command basically dictates how many chunks a server loads around each player. Configuring it will directly impact your gameplay’s performance. View distance is set at 10. However, you could lower it even further to mitigate any strain your server might be experiencing.
(ii) Max-Tick-Time: This dictates exactly how many times a tick will take before the server finds itself overloaded. Think of a tick as Minecraft’s own clock cycle. A tick occurs almost 20 times per second. Its default setting is 60 seconds.
Setting it to 30 seconds could help you avoid gameplay lags, thus considerably improving performance by a long shot. If you have a server running on heavy modpacks, you can bring the tick time down even further to -1. This could take a lot of the load off your server.
(iii) Max-Player: The best way to manage load on your server is to limit the number of players who have access to it. A good number would be 20. That said, it is up to you how many players you wish to accommodate, given your server’s overall capacity.
2. For Security
(i) White-List
We’ve already discussed this setting in the article. With White-List enabled, only players added to your White-List can join the server, thus ensuring only authorized players get to be a part of your server.
(ii) Online-Mode
Enabling this mode basically means you are commanding your server to verify accounts through the Mojang account database. This can be done to keep fake accounts from gaining access to your server. With Online-Mode enabled, only those players with verified Mojand accounts will have access to your server.
(iii) Op [username]
Op [username] is a command that can bequeath certain players with the ability to use special commands and permissions. Let’s say you enter the command Op [adam_wardock]. The player with the account name adam_wardock will now have special abilities that a regular player doesn’t have.
With the special operator status, that player can now use the following commands to secure your server:
- ban-list: Check and manage a list of banned players.
- enable-status: Check a server’s status and related information
- enable-room: Get remote access
- prevent-proxy-connections: Deny access to players trying to connect via proxy servers.
Specific Settings for Different Server Sizes (5 Players vs 100+Players)
For the best performance, it is important that you configure your Server.Properties file based on the number of players you wish to accommodate. I would recommend paying heed to the following three settings for the best result, according to your server’s size:
1. Max-Players
With fewer than 5 players, the load on your server will obviously be low. As such, you can set max-players to a number, preferably between 10 and 20.
With over 100 players on the server, you’ll need to naturally set the number higher. Before you set a higher number, make sure your hardware can handle the load.
2. View-distance and Simulation-distance
With 5 players, you can get exceptional performance with both of these settings configured at a number around 10. With over 100 players, you’ll need to bring this number down to help the server manage the amount of world data it will now need to load. Somewhere between 6 and 8 would be a good option.
Troubleshooting Server Properties Issues

While running or editing the Server.Properties file is simple, you may run into a variety of issues that lead to a very annoying experience. However, every problem has its own solution. Depending on the one you are facing, I suggest you refer to the following troubleshooting tips to get rid of any issue for good.
1. Server Not Starting
A server that just refuses to start can be frustrating. You can attribute various reasons to this problem. It could be because of an incorrect launch command, or maybe some files are missing. I suggest you do the following if you encounter such an issue:
First, I suggest checking whether your Minecraft server matches your Java version. You could also try checking the Java runtime error codes, as they can help you detect issues right away. You could also find important information to kick-start your server in crash reports and server logs.
2. Performance Lags
Performance issues are common with all online games, and Minecraft is no exception. Thankfully, there are easy fixes for whatever performance issues you might be facing.
You could start by keeping your view-distance setting below 10, thus significantly reducing load on your server. Periodically check your CPU and RAM usage. Use plug-ins like Purpir to clean up your server. You could also try restricting the player limit and the spawns of mobs.
3. Player Connection Failure
Players may have a tough time joining your server. If this happens, I would suggest checking whether the player is on a ban or white-list. Check your server’s slot limits. Extend it if you must. Players may also have trouble joining if you are using a custom domain. If so, try to verify DNS records to make sure they are properly configured.
Your server will reject players who are trying to gain access through cracked or unauthorized clients. If that is the case, request your players to only use official Minecraft clients to access the server.
4. World Corruption
World Corruption refers to a very serious problem wherein a player’s progress and data are erased. This can happen due to sudden shutdowns and improper plug-ins.
To avoid this problem, I would suggest the following measures:
- Try to use the /stop command to shut down your server carefully
- Regularly back up your data to make sure you aren’t losing any progress.
- World Corruption can also happen due to corrupted chunk data. You’ll need to identify this chunk and remove it from your server.
5. Version Compatibility Warnings & Errors
You may encounter a compatibility warning when configuring your server.properties file across different versions of the game.
For instance, you can encounter this warning when upgrading your Minecraft server to a newer version, like 1.20 or 1.21. When you update your server, the server-properties file is regenerated with new options set at their default values.
This update will result in some settings being renamed, some functions being altered, and some settings being completely erased. You can also face a version compatibility error when trying to start a new Minecraft server version via an older version of Java.
To prevent compatibility warnings, I suggest you do:
- Always create a full backup of your server
- Carefully read the new Minecraft version’s patch notes. This way, you’ll know what changes and updates to expect.
- An “Outdated Client” error can be avoided by using an up-to-date launcher for your game.
- Keep your Java and Minecraft server versions up to date.
- Keep and use the old server.properties file as a reference for your new server.properties file. You could try copying some settings from the old file to the new one.
6. Server Crashes
Server Crashes can happen due to a variety of reasons that include a mismatched plugin, out-of-date software, and resource shortages. Make sure the plug-in you are using is compatible with your server. Check crash reports to identify the exact cause of a crash. Keep your server and plugins up-to-date.
Regularly monitor your CPU and RAM usage. If the problem persists, try to upgrade your hosting plan or hardware.
7. Minecraft Server Properties Not Working
If the property changes you’ve made aren’t working, I would suggest that you first try to verify the Server.Properties file’s location. This file must be in the root directory of your Minecraft server.
I would also suggest making edits to this file via your web interface if you are using the web interface for your server.
Some changes only take effect after you’ve restarted the entire Minecraft server. Also, try using the /reload command to refresh some of the changes you’ve made to the Server.Properties file.
Syntax errors could also be responsible for properties not functioning as intended. If that is the case, make sure that your file is saved using UTF-8 encoding.
8. Mod Errors
While Mods can enhance your gaming experience, they can also lead to some unexpected problems. Try to ensure all mods and plugins are compatible with the version of your Minecraft server.
Check crash reports, as they may reveal information on mods that are missing. You could also try testing Mods in a different environment before applying them to your server.
Property Settings That Can Affect How Popular Plugins Function

There are many plugins at your disposal that one can use for robust Minecraft server optimization and other critical purposes. There is a good chance that certain configurations you make to the server.properties file can impact the plugins you’ve employed to enhance the performance of your server.
Below are a few examples of server.properties settings that can interfere with the performance of your plugins:
1. Spawn-protection Affecting WorldGuard
Spawn-protection is a setting used to prevent non-op players from pillaging or causing havoc in a radius around a world’s spawn point. Using spawn-protection can affect a region that was created using a plugin like WorldGuard.
The only solution to this problem is to set spawn-protection to 0 on a server that’s employing a plugin like World Guard.
2. Allow-fight Affecting Essentials
Allow-fight, if set to false, can interfere with Essentials’ fight feature, which enables combat within a Minecraft world. For Essentials to do its intended job, you’ll need to set allow-fight to true.
3. Difficulty Settings Affected by Plugins like HardPlus
The base difficulty that you’ve configured within your server.properties file might come into conflict with plugins like HardPlus, which let you customize difficulty. Note that a plugin’s difficulty setting will usually take precedence over the settings configured within your server.properties file.
4. Max-players Affected by Plugins like PlayerCap
There are plugins available for Minecraft that let you set a limit on the number of players allowed on your server. These plugins can interfere with max-player settings within your server.properties file. To make sure these settings aren’t cancelling each other, set the max-player setting considerably high.
Plugin Conflict Resolution
Besides Plugins are conflicting with server.properities settings, they might also end up conflicting with each other. If that happens, I suggest following the tips below to troubleshoot the problem.
- Identify the conflicting function and disable it in one of the plugins
- Report the issue to the developers of the plugin.
- Find an alternative plugin, one that’s developed by a reputable developer.
- Perform a binary search on your list of plugins to pinpoint the cause of a conflict.
Minecraft Server.Properties – Paper & Spigot Specific Considerations
Both Paper and Spigot are popular and powerful performance-optimized server software. You can get the best performance on both of these servers, provided you know which server.properties settings to prioritize.
It is also important to note that both Paper and Spigot come with their own configuration files, which include paper.yml, spigot.yml, and bukkit.yml.
As far as Minecraft server.properties vs bukkit.yml, spigot.yml, or paper.yml is concerned, know that the configuration files offered by Paper or Spigot can either work hand-in-hand with the server.properties or override some of its key settings.
Spigot Specific Considerations
| Key | Description |
| tick-inactive-villagers | Increases the radius of the area where XP orbs and ground items will merge. |
| entity-activation-range | Refers to the distance from a player at which any entity becomes active. |
| mob-spawn-range | The maximum number of chunks that can be formed around a player where mobs can spawn. |
| Increases the radius of the area where XP orbs and ground items will merge. | Increases the radius of area where XP orbs and ground items will merge. |
All the above settings play a critical role in helping you boost a server’s performance.
Paper Specific Considerations
| Key | Description |
| anti-xray | Enabling this feature can increase CPU usage |
| use-faster-eigencraft-redstone | Makes redstone updates more efficient without breaking vanilla mechanics |
| no-tick-view-distance | Can be used to set a visual distance that is higher than the simulation distance. |
| optimize-explosions | Reduces the impact of explosions on your server’s performance considerably. |
Difference Between Forge and Fabric
Forge and Fabric are popular mod installers that you can use to install a mod on your Minecraft server.
Both of these installers rely on server.properties for key settings. While there is no difference in how these two mod-installers affect server.properites, They do differ in terms of their respective features, which are as follows:
| Features | Forge | Fabric |
| Performance | Resource Heavy | Lightweight |
| Mod Compatibility | Extensive Mod Library | Limited Mod Library |
| Usage | Complex to set up | Easy to set up |
| Customization | Helps with large, complex customizations | Ideal for smaller performance modifications |
| Update | Slow updates | Rapid updates |
| Support | Extensive documentation and tutorials with a large community to help you. | Support offered through Discord channels, forums, and GitHub repos. Features a relatively small community. |
Frequently Asked Questions
1. How to find Minecraft server properties?
Server.Properties can be found in your server software’s current working directory. If you are accessing Minecraft via a host, you can access it via its game panel.
You’ll need to navigate to the game panel, open File Manager, and find the server.properties file there. You can also find it via an FTP client, provided it is connected to your server.
2. How much RAM for a 100-person Minecraft server?
It is recommended to have a RAM of at least 10 GB to accommodate over 100 players. 16 GB of RAM is recommended if the player list crosses 150.
3. How to modify Minecraft server properties?
Modifying Minecraft server properties is simple, provided you know how to access them. Once you make your way to the server.properties File open it and make the necessary changes.
The changes could pertain to enabling PvP mode or changing the game difficulty. Once the changes are made, save them and restart the server.
4. What is spawn protection in Minecraft?
Spawn Protection is a key server property configuration that lets you block griefing and breaking around your world’s spawn points. This ensures that no player can cause damage as soon as they join the game. This ensures new players always have a fresh, safe environment to begin their journey.
5. Is Java or Bedrock Better?
This answer will vary depending on what you seek from your Gameplay. Bedrock Edition ensures you have a smooth gaming experience with exceptional cross-platform play. Java is great for modding, gaining full server control, and a more strategic, combat-heavy play style.
6. What is a whitelist in Minecraft?
Whitelist is a setting within your server.properties file that allows players to limit or grant access to players. Access to any player not on your whitelist will be denied. This setting is ideal for players who want to create an invite-only or private server.
7. How to give OP in Minecraft?
OP here refers to operator control. You can grant this privilege to any player on your server by opening the console menu and then initiating the command – op [username].
8. How to reset server properties in Minecraft?
Resetting server properties in Minecraft is simple. All you have to do is delete the server.properties file and then restart your Minecraft server. The reboot will result in a new server.properties file being generated automatically with default settings. This is the best and most convenient way to reset the settings in your server.properties file.
Conclusion
At first glance, finding and configuring the server.properties file may seem a little intimidating, especially if you are new to the Minecraft server experience. Hopefully, my in-depth analysis will simplify things and help you set up the file with assurance.
Being able to edit the server.properties file can be a rewarding experience, wherein you get complete control over the gameplay, security, and performance of your Minecraft server.
My only advice to you before you make any edits would be to make a backup of your server. This way, even if you do end up making mistakes, you revert to the original server and start again.
Research Process:
The total time involved to complete and publish this article is approximately 35 hours. This content was created through a structured research approach to ensure accuracy and reliability.
For more quick Minecraft-related guides, you can explore our range of Minecraft tutorials below:
- How to Port Forward a Minecraft Server
- How to Download and Host a Minecraft Server on Your PC
- Top Minecraft Earth Server List
- How to Find the Seed of a Minecraft Server
- Apex Hosting Review: Is it the Best Minecraft Server Hosting
- Best Rust Server Hosting Providers
- How to Make Terracotta in Minecraft
Was this helpful?
Recommended Reading
-

This is a comprehensive review of Apex Hosting with features, pricing, pros, cons, and comparison with other Minecraft Hosting Platforms: In this article, we will take a thorough analysis of the many features provided by Apex Hosting, understand whether the pricing packages that the platform offers are reasonable. Read this…
-

We have put together a list of the best, free, and cheapest Minecraft Server Hosting Provider companies in the world. Check out the detailed comparison and select a suitable vendor for you. Minecraft Server Hosting is a service provided by hosting companies to help individuals or organizations host their games…
-
Are you an addictive player who is looking for a seed finder in Minecraft? Discover how to find the seed of a Minecraft Server instantly with proven methods using simple commands: So, how does one find the seed of a Minecraft server? A question that’s often asked by the more…
-

Unlock the Crafting Secrets and get to know how to make Terracotta in Minecraft. Explore more about the Terracotta Minecraft recipe and learn to successfully create terracotta within the Minecraft game environment: Terracotta, as hardened clay was introduced on 24th April 2013 by Dinnerbone - its developer, and released under…