


A simple guide on Azure DevOps Repos and Azure DevOps Pipelines. Get educated on the Azure DevOps board’s connection to the GitHub repository and its integration with GitHub:
Azure DevOps (previously known as VSTS) is a new cloud-based offering that helps project teams take care of all aspects of the software development process.
Azure DevOps Service is a SaaS platform providing tools for better team collaboration. It provides tools that help the entire project team capture Requirements, Agile/Traditional Project Planning, Work Item Management, Version Control, Automated Build, Deployment, and manual Testing in a single platform.
=> In-Depth Azure Tutorials for Beginners
Table of Contents:
Azure DevOps Repos and Pipelines

Azure DevOps Services

In the last tutorial of the series, we looked at:
- Create a new Organization
- Create a project using the Scrum template
- Use Azure board to create User Stories, Tasks, and other work items
- Create queries
- Dashboard
In this tutorial, we will look at:
- Azure DevOps board connection to GitHub repository
- Repositories and integration with GitHub as a source for the code
- Pipelines for build and release using a Java Maven example
Azure DevOps Board Integration With GitHub
Azure pipelines is a cloud solution to build, test, and release your project automatically, using the source code from the GitHub repository. Though Azure DevOps also has the inbuilt feature to host Git repositories, I will show the integration with GitHub, as it is a widely used platform to host the project’s source code.
Create a GitHub Connection
In Azure DevOps, you can use GitHub repositories for software development and as a source in Azure pipelines. The project and GitHub repository can be connected so that the commits and pull requests can be linked to the work items. The integration helps to establish traceability.
To create the connection, the user must be part of the Project Administrators group and can connect to the Azure DevOps project using a GitHub account or PAT token.
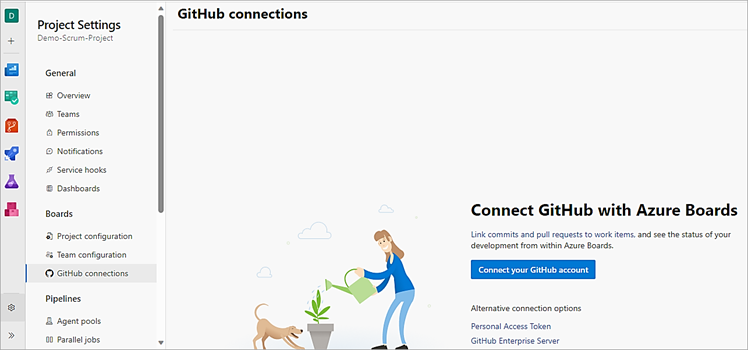
To create the connection, go to the Project Settings -> GitHub connections. Click on the link Personal Access Token.
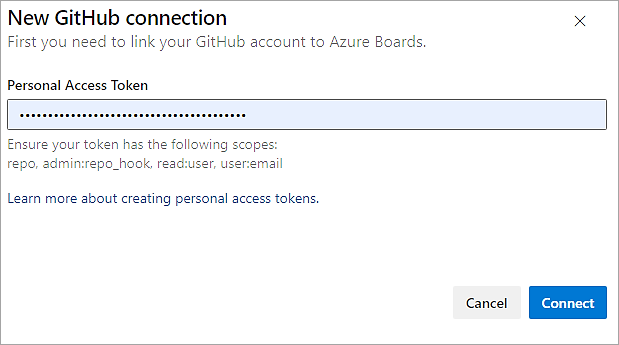
Enter the GitHub account PAT token and click Connect.
Connect to your GitHub repo and click on Save.

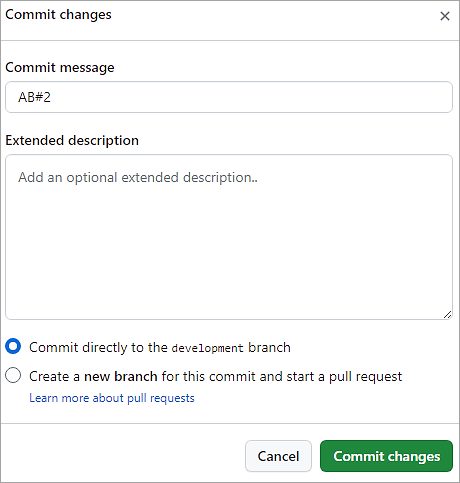
In GitHub, modify a file and mention AB#<WorkItem-ID> format in the commit message to link the source code changes to the Azure Boards work item.
E.g. as shown in the format in the commit message and click on Commit.
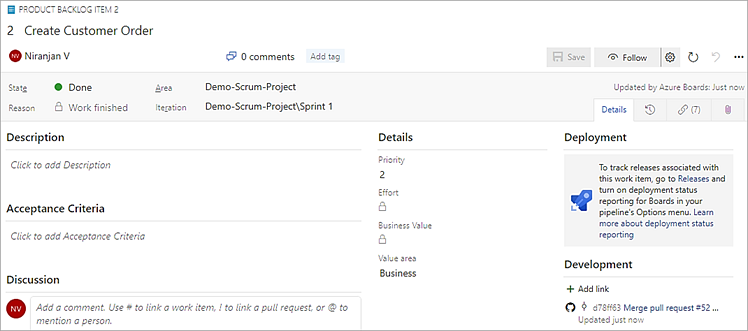
Open the work item in the project and look at the link under Development.
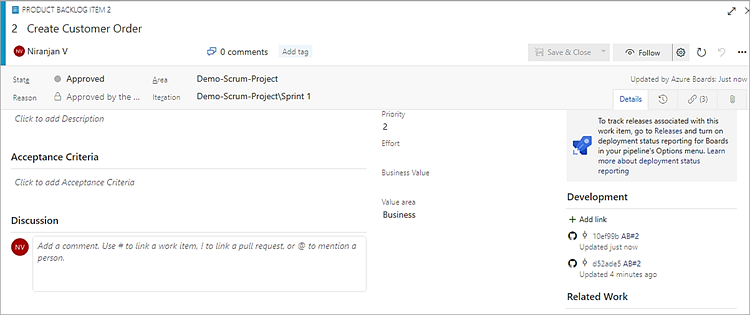
Clicking on the latest link AB#2 will take you to GitHub and show the changes.
Creating Azure DevOps Pipeline
Azure DevOps pipeline is all about Continuous Integration, Continuous Delivery, and Continuous Testing which helps to build, test, and deliver your code to any environment.
Azure Pipelines require your source code to be in a version control system. It supports two forms of version control – Git-based and Azure Repos.
Using the pipeline, you can build, test, and deploy C#, C++, .NET, Java, Go, Node.js, Python, Android, and iOS applications. Deployment supports various targets like VMs, Containers, and On-prem and Cloud environments.
In this example, as the source code is in GitHub, the workflow for Azure DevOps and GitHub integration would be as shown. E.g. Project1 pipeline in the Azure, DevOps Organization will map to GitHub Repository 1 and likewise.

In this section, we will look at continuous integration and then create a release definition to automate the deployment to various environments. Before the creation of the pipeline, we will need to create an agent, which is explained below.
Agents and Agent Pool
To run the Azure DevOps pipeline (build or deploy) you will need an agent that will help to run the jobs. You can use Microsoft-hosted agents which are hosted and managed by Microsoft or Self-hosted agents, which teams can host and manage on the VMs.
In this example, we will use and configure a self-hosted agent on a Windows machine. The OS supported for Windows are Windows 7, 8.1, 10, 11, and Windows Server 2012 and above.
An agent pool is nothing but a collection of agents. The agents are organized into agent pools. When configuring an agent, you register it with a single pool, and when creating a pipeline, you specify the agent pool in which the pipeline runs. When the pipeline is run, it runs on an agent from that pool.
Personal Access Token for Agent Registration
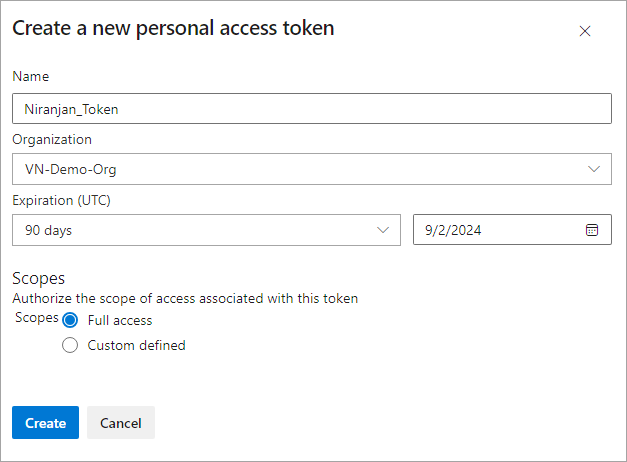
To create a token in the user settings, select Personal Access Tokens.

Click on New Token. Select as shown. Click on Create. Save the token.
Permission to register the agent
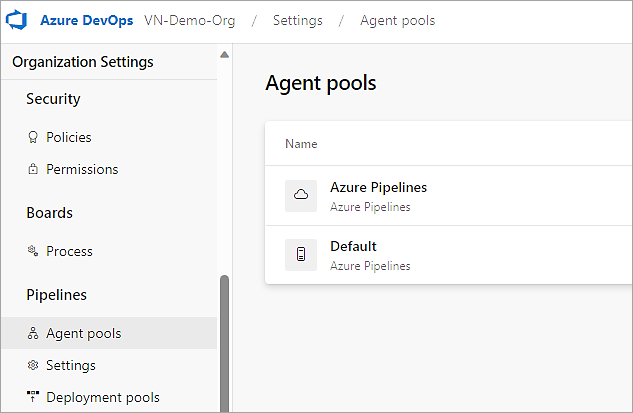
In Azure DevOps, go to the Organization Settings and select Agent Pools. Select the pool on the right side and click on the Security tab.
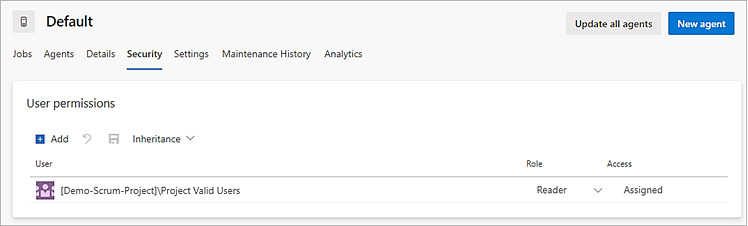
Click on Add to add the users who can create and manage the agents as administrators.
Click on Add.

Download and Configure the agent
In the Organization settings select Agent pools -> Default pool and click on New Agent.
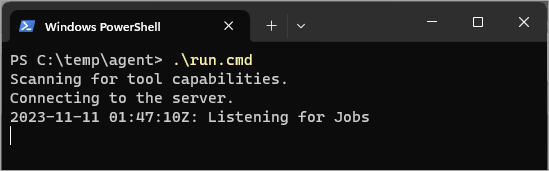
Follow the instructions to download and configure the agent. Make sure to run this in a POWERSHELL window.
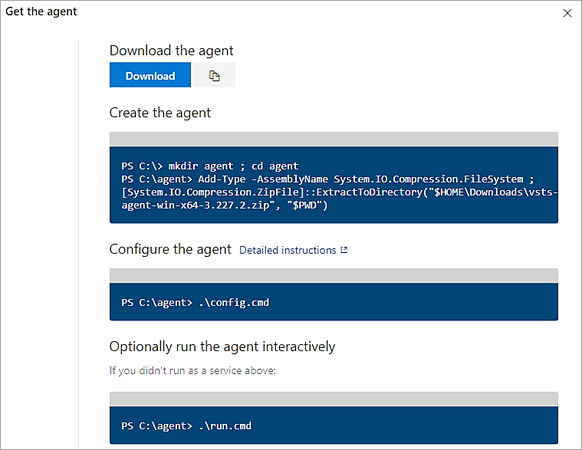

Run the agent.
Create Azure DevOps Pipeline
Azure DevOps pipeline combines CI/CD/CT to build, test, and deliver your code to different environments. We will use the pipeline to use the GitHub repository. We will do the following in our pipeline.
Source code repository -> Build task -> Create and push artifact -> Deploy to environment
To create the pipeline using classic editor, go to the Project -> Pipelines. Click on Create Pipeline.
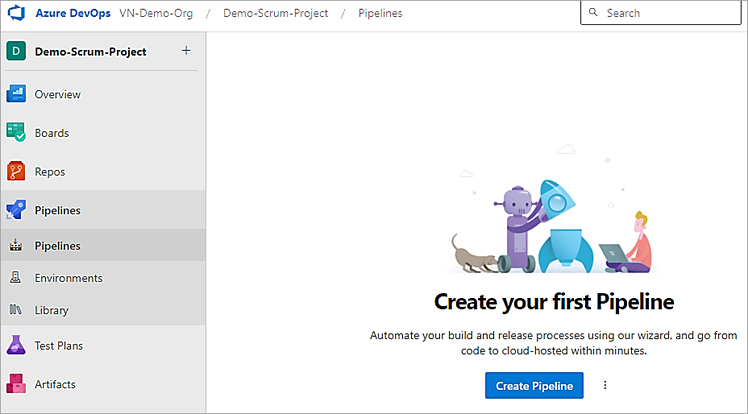
Click on Create Pipeline. Select the link Use the classic editor
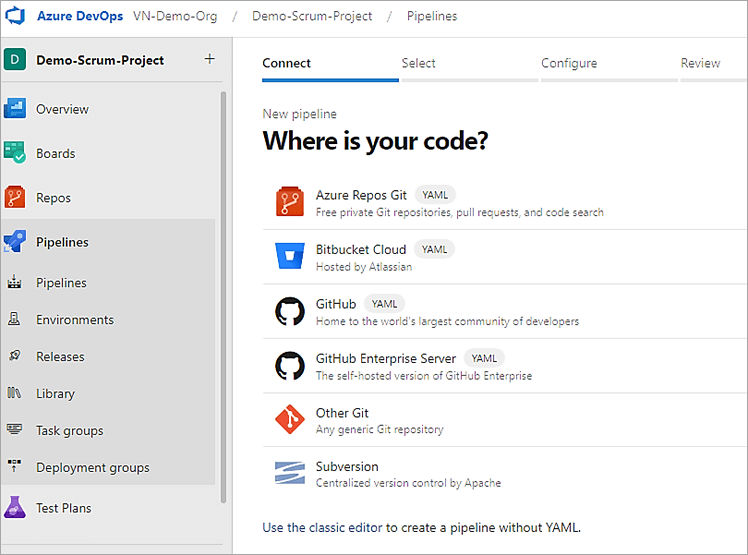
If the link “use the classic editor” is not shown, then as project admin go to the Organization settings -> Pipeline Settings and switch off the options shown.

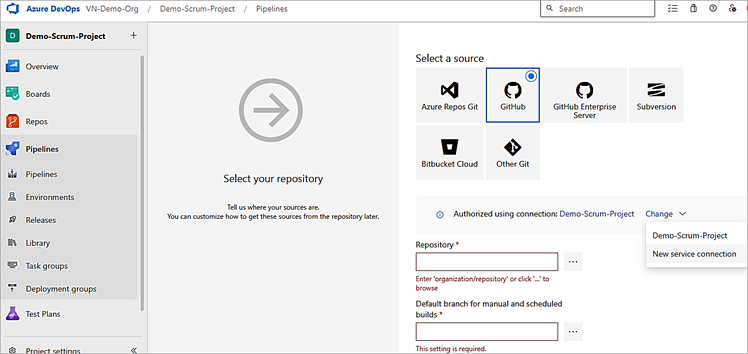
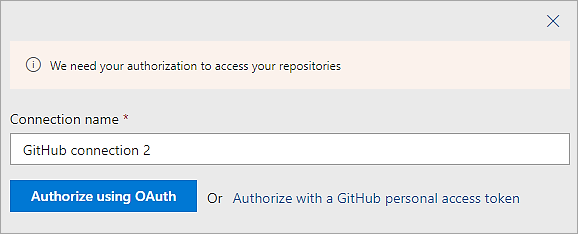
Back in the Pipeline creation click on the link. Select GitHub and click on Change->New service connection.
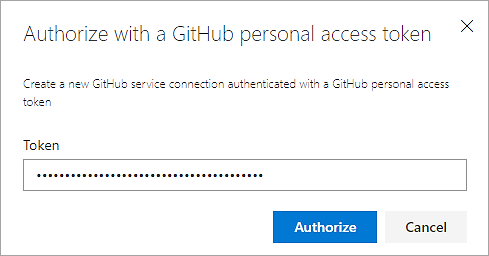
Click on Authorize with a GitHub personal access token
Enter the token and click on Authorize.
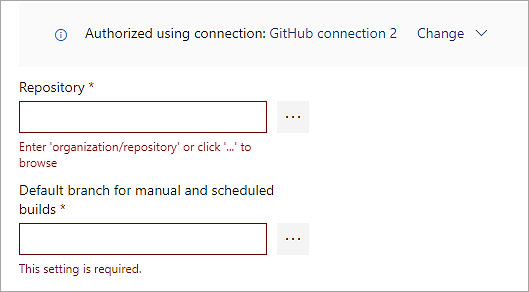
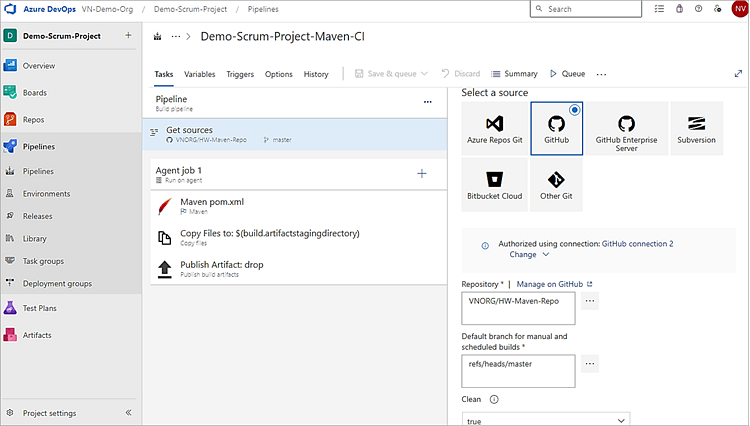
Click on 3 DOTS next to Repository and choose the repository to be used in the pipeline.
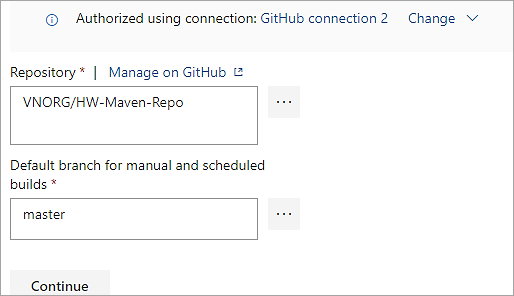
Click on Continue. Apply the Maven template.
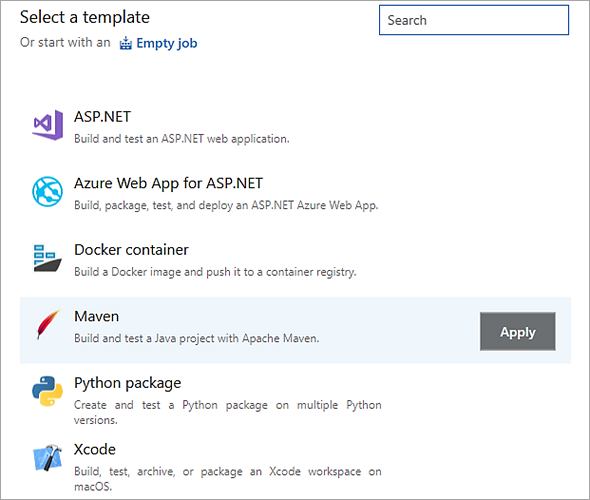
Once the Maven template is applied, you get the following view of the pipeline. First is the Get sources which is getting the source code from our GitHub repository and then proceed with the Maven build on the machine where an agent is running.
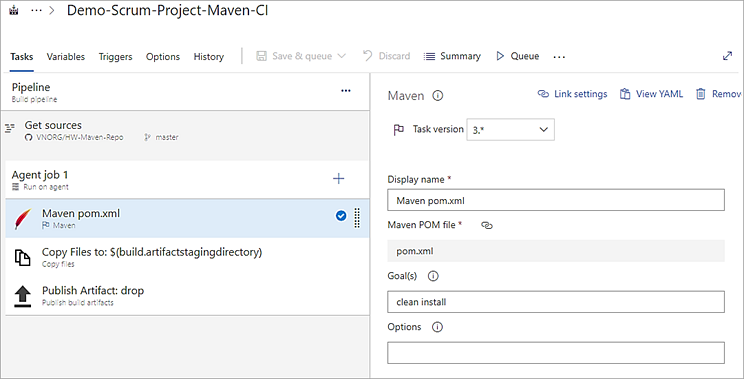
Maven step – Change the Goal(s) as per the project need
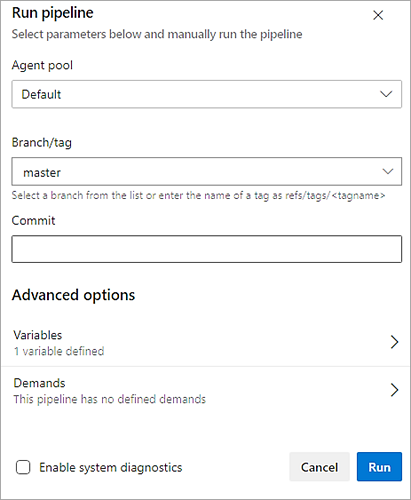
Click on Save and Queue. The build will be triggered by selecting the Agent pool.
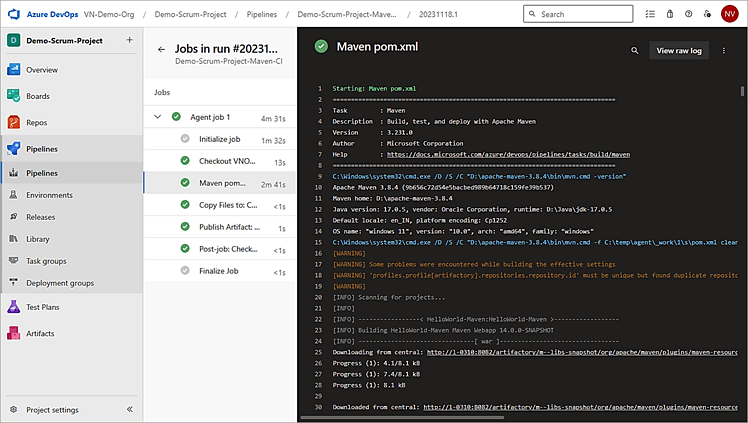
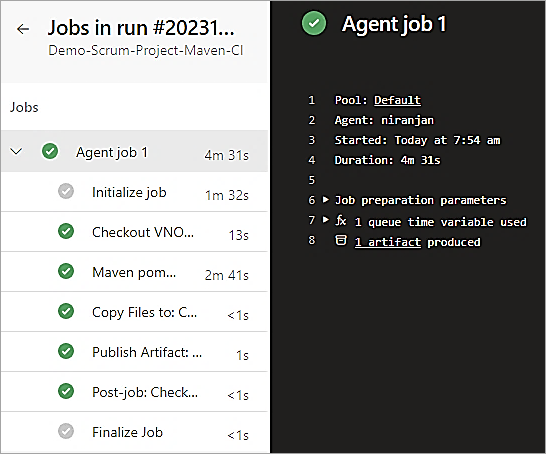
Summary of Agent Job 1 shows that 1 artifact is produced, which is the WAR file, and published to a Drop location where the artifact is stored in Azure pipelines and which will be retrieved for release later on.
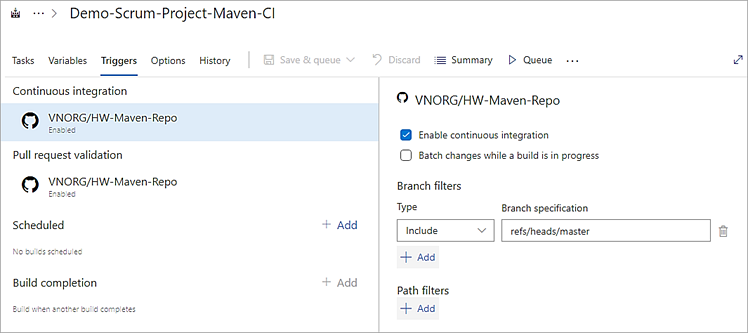
Enabling Continuous Integration
Before triggering a build if needed, enable the continuous integration option to build on every code check-in then in the Triggers TAB of the Build Definition.
This applies to pull requests as well. If not based on the Continuous Integration option, then enable the Scheduled option on the right to build the solution during the specified weekday and time. This will depend on how you want your project to be built.
This option will avoid the manual trigger of the builds.
Auto Close the Azure Board Work Item as Part of the Pull Request
As a Pull Request is created in GitHub to merge the contents from let’s say development branch to the main branch the Azure board work item should transition to close or done status.
To close or transition work items from GitHub, you will need to add the word ‘fix’, ‘fixes’, and ‘fixed’ to the ‘AB#{Id}’ in the pull request title.
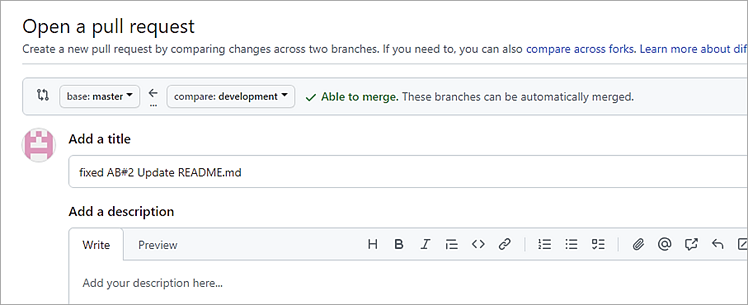
Create the pull request and once changes are merged, look at the work item status.
Create a Release
Since the build artifacts are available in the drop folder as in the build definition, the release definition that we will create now for deployment will pick up the artifacts and then deploy them in Tomcat. Note that Tomcat should run on the same server where the agent runs.
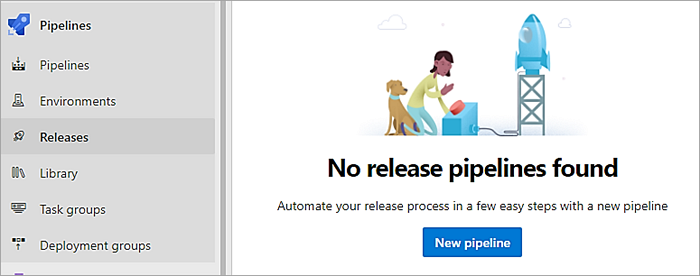
Back in Releases under the Pipeline hub, we will create a release definition by clicking on the New pipeline and link to the build definition which will enable the continuous delivery process.
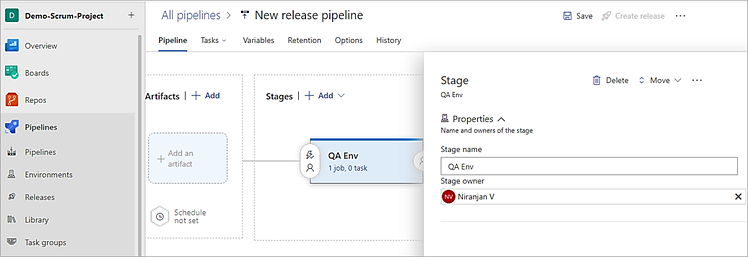
Name the stage with your environment and close it. Click on Add an Artifact on the left.
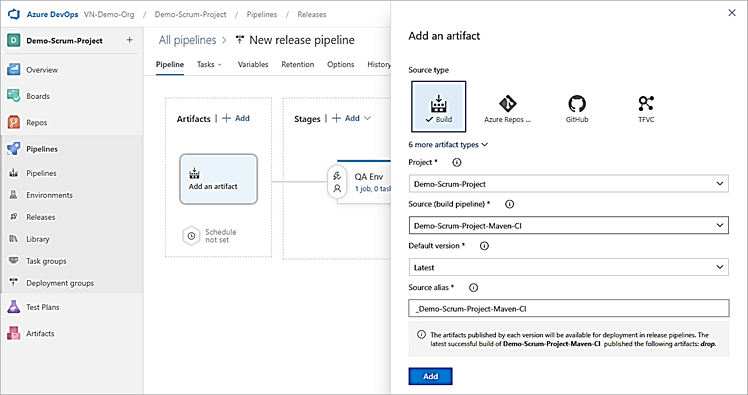
Select the source, which is the build pipeline where the artifacts were published to the drop location. Click on Add.
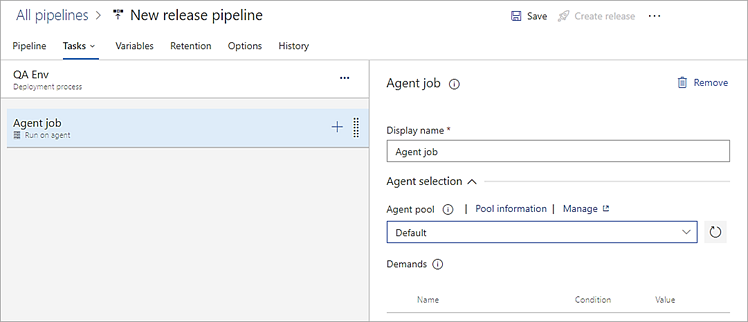
Click on the Tasks tab to add the release tasks to deploy to Tomcat. Select the Agent pool as Default and click on + next to the Agent job to add tasks.
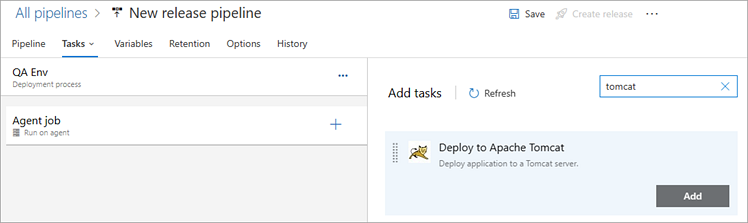
Select the Deploy to Apache Tomcat task and click on Add. In case it is not available install the free extension to the Azure DevOps org from Marketplace.
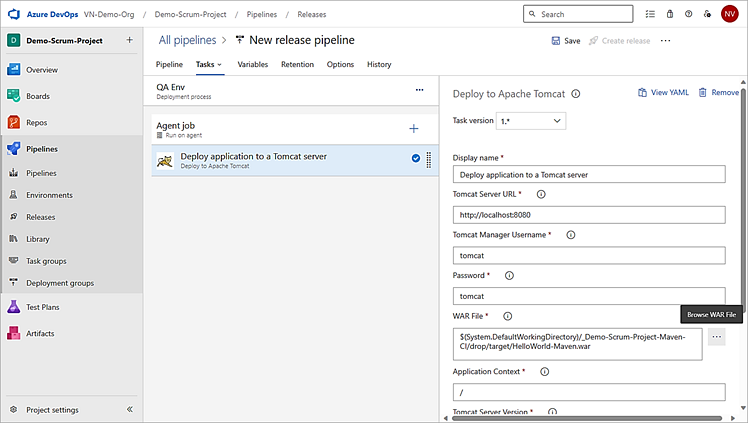
Configure the task as shown and Save.
Click on Create Release to start the deployment.

Select the stage and click on Create.

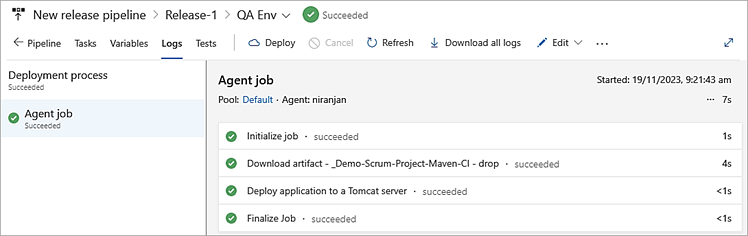
Click on the link Release-1
Click on Deploy under the QA Env.

Click on the logs to view the deployment to Tomcat.
Enabling Continuous Deployment
To enable continuous deployment from the build, go back to the pipeline, select the trigger as shown, and allow the same. This will ensure that once the build is completed, the release will automatically start, thereby avoiding any manual deployment.

Azure Cloud Services
In the previous section, we did see a deployment in an on-prem system. You could also look at Azure Cloud Services which is PaaS, and an example of the same is Azure App Service, which is an HTTP-based service for hosting web applications and can run and scale on both Windows and Linux environments. It also helps to add the power of security, load balancing, and auto-scaling.
DevOps capabilities like continuous deployment from Azure DevOps, GitHub, or Docker Hub can also be used. It is used to support applications that are scalable and reliable.
Azure DevOps Certifications
Certifications are very important for any candidate for their future and also in projects wherein certain clients do ask for certified engineers. Azure certifications and their pricing from the developer’s point of view can be found @ Microsoft Certified: Azure Developer Associate – Certifications | Microsoft Learn
Conclusion
In this tutorial, we have seen the most important aspect of Build and Release in Azure DevOps. Once we deploy the application, we will need to focus on testing it.
In the next tutorial of the series, we will look at the test management feature of Azure DevOps.
Was this helpful?
Recommended Reading
-

This is a complete guide to multiple Microsoft Azure Certification exams along with necessary details to help you identify the suitable certification: When you have a Microsoft Azure certification, you have the privilege of pursuing a wide range of career options like becoming a Solution Architect, Solution Developer, Cloud Architect,…
-

Microsoft VSTS DevOps features for automating the build (Continuous Integration) and release process (Continuous Delivery) to Azure Web App: In VSTS Part 1 Tutorial, we learned how Microsoft VSTS can be used as an ALM tool (Work Items, Agile Project Planning, Version Control) in the cloud. Suggested Reading => Thorough…
-
This tutorial explains concepts related to Microsoft Azure SQL Database like how to connect to and create a database, architecture, price, etc.: As per today's modern generation technology, a cloud solution is in high demand, and in the corporate world, they have already adopted modern data center technologies. Microsoft Azure…
-
In this Microsoft Azure tutorial, we will learn about Cloud Computing, Azure Cloud, Azure Marketplace, Azure DevOps, Continuous Integration, etc: Microsoft Azure is a cloud computing platform. It provides a set of services that you can use while developing your application and gives the best solutions to business users with…
-
Read this tutorial to understand how to monitor Azure Service Bus proactively to constantly track your services’ performance: Most of today’s enterprises rely on the cloud for developing their business applications. As the Azure footprint evolves, monitoring the resources becomes inevitable. It is mandatory to ensure the health and performance…
-

Azure is a job scheduling software that caters to various industries and businesses. Here you will review the top Azure Scheduler Alternatives along with a comparison: As far as job schedulers go, the Azure Scheduler by Microsoft was one of the best solutions that I had the privilege of using.…
-
Most popular interview questions on Azure Test Plan: Azure Test Plan is also known as Azure DevOps Test Plan or TFS (Team Foundation Server). I have been using Azure Test Plans at work as a test management tool for over 2 years now. Here, in this article, I will provide…
-
This tutorial provides frequently asked Azure interview questions and answers with explanations to help you prepare for the interview. In this tutorial, we are going to discuss the top-most frequently asked Azure interview questions. This tutorial serves as a rich resource for a quick refresher or review as far as…


