Discover all about Azure DevOps Services with examples. Get to know how to create a new organization, or project using a Scrum template, create queries, etc with Azure DevOps:
What is Azure DevOps?
Azure DevOps (Previously known as VSTS) is a new cloud-based offering that helps the project teams take care of all aspects of the process for software development.
Azure DevOps Service is a SaaS platform providing tools for better team collaboration. It provides tools that help the entire project team capture Requirements, Agile/Traditional Project Planning, Work Item Management, Version Control, Automated Build, Deployment, and manual Testing in a single platform.
=> Read Through the Series of Azure Tutorials
Table of Contents:
- Azure DevOps Services – A Detailed Study
- Creating an Organization and Project
- Iterations in Azure DevOps
- Process in Azure DevOps
- Create Product Backlog Items and Tasks in the Azure Boards Hub
- Create Query in Azure Boards Hub
- Create Teams
- Dashboard in Azure DevOps
- Pricing
- Features
- Azure DevOps Services v/s Azure DevOps Server
- Azure DevOps Tools Summary
- Conclusion
Azure DevOps Services – A Detailed Study

Azure DevOps Service helps in quick setup and maintenance-free operations with proper security.

Azure DevOps Service is an online hosted service from Microsoft. You can sign up for Azure DevOps Service @ Azure DevOps Services | Microsoft Azure
When you sign up for Azure DevOps Service, you get the following free services:
- The first 5 users free with Basic License
- Azure Boards for Agile work item tracking and Kanban boards
- Azure Pipeline with one Microsoft-hosted CI/CD and one Self-Hosted CI/CD job
- Azure Repos with unlimited private Git repos
- Azure Artifacts with 2GB free per organization
Teams also use Azure DevOps Server, an on-premise intranet-based offering license-based for every user. Here the infra is of course managed by the company resources and supports the above features.
In this tutorial, we will look at:
- Create a new Organization
- Create a project using the Scrum template
- Use Azure board to create User Stories, Tasks, and other work items
- Create queries
- Dashboard
Suggested Reading =>> DevOps for CI/CD to an Azure Web App
Creating an Organization and Project
An Organization in Azure DevOps service relates to an account name. So e.g. you are using the platform for XYZ clients then you can name it accordingly. An organization can then contain multiple projects within it. When an organization is created you get access to the features described above.
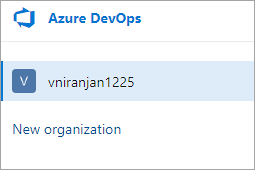
To create an organization sign in to Azure DevOps and click on New Organization
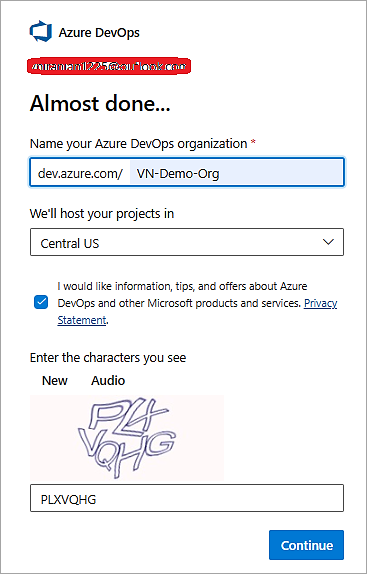
Next enter the Org name, hosting region, and click on Continue.
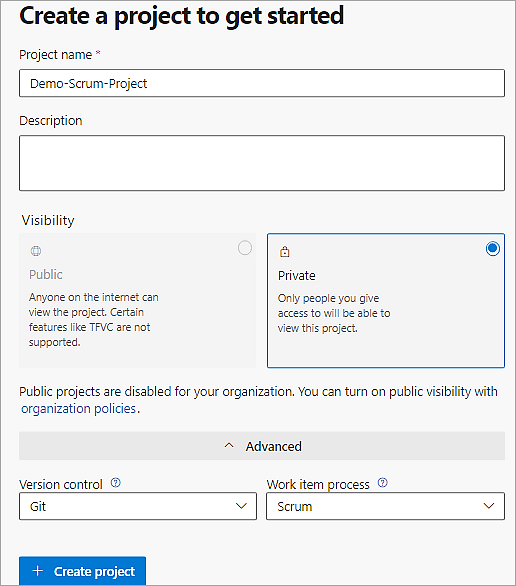
Proceed to create a project within the organization. Enter the name of the project, select the private visibility (users need to be given access to the project with private visibility), select the version control as Git, select the work item process type as Scrum, and click on Create project.
Note: An organization is needed to create a project as a prerequisite.
More about the Work item process is detailed later in this document. The project is now created.
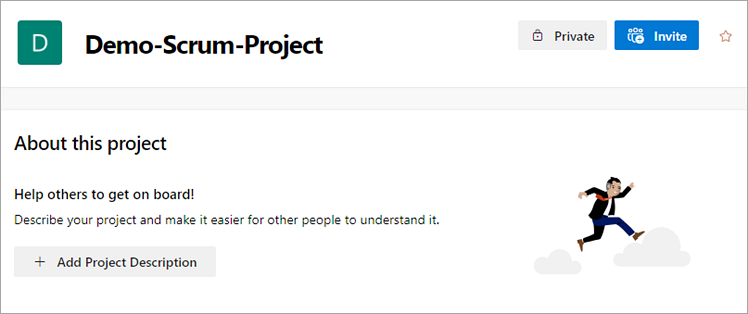
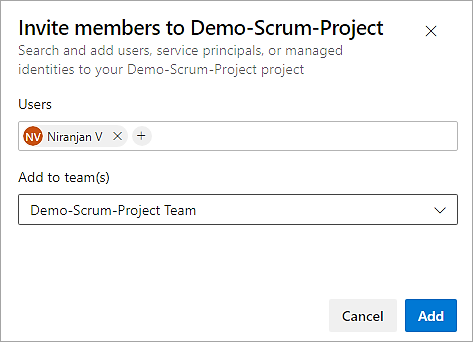
To continue we need to Invite users to the project. In the main screen click on the Invite button on the right.

Enter the email id and click on Add.
IMPORTANT: Once members are added the users will need to accept the invite by joining the organization.
In this series of articles, we will look at the Boards, Repos (Connect to a GitHub repository), Pipelines, and Test Management.
Let’s start with the Boards hub.
Iterations in Azure DevOps
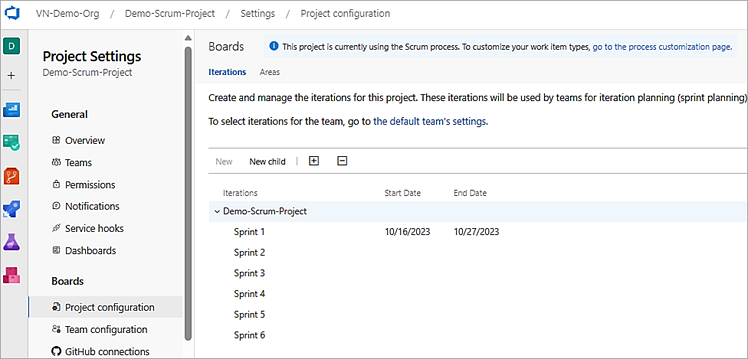
Iterations in Azure DevOps are timebox intervals that allow work items to be assigned. These are defined at the project level and are used to group work into sprints. To define iterations as a project admin click on the Project Settings at the bottom of the project page and go to Boards. Project configuration. Define the iterations and provide the start and end dates.
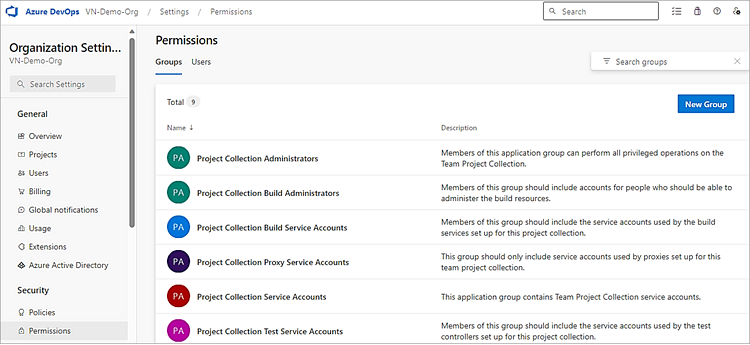
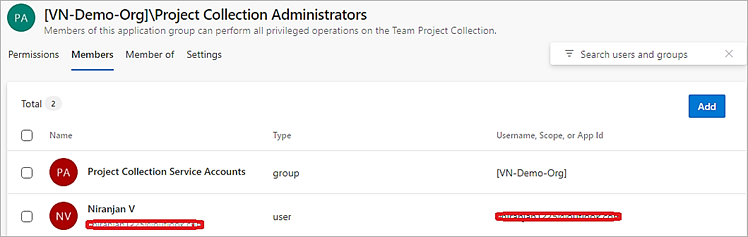
To add users to the organization you must be a part of the project collection administrators’ group. Organization owners are automatically part of this group. It is preferred to have 2 to 3 users to be part of this group.
To add additional users to the project collection administrators’ group go to the Organization Settings -> Security -> Permissions. Click on the project collection administrators’ group and add users.
Select the Members tab to add users.
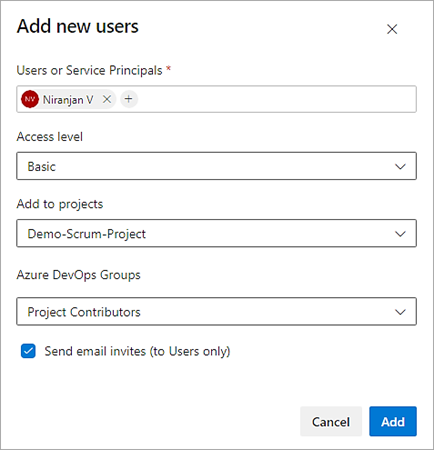
As a project collection administrator go to the Users section under the General category on the left.
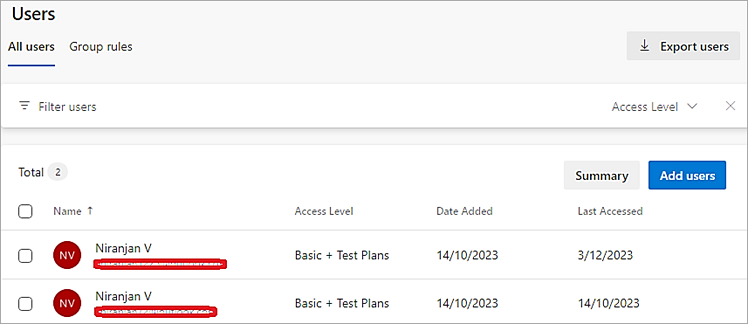
Click on Add Users. Select the users and access level, Add the users to the projects, and provide contributor access to the users. Click on Add.
Process in Azure DevOps
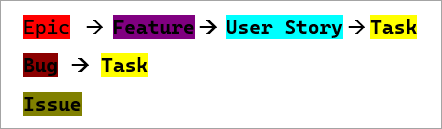
Process in Azure DevOps forms the building blocks for work item tracking. Azure DevOps supports the following 4 types of process and it contains the work item types for tracking which can be customized as well.
This process follows the Inheritance model which means you can create a custom process for your project and customize the same by adding custom fields or modifying workflows etc.
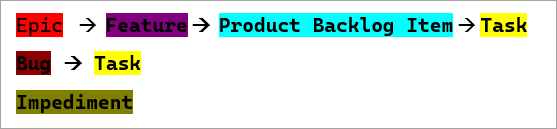
Basic
This is the simplest model and contains the following work item types to track work.

Agile
Teams can choose this process if they want to use agile planning methods like Scrum and track user stories and bugs in the Kanban board. The tasks work item type supports tracking original estimate, remaining work, and completed work which is the difference compared to the scrum process type if selected.
Scrum
Teams choose this process when practicing scrum methodology as per the Scrum Organization. Here in this process, you track product backlog item (PBI), which represents a feature or requirement to be delivered, and bugs in the Kanban board. The tasks work item type supports tracking only the remaining work.
Further Reading =>> Detailed Comparison of Kanban vs Scrum vs Agile
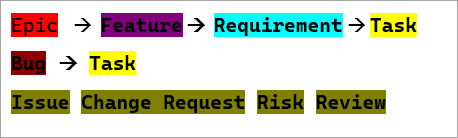
CMMI
Teams choose this process type when doing projects the formal way. This process can help to track requirements, change requests, risks, and reviews.
The tasks work item type supports tracking original estimate, remaining work and completed work, and also formal change management activities.
Create Product Backlog Items and Tasks in the Azure Boards Hub
Azure Boards enables teams to plan, track, and discuss work across the development life cycle. Azure boards support agile methodologies, including Scrum and Kanban.
A Backlog is a prioritized list of work items that form the basis of the project scope. The backlog is used to create Product Backlog Items or User Stories.
A Product Backlog Item is a work item that represents a User Story or a Requirement which are used to track work done by the development team and will be prioritized as per customer needs.
Using Azure boards we will start by creating a Product Backlog Item and link Tasks to it. The tasks will typically need to be assigned to the developers for them to link to the code changes. These Product Backlog Items and Tasks will need to be added to the Sprint cycle from a project planning perspective.
Click on ![]() hub
hub
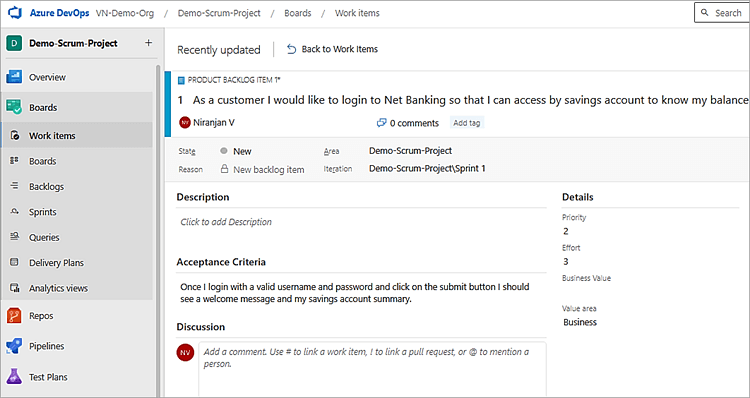
Under the Boards menu select Work Items. Click on New Work Item -> Product Backlog Item

Enter a title with a description, select assignee, acceptance criteria, iteration, effort, typically story points, and other fields. Click on Save.
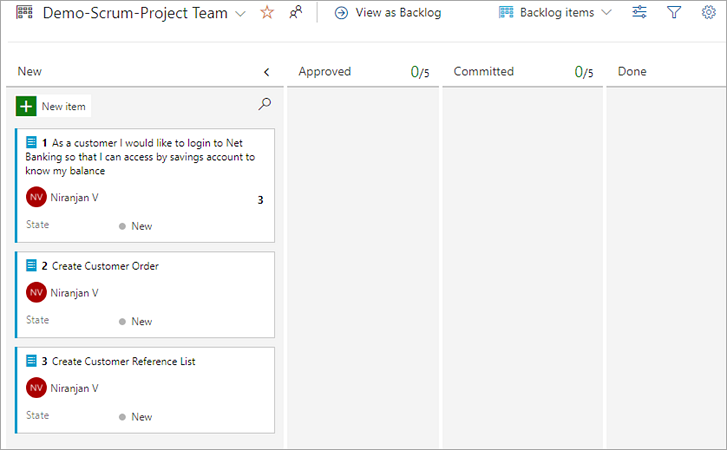
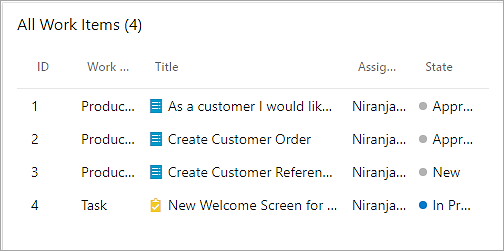
Back in the Boards hub, you should see the work item created. Add a few more PBI’s.

The Sprints category in the Boards hub will show the work item as part of the sprint selected.

Creating Tasks
As we have seen how to create the product backlog items these work items (PBI’s) will normally be split or decomposed into developer tasks, bugs, and test cases.
Open the product backlog item ‘Create Customer Order’ and under the Related Work -> Add Link -> New Item
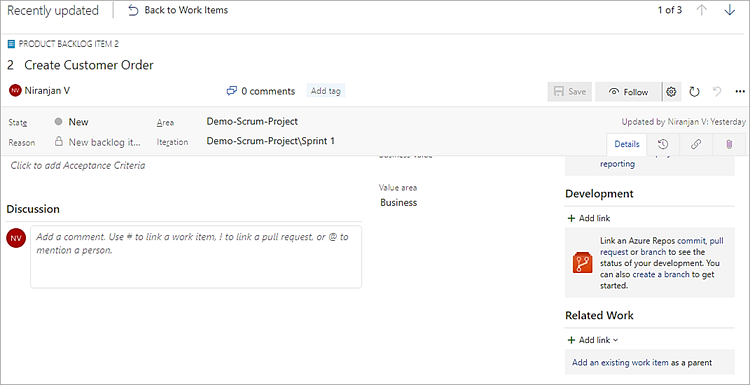
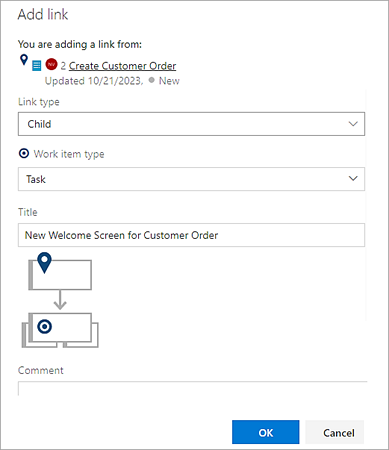
Add the details for Task as link type child as shown and click OK.
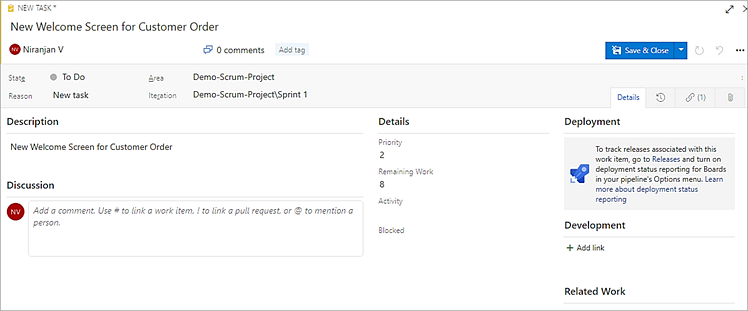
Add Remaining Work in hours and click on Save & Close.
The link is added under the Related Work of the parent Product Backlog Item.
Sprints Taskboard and Capacity
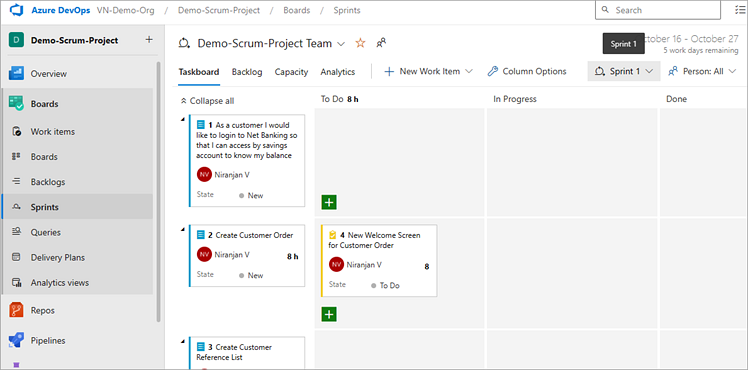
Click on the Sprints category under the Boards hub and ensure Sprint 1 is selected on the right side. This opens up the Taskboard view for all the work items created. As you progress on the development activities drag and drop the work items to the appropriate status as defined which is the workflow.
For every Sprint we can define the number of hours each member will be working for the project assigned to. The capacity view for each sprint defines this. This view also captures the activity that each member works on like Design or Development or Reporting etc.
Click on the appropriate Sprint. In this case open Sprint 1 and go to the Capacity View. Update as shown. For each user update the capacity per day. Save the updates.

So here as an example, the first user has a capacity of 6 hours per day and for 2 weeks sprint, he has 60 hours to complete the tasks assigned for 10 working days. You can also click on Days Off to specify any unplanned or planned leaves during the sprint.
The number of hours will then be deducted from the total number of hours for the user. As a team then there will be a total of 120 hours during the sprint to complete the work assigned to all.
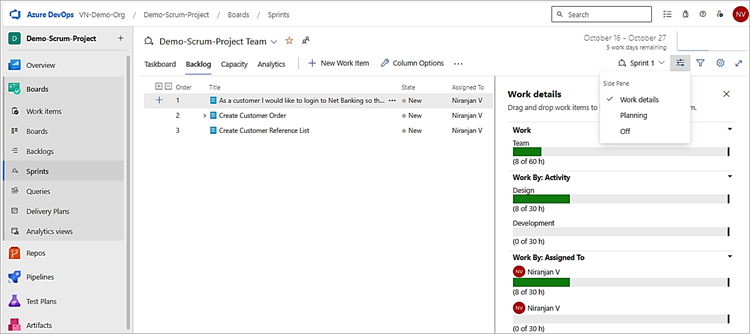
Backlog view in the Sprints category
Click on the Backlog view. You can see here in this example that the sprint started on Oct 16th and ended on October 27th. So 5 days are gone and the Work detail’s view has the details of remaining work for the sprint.
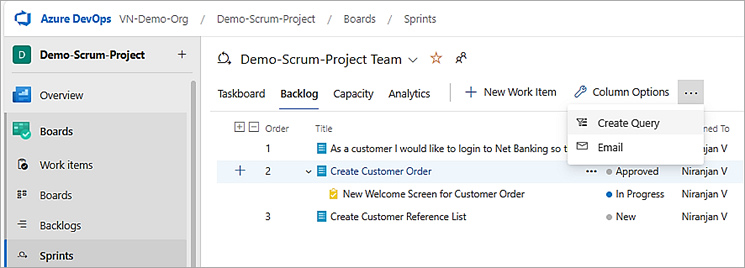
Create Queries
To create a query click on the 3 DOTS and select Create Query.
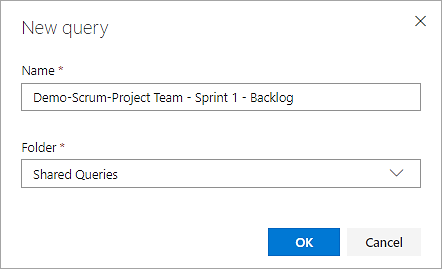
Save the query in the Shared Folder. Click OK.
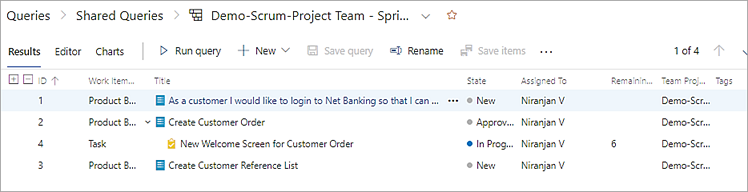
Click on the link as shown.

The Query results open up.
More on creating and managing queries is described in detail in the next section.
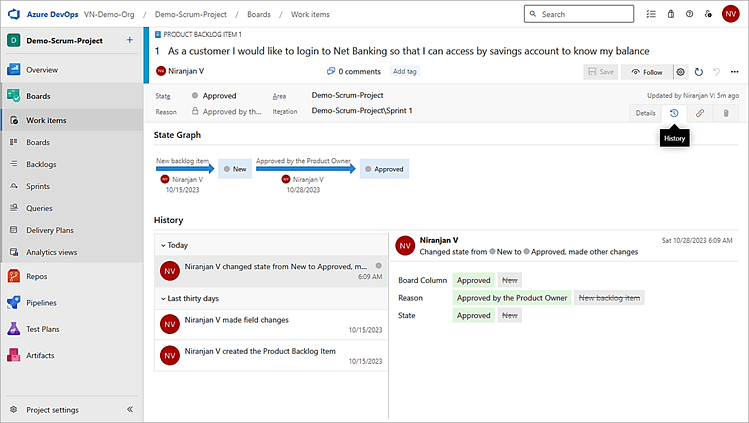
View the history of work items
An entry is made to the work item’s history field every time it is saved. To view the history of the work item click on the tab.
Create Query in Azure Boards Hub
During any sprint or stakeholder review, it is very much needed to list items based on certain criteria. The queries in Azure DevOps list those. E.g. I would like to know the work item status for a particular assignee or list of work items in a particular state.
The queries can also be exported. CSV files and also shared with other users.
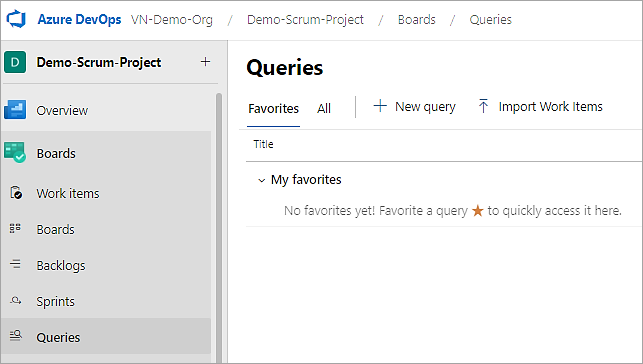
To create a query go to Boards -> Queries. Click on New Query.
Example Query #1: Query by Title
To filter on a string match use the contains words operator which applies to the entire field and is faster.

Example Query #2: Query by Sprint with work item type Any
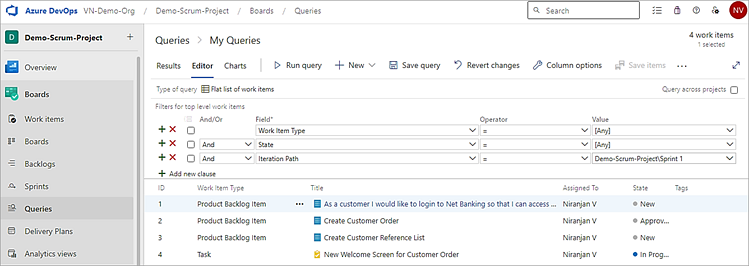
Save the Query to the Shared View which will be used in the dashboard.
Create Teams
In Azure DevOps, you create teams wherein a group of project members focuses on developing specific features. Teams can then manage their backlog, plan their sprints, and configure dashboards.
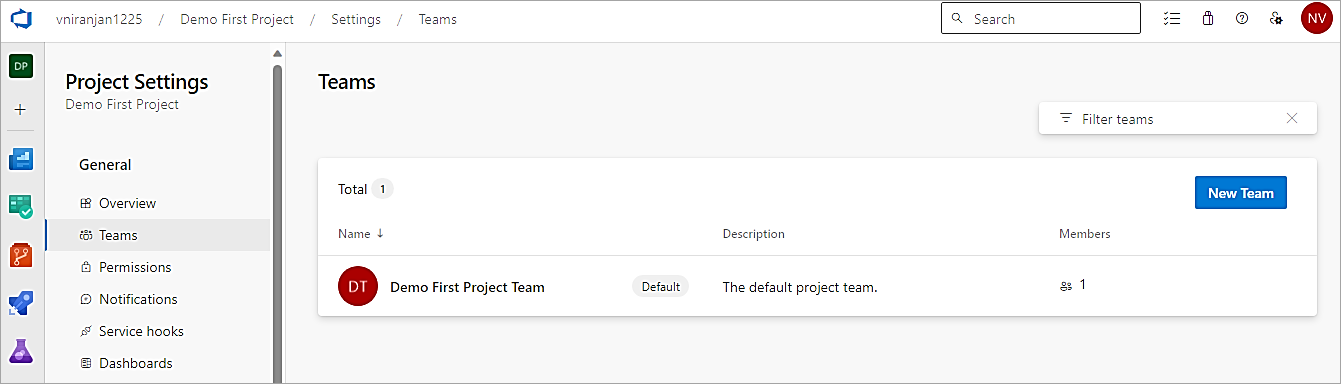
Any project is configured with a default team with the project name which can be changed to a new team as well.
Let’s now look at how to create a new team and assign members/administrators. To create a new team you should be part of the Project Administrator group. In the project select the Project Settings -> Teams. Click on New Team.
Add a team name, members, and Administrator, and click on Create.

In the Teams screen click on the 3 DOTS to set the new team as default.

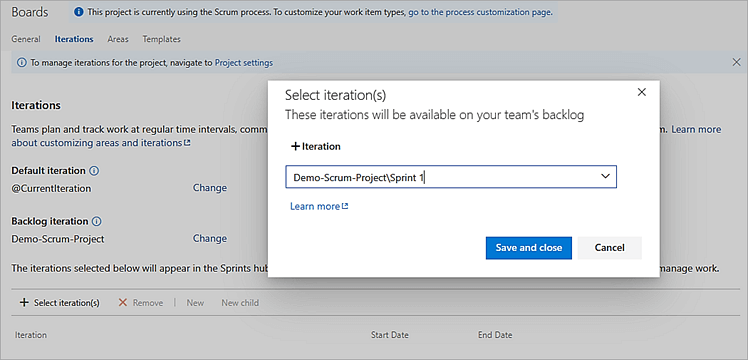
Click on the newly created team and select Iterations and areas to set the Area Paths and Iteration Paths for the team to use. Select the Iterations TAB and select the Iterations for the team. Save and Close.
Back in the Boards hub -> Backlogs you can start creating work items for the team and look at the Sprint backlog for the team in the Sprints category.

Dashboard in Azure DevOps
Throughout the project implementation, there will be a continuous need to gain visibility into the team’s progress. This is where the dashboards come in to picture where widgets and charts can be added.
Charts are based on queries to provide status. Widgets are configurable and display the information and charts on the dashboard.
Users need to have Basic access to create, edit, and view dashboards. Users with Stakeholder access can only view the dashboard, charts, and widgets.
Create Dashboard
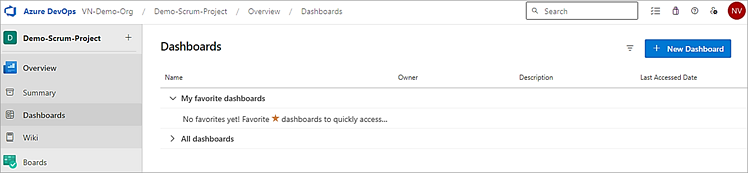
To create a dashboard for your project select Overview->Dashboards. Click on New Dashboard
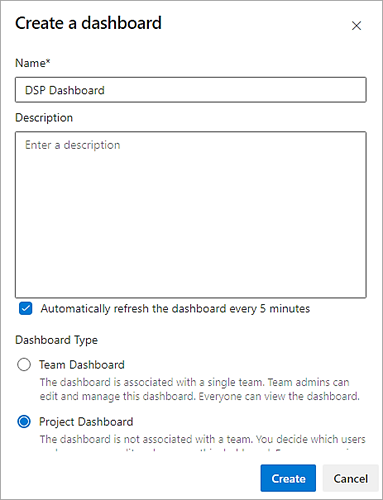
Provide a Name and select the radio button Project Dashboard. Click on Create.
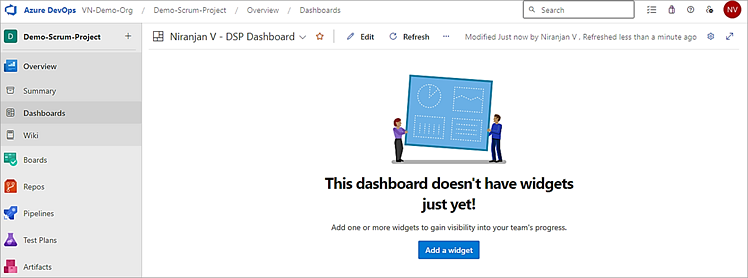
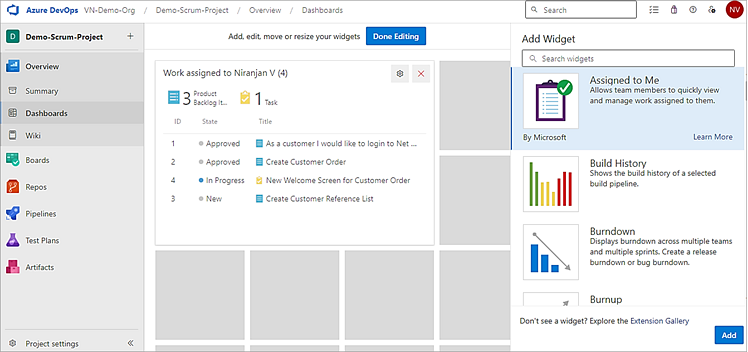
Click on Add Widget.
Select the widget as shown and click on Add. Click on Done Editing.
Add a chart
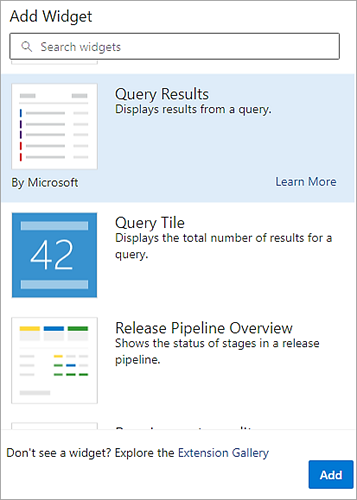
In the Add, widget screen select Query Results and click on Add.
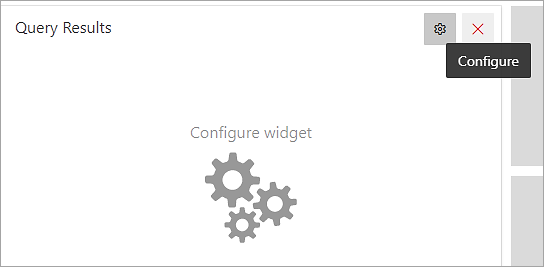
In the widget added click on Configure icon.
Under Shared Queries select a Query and click on Close.
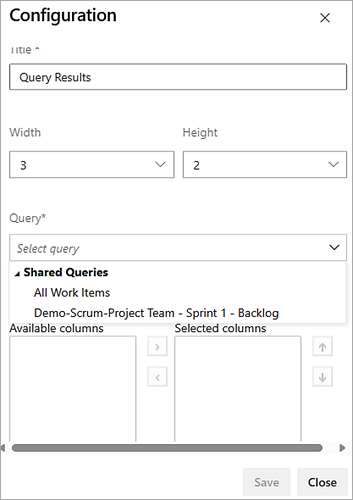
The results are displayed.
Similar queries can be selected for chart widgets as well.
Pricing
The pricing for the licenses of Basic Plan and Basic + Test Plans are as follows.
- The Basic Plan which includes Azure Boards, Azure Pipelines, Azure Repos, and Azure Artifacts is free for the first 5 users. Post the 5 users it would be $6 per user per month
- Basic + Test Plans which include Azure Boards, Azure Pipelines, Azure Repos, Azure Artifacts, and Test Management activities include a 30-day free trial and post that it would be $52 per user per month
For up-to-date pricing information please visit the URL Azure DevOps Services Pricing | Microsoft Azure
Features
- Dashboard Control: Manage and configure dashboard widgets
- Improved Source Control: Support for Git and TFVC repos
- Plan and Track: Plan and track work using Agile, Scrum, and Kanban methods
- Continuous Integration and Deployment: Automate Build and Deployment
- Manual and Exploratory Testing Support: Multiple testing features in one place
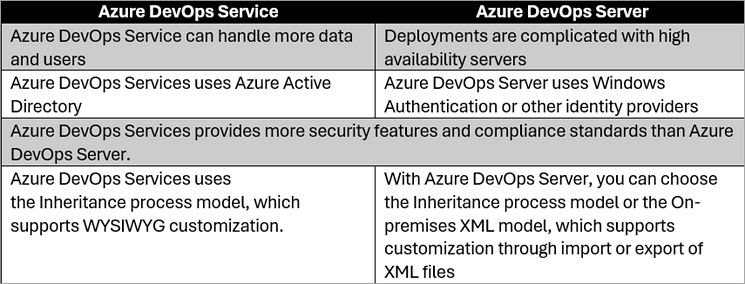
Azure DevOps Services v/s Azure DevOps Server
Azure DevOps Tools Summary
- Azure Boards: Hub for managing work items, tracking progress, and collaborating with team members
- Azure Pipelines: This tool is for automating builds, tests, and deployments of your projects
- Azure Repos: This tool is for version control and source code management using Git or Team Foundation Version Control (TFVC).
- Azure Test Plans: This tool is for planning, executing, and tracking manual & automated tests.
- Azure Artifacts: This tool is for creating, hosting, and sharing artifacts that include packages and libraries.
Conclusion
In this tutorial on Azure DevOps, we have seen the Agile portion from the features supported. Board hub was the major focus of creating the Product Backlog Items, Tasks, Bugs, etc. from a Sprint Planning point of view.
We also looked at creating queries and dashboards from a reporting point of view which is very essential to getting the status of work items.
In the next tutorial, we will look at the Builds-Release and Test Management Hub activities.
Was this helpful?
Recommended Reading
-

This is a complete guide to multiple Microsoft Azure Certification exams along with necessary details to help you identify the suitable certification: When you have a Microsoft Azure certification, you have the privilege of pursuing a wide range of career options like becoming a Solution Architect, Solution Developer, Cloud Architect,…
-

Microsoft VSTS DevOps features for automating the build (Continuous Integration) and release process (Continuous Delivery) to Azure Web App: In VSTS Part 1 Tutorial, we learned how Microsoft VSTS can be used as an ALM tool (Work Items, Agile Project Planning, Version Control) in the cloud. Suggested Reading => Thorough…
-
This tutorial explains concepts related to Microsoft Azure SQL Database like how to connect to and create a database, architecture, price, etc.: As per today's modern generation technology, a cloud solution is in high demand, and in the corporate world, they have already adopted modern data center technologies. Microsoft Azure…
-
In this Microsoft Azure tutorial, we will learn about Cloud Computing, Azure Cloud, Azure Marketplace, Azure DevOps, Continuous Integration, etc: Microsoft Azure is a cloud computing platform. It provides a set of services that you can use while developing your application and gives the best solutions to business users with…
-
Getting started with WebLOAD for Visual Studio and Azure DevOps Users: The world of Web Performance and Load testing is dynamic and changing all the time. Web Performance and Load Tests via Visual Studio Enterprise and Azure DevOps used to be a good option. However, since Microsoft recently published that…
-
Read this tutorial to understand how to monitor Azure Service Bus proactively to constantly track your services’ performance: Most of today’s enterprises rely on the cloud for developing their business applications. As the Azure footprint evolves, monitoring the resources becomes inevitable. It is mandatory to ensure the health and performance…
-
Read this comprehensive review of Serverless360 to install, configure, and use the features of this Azure monitoring and management tool: Azure Monitoring Tools play a critical role in all forums i.e. from small businesses to large businesses. It helps in keeping an eye on various components that are integrated into…
-
Most popular interview questions on Azure Test Plan: Azure Test Plan is also known as Azure DevOps Test Plan or TFS (Team Foundation Server). I have been using Azure Test Plans at work as a test management tool for over 2 years now. Here, in this article, I will provide…