


Learn how to migrate WordPress website to Cloudways Lightning Stack in minutes. Enjoy seamless migration experience with zero downtime and maximum performance from this step-by-step guide:
This tutorial will thoroughly guide you through the migration process of a busy WordPress Site to the Cloudways Lightning Stack, providing comprehensive coverage of preparation, setup, testing, security measures, and illustrative case studies from beginning to end.
The process of migrating your busy WordPress site is not only about transferring the site files but also about preserving performance, user confidence, and continuity of business.
Traditional VPS hosting will often fall under pressure when traffic spikes (e.g., due to a flash sale, a viral, or a ticket launch). Web your website pages crawl, check-ins can become stuck, and in the worst scenario, your website will obviously crash.
Table of Contents:
Migrate High-Traffic WordPress Site to Cloudways Lightning Stack
To businesses, this does not merely happen as a technical inconvenience, but it represents a lost revenue, sometimes so huge with ramifications of losing client loyalty, ruined credibility, and poorer SEO presence.
What we are now addressing is the Lightning Stack, which was an initiative by Cloudways to help address these areas of pain. This solution helps realize faster load times, reduced latency, and increased scalability of websites, and is based on NGINX, Apache, Varnish, Redis, and PHPFPM.
There are benchmark reports that say websites that moved to Lightning Stack typically ended up reducing their load times by over half, with a two to threefold increase in the number of simultaneous users with no downtime.
Moving in is not a mere case of a technical upgrade to the agencies and site owners; it represents an investment. The speed of your websites enhances Core Web Vitals, thereby increasing the search ranking.
Fewer frictional checkouts by clients visiting your websites will minimize abandonment of carts. A robust infrastructure will keep the website online when traffic rises, and it will not abandon the customers.
We now use this tutorial guide to take you through the entire migration process: how to prepare, how to set up, how to test, and how to secure, all the way to real case studies of businesses to show us how the business was affected.
At the end of it all, you see that not only performance metrics but also future genuineness in digital presence change to Cloudways Lightning Stack. Let’s dive right in.
Site Overview (Traffic, Plugins, Set up)
[Via WooCommerce]
The WordPress site examples cited here in our tutorial as case studies had some common features before the migration process. They had high traffic volumes, were configured with the use of numerous plugins, and were set up in a manner that put pressure on the conventional VPS hosting.
Traffic: The WooCommerce site we are considering as a case study for you to see the realities of migration to the solution had, on average, 500,000 visitors to the site each month. The lifestyle blog had 1.2 million readers, and the ticketing platform experienced tens of thousands of simultaneous users on launches.
Plugins: Every site was based on numerous plugins: payment and shipping extensions (WooCommerce) and caching (WP Rocket), search engine optimization (Yoast), and social share/comment (social). These plugins added this functionality, which added database queries and potential conflicts.
Configuration: All three locations were on a shared VPS before being migrated. These setups were cost-effective but had difficulties in scaling, caching conflicts, and slow backend performance.
Benchmarks Before & After
| Metric | WooCommerce Store (Before) | WooCommerce Store (After) | Lifestyle Blog (Before) | Lifestyle Blog (After) | Ticketing Platform (Before) | Ticketing Platform (After) |
| Homepage Load Time | 3.8s | 1.4s | 4.5s | 1.6s | 4.2s | 1.5s |
| Checkout / Key Interaction | 5.2s | 2.1s | N/A | N/A | 20m downtime | 0m downtime |
| WordPress Admin Dashboard | 4.5s | 1.7s | 3.9s | 1.8s | 4.0s | 1.9s |
| Time to First Byte (TTFB) | 800ms | 220ms | 900ms | 240ms | 780ms | 210ms |
| Concurrent Users Supported | ~1,200 | ~3,500 | ~2,000 | ~5,000 | ~2,000 | ~6,000 |
| Bounce Rate | 38% | 22% | 38% | 22% | 35% | 18% |
| Conversion / Completion Rate | 65% | 92% | Ad revenue flat | +15% | 65% | 92% |
Pre-Migration Items Preparation of Busy Sites
Let’s now talk about what you must do first before you migrate the site. To prepare for migration, your teams will have to audit the plugins and themes for compatibility, as caching such plugins as WP Rocket may not work well with Varnish without proper configuration.
The backups, both the local and cloud-based ones, will be important. Staging environments enable developers to do migrations without impacting live users, and effective communication with stakeholders creates awareness of downtime windows and allows them to be accepted.
Preparing well before migration is concerned with the vision you create for achieving it. Through auditing, data backup, staging, optimization of search results, downtime communication, compatibility verification, and data cleaning, site owners would have not only a comfortable transition to Cloudways Lightning Stack, but a strategic one as well.
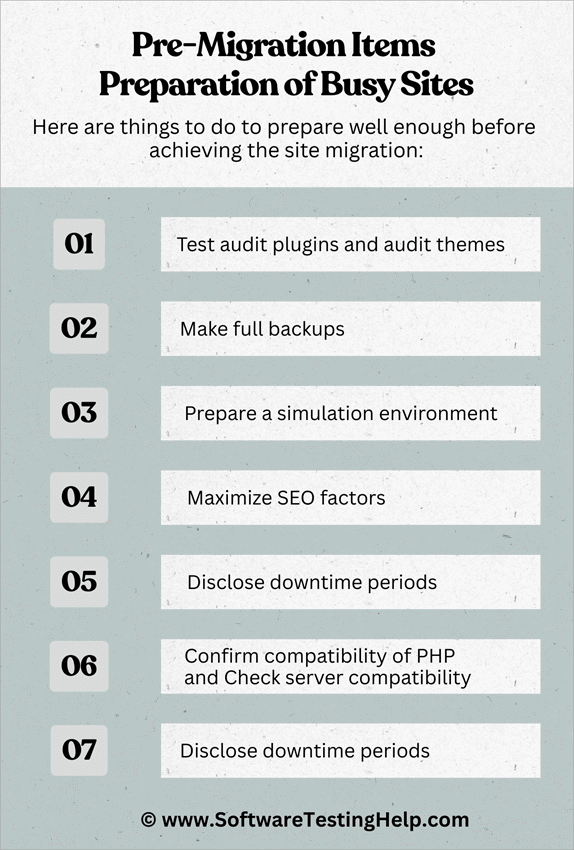
Here are things to do to prepare well enough before achieving the site migration:
- Test audit plugins and audit themes: Many migration problems are related to conflicts of the plugins. As an illustration, the use of caching extensions like WP Rocket or W3 Total Cache may not work together with Varnish unless it is properly configured. Before migration, revisit all the plugins and themes and check them for compatibility, update them to the most recent version, and disable any that are unnecessary or create conflicts. This ensures that the new environment does not inherit old troubles.
- Make full backups: There can be no loss of data on a busy site. You should back up both the database and the entire files of site. Cloudways provides built-in backups; however, it is recommended to have copies stored on the outside, e.g., Google Drive or Dropbox. This backup ensures that in case anything goes wrong during mid-migration, the team can recover.
- Prepare a simulation environment: Staging is a rehearsal environment. Cloning the site, the developers are allowed to test the migration without any impact on live users. Here, before launching, one can know about the conflicts with a plug-in and broken layouts or checkout errors, and provide a solution. With high-traffic websites, staging is a must.
- Maximize SEO factors: Migration has the potential to break your web search ranking positions unless you can ensure it is done carefully. As you perform the migrations, take a consideration that permalinks should be kept uniform, redirects need to be set correctly, and your metadata must be maintained. That said, a loss of traffic and visibility of your site can be caused by the absence of a redirect or a malfunctioning sitemap.
- Disclose downtime periods: The stakeholders at your company/firm/operations should have information about the possible downtime, and these include clients, customers, or internal teams. With the WooCommerce stores case study we are referring to now, and then in this tutorial, it can have the effect of freezing orders. You will note that communicating with your stakeholders also creates trust and avoids frustration among users when they experience promotion interruption.
- Confirm compatibility of PHP and check server compatibility: Busy sites have their support based on or relying on custom scripting or older plugins. Thus, ensuring the version of PHP and MySQL settings installed on your new server is compatible with site functionality prevents the occurrence of functionality failures following the migration.
- De-clog defunct data: Notice how huge websites have an excess of idle media files, obsolete revisions, and dormant plugins? You will notice that these are not needed now or even after a migration. Purification of these before migration decreases the intensity of the transfer and minimizes possible errors.
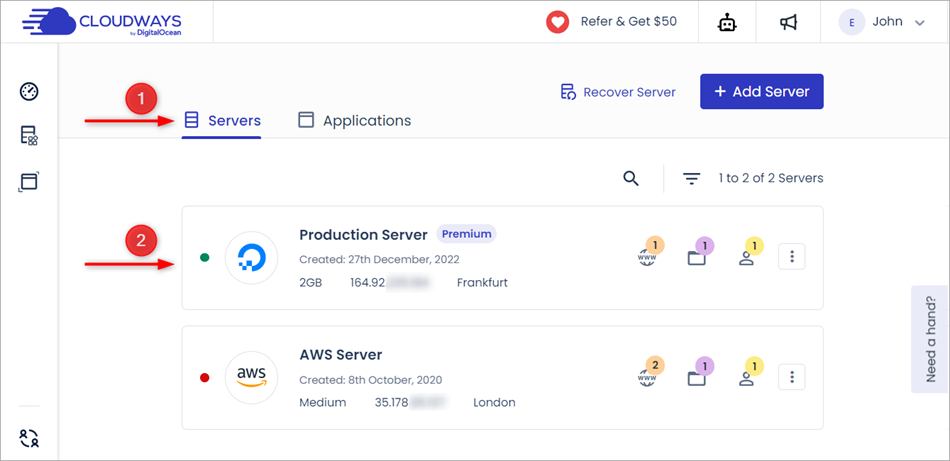
Creation of Your Cloudways Account
- Selection of the Solution: Cloudways is compatible with providers like AWS, Google Cloud, DigitalOcean, Vultr, and Linode. Both have their strong points: AWS and GCP are better in auto-scaling, whereas DigitalOcean provides simplicity at quite a reasonable price.
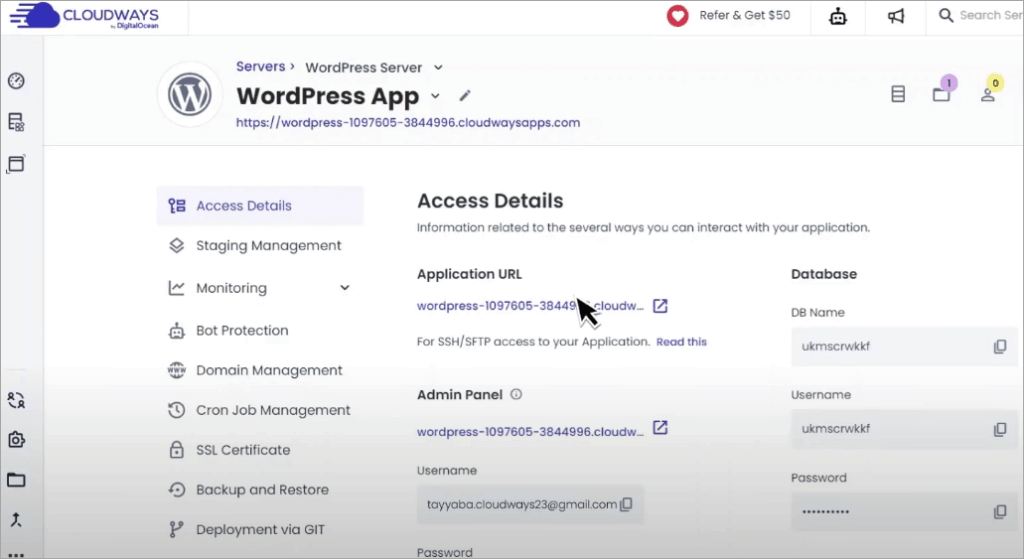
- WordPress Deployment: Cloudways offers one-click WordPress deployment, which automatically deploys the system and pre-optimizes the environment.
- Setting up Server Size: Traffic sites demand powerful servers. The 500k monthly visits WooCommerce store might require a 4GB RAM server with multiple vCPUs, and content publishers can begin small and grow vertically.
- Turning on Advanced Features: Redis object caching, Varnish exclusions, PHPzerwig FPM optimization, SSL certificates, and Cloudways CDN must be enabled first to release all the performance.
Migration Methods
[via cloudways.com]
This one is of greater interest to developers and site managers who understand in-depth what this is and how this migration is done. You have only a few options when planning to migrate.
Enlisted below are the various types of Migration Methods:
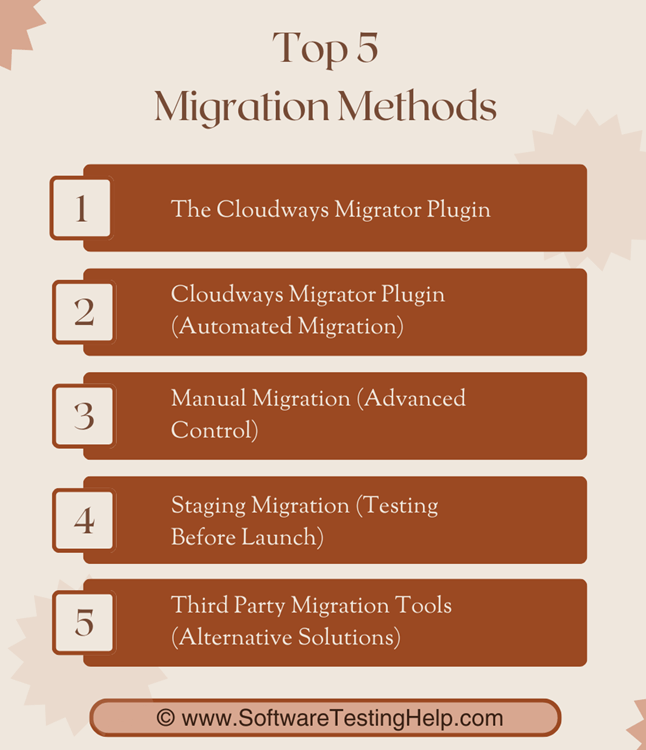
1. The Cloudways Migrator Plugin: This method is used on most sites, and it is the one that automates file and database transfers. Custom-written complex websites might need to be migrated manually by FTP and SQL importation/exportation.
For migration, whether on the high-level or the low-level, your migrations must be out on a good plan to migrate the site at off-peak times to reduce drawbacks.
2. Cloudways Migrator Plugin (Automated Migration): Cloudways Migrator Plugin is the most used as it is an automated tool that transfers files, databases, and configurations of any hosting service to Cloudways. It also needs only the Cloudways SFTP credentials, and the plugin manages the rest.
This technique is best for you if your agency is using more than one location because it maintains themes and plug-ins using minimal human intervention.
The values in the database are also updated automatically by the use of the plugin so that the URLs and paths are associated with the new environment. For busy sites, it reduces downtime and technical risk.
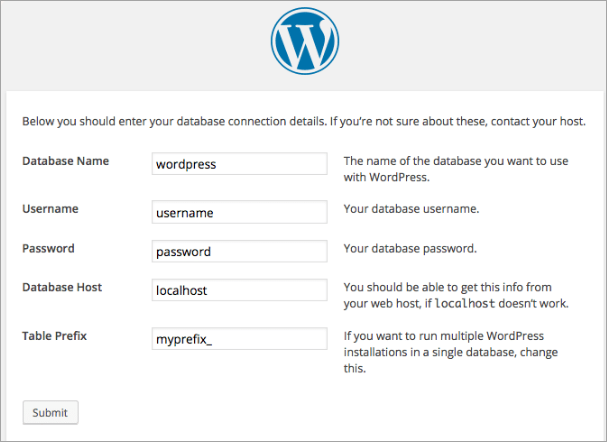
3. Manual Migration (Advanced Control): Manual migration is done using the WordPress database by exporting it, using SFTP to transfer files, and changing wpconfig.php and DNS settings.
It is more labor-intensive but gives absolute control over the process. Your developers tend to use this approach when dealing with complicated websites that use custom code or unusual designs.
[via kinsta]
You or your developers can use manual migration to fine-tune caching policies, database optimization, and check the compatibility of the various plugins before getting the site online. It is most appropriate for high-traffic sites where precision is much better than convenience.
4. Staging Migration (Testing Before Launch): Staging migration involves a copy of the live site in a staging server. This provides teams with the ability to do functional testing, test the compatibility of various plugins, and benchmark performance without having to impact actual users.
Staging can be especially useful to WooCommerce stores where the checkout processes need to be tested. After you finish your testing, you can commit the staging site to live. This is a risk-reducing approach that allows any problems to be addressed before they affect customers.
5. Third-Party Migration Tools (Alternative Solutions): Other businesses employ third-party tools such as Migrate Guru. They are flexible and may prove helpful in case there is a migration to hosts that do not allow direct transfer of the plugins.
They can, however, need extra setups to match Lightning Stack optimization of Cloudways. These tools are sometimes used together with Cloudways staging to facilitate smooth transitions by the agencies.
[via Migrateguru]
Testing Your Migrated Site
You need to run your site through testing procedures to check whether everything works well after migration. WooCommerce outlets should also test their transactions to ensure that the checkout processes are working.
Publishers should also check forms, APIs, and integrations during this testing procedure. Web performance measurement instruments, such as GTmetrix and WebPageTest, are objective and allow comparing pre-migration and post-migration load time and Core Web Vitals.
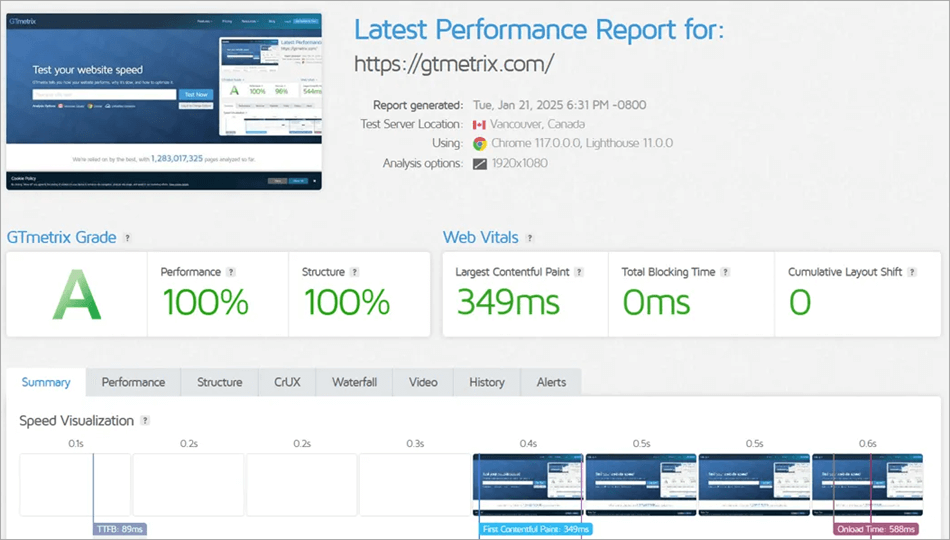
[via gtmetrix.com]
1. Homepage and Key Page Validation: Load the homepage, product pages, and blog posts after the migration to ensure that layouts, menus, and the use of widgets are functioning properly. Diffuse CSS or missing JavaScript files are frequent faults if the paths are not changed.
2. Navigation and Internal Navigation: Breadcrumbs, pagination, and click-through menus are generalized in this list. Make sure that redirects work well, and that the canonical URLs have not been removed. Wrongly configured redirects may damage the SEO and disorient the users.
3. Forms and Check out: Fill in the contact form, newsletter opt-in, and complete WooCommerce test transactions. Make sure that confirmation e-mails have been sent and payment gateways, for instance, Stripe and PayPal, are operating in sandbox mode.
4. Search and Filter: Test WordPress search and product filters once you are done with migration. Test results should be applicable, and caching should not disturb dynamic queries. Improper caching setup can disable search.
5. Plugin and API Integrations: Check CRM integrations, analytics (GA4), and marketing integrations when you are done with migrations. Check the execution of tracking pixels, as well as webhooks, e.g., subscription firing. Analytics can be biased with double-firing scripts.
6. Media and CDN Paths: The URLs of images should be checked to ensure that they refer to the appropriate domain or CDN. The responsive image sizes (srcset) are expected to work as expected, and the lazy loading is expected to work without breaking the layouts.
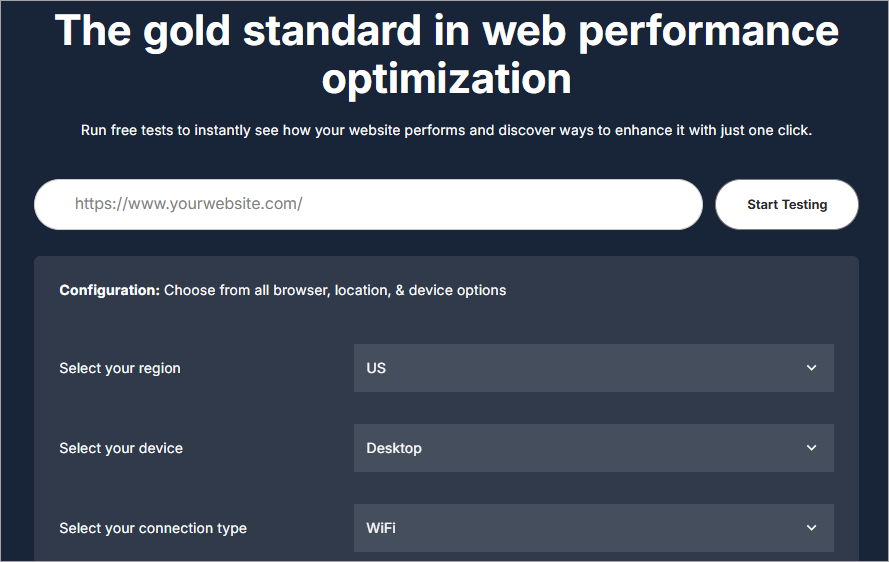
[via webpagetest]
7. Performance Benchmarking: GTmetrix, WebPageTest, or Google PageSpeed Insights can test TTFB, LCP, and load time in total. Occupy outcomes with pre-migration criteria to measure the ameliorations.
8. Cache Validation: You will need to do this to verify that Varnish caching hits on the public pages and an intentional miss on cart /checkout/ account. Redis must decrease the number of queries in dynamic pages such as dashboards.
9. SEO Integrity Checking: This is to be performed with the help of Ahrefs and other similar applications, which are used to detect 404s errors in the content, detect the redirect chains that should be eliminated, and identify the absence of content metadata. Make sure that the sitemaps and robots.txt are not lost and resubmit them to Google Search Console.
10. Checks on Security: HTTPS should be enforced everywhere, mixed content warnings should be checked, and active implementation of the SSL certificate should be checked. Login/logout and role-based access are tested to verify that permissions are maintained.
11. Backup and Restore Test: Manually perform a backup and a restore in the staging. This will guarantee that the recovery processes are effective with failure after a post-migration.
Backup and Security Best Practices

Cloudways provides automated daily backups with restore points, and in case something happens, it is fast to restore. Just after migrating to new systems, re-issuance of the SSL certificates must be done to ensure the systems have secure connections.
Cloudways Bot sends real-time notifications regarding the health of the server and traffic peaks, which makes it possible to react proactively.
- Enable automation of backups: Cloudways provides backups daily, including restore points. With busy sites, this is guaranteed so that in case something goes amiss, recovery is quick and painless.
- Use SSL certificates as soon as possible: User trust and SEO are impossible without secure connections. Cloudways offers a free SQL certificate, and it must be enabled once the migration is done.
- Examine the health of monitors with Cloudways Bot: This application will give real-time notification of the peak of traffic, potential vulnerabilities, and server performance. Active surveillance will enable the administrators to tackle problems before they develop.
Migrate WordPress Website: Problems Involved
DNS propagation is prone to causing downtime when handled otherwise. Caching layers may conflict with the use of a plug-in and break the operation.
The problem of database sync is especially troublesome in WooCommerce, whose orders need to be kept appropriately. There is also the scaling issue whereby traffic rises unpredictably, which will force servers to carry loads that are not in their base.
Case Studies
We now compile a list of case studies to help you with real-world guidance and examples of how you can achieve the migration of your own site. You can follow them as a template, but obviously, it is critical to check the applicability of methods in your case.
#1) WooCommerce Migration Case Study
An illustration of this is that of WooCommerce in March 2024. The store received visits of 500,000 per month back then. The store since then had its visits transferred to Cloudways Lightning Stack since then.
The migration had a smoother checkout performance, less backend lag, and was three times the concurrent user capacity. The lessons learned were that it is important to customize caching rules to WooCommerce to allow Redis time to stabilize database queries and to scale resources before peak seasons.
Solution Proposal: AWS through Cloudways on autoscaling. Installation of WordPress: One click WooCommerce. Server Size -configured: 4GB RAM, vCPUs. Enabling Advanced Functionality: Exclusions Redis, Varnish, PHP hasta machete tuning, SSL reissuance.
Prior to Migration: Homepage 3.8s, Checkout 5.2s, Dashboard 4.5s, TTFB 800ms, Approx 1,200 users.
Migration: home page 1.4s, checkout 2.1s, dashboard 1.7s, TTFB 220ms, approximately 3,500 users.
#2) Case Study: Migration of Lifestyle Blog
In July 2023, a blog on lifestyle that has 1.2 million monthly visitors went to Cloudways Lightning Stack. The improvements that were made were in terms of faster delivery of content globally, increased duration of sessions as well as decreased bounces.
Lessons learned: Image optimization must be included in every migration, CDN integration is crucial to the international audience, and Redis is required to have interactive features.
Selection of the Solution: DigitalOcean through Cloudways at an affordable cost. Installation of WordPress: WordPress Multisite through a one-click deployment. Server Size: Server configuration: 2GB RAM server, scalable. On-demand Provided Features: CDN, Redis, Varnish caching, image compression.
Migration: 4.5s Homepage, Session: 2m, Bounce: 38%. Migration: Homepage 1.6s, Session 4.5m, Bounce 22%.
#3) Online Ticketing Platform Case Study
In November 2022, an online ticketing system went to Cloudways Lightning Stack ahead of a huge concert release. Some successes were the smooth selling of tickets, threefold simultaneous user capacity, and an increase in the number of tickets being cleared. ‘Lessons learned: auto-scaling is indispensable, monitoring tools can give early indications, and the re-issue of the SS needs to be instant.
Selection of the Solution: Google Cloud through Cloudways to reach all over the world. Deploying WordPress: One-Click deployment with Ticketing workflow customization. Server Size: 6GB RAM, more than one vCPU.
Switching on Advanced Options: Autoscaling, Redis, fine-tuned Varnish, refresh any issuance of an SSL certificate, and Cloudways Bot monitoring.
Pre-Migration: 2000 users, 65 percent completion, 20 minutes offline time. Migration to: 6,000 users, 92 completion, 0m downtime.
Issues Faced with Expert Fixes
Migrating WordPress and indeed other websites, especially those that are busy with hefty and many files, presents a majority of challenges and risks despite the benefits and opportunities being more.
You therefore need to be careful. The caching problem caused incorrect order data due to Varnish caching WooCommerce cart and checkout pages. Omitting these pages solved the problem.
There were database bottlenecks when traffic was at its peak, but query load was minimized with Redis object caching.
Another obstacle was the renewal of the SSL, which was made easy with the automated certificate manager provided by Cloudways. Order syncing demanded a temporary freeze of checkout to avoid the loss of data in the process of migration.
1. Caching conflict(s) (WooCommerce checkout/cart pages)
- Issue: Varnish of occasionally cached dynamic pages, such as cart and checkout, interfered with the order data or displayed old cart contents to the user.
- The Fix: Developers put these sensitive pages out of the Varnish rule. Fine-tuning of caching policies gave a speed boost to the static pages, and they did not compromise dynamic flows.
2. Database Bottlenecks during peak traffic
- Issue: Slowness in queries and sometimes a timeout occurred on high-traffic sites that included plugins that create a high amount of queries (e.g., WooCommerce, membership systems).
- Fix: Object caching with Redis was turned on to remove the repeated queries of the database. This minimized query pressure considerably and averaged out spikes.
3. The issues with the renewal of the certificate through the SSL are
- Problem: Some of the sites ended up with expired or misconfigured certificate keys after migration, therefore triggering warnings about insecure connections in the browsers.
- Fix: The automatic SSL management at Cloudways was deployed to reissue the certificates on the spot. They used HSTS policies to guarantee HTTPS on the entire site.
4. WooCommerce stores: order syncing
- Problem: In the process of migration, new orders on the old server were in danger of being lost when the database was migrated.
- Fix: Checkout was frozen momentarily when finally making a database request. The team informed customers that checkout would reopen after the migration, and all orders would still be there.
5. DNS Propagation Delays
- Problem: Sometimes changing the DNS records could leave the system without service, or redirect users to the old host.
- Fix: Before migration, TTL (timewiselive) values of teams were reduced in order to speed up propagation. The monitoring tools were used to trace the DNS resolution across the world to ensure a smooth cutover.
6. Problems with Compatibility of the Plugins/Themes
- Problem: There were conflicts; some plugins would not work with NGINX or Varnish, and the layouts would break, or there would be duplicate headers.
- Fix: Developers fixed themes, maintained plugins, or substituted the incompatible ones. To make sure the fixes were made before launching, developers did staging testing.
7. SEO Risks during Migration
- Problem: Redirects or lack thereof caused incomplete ranks for the search.
- Fix: URL geometry redirects were developed to save the URL structure, sitemaps were re-submitted to Google Search Console, and metadata was checked after the migration.
Key Takeaways
- Proper planning and staging are essential and cannot be sacrificed. Moves are justified through benchmarking before and after migration. Redis and Varnish are fast, although they should be tuned. The team should address stakeholders gracefully regarding the downtime. Setting up Redis and Varnish with site-wide specifications results in optimal performance.
- High-trajectory sites must not be staged to identify plugin/theme conflicts at an early stage. Without auto-scaling, unpredictable traffic spikes would overwhelm systems, especially those for ticketing and event ticketing. The reinsurance of SSL ought to be done immediately after the post-migration in order to prevent security breaches.
- Communication can be used with the stakeholders to avoid frustration when there is downtime or checkout freezes.
- Before and after migration benchmarking will justify ROI and create client confidence.
- Integration into a CDN is vital to fulfill the needs of global audiences in order to minimize latency and enhance engagement.
- The migration optimization of the image lessens the page weight and enhances Core Web Vitals.
- By adjusting the propagation of the DNS TTL, you can maximize the number of propagations, as well as minimize the downtime of the service.
- Backup and restore testing is used to help provide disaster recovery in the event of migration errors.
- The integrity of the SEO measures in place on your service, e.g., the redirects, sitemaps, and metadata around the SEO, can also be checked to help ensure the rankings of the service is not jeopardized by the changes in infrastructure.
- Plugin audits are used to prevent conflicts with caching and broken layouts in new environments.
- Vertical scaling offers WooCommerce and content site flexibility without server re-architecture.
- Outage prevention can be achieved by monitoring tools such as Cloudways Bot that have real-time alerts.
- Freezing WooCommerce orders prevents missing transactions.
Frequently Asked Questions
1. How do I migrate a busy WordPress site to Cloudways Lightning Stack?
You can migrate most sites using the Cloudways Migrator Plugin, test them on staging, and switch the DNS during low traffic times. This may have some manual processes and others that are automated.
However, for those who can, there are other methods of achieving the migration. These include Cloudways Migrator Plugin, which is an Automated Migration, and Manual Migration, which provides the advantage of Advanced Control.
2. What are the best practices for migrating high-traffic WordPress sites?
Backup all the things, test in the staging environment, set caching correctly, and check the performance after the post-migration.
3. How does the Lightning Stack improve performance after migrating WordPress?
The combination of NGINX, Apache, Varnish, Redis, and PHP FPM provides the stack with a shorter load time and scalability. This improves performance when you migrate a WordPress site to Cloudways Lightning Stack.
4. How should agencies or businesses plan a WordPress site migration?
Here are things to do to prepare for migrating a WordPress site to Cloudways Lightning Stack: carry out plug-in auditing, set up a schedule of migration, liaise, and record all processes to be referred to in the future.
5. How can WooCommerce site migration be handled with minimal disruption?
Freeze orders, synchronize databases, test transactions, and migrate during off-peak periods. These are some things that can be done to ensure minimal disruption during the migration of the site.
Here is a video tutorial to guide you on how to back up a WordPress website:
Please watch the video below about the Cloudways WordPress Migration Plugin:
Check the video below on Cloudways Migrator Plugin:
Conclusion
This tutorial taught readers all things in migrating a busy WordPress site to Cloudways Lightning Stack. A technical upgrade to the Cloudways Lightning Stack is more than just a technical upgrade since it is a strategic investment in performance and reliability to migrate a busy WordPress site.
Real-world benchmarks indicate speeds up to 65 percent faster; this means businesses should anticipate improved user experiences, higher conversion rates, and the ability to handle traffic spikes. Migration is not only a technical success, but it can also be a business win done correctly.
Time spent for Review: 3 days
For more migration-related guides, you can explore our range of migration tutorials below:
- Data Migration Testing: Strategy & Techniques with Example
- Types of Data Migration Testing with Example Test Cases
- 19+ Best Data Migration Tools For Complete Data Integrity (2025 LIST)
- TOP 17 Cloud Migration Service Provider Companies in 2025
- General Purpose Vs CPU-Optimized Servers on Cloudways
- A Comprehensive Guide on Confluence Cloud Migration
Was this helpful?
Recommended Reading
-

List of The Most Popular Free WordPress Hosting Services with Features and Comparisons. Select The Best WordPress Hosting Service For Your Business: WordPress hosting is the shared web hosting service that runs WordPress sites. WordPress hosting is used to improve the performance of the website such as loading speed and…
-

Are you concerned about adding a file uploader plugin to your WordPress website? Read this review to decide from the list of the best WordPress File Uploader Plugins: File upload plugins are the software that enables the visitors of your WordPress site to easily upload files like documents, images, and…
-
The list and comparison of the Most Popular Data Migration Tools: When we hear the term "Data Migration", questions like - What is data migration? Why is it needed? How is it done? etc., pop into our mind instantly. This article will address all the basic queries on Data Migration…
-
Read, review, compare and select among the list of top Cloud Migration Service Provider Companies for a hassle-free cloud migrating experience: Cloud migration, although important, isn’t easy for any organization to carry out. It doesn’t matter what the scale of your business is, it simply isn’t cost-effective to have a…


