


Learn how to create an Email Group in Gmail and simplify your emailing task drastically. Handle group email communication effectively with just one single click and send emails to multiple recipients:
You could have many good reasons to email several people at once. Perhaps you want to shoot an urgent message to everyone on your team or keep your newsletter subscribers satiated.
What you don’t want to do is go through the tedium of manually typing in every single email address, especially if the number of recipients is in the hundreds.
Fortunately, Gmail offers you an easier way to do this, saving you oodles of time and money.
Table of Contents:
- Build Group Emails in Gmail: Simple Steps to Explore
- How to Create a Group in Gmail
- Ways to Set Up a Group Email in Gmail
- How to Create an Email Group in Gmail App
- Managing Contacts in Gmail
- Useful Tips For Managing Your Gmail Group
- Major Benefits of Creating an Email Group in Gmail
- FAQs to Create Email Contact Group in Gmail
- Conclusion
Build Group Emails in Gmail: Simple Steps to Explore
All you need to do is create a group and mention this group as your recipient when sending the mail. With a single click, you’ll send that message to all contacts included in that email group.
If you don’t know how to create a group in Gmail, consider this article your crash course for the same.
So, without much further ado, let’s get started.
5 simple steps to create an email group in Gmail:
- Go to Google Contacts
- Create New Label
- Select Contacts
- Click Manage Labels
- Select Label & Click Apply
How to Create a Group in Gmail
Now that you know how beneficial it is to create an email group, let’s look at how you set one up. The entire process is quite simple. It will only take you a couple of seconds or minutes, depending on how large of a Gmail group you wish to create.
Here’s how you do it.
1. Start with Google Contacts
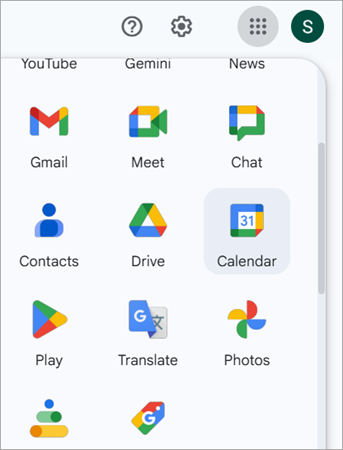
To open Google Contacts, you have two options. Either enter contact.google.com in your browser’s URL box or simply hit the 3×3 grid of dots you’ll see on the top-right corner of your Gmail account. Select “Contacts” from the menu.
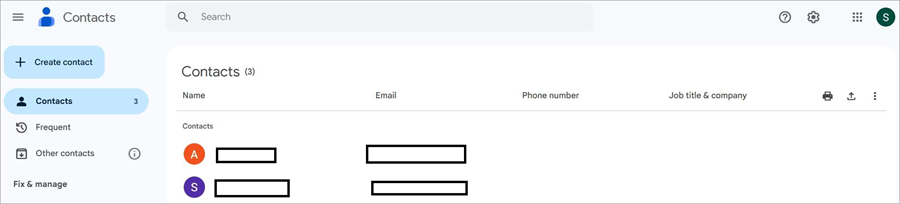
In the “Contacts” section, you’ll find all the email addresses you’ve communicated with since the inception of your Gmail account.
Further Reading => How to Create a New Gmail Account
2. Create a Label

You now need to move your attention to the menu on the left side of your screen. You’ll find the Labels option here with a + icon right beside it. Hit the + button to create a label. Give your label a name.
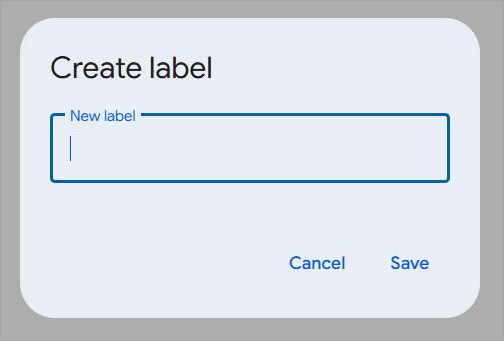
For example, if I am creating a group consisting of members from my QA team, I’d simply name it “QA Team”.
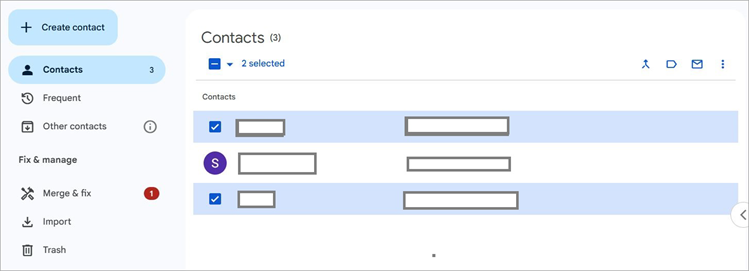
3. Adding Contacts
With your label created, it is now time to populate it with contacts. You’ll find email addresses in the “Contacts”, “Frequent”, and “Other Contacts” sections.
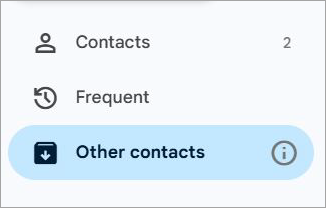
Simply check the box right next to the email address if you want it included in the group. With all your email addresses checked, click on the “Manage Labels” icon right above the contacts section and click on the label you just created from the drop-down menu.
Also Read => Best Email Verification & Validation Services
Just like that, with a single click, all your checked email addresses will be added to this label.
Congratulations, you’ve created an email group. However, you are not done yet. It is now time to send a mass email.
Ways to Set Up a Group Email in Gmail
With your label created, it is time to test it out with an actual email. So, open your Gmail account and start composing an email.
1. Select “Compose”
2. Type in the name of your created label in the To, CC, or BCC box. Gmail will automatically suggest the name of your box while you type in the label’s name. You’ll be shown the label’s name alongside the number of members it includes. (Suppose here we have created the Label “Test1”)
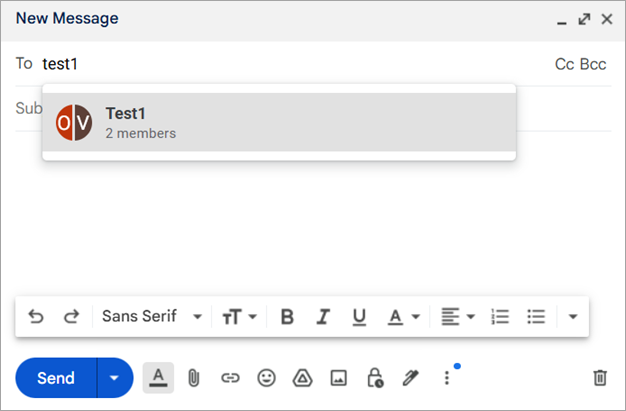
3. Select it and proceed to compose your email.
4. Once finished, simply hit the “Send” button.
You’ve successfully composed and sent a group email.
Suggested Read => How to Sign Out of Gmail on PC or Phone
How to Create an Email Group in Gmail App
Things are a little bit different, yet simple, when creating a group in your Gmail mobile app. Here’s how to create an email group in Gmail on iPhone and Android.
1. Open the Gmail app on your phone
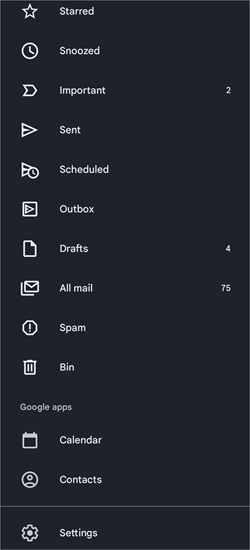
2. Tap on the three lines you’ll find in the top-left corner of your screen.
3. Select Contacts from the drop-down menu.
4. To create a new label, tap on the “Manage Labels” icon right above the contact list.
5. Name your label and save it.
6. Now tap and hold the contacts you wish to move to the newly created label.
7. Once all contacts are checked, tap on the three dots above and select add to label > label name.
8. The contacts will be moved to that label.
If a contact you wish to add isn’t on the contact list, you can add it yourself by tapping on the giant + icon you’ll see at the bottom of your screen.
Further Read => Most Popular Email Trackers of the Year
Managing Contacts in Gmail
Learning how to create an email contact group in Gmail is one thing, but managing all the contacts your account holds is another task altogether.
1. Importing Contacts or Creating New Ones
It is easier to add an already existing contact to your newly created group. However, what if the contact you wish to add isn’t in your contact list yet? Thankfully, Gmail does offer you a way to add this new contact to your group simply and efficiently.
Simply follow the steps below to create new contacts or import an existing list:
1. Click on “Create Contacts”. You’ll find it at the top of your side menu on the left.
2. Add the details in the given fields (Name, Job Title, Email, etc.) and hit the save button.
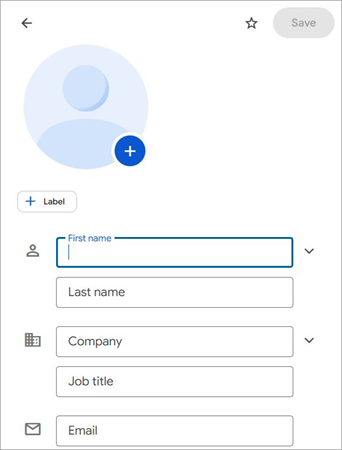
3. You’ll also have the option of adding this new contact directly to your label by clicking on the +Label option above and selecting the group name where you wish to place the contact.
Alternatively, you can import multiple contacts by clicking on the “Import Contacts” option. You can import contacts from an XLS or vCard. You can also export contacts in the form of a CSV file.
2. Deleting Contacts from a Gmail Group
If adding a contact is easy, it makes sense that deleting it would also be simple. All you need to do to delete a contact is the following:
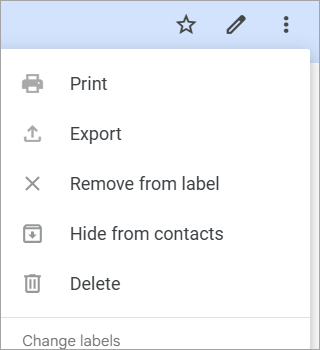
- Open the Label
- Click on the three dots next to the contact you wish to delete.
- Select “Remove from Label”
You’ll also see the option to delete the contact. Note that doing so will permanently delete the contact from your account after 30 days. If your goal is to only remove the contact from your group, keep your fingers off the “Delete” button.
Useful Tips For Managing Your Gmail Group
I’ve seen people create a Gmail group to then never pay attention to it again. It is important to check your group and do the necessary due diligence to ensure it remains useful whenever you have to send a mass email.
Here are a few tips I suggest you keep in mind to get the most out of your Gmail group.
1. Keep it Updated
Team dynamics change all the time. New members are added while others leave. You need to keep a tap on this and keep your Gmail group up-to-date accordingly. Continuously update your Gmail group by adding new members and deleting those that no longer have any business being in it.
Also Read => Top-Rated Free Business Email Accounts
You don’t want to send a sensitive message to someone who is no longer part of your team. At the same time, you don’t want a new member left out of a critical email because you forgot to add them.
2. Keep Your Group Name Simple
People have the habit of getting snappy with group names. This can cause you problems. I would suggest keeping this name short and specific to the people it is addressing. As I said before, simply naming by Group as QA Team is enough and gets the job done. If I want to get in touch with my QA team, I know what to type in the address bar.
3. Be Careful When Removing Labels
When deleting a label, you’d be confronted with two options. You can either keep all the contacts and just have the label deleted or delete the contacts along with the label. Choose the former option if you don’t want to permanently delete the contacts it contains.
Major Benefits of Creating an Email Group in Gmail
If you are one of those folks who don’t know how to create an email group in Gmail, don’t try to beat yourself over it. Many folks who’ve been using Gmail for decades have no idea you could create an email group in the first place. Most people that I know have often taken the time-consuming route of sending mass emails.
This is because a large majority of people didn’t see the point of creating such a group until now. Things have changed. People today value their time more than ever. If there is an easy, more convenient way to shoot mass emails, they are going to take it.
Here are just a few benefits of creating an email group.
1. Making Sure Nobody’s Left Behind
Let’s say you have to send a mass email to at least 20 people on your team. How sure are you of remembering every one of their email addresses? Most folks aren’t blessed with a sharp memory. You are bound to forget someone when creating your email list.
Creating an email group in advance solves this issue. By sending an email to a group, you ensure no one misses out on a critical message.
2. Keeping Everyone Informed in Your Team
Gmail groups are an excellent way of keeping everyone in your team connected at all times. Such groups are particularly useful when you have a remote team that’s scattered all across America or even the world.
You could send out a message on a critical project, and everybody else can chime in with their own opinions on the matter. The ensuing email thread ensures that everybody stays in the loop during the discussion.
3. Boosting Collaboration and Productivity
By creating a Gmail group, you are essentially creating a space online where everyone on your team can come together and collaborate to attain a common objective. All conversations in the group ensure that everybody knows what’s going on at all times.
Chances of miscommunication or misunderstandings are very low, thus allowing everyone on the team to perform their assigned duties competently.
4. Building a Positive Workspace Culture Online
It is tough to connect with your fellow workers when everyone’s working from a distant, remote location. Online spaces like a Gmail group ensure people can connect and communicate with each other. As such, companies have the opportunity to build a positive work culture even in the absence of a physical office space.
In my opinion, creating Gmail groups is a must if you have a remote team. Not only are you saving time when communicating with them, but you also have a chance at creating an online space where colleagues can build a strong rapport with each other.
Further Reading => Top Bulk Email Services to Look For
Here is the video on how to send customized bulk emails:
FAQs to Create Email Contact Group in Gmail
1. Can you create a Gmail account for a group?
Google offers a special feature that specifically serves the interests of project teams, clubs, or any other group of people who want a space to collaborate and communicate online.
To create a Gmail account for a group, simply follow the steps below:
1. Open Google Groups and select “ Create Group.”
2. Give the group a name and mention the email address you want to use. It will end in @googlegroups.com.
3. Now select “Collaborative Inbox.”
4. Choose members who’ll be authorized to access all of the inbox’s features.
5. Specify the necessary permissions.
6. Finally, click “Create”.
2. How do I send mass emails to a group?
To send a mass email, you’ll first need to create an email group. Simply follow the steps below to do this:
1. Open Gmail
2. Select the 3×3 grid of dots and select “Contact.”
3. In Contacts, click on the + icon beside “Labels”.
4. Create a new Label and give it a name.
5. Navigate to the contact list and check the email addresses you wish to add to the newly created label.
6. Once all contacts are checked, click on the “Manage Labels” icon and select the label where you want to move the contacts.
3. How many recipients can Gmail allow in one email?
Gmail currently allows its users to add up to 2000 recipients. This includes all addresses mentioned in the To, CC, and BCC sections.
4. How do I upload an email list to Gmail?
Gmail allows you to upload an email list directly to your contacts in CSV file format. Here’s how you do it:
1. Open Google Contacts
2. Navigate to the Contacts section
3. Select “Import Contacts.”
4. Choose the file from your system and click “Import”.
5. Can I create multiple Gmail addresses under one Google account?
Yes, you can create as many Gmail addresses as you like under a single Google account. However, there is a catch. You can only create 4 addresses linked to a single phone number.
Conclusion
As you can see, learning how to create an email address group in Gmail is quite simple. It is something I recommend team leaders and company heads do to stay connected and communicate more efficiently with the people working for them. A Gmail group will help you overcome the many mistakes that commonly occur when sending mass emails.
With a group Gmail, you don’t have to worry about sending the same email to the same person over and over again. You also don’t have to worry about leaving an important contact out of your recipient list.
You’ll save yourself a lot of time and trouble by creating a Gmail group. I would recommend creating multiple groups if you must. You are only going to benefit from them. Just make sure to keep the contact list in each group regularly organized and up-to-date.
Was this helpful?
Recommended Reading
-

Explore this step-by-step guide to create a new Gmail Account for personal or business use. Learn to connect various applications with Gmail account: Almost everybody nowadays uses Gmail, as it is one of the most popular email platforms used worldwide and is user-friendly. Whenever a new user tries to open…
-
This is a complete guide on how to create a free or paid Business Email Address to establish business communication. Learn various ways to set up a Free Professional Email account: Professional communication is the most important factor for every organization, as it helps in getting new clients and makes…
-
A Brief Introduction to the Best Email Tracker in 2024: Email tracking is generally required or used for the follow-up process. The Email tracking Software is of immense use when emails are sent in bulk. What does email tracking tell us? Which factors will you get to know by tracking an…
-
This tutorial explains the step-by-step process to send an Encrypted Email in Outlook, Gmail, iOS, and Android devices with screenshots. You will also learn to open Encrypted Emails: Encrypting email is the process of encoding and decoding your messages so that they can remain safe and secure from intrusive third…


