This is a comprehensive review of the ACCELQ test automation and test management platform that includes the installation process, functionalities, etc.
ACCELQ is fast growing to be leader in the cloud-based no-code test automation space, with an approach that uniquely focusses on the design and maintenance aspects of testing in the automation life cycle.
It is an all-round platform that offers both test automation and test management capabilities for Web, Mobile, Desktop and API testing requirements. It offers intuitive and user-friendly features for testers most tools in this segment (codeless) do not offer.

This tool offers a codeless approach to test automation, and its intuitiveness and comprehensiveness can pleasantly surprise you. From experience, it is said that most tools in this segment (codeless) cater to be simple, vanilla use cases. ACCELQ seemed to bring a lot more innovation and freshness to this concept.
Table of Contents:
ACCELQ Review
=> Website: ACCELQ Website
ACCELQ’s adopts Behavior Driven test automation, with development mirroring the business processes within the application. The design-first approach enabled by the platform during test development aligns with demands in the testing world today and it also actively promotes modularity and reusability of test cases.
It also supports a diverse technology stack covering both web technologies and legacy platforms. It also offers the same robust features in testing powerful ERP platforms like Salesforce, MS Dynamics 365, Oracle, ServiceNow, Pega, and SAP. It also extends a codeless approach to full-blown Web-API-Mobile and Manual testing, in a single seamless unified flow. ACCELQ offers a similar, simplified approach to backend test automation tool, with robust support for Databases, Messaging Queues, and even Mainframes!
Having created test cases spanning UI, Mobile, Desktop and API calls, it determines how this tool could achieve seamless automation across a complex enterprise technology stack. Various workflows in the tool reflect enterprise-grade maturity and it is Agile & DevOps ready straight out of the box.
ACCELQ offers native integration with all the leading tools in the DevOps space and in the time spent on the evaluation and can easily be integrated with an instance of Jira, Bamboo Azure DevOps Pipeline, Team City, Circle CI, etc.
The process is simple and the information flow between the tools is thorough.
Getting Started With ACCELQ
ACCELQ is a SAAS offering delivered both on cloud and on-premises models. Once the accounts are set up on the cloud, all it takes is the click of a link in an email to get started. Out-of-the-box support is also available for SSO against leading IDPs, but here, we chose to set up our trial with ACCELQ’s native authentication.
Being a completely cloud-based application, not having to install an IDE makes things a lot simpler. In fact, the tool’s sleek and modern UX driven design is one of its clear differentiators. Very few tools in the testing space can claim a UX/finish that comes close to this offering.
Before jumping into the functionalities of the tool, let’s see a couple of simple initial set up steps:
Step 1: View Recorder
=> Download ACCELQ – View Recorder Chrome extension
This is a Chrome plugin for analyzing the UI layout of the application for test development.

Step 2: ACCELQ Local Agent
The Local Agent is a REST-based Java client and will run on a machine where the actual test executions take place. This allows you to test your application behind the firewall, while you are still subscribed to ACCELQ’s cloud service. There is no need to expose the application-under-test to ACCELQ services.
In our evaluation, we were able to test applications in our internal network without any hassles.
Note: ACCELQ provides a couple of cloud-based agents to utilize for test execution during trial/evaluation. Therefore, setting them up was not a mandatory step for our trial.
The setup of the local agent is straightforward and involves downloading the agent, unzipping it, and updating the properties for the agent to register with the ACCELQ server. The properties, too, are generated through a guided approach and the details of each of these fields are clearly laid-out, making it an uncomplicated process.
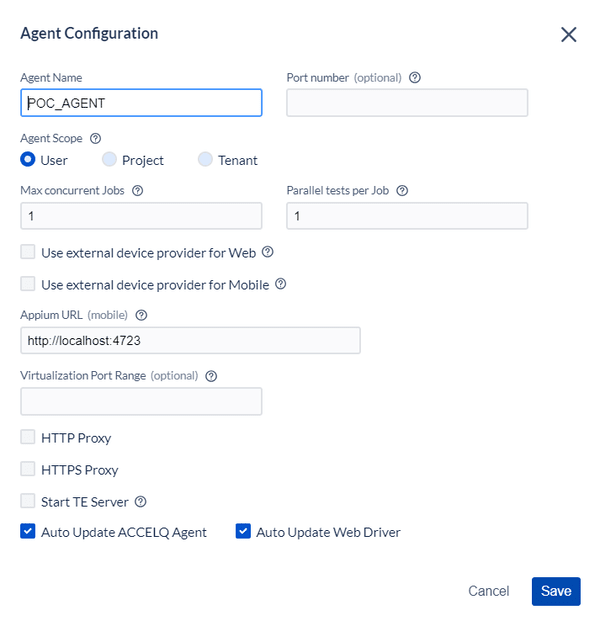
We set these up in a few minutes, and the process is well-documented on ACCELQ’s support site and contextually in the product.
Application Layout
ACCELQ sports a clean and uncluttered look that speaks to our minimalist sensibilities. The design and layout were visually appealing and efficient.
The application is divided into four logical sections, and the navigation between pages and sections was very intuitive. Even as a beginner on the tool, you will feel that the navigation is fluidic. The UI is truly refreshing and slick! Kudos to the team for raising the bar!
The “Global Tool Bar” enables easy creation of all the entities in the tool, to search and navigate to various assets, and kick off tests.

The Help Center located at the bottom-right of the screen is a nifty addition that lists documentation and instructional videos along with access to community. And by the virtue of it being context-aware, we can quickly grasp and understand the various concepts in ACCELQ.

For the purposes of review, we chose a scenario consisting of a UI flow to understand the automation approach in ACCELQ. The remainder of the section documents our experience of exploring the tool and developing our first script in ACCELQ.
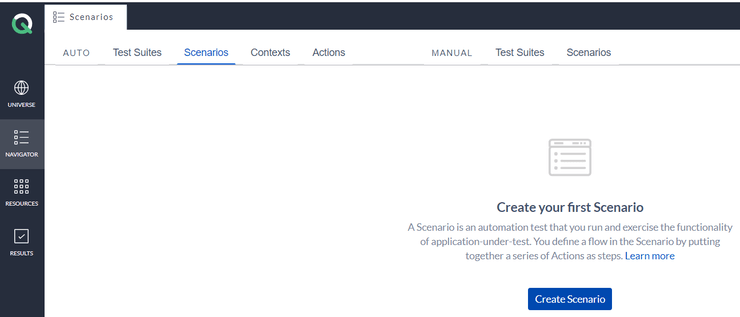
How do you create a Test Scenario?
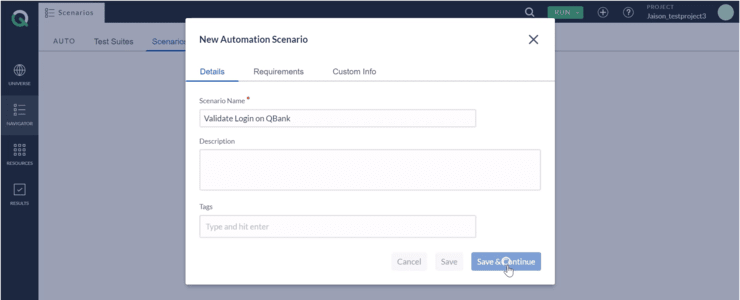
Let us get started with the creation of a test scenario. Here is the screen as it appears:
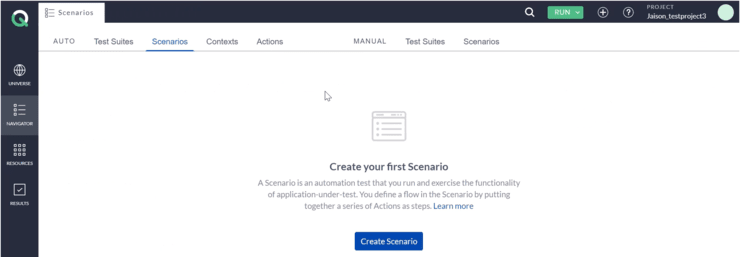
You may now provide the name of the scenario that is needed to get started with-
Now, click on Design Studio to start a recording session with ACCELQ, and begin adding steps one after another.

Proceed to enter the URL in the address bar of the inbuilt browser to load the website.
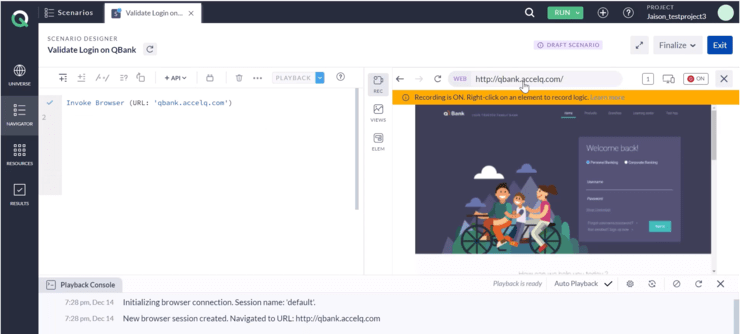
Right click on the respective elements to record your test flow.

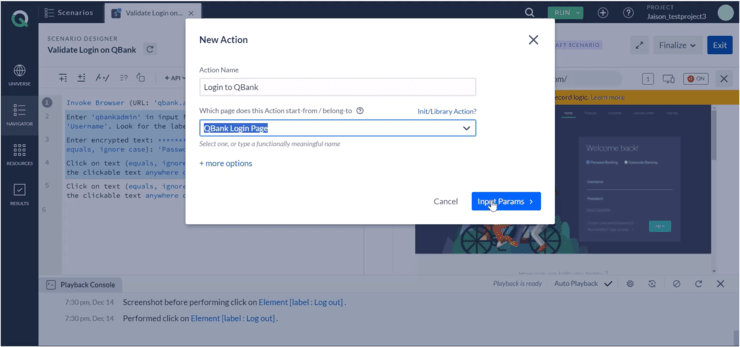
Once the above steps are recorded, we can convert them into a reusable action by selecting the function steps. Now right click to choose Create New Action and Replace.

It is now possible to provide a name to our Action and specify the page on which that action is to be performed.
Next screen allows you to parameterize your test scenarios to make it dynamic and data driven.
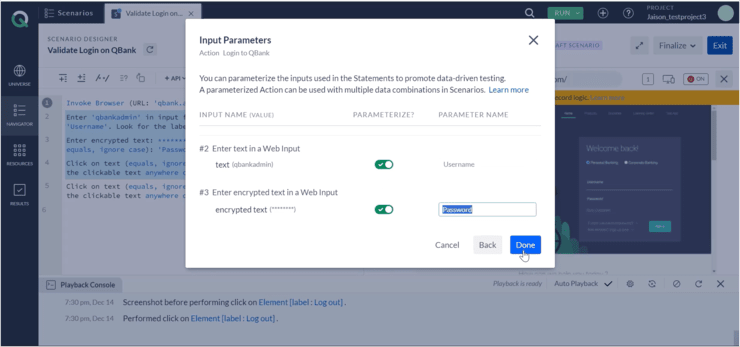
Once we convert all the steps to reusable actions we can “Finalize Changes” to complete our scenario.

Test Execution and Reporting
ACCELQ allows us to trigger the test from the top toolbar “Run” button. We picked the scenario that we had created and set necessary configuration flags (OS/Browser combinations, parallel executions, scheduled runs, notification settings, self-healing settings, etc.).

During the evaluation, the results were easily interpretable and displayed at a granular level of every operation. The tool also captured a comprehensive set of screenshots to complement the execution. Defects in Jira could be created with a mere click of a button!

Self-Healing
Self-healing codes are sought after today. Pretty much every vendor in the segment has some version of self-healing as part of their offering. To know how ACCELQ differentiates its version is something new to experience. Most tools toy around with a set of XPath variations and keep adding to the repository as the application undergoes change.
With ACCELQ, we have deliberately modified few elements, each to a different level of complexity such as an attribute change, position updates, DOM structure changes, text changes, etc. Some use cases were particularly interesting, such as synonym-based detection.
Conclusion
My past evaluations of several products in this space had rendered me quite skeptical. With ACCELQ’s claim of being completely codeless, it seems like a lot of low-code/no-code automation tools traditionally have had a rather narrow view of automation.
After having extensively used the tool, I now consider myself to be a convert who has not faced the conventional pitfalls that arise because of the compromising functionality in pursuit of simplicity. The onboarding was a breeze and made me appreciate the efforts behind it.
A quick walkthrough of the application with the view recorder resulted in a seamless creation of the structure for the scenario and all its assets. ACCELQ takes a unique approach (what they officially call a “design-first” approach) to produce test assets easy to reuse and manage.
Having spent enough time in test automation space, I know how painful the maintenance of test scripts becomes after the initially recorded flow. ACCELQ seems to have focused on this pain point, and they have largely succeeded. Element Identification is visual, and the tool is adept at picking up the right attributes.
I’ve found the scripting to be very expressive and the command library extensive. And like I had mentioned, reporting was top notch!
In my opinion, ACCELQ is a bold attempt which really sets the tone for the future of Quality Automation Tools. Bravo to the team for keeping it simple and efficient!
Was this helpful?
Recommended Reading
-

All You Need to Know About Codeless or Scriptless Test Automation Frameworks and the Best Tools. List of Top & Most Popular Scriptless Test Automation Tools for Mobiles with Features and Comparison. This article will give you a complete overview of the Scriptless Automation Framework in simple terms. The design…
-

Data Driven Testing using TestComplete (Part-II): TestComplete is a UI as well as a functional automation tool. In our first article, we have created simple Desktop and Web projects, recorded our test, played back and observed the results through Visual Analyzer. We have extended this functionality to both Desktop and Web-based…
-

Last year we did a TestLodge review and mentioned some pros and cons of this test management tool. STH readers also shared their thoughts and requested some new features. TestLodge owner Scott Sherwood took our suggestions seriously and improved this tool with a new range of awesome features. He contacted…
-
This SOAtest Tutorial explains how to create a sample project, .tst file, test suite, and REST Client in Parasoft SOAtest. It also presents you with a glossary of the most important terms and describes major components of the application. It will provide you with an example of how a .tst…