


Streamline workflows, reduce manual tasks, and quickly boost developer productivity with Jira Cloud Automation. Explore more about its integration with GitHub and Confluence Cloud in detail:
In this last tutorial of the Jira Cloud Administration Series, we will look at how Automation in Jira works, which helps every developer avoid repetitive manual tasks. We will also look at the integration of Jira Cloud with GitHub and Confluence Cloud.
Automation in Jira helps to remove the need to perform repetitive manual tasks by automating the process and workflows.
Table of Contents:
- Basics of Jira Cloud Automation
- Example #1: Auto-create Sub-tasks when a Story issue is created
- Example #2: Automatically Close Parent Issue When all Linked Sub-tasks are Closed
- Example #3: Transition Status of Epic When one or all of the Story Issue Status Changes or Even Linked Issues.
- Example #4: Auto-assign Issues to Who Created it
- Example #5: Update Due Date for High Priority Issues Created
- Example #6: Copy the Assignee of Epic to Story
- Example #7: Commit in GitHub will Transition the Jira Issue From To Do to In Progress
- Example #8: PR in GitHub will Transition the Jira Issue From To Do to In Progress and Add a Comment to the Jira Issue
- Example #9: PR Merged in GitHub Will Transition the Jira Issue From In Progress to Done
- Integrate Jira and GitHub (Cloud)
- Jira and Confluence Cloud Integration
- Conclusion
Basics of Jira Cloud Automation
Suggested Read =>> JIRA with Katalon Studio
Jira Cloud has a rule builder with which one can configure automation rules based on criteria that you will be setting.
Automation rules are made up of 3 parts
- Triggers that help to kick off the rule. Every rule starts with a trigger
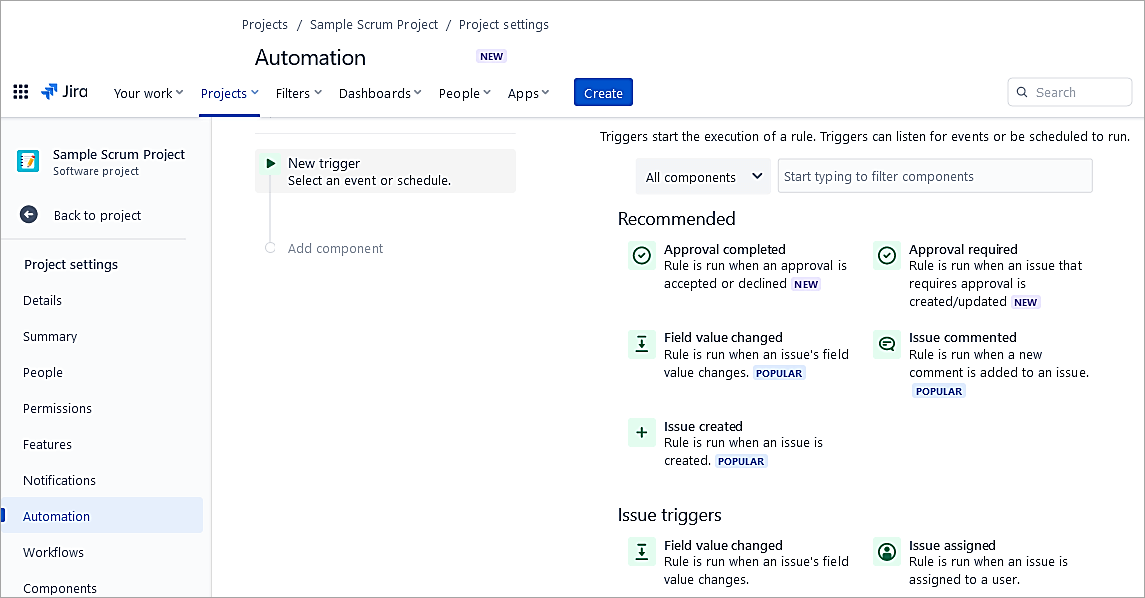
- Conditions to refine the rules defined or narrow the scope. These must be met else the rule will stop running.
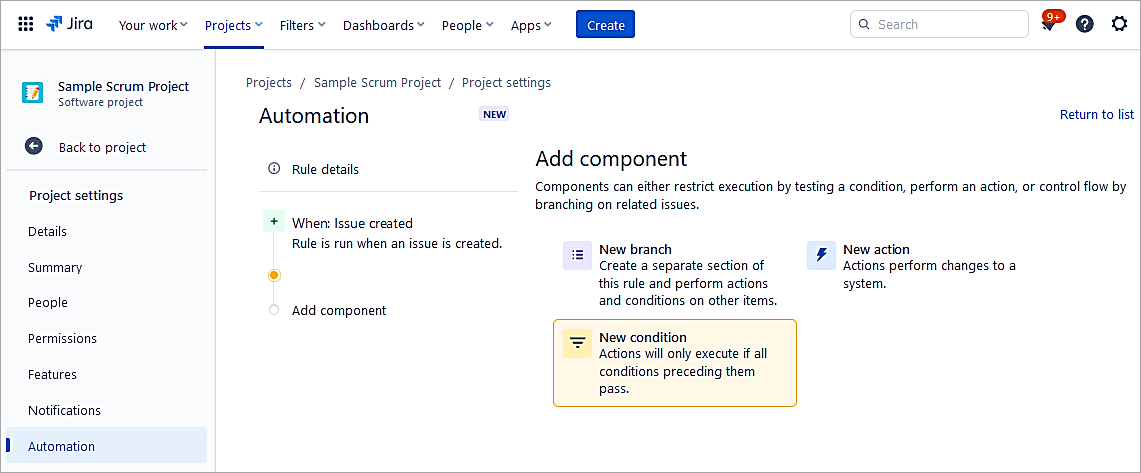
E.g., set criteria if Status = In Progress, then only proceed.
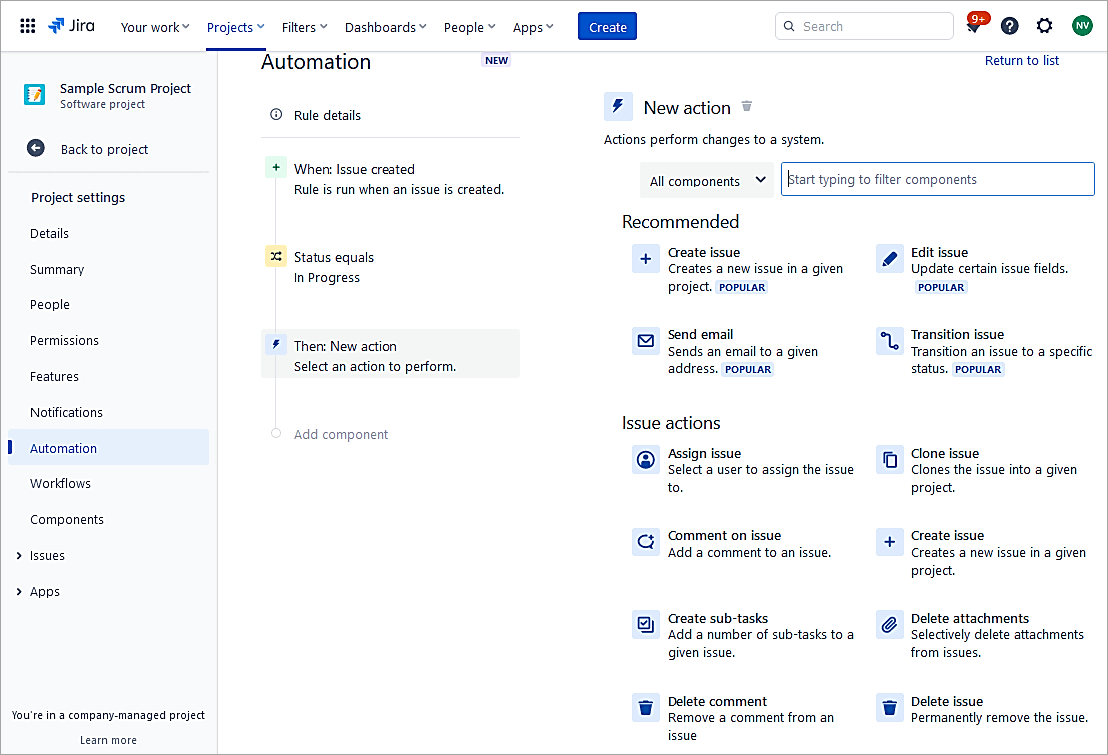
- Actions performed the task, such as editing issues, assigning issues, creating sub-tasks, etc.
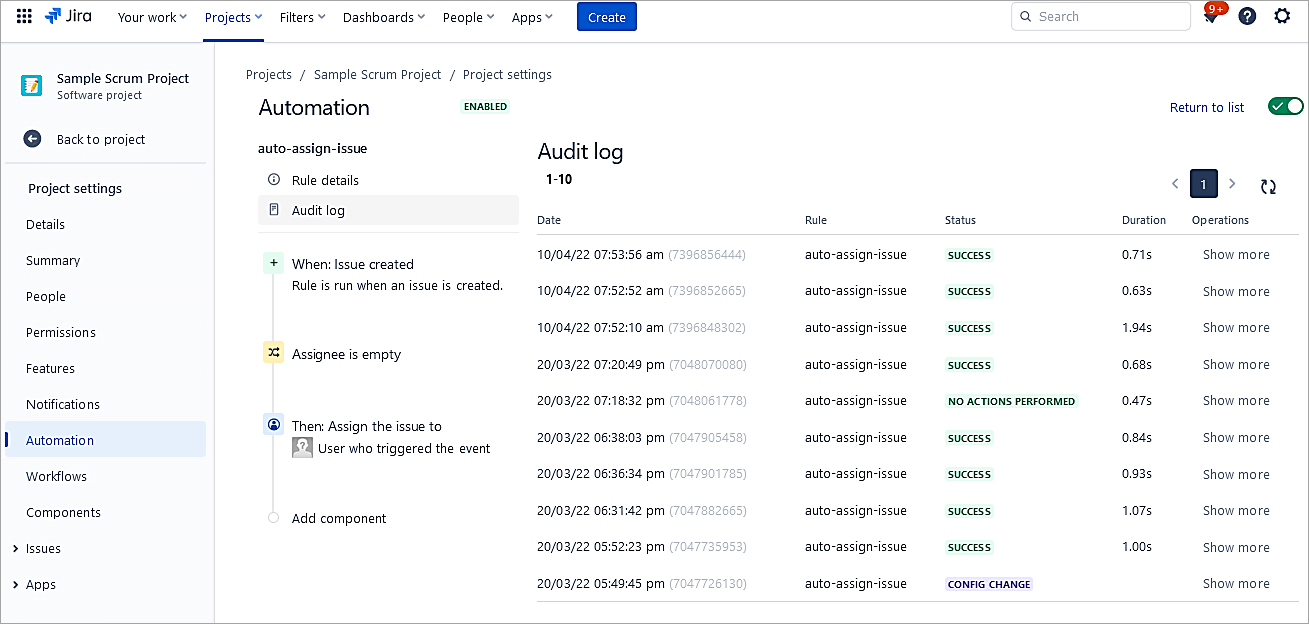
- Audit log: Every rule has an audit log to look at the results of the execution.
In the next section, we will look at common use cases of how automation in Jira works.
Example #1: Auto-create Sub-tasks when a Story issue is created
In this example, we will see how to automatically create sub-tasks when a Story issue is created.
As a Jira administrator, go to Project Settings -> Automation. Create a new rule.

Find the issue created trigger from the list.
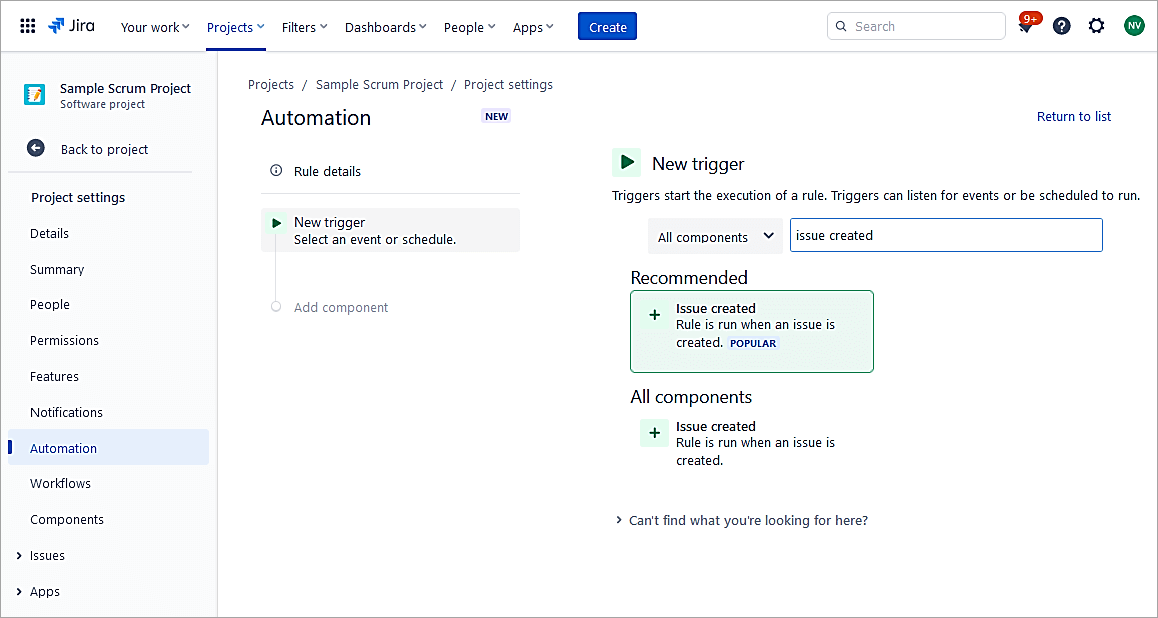
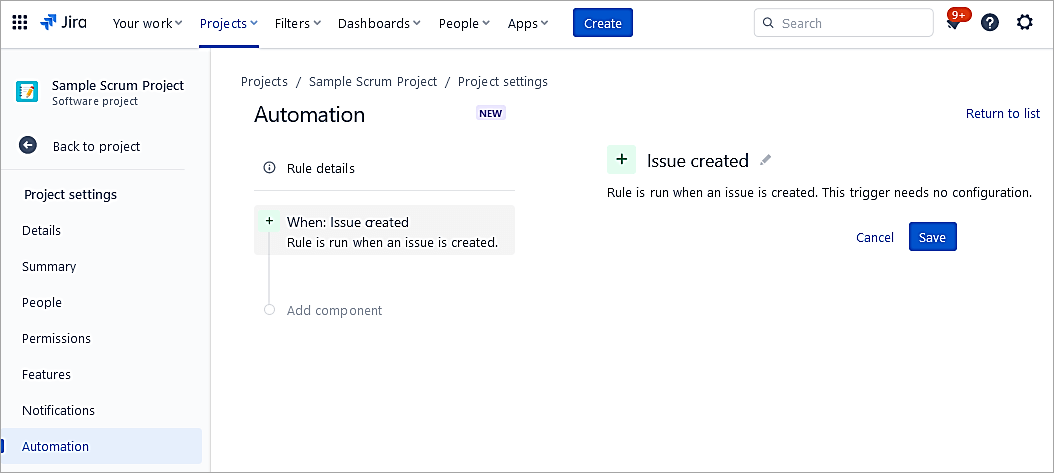
Click Save.
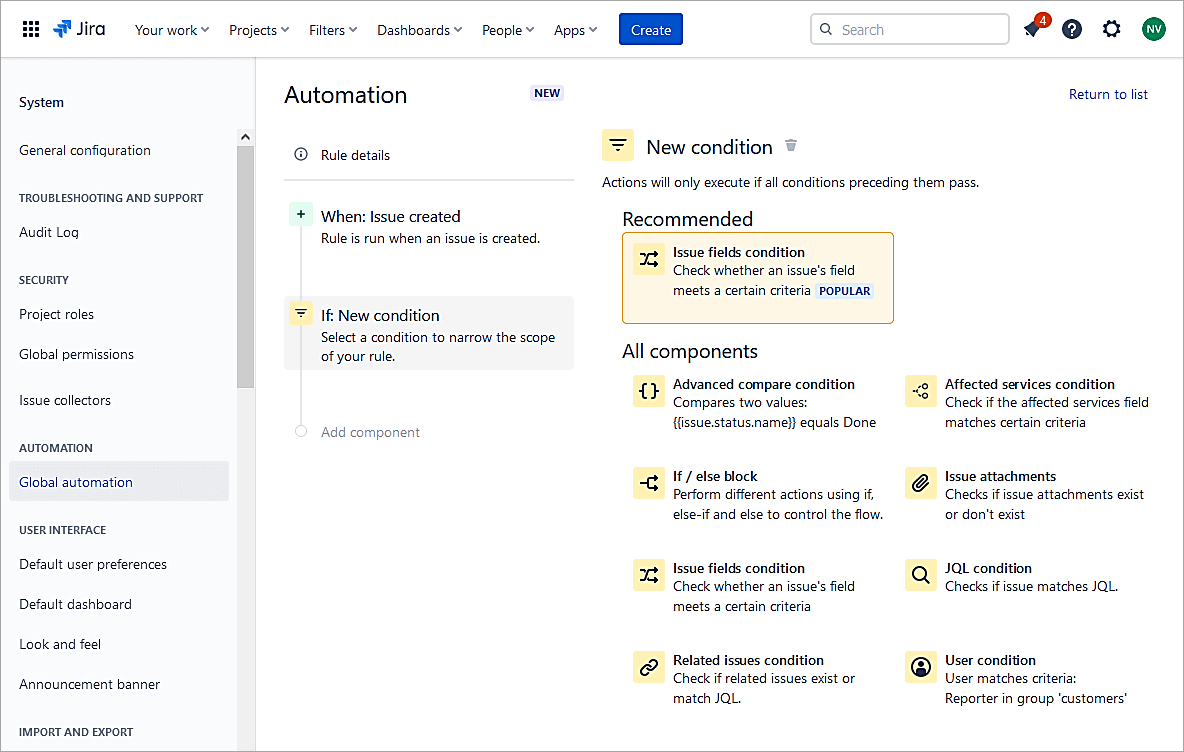
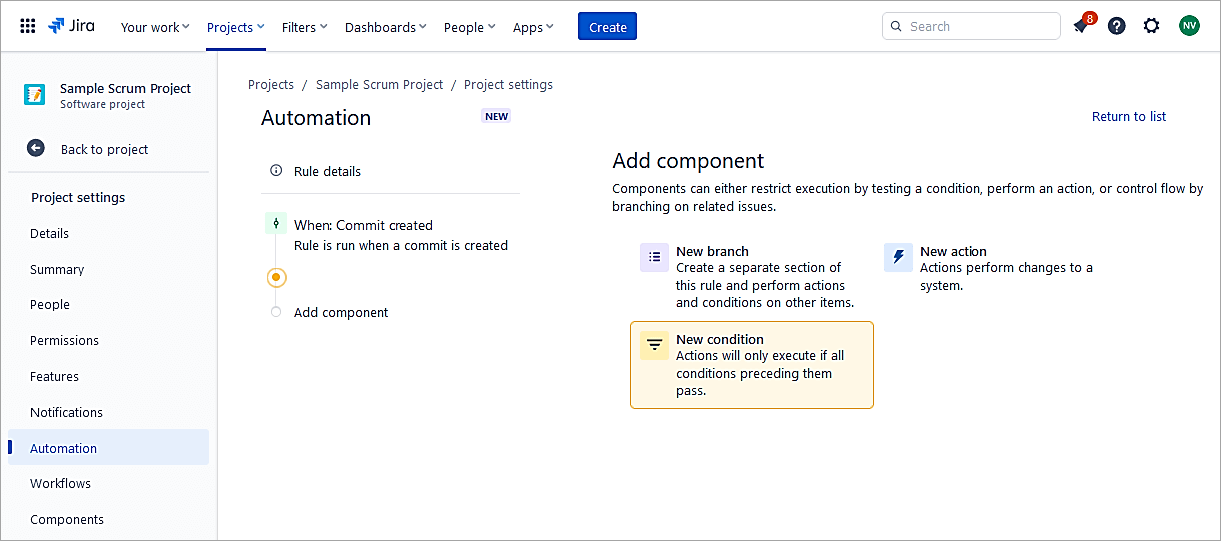
Add a New condition.
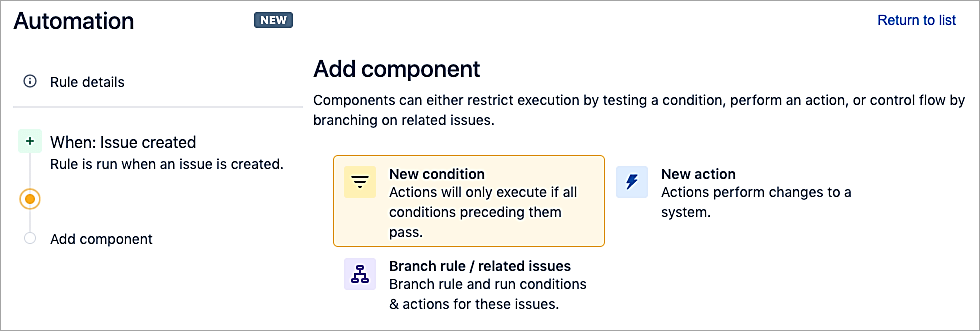
Click on the Issue field condition.
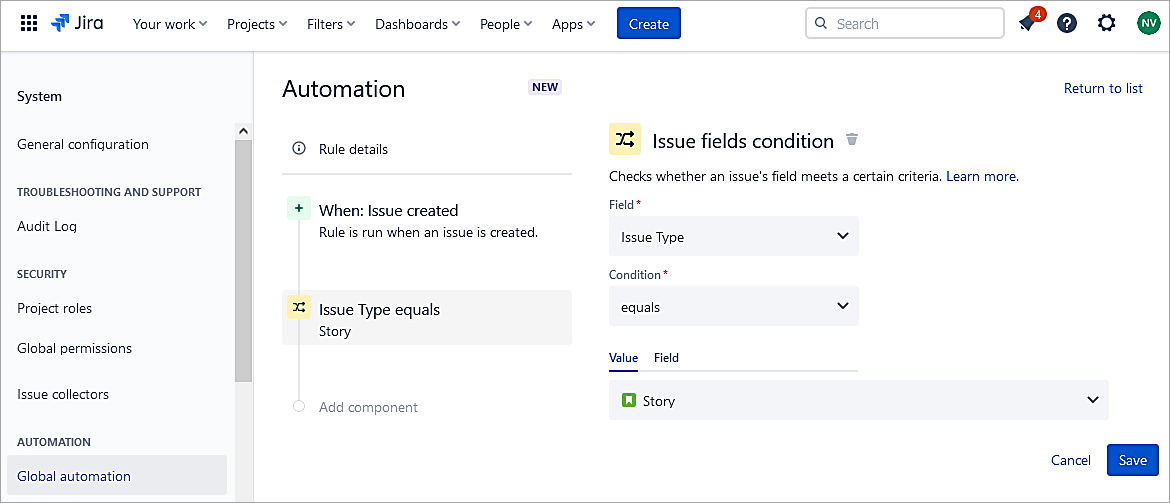
Select the Issue type field and the value is Story. Click Save.
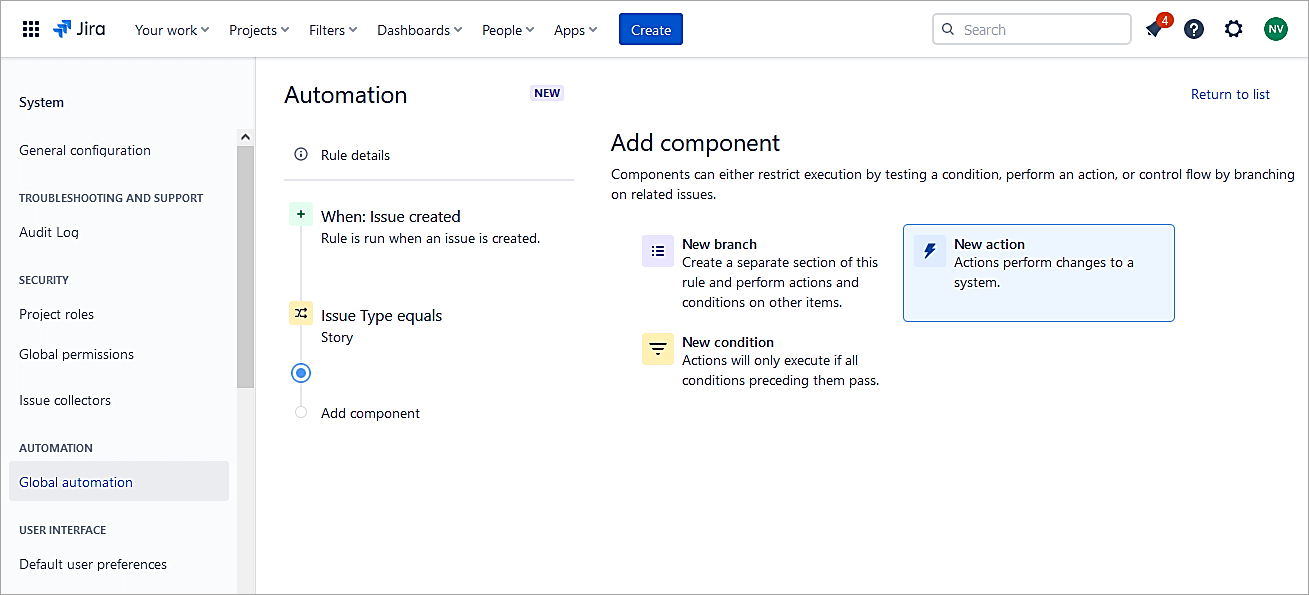
Next, add New action.
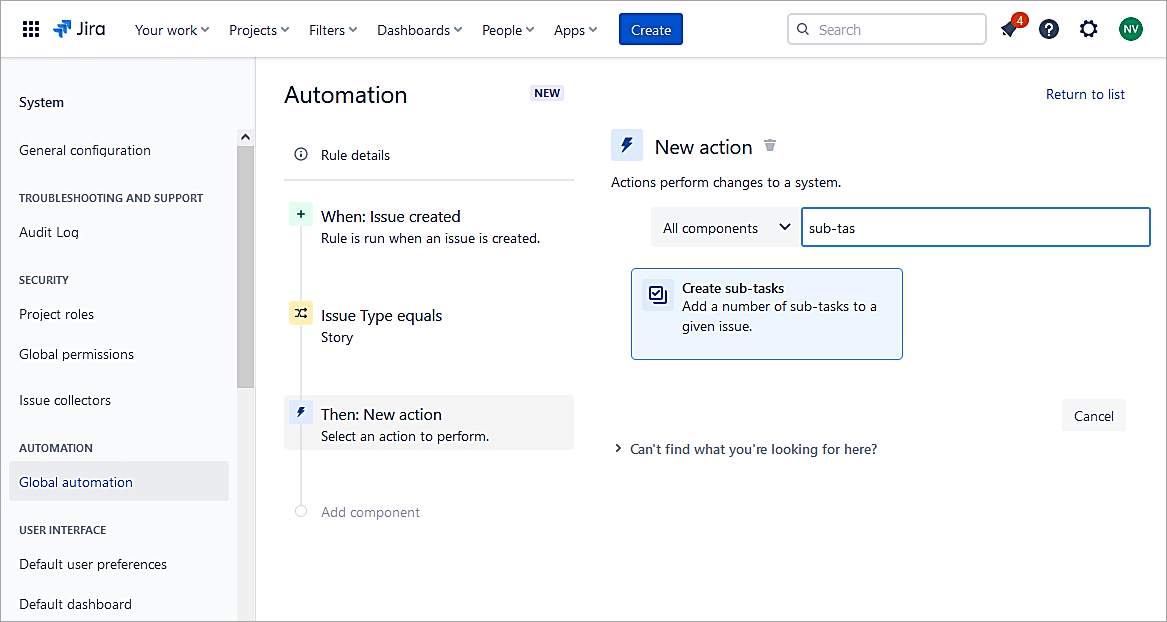
Select Create sub-tasks.
Add all sub-tasks and click on Save.
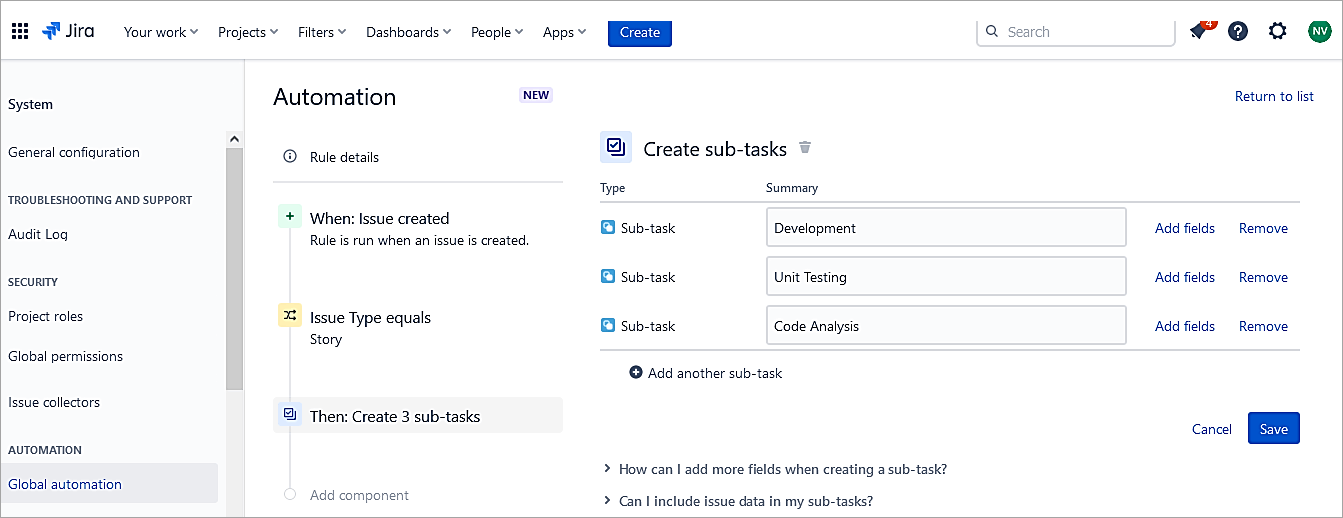
Turn the rule ON.
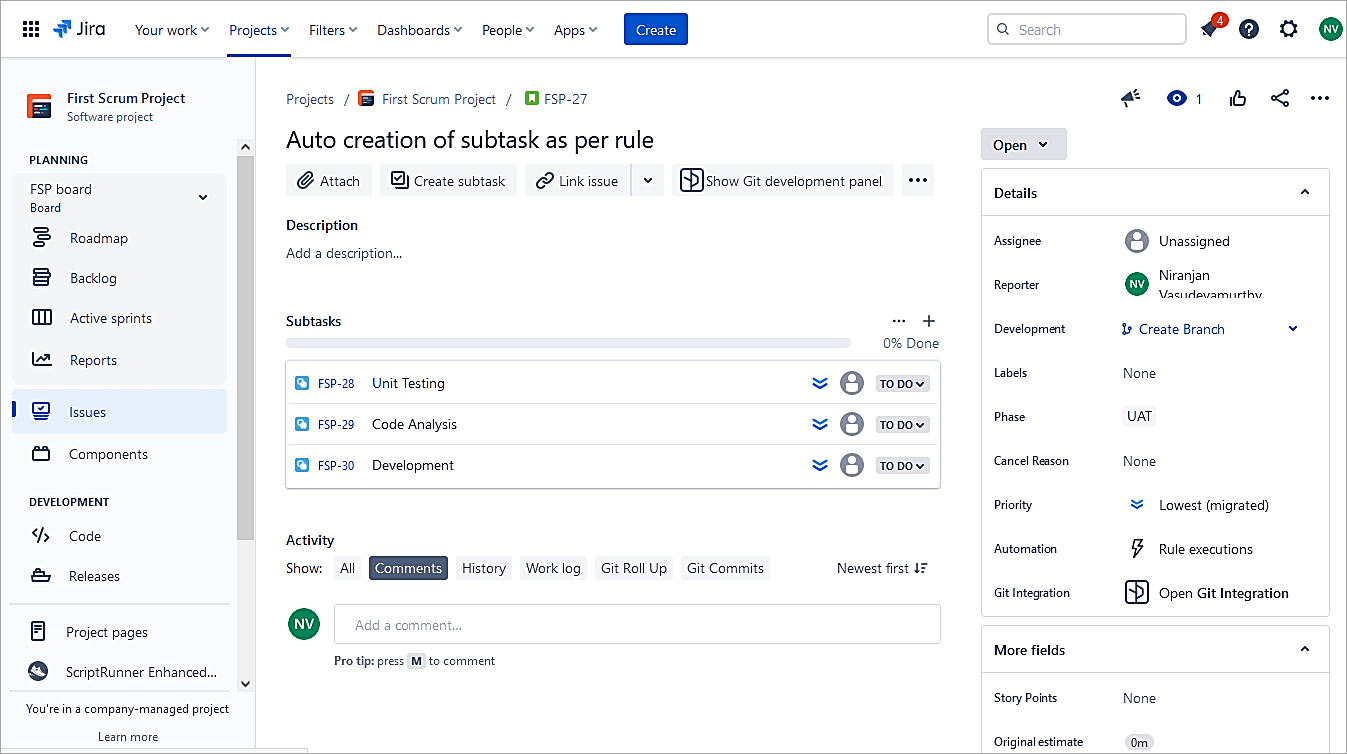
Test the rule: Create a Story issue in the project and look at the sub-tasks created automatically.
To restrict the scope to a single project, select the Rule details and select the scope to a single project.
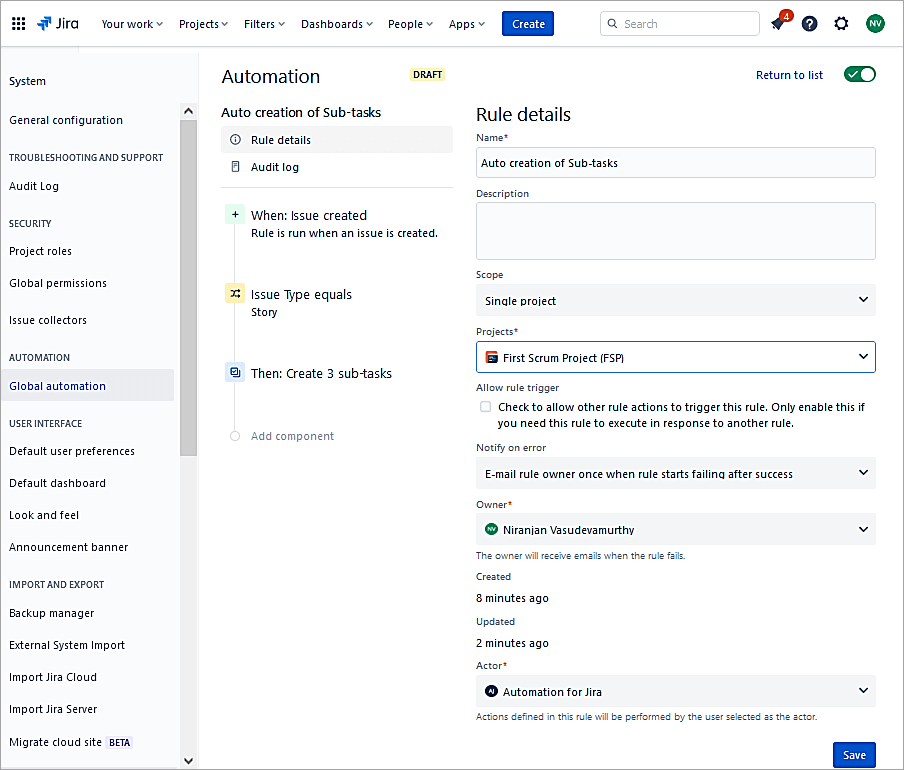
Click on Save.
Example #2: Automatically Close Parent Issue When all Linked Sub-tasks are Closed
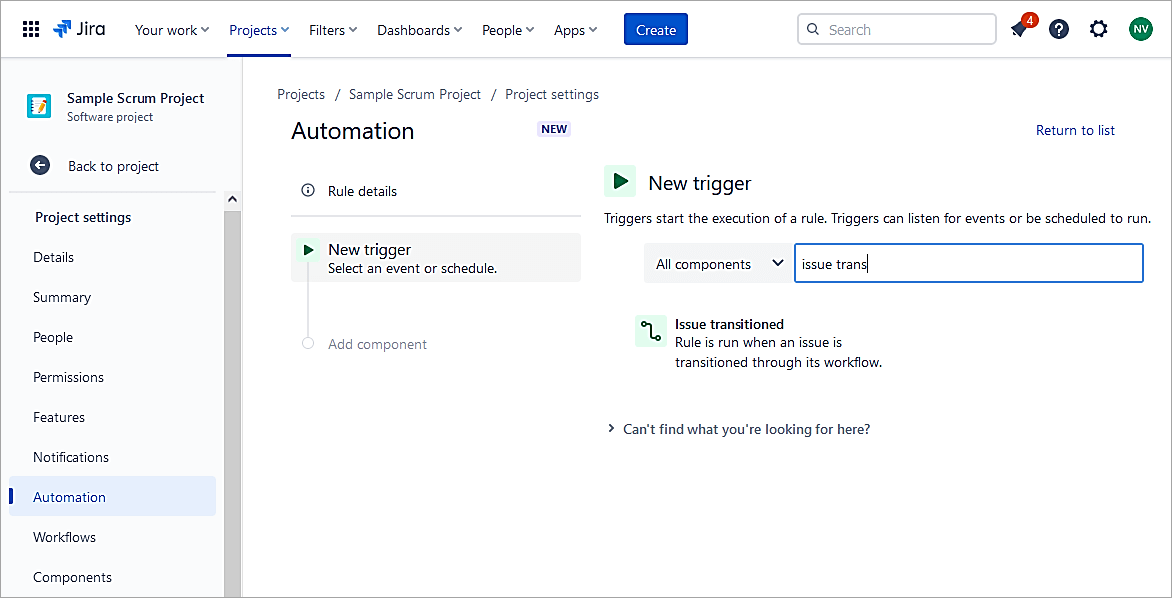
Start to create a new trigger in the project. Go to Project Settings -> Automation -> Create Rule
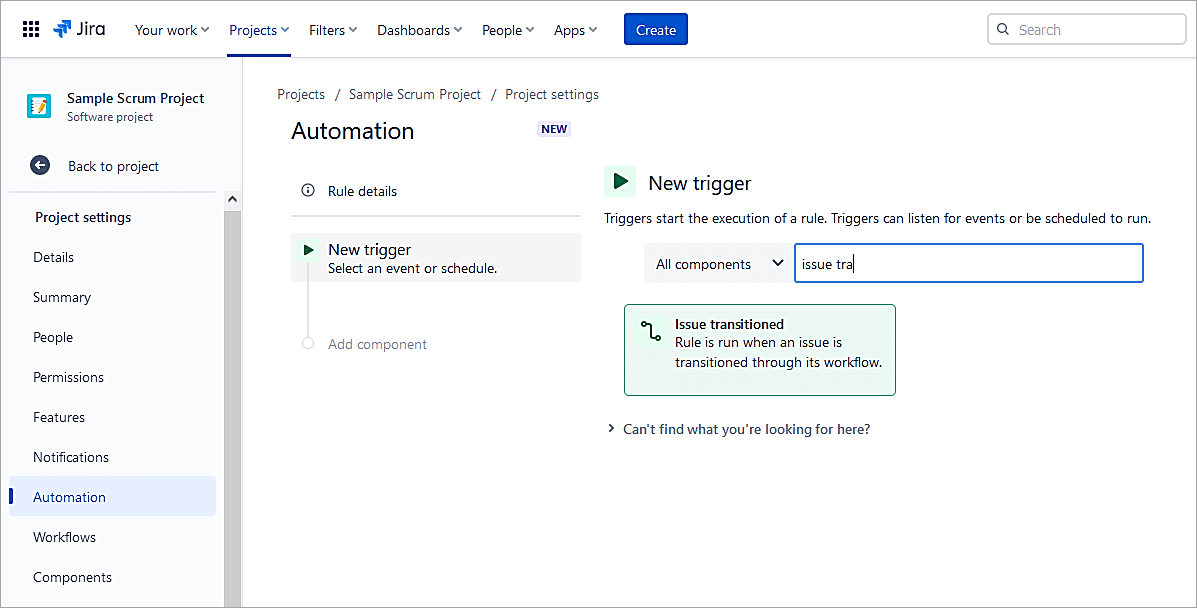
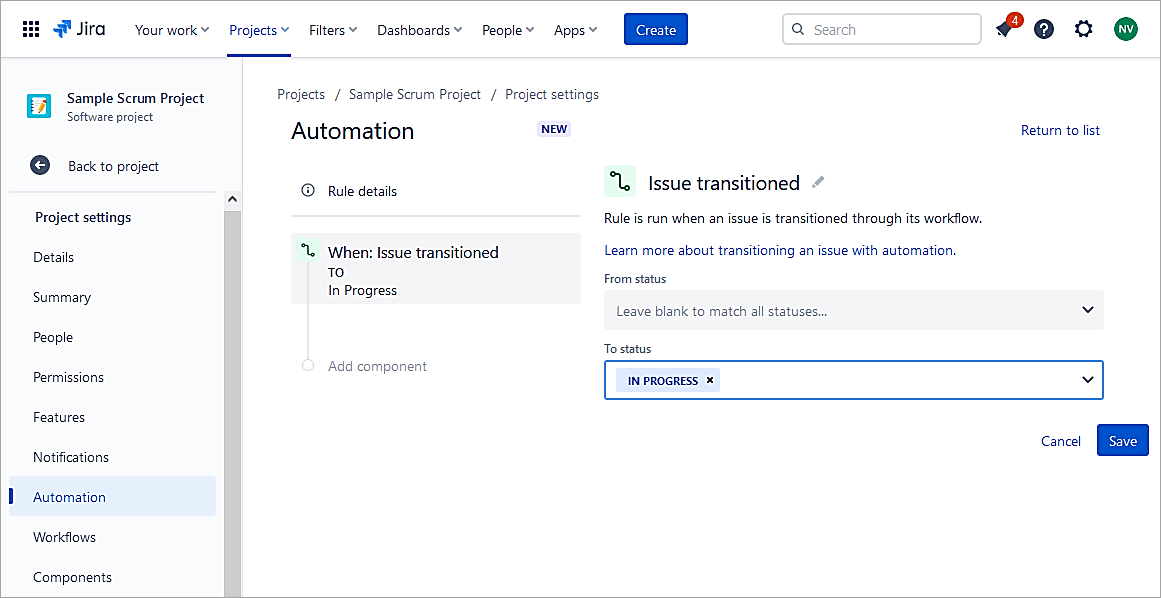
Select the New Trigger as Issue Transitioned.
Select To status to Done.
Click on Save.

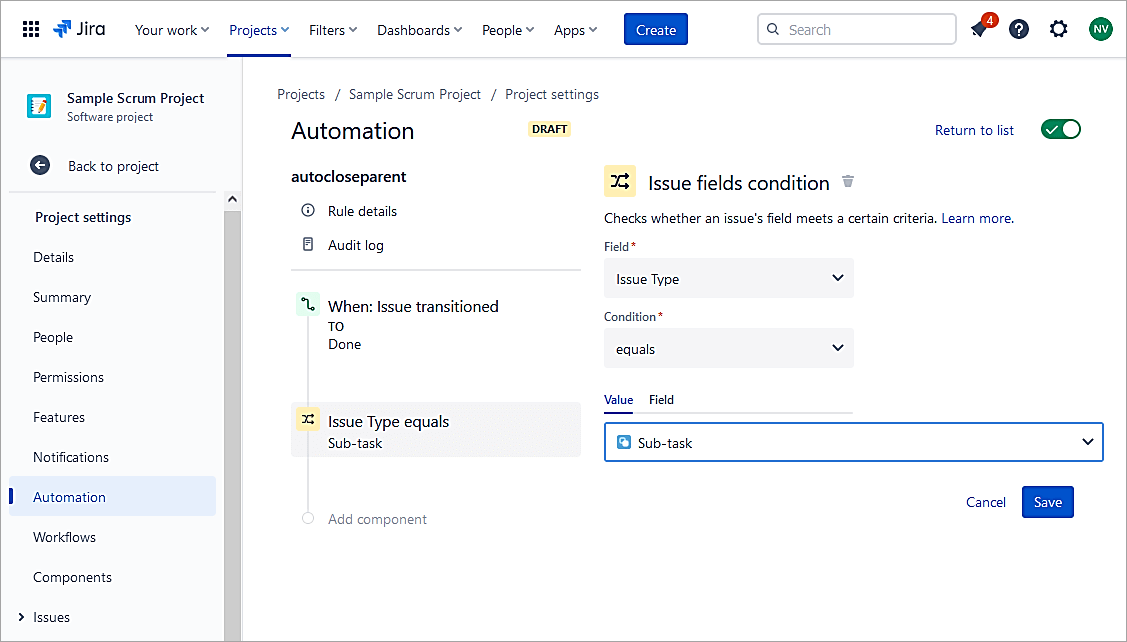
Select New Condition.
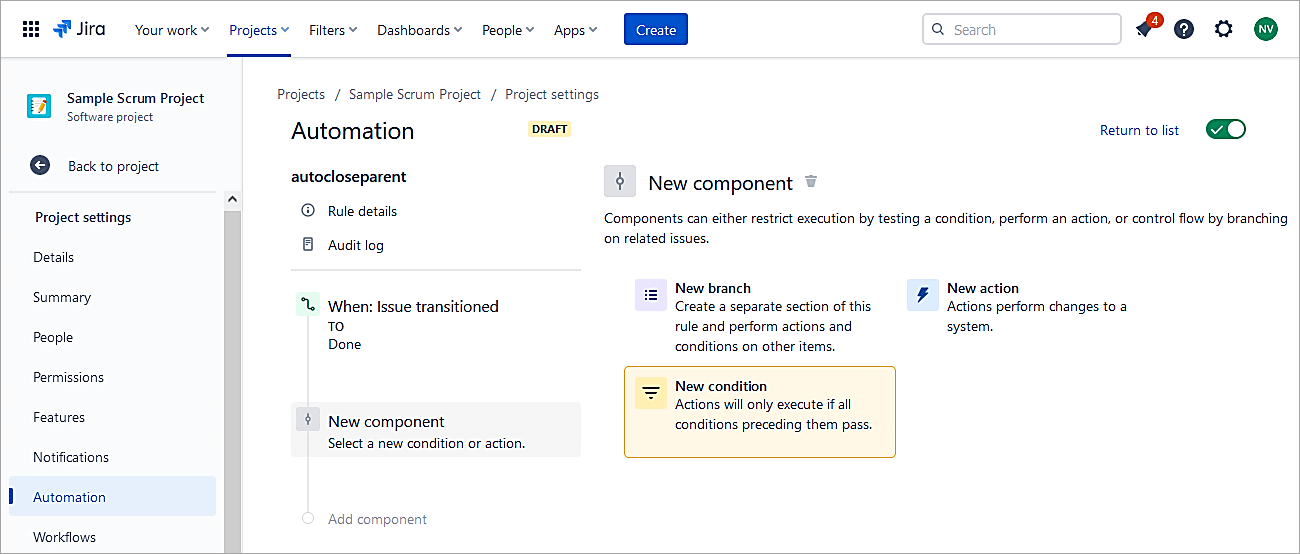
Select Issue fields condition.
Select Issue type field and value equals Sub-task. Click on Save.
Click on Save.
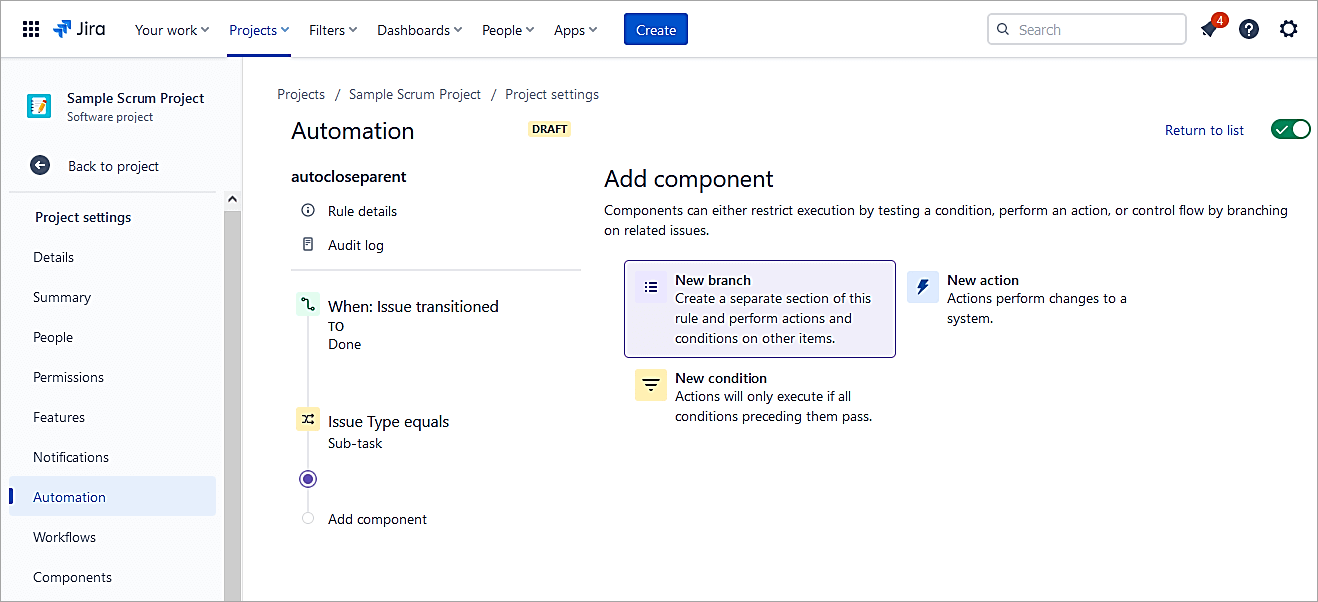
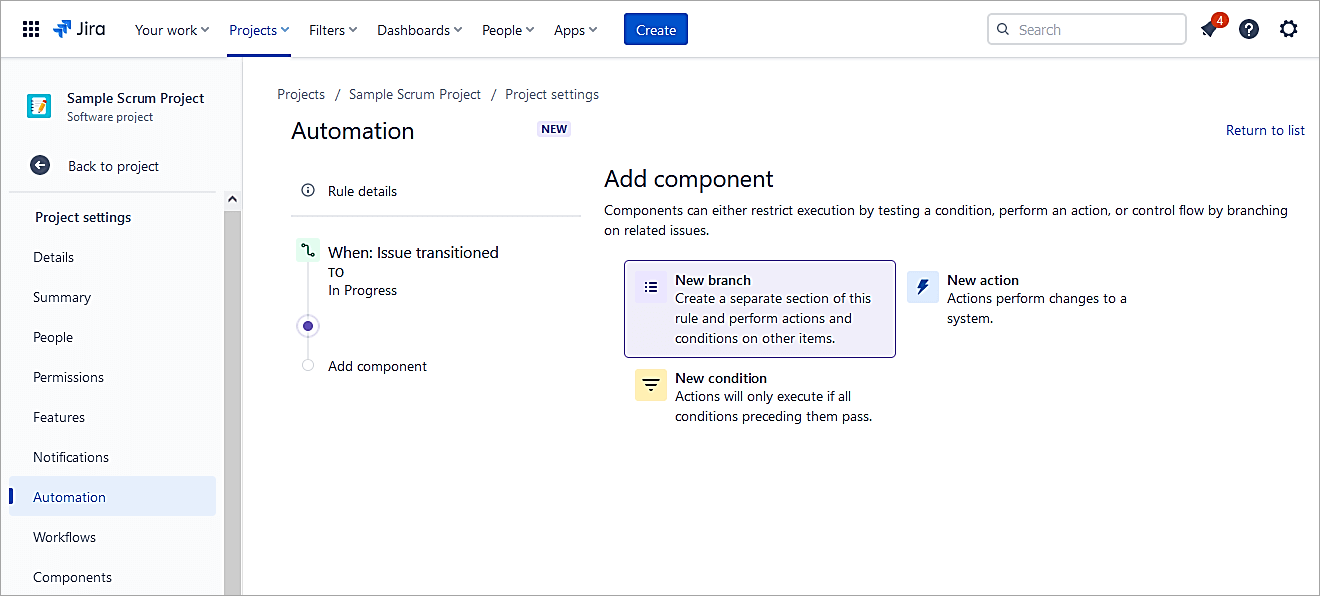
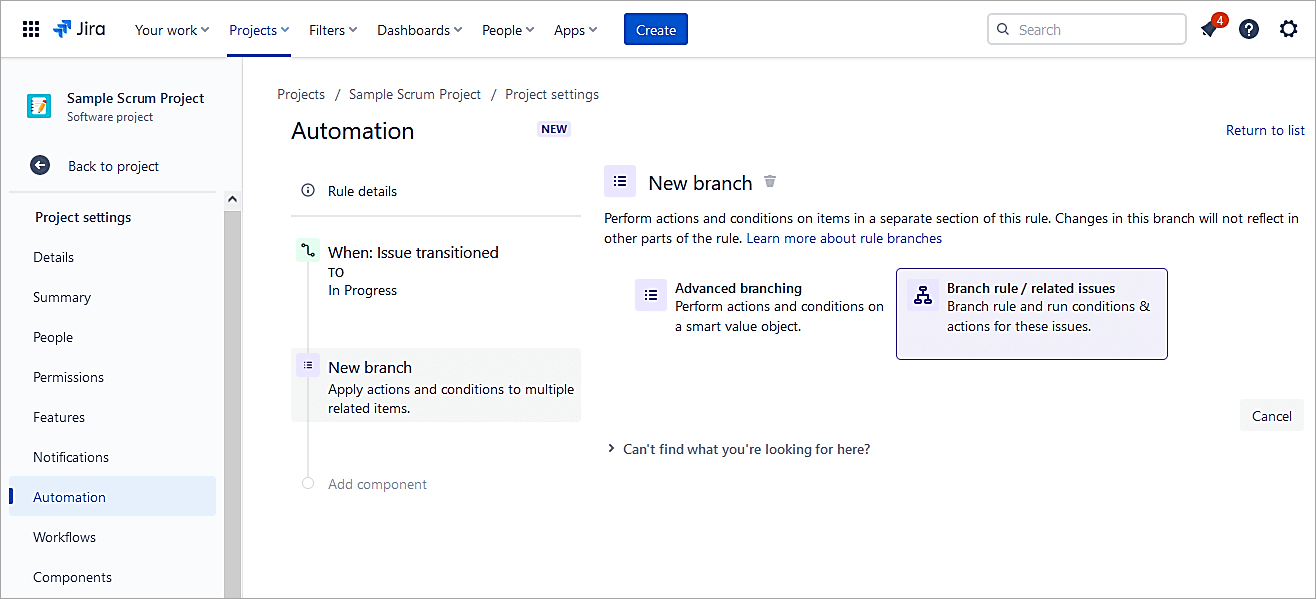
Click on New Branch. Here we mention what needs to be done for the Parent issue. In this case, it will transition to Done status.
Select Branch rule / related issues. Select Parent from the Type of related issues. Click Save.
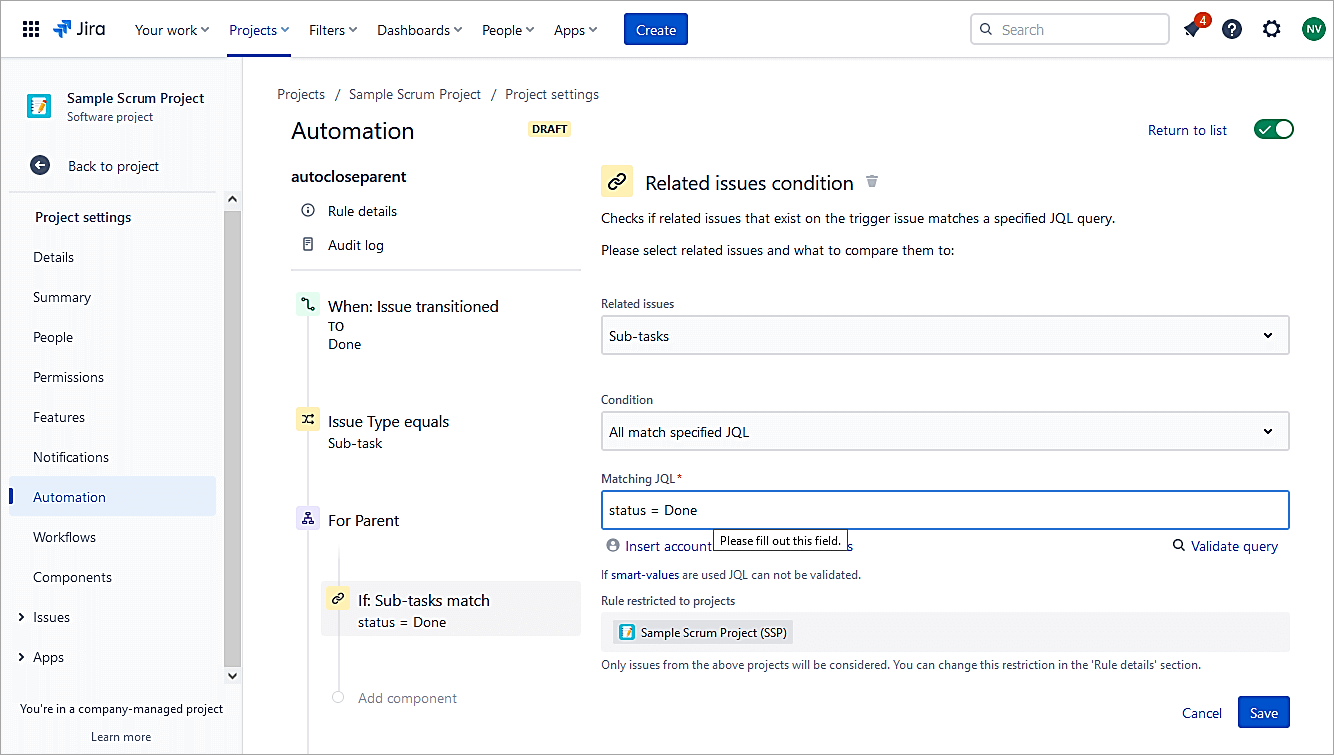
Select New condition->Related issues condition
Select the values as shown. We are checking for the status of each sub-task and if it is transitioned to Done. Click on Save.
Click on New action
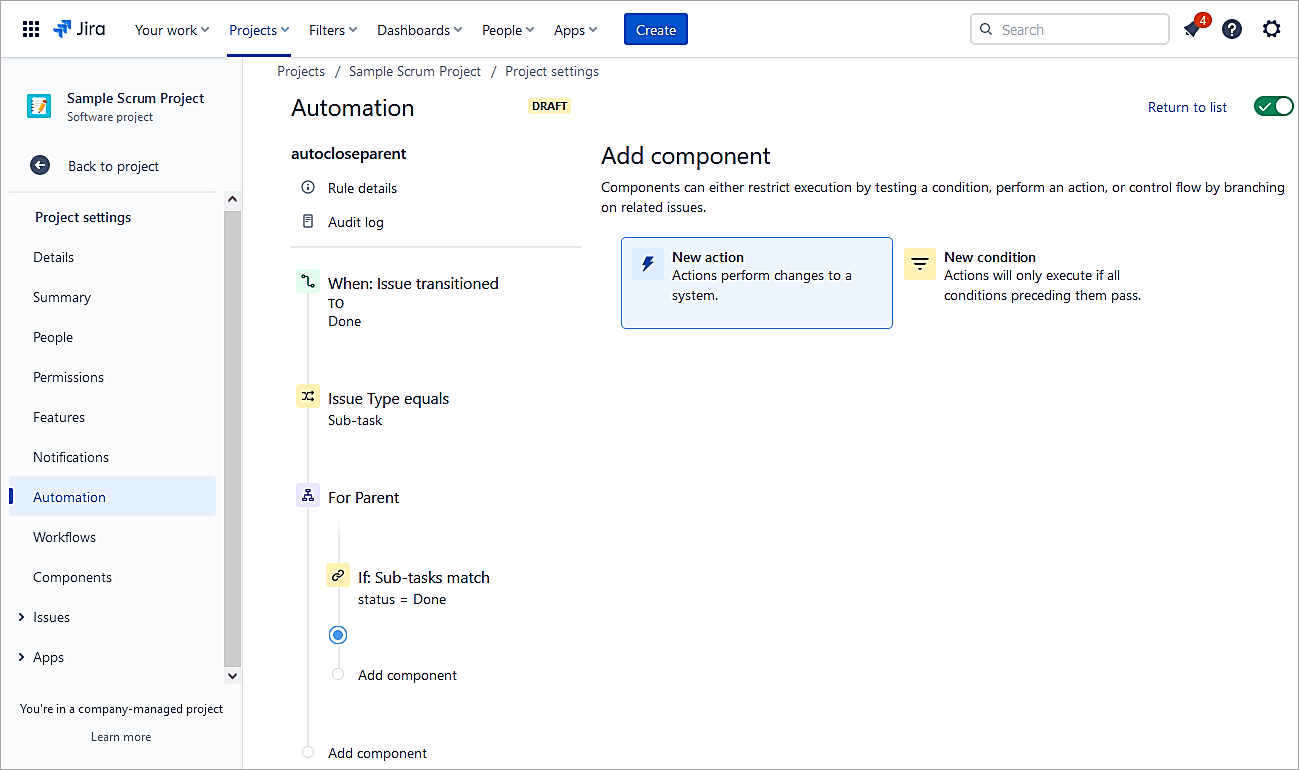
Select Transition issue.
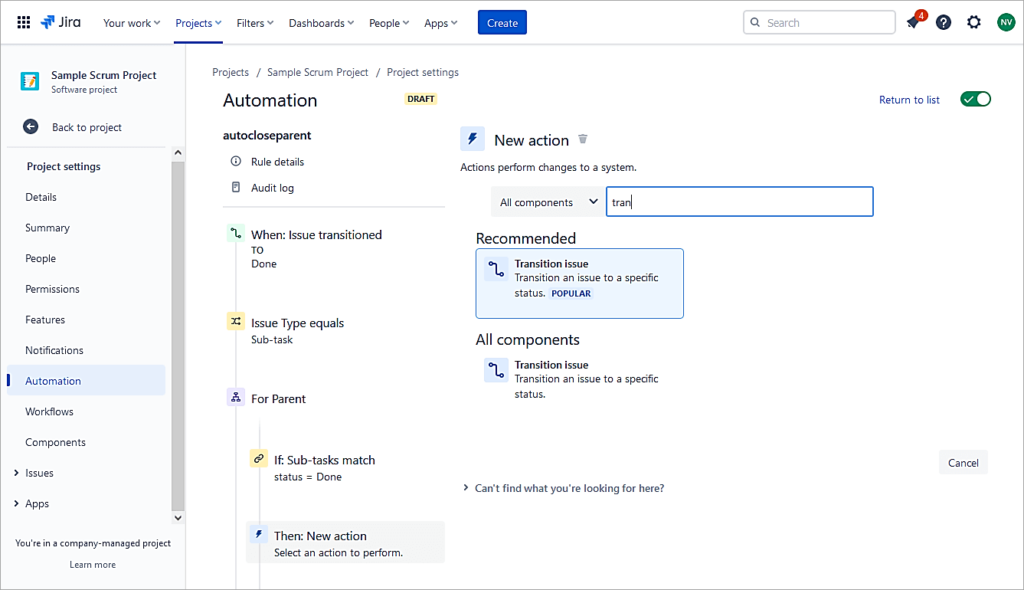
Set Destination status to ‘Copy from trigger issue’. Click on Save
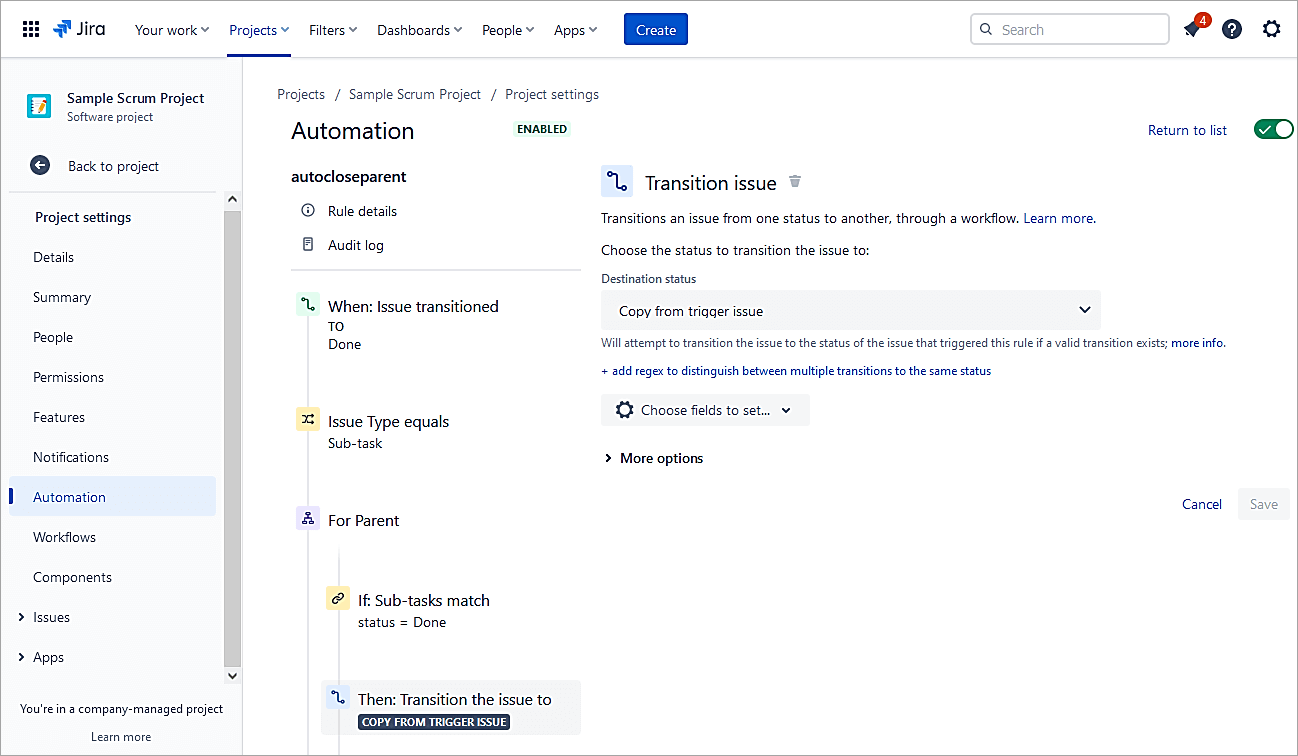
Click Save.
Publish changes Or Provide a name and switch the rule ON
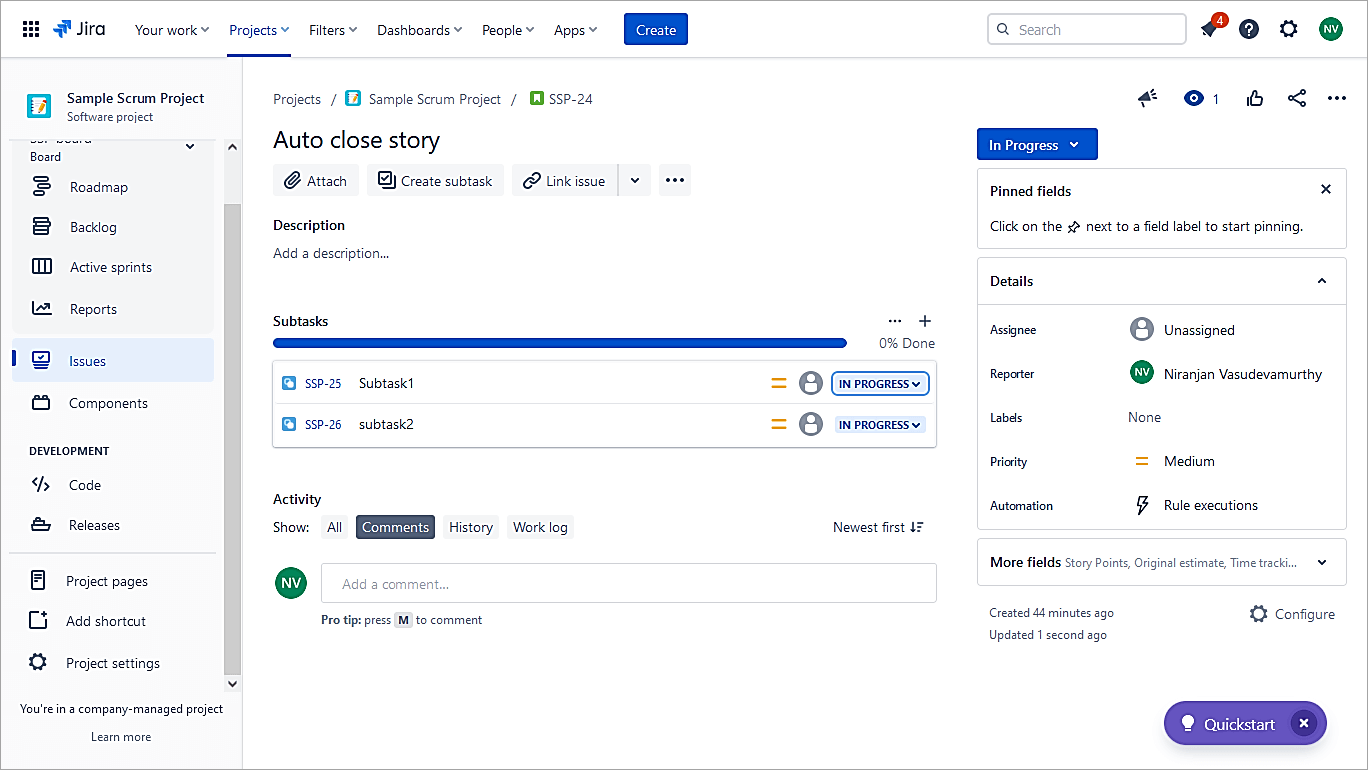
Test the scenario. In the example, the Sub-task is at the In progress status and also the Story is in In progress status.
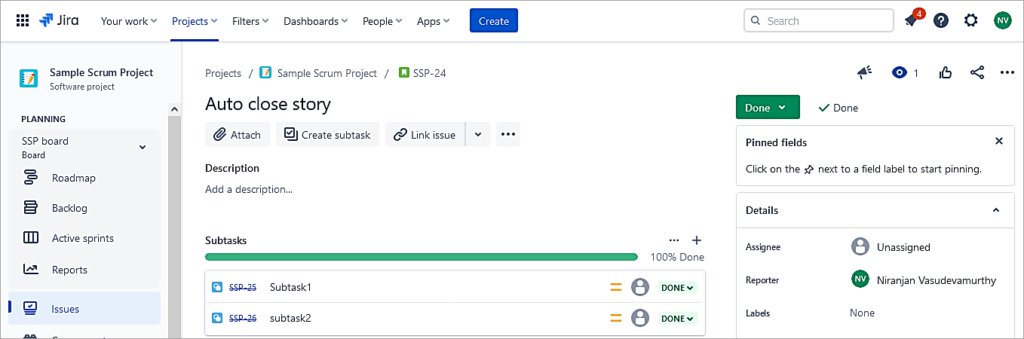
Transition each Sub-task to Done and you see that even the Story is transitioned to Done status.
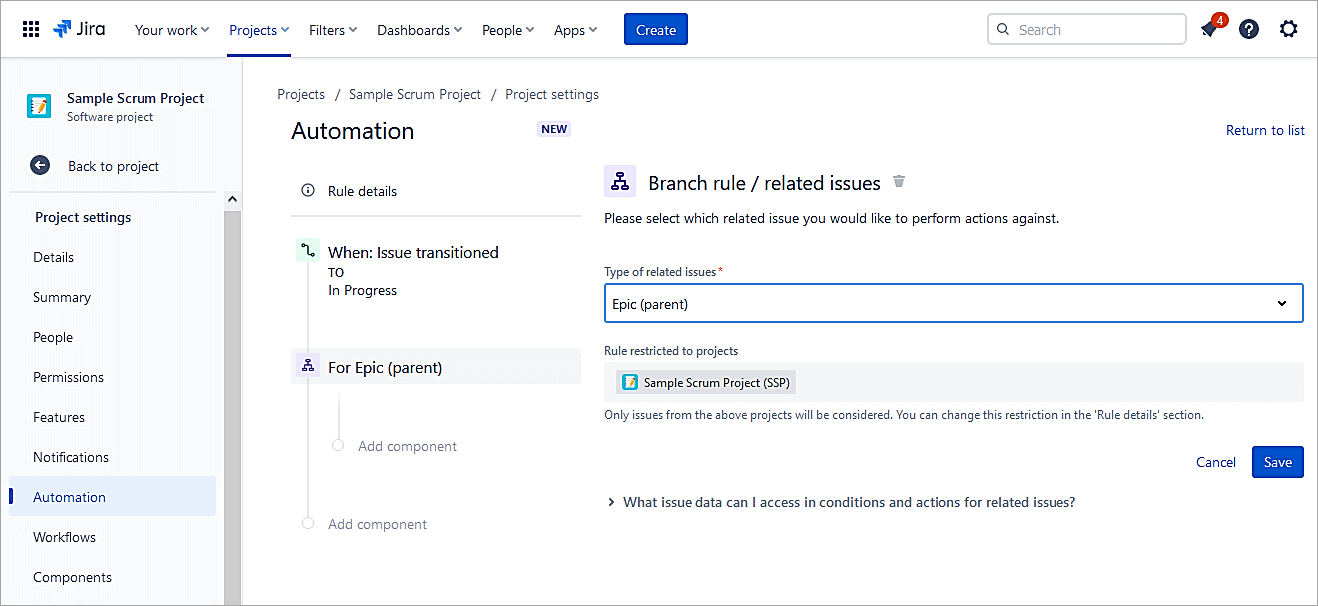
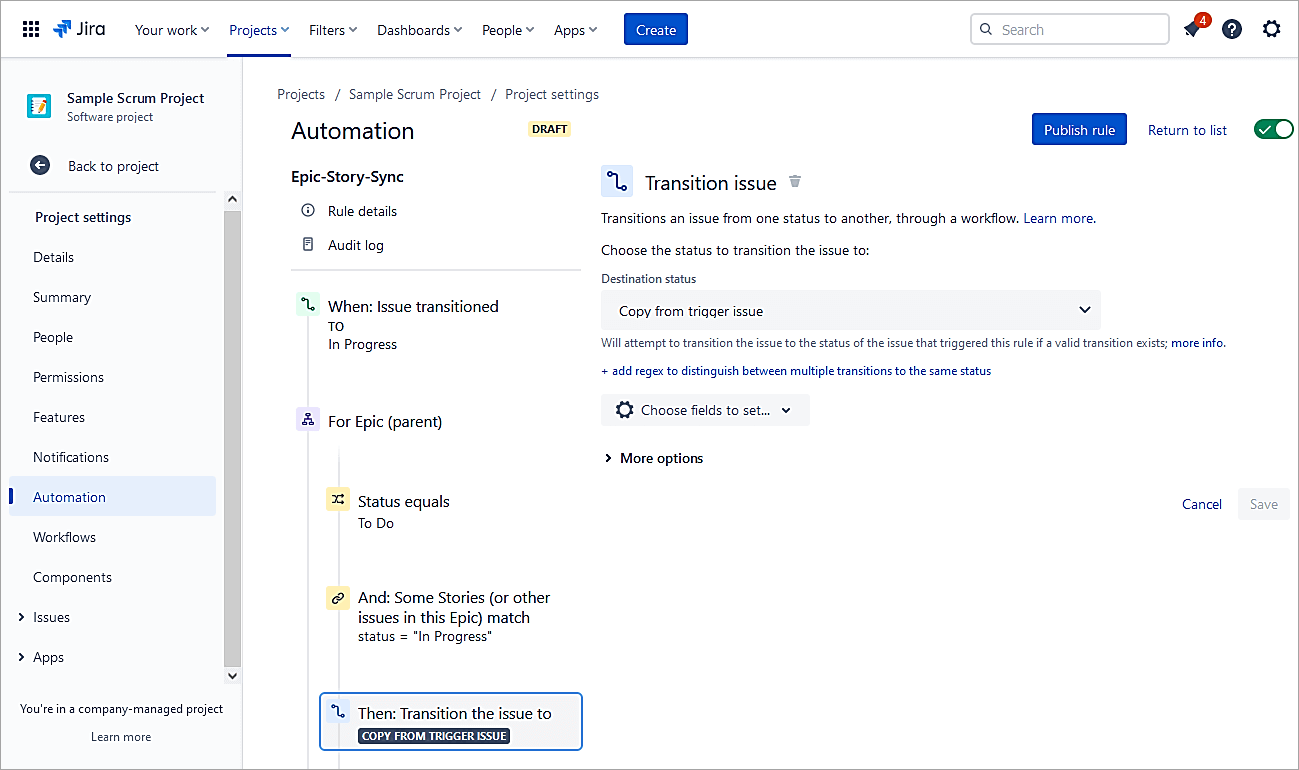
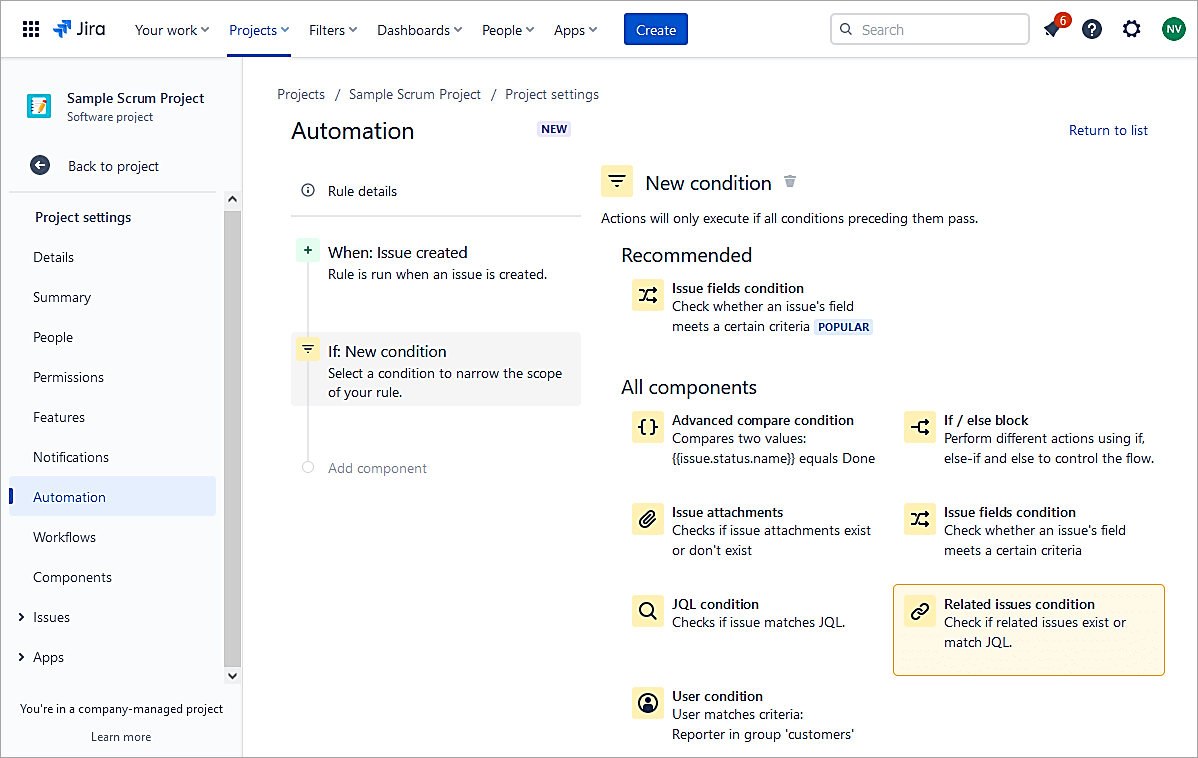
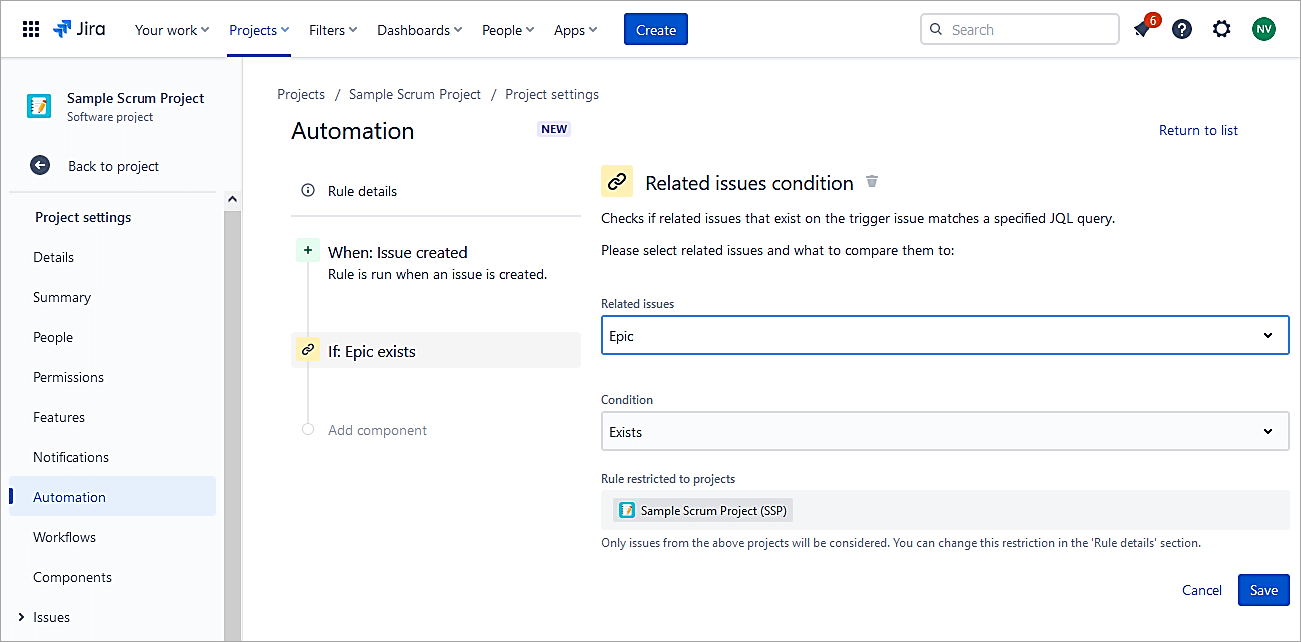
Example #3: Transition Status of Epic When one or all of the Story Issue Status Changes or Even Linked Issues.
The below automation is to keep Epic and Story status in sync. So, if any or all of the linked story status changes to In progress change the status of Epic also to In progress.
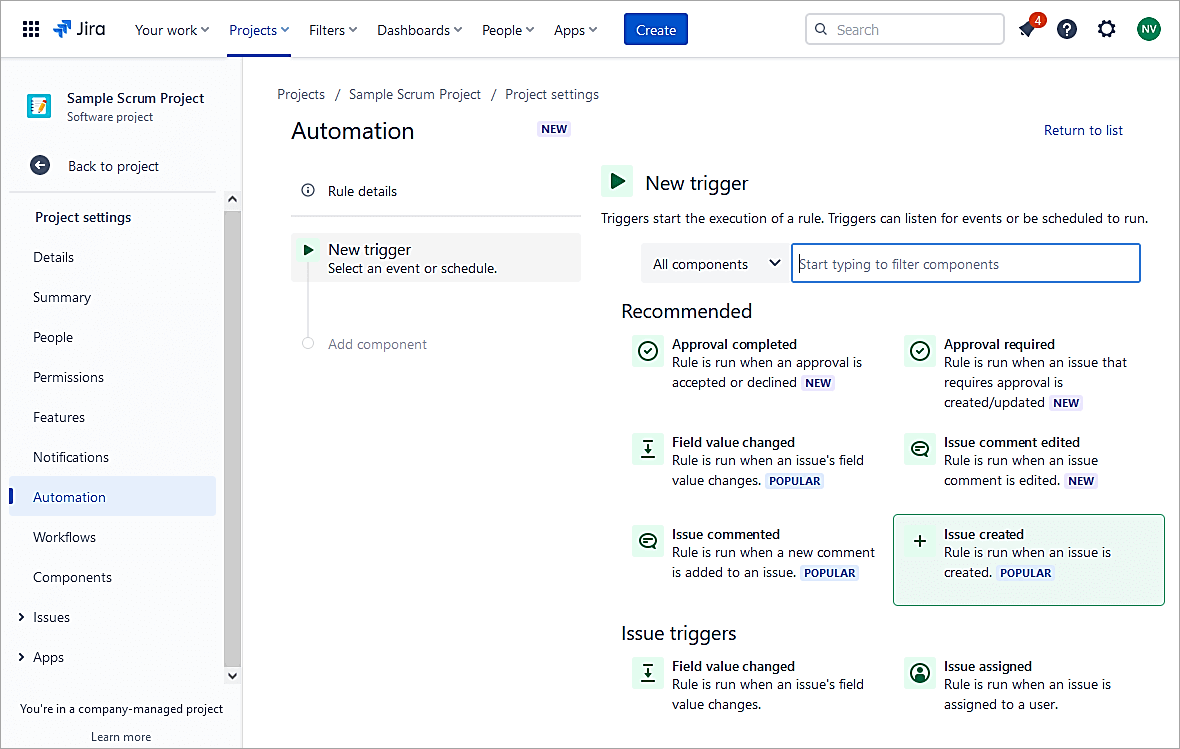
Create a new rule.
Select Issue transitioned.
Select To status as In progress and click on Save.
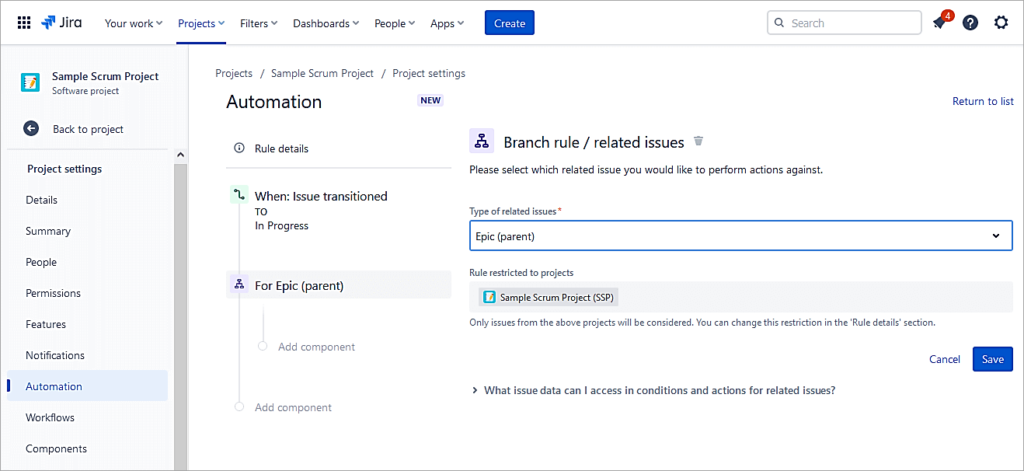
Select New Branch.
Select Branch rule / related issues
Select Epic (Parent) in the Type of related issues and click on Save.
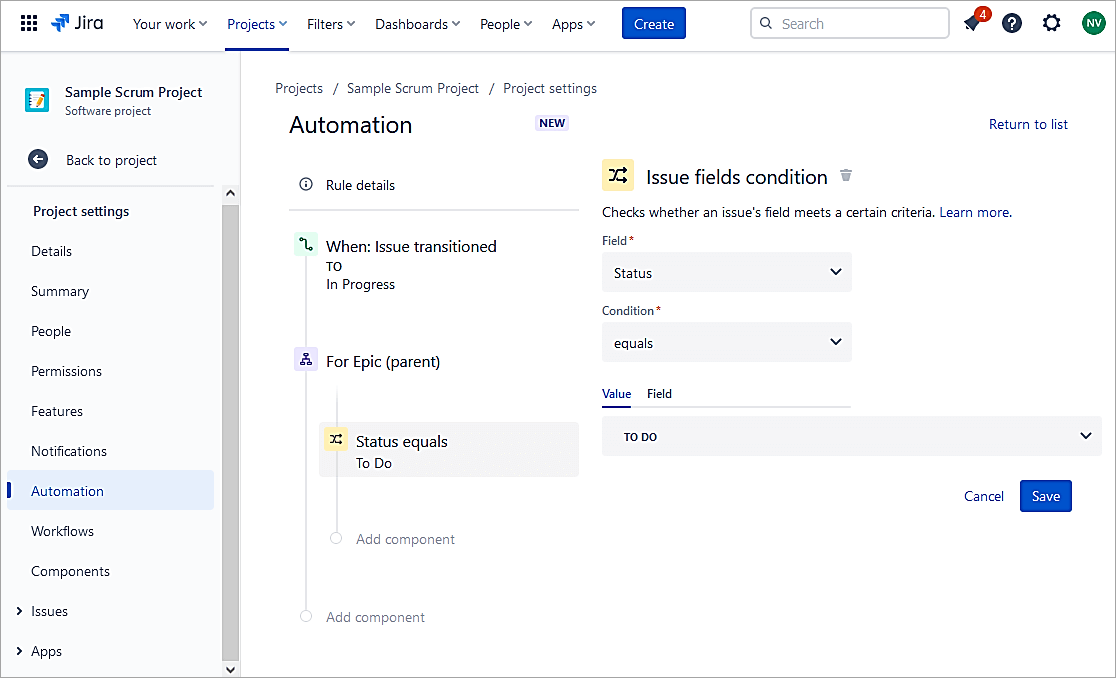
Select New condition.
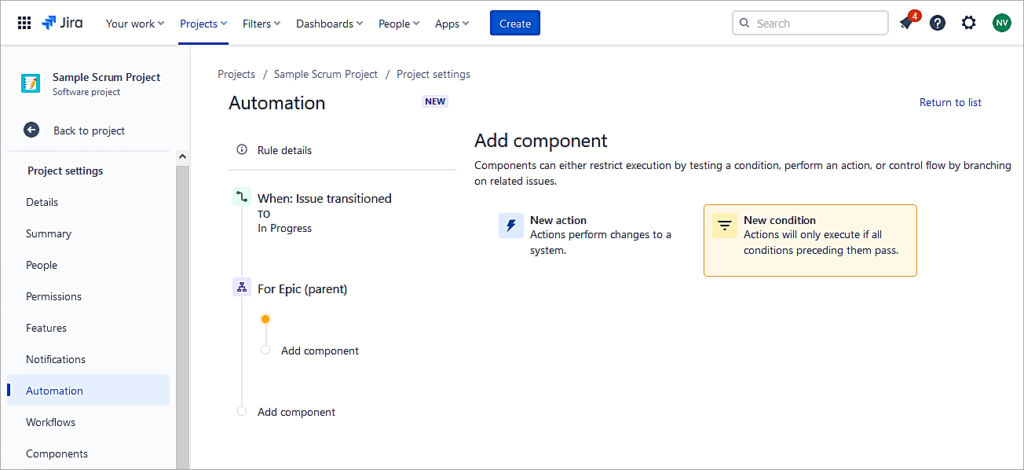
Select Issue fields condition,

Status equals To Do. Click on Save.
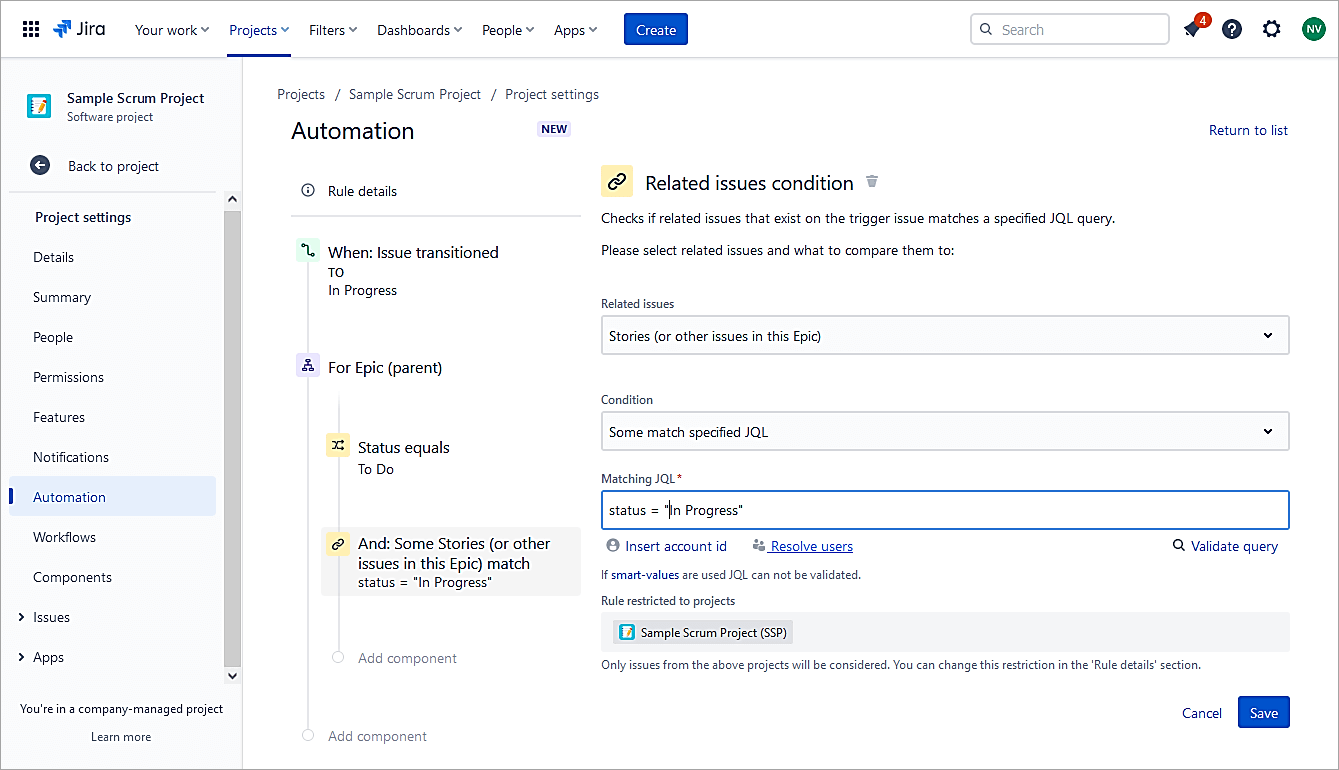
Click on New condition.
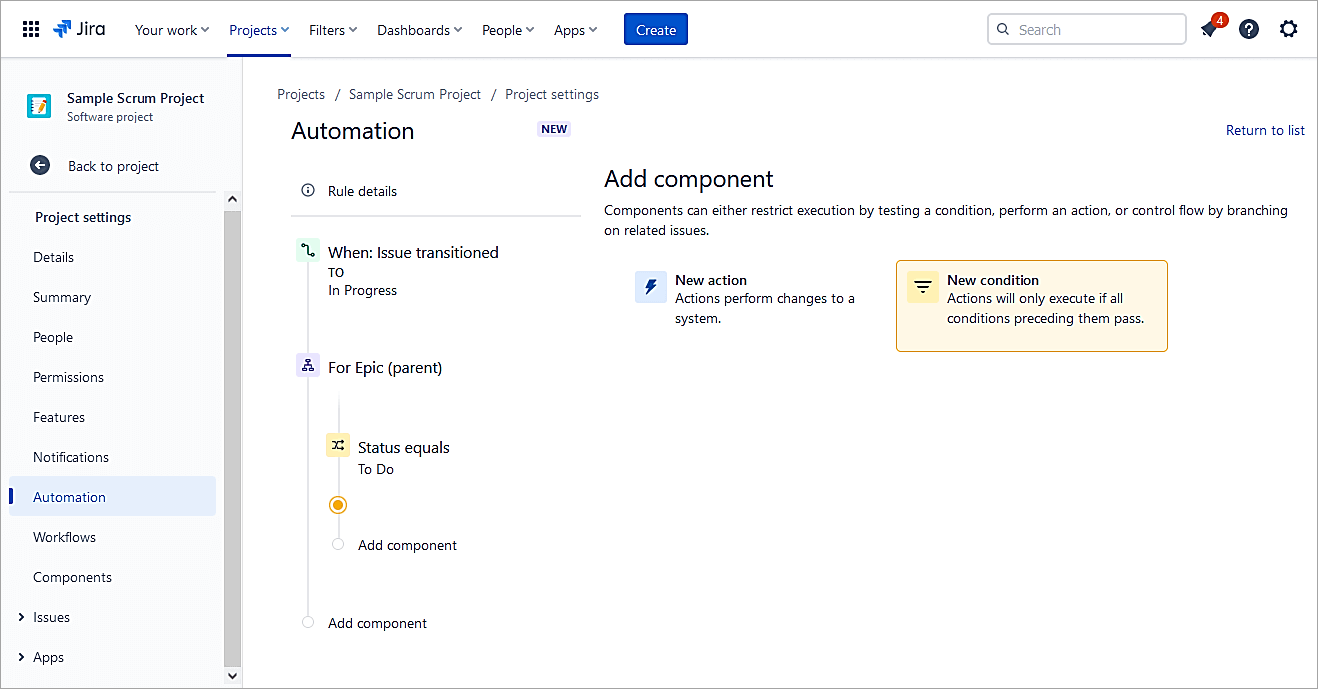
Select Related Issues condition.
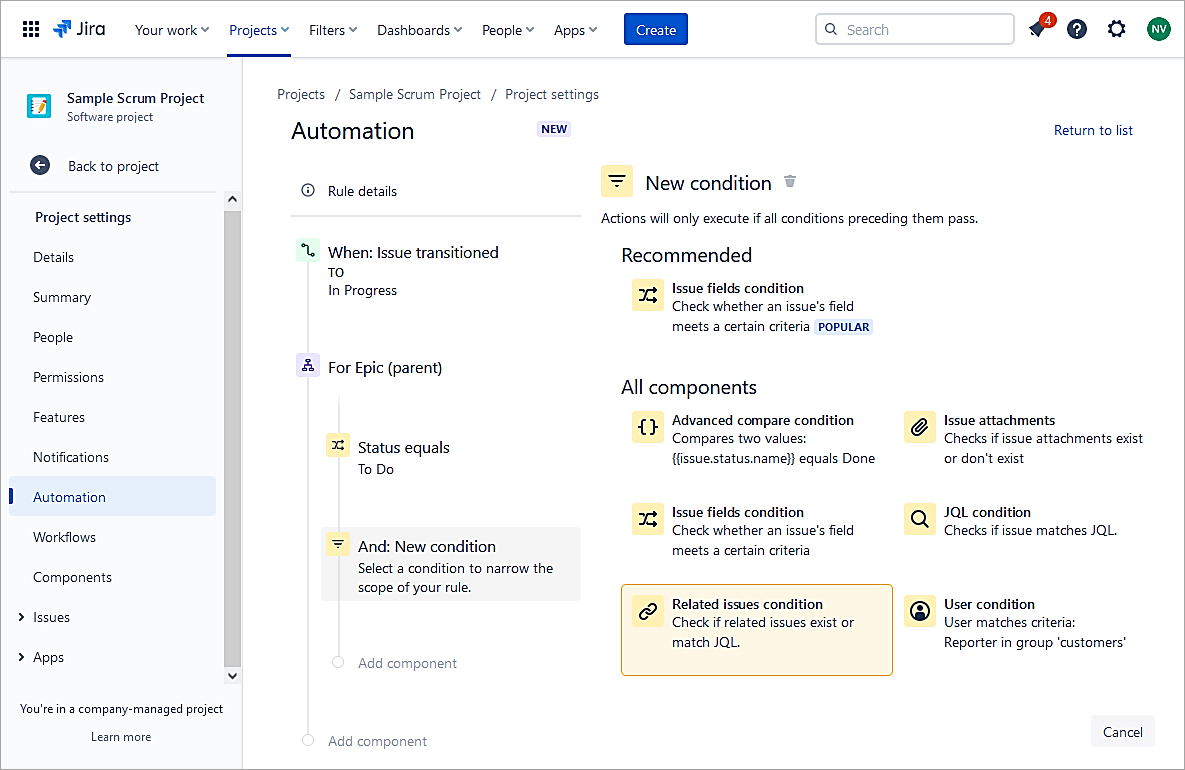
Select as shown. Click on Save.
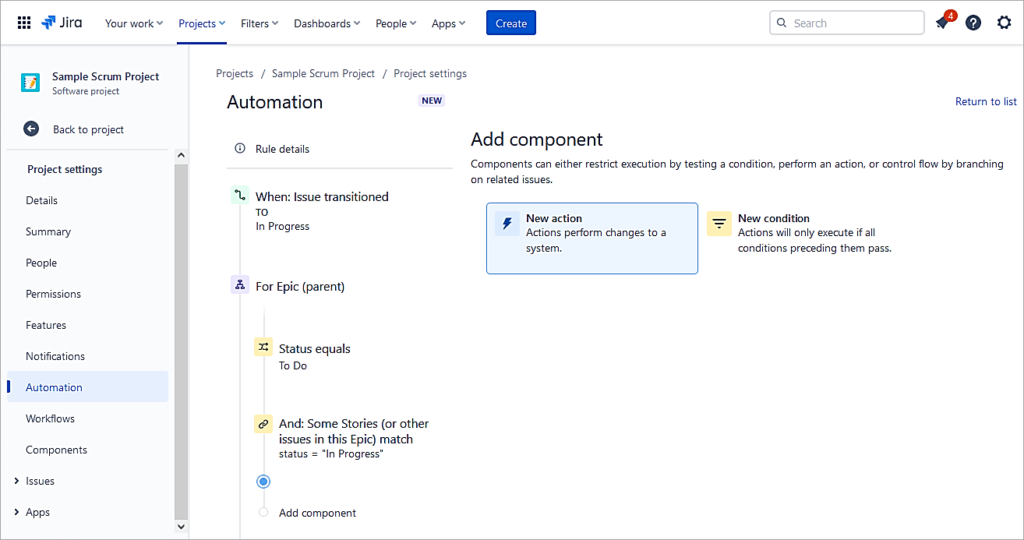
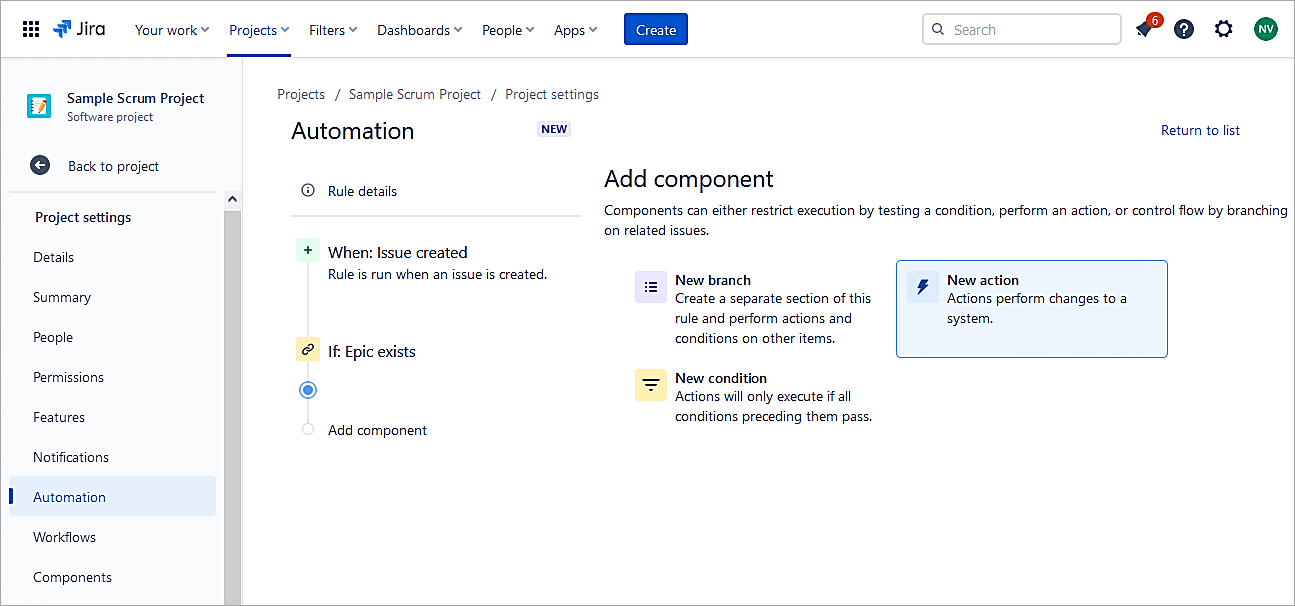
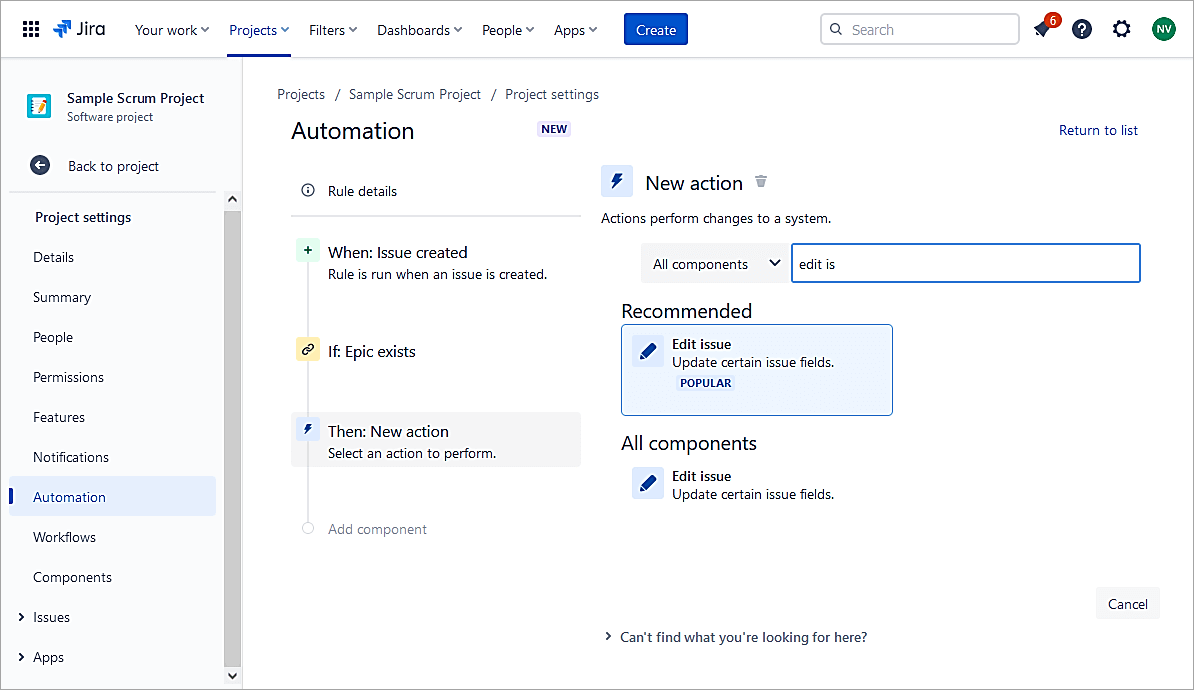
Click on New action -> Transition issue.
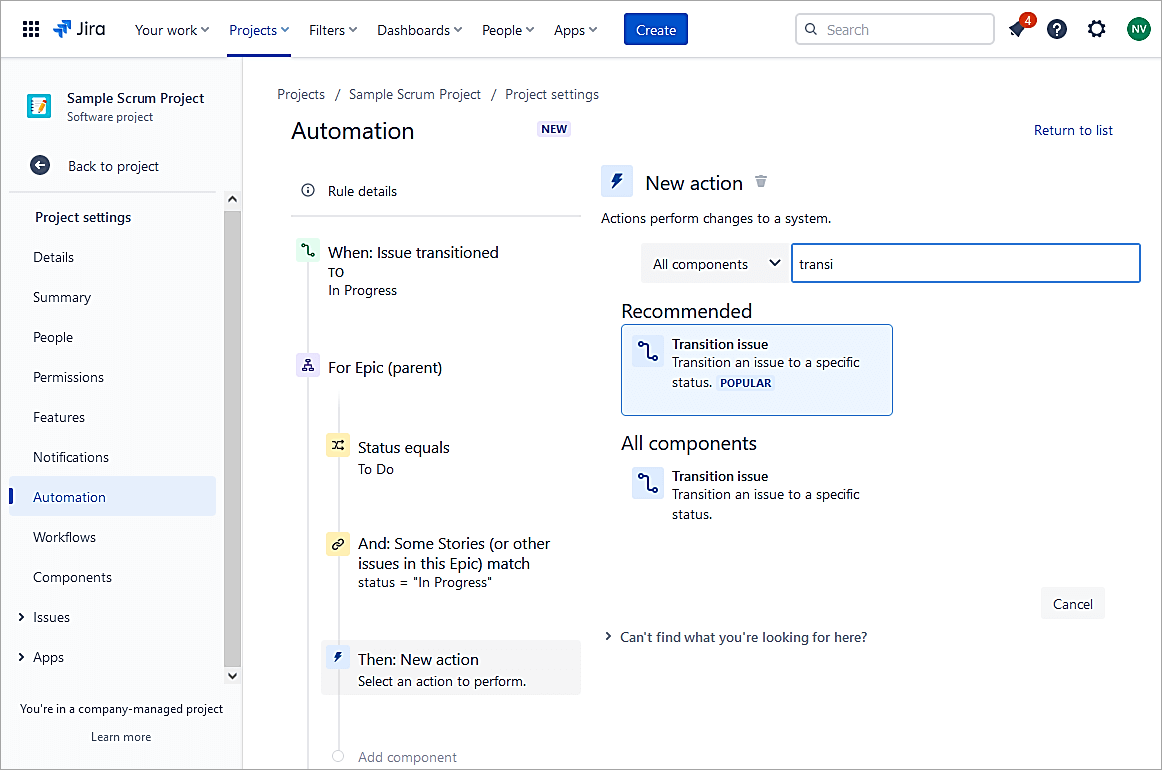
Transition issue to Copy from trigger issue. Click on Save.
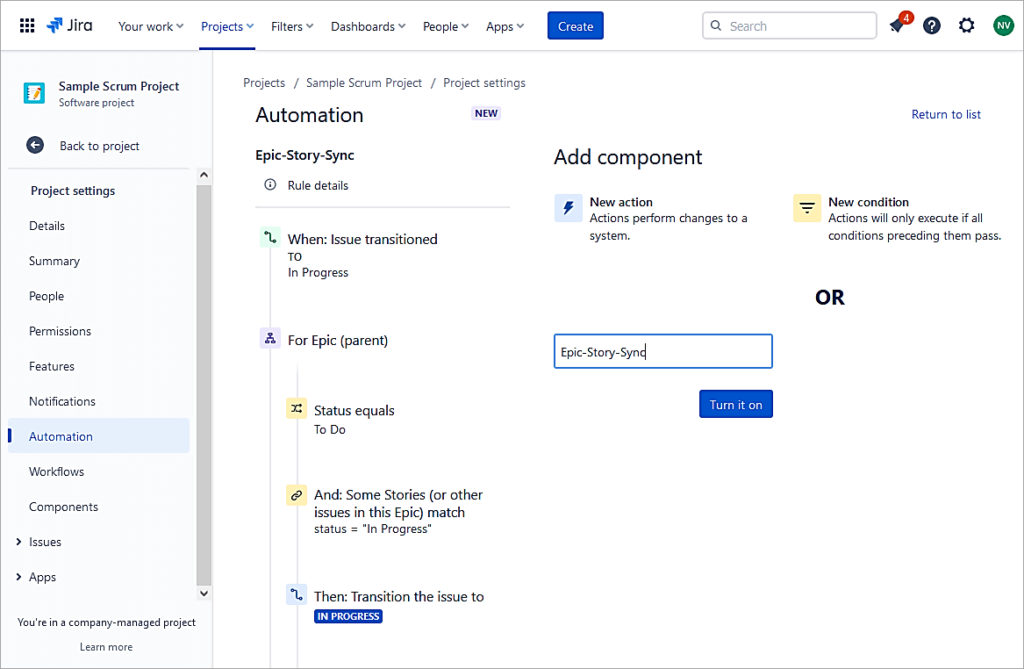
Provide a name and click on Turn it on.
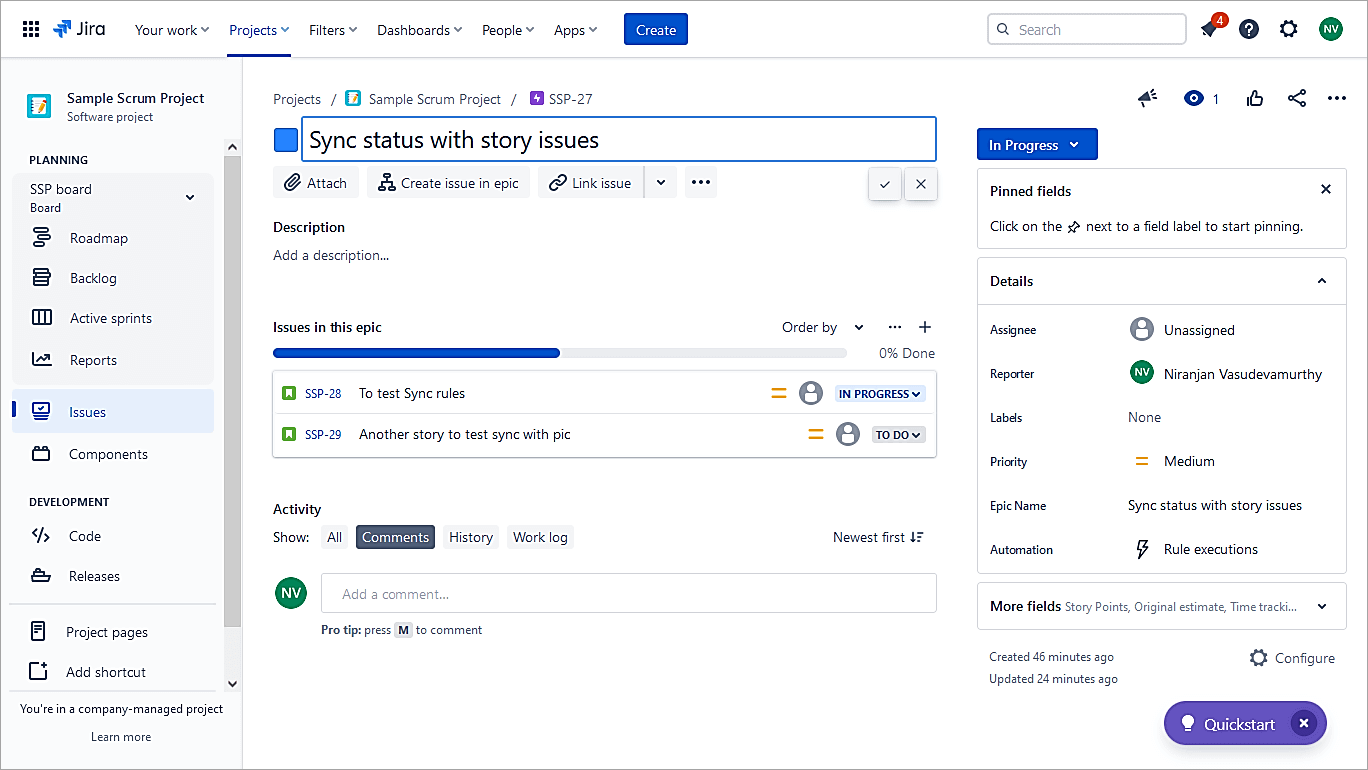
To test the rule, here is an Epic with 2 Story items created. Mark anyone’s Story to In Progress and look at the status of the Epic changing to In Progress.

Change the status of any one story and the status of the Epic will transition to In Progress.
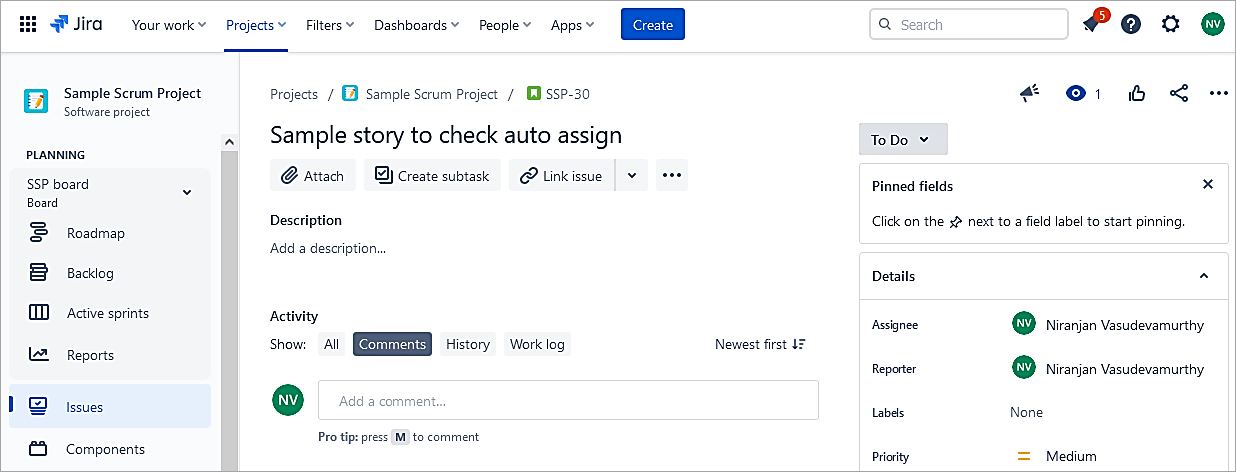
Example #4: Auto-assign Issues to Who Created it
The automation will help to auto-assign issues to who created it.
Create a new automation rule in the project. Select Issue created. Click Save.
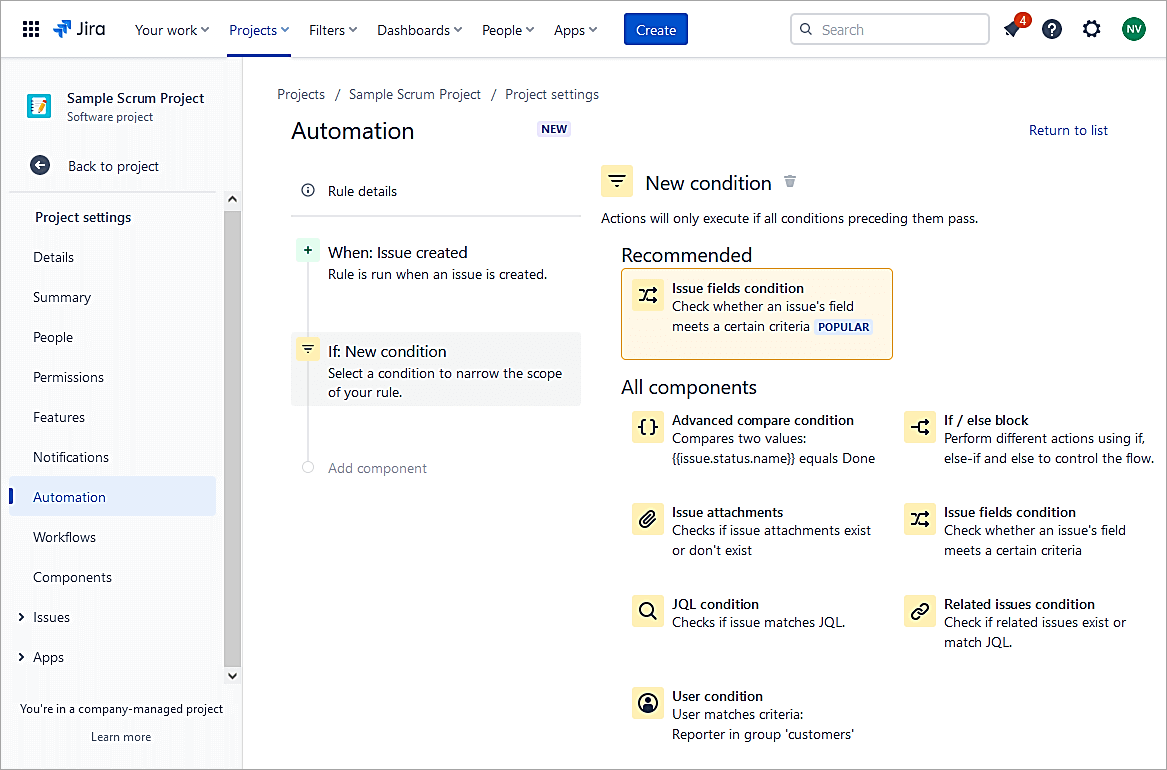
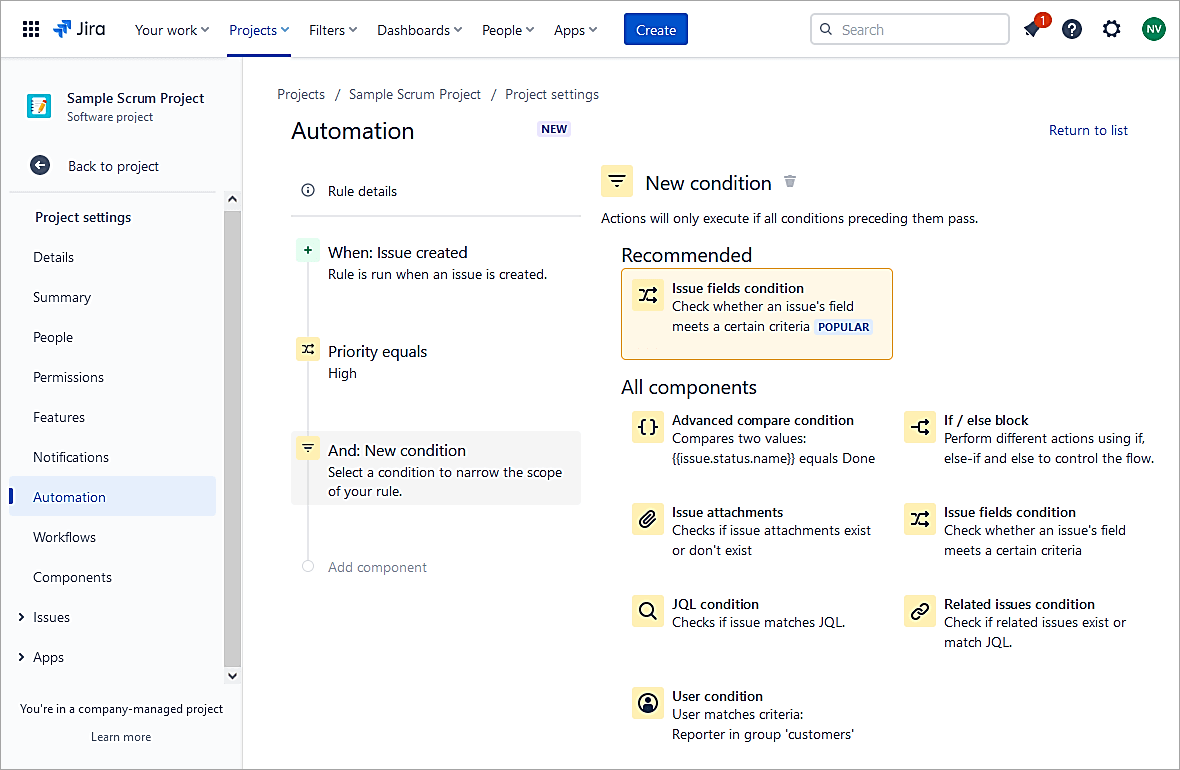
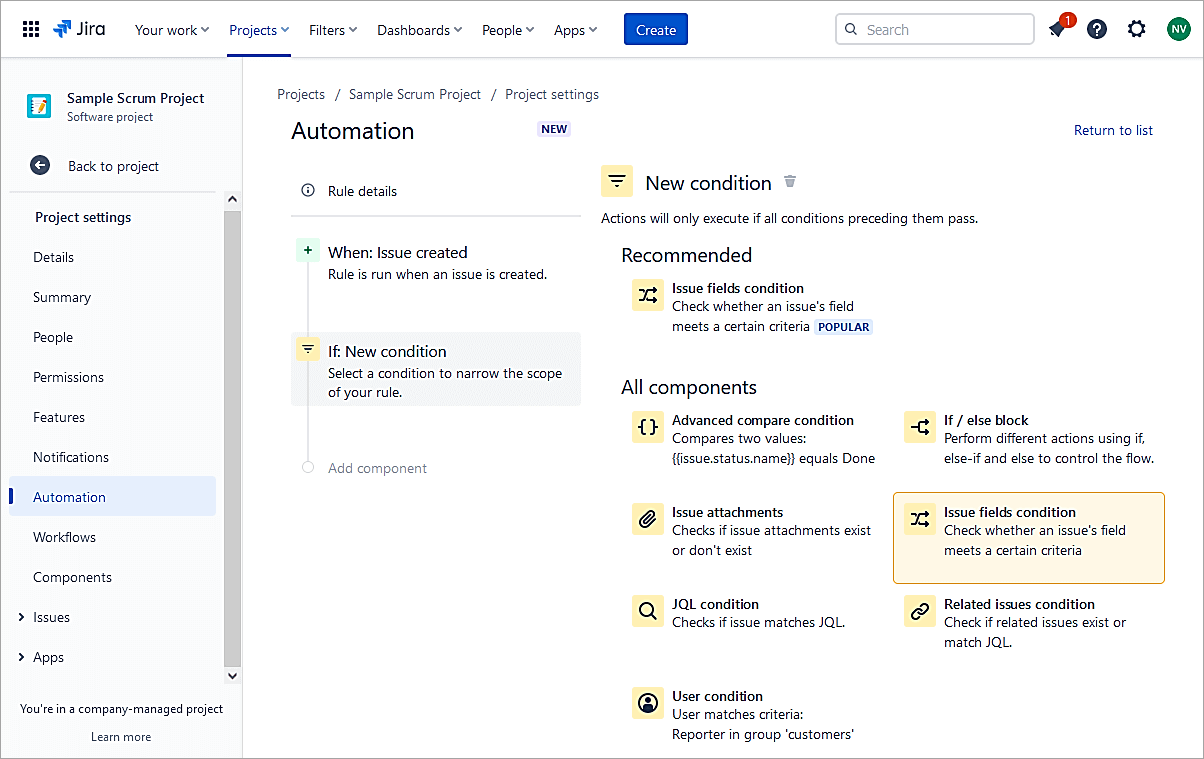
Select New condition.
Select Issue fields condition.
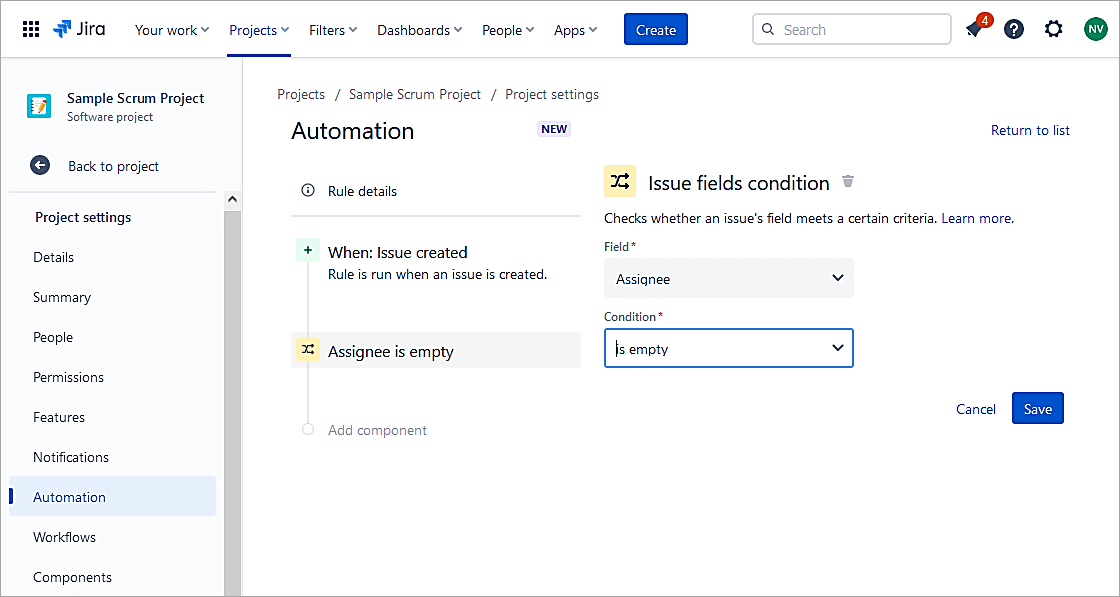
Select the option Assignee is empty. Click Save.
Select New action. Assign the issue to the user who created the issue.
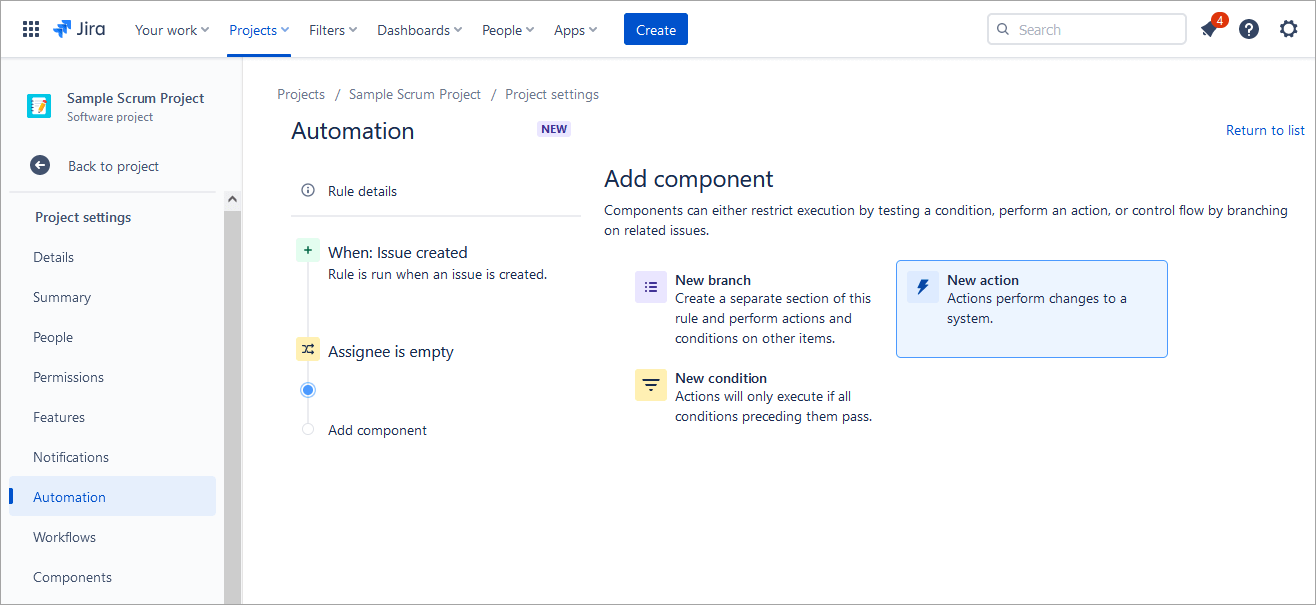
Select Assign issue.

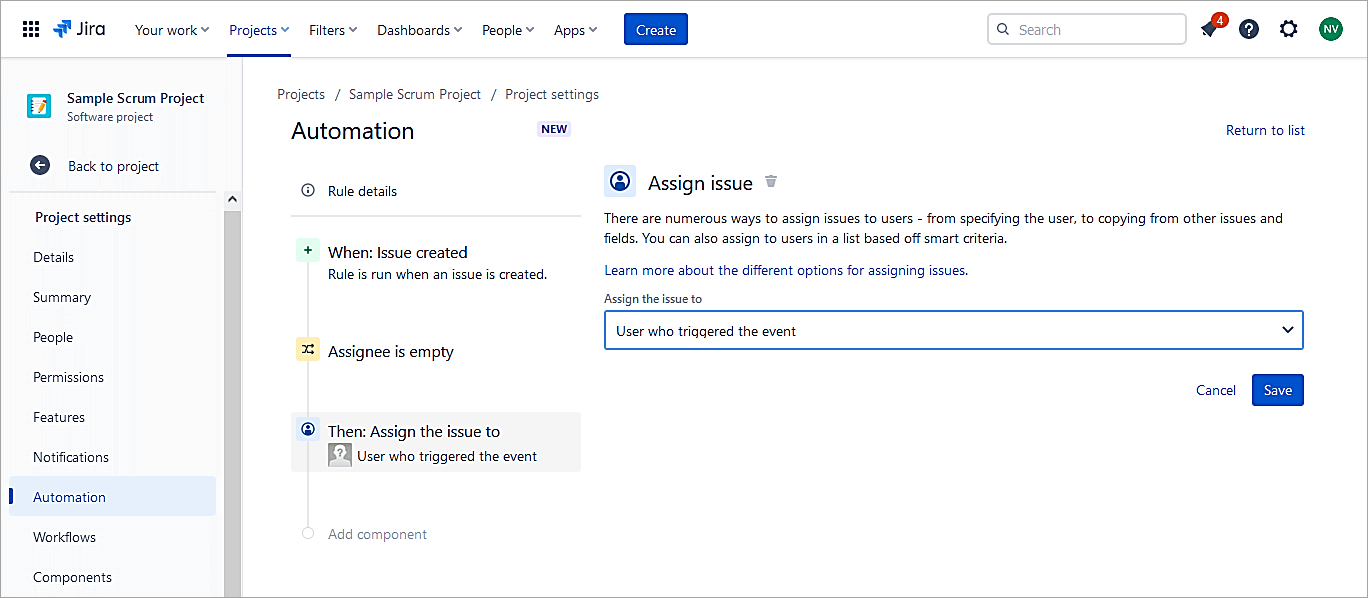
Click Save.
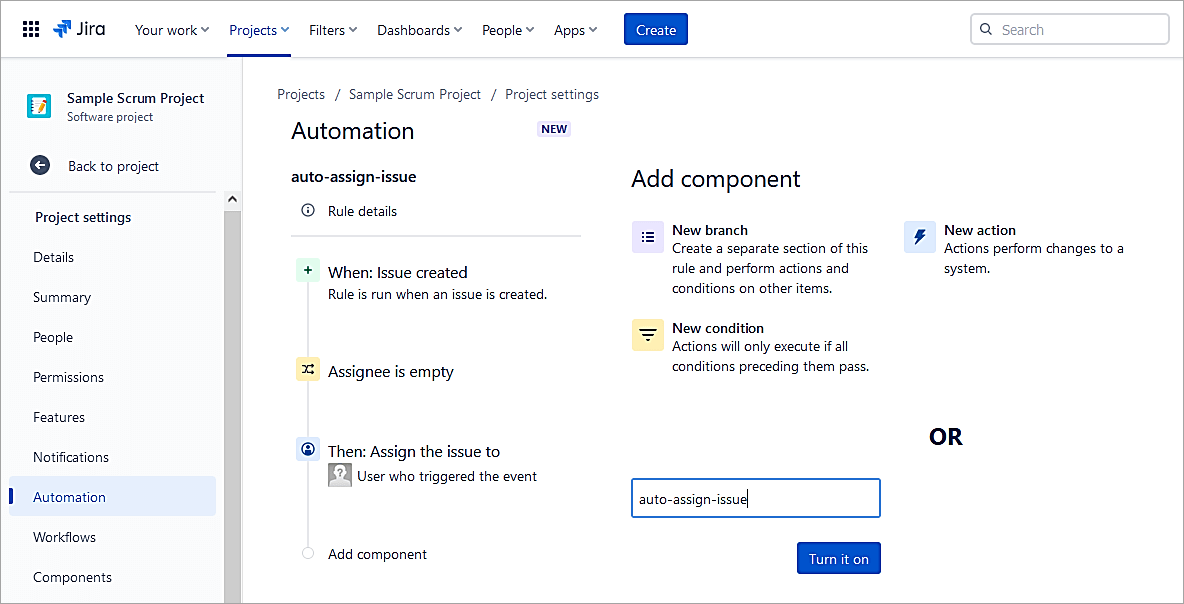
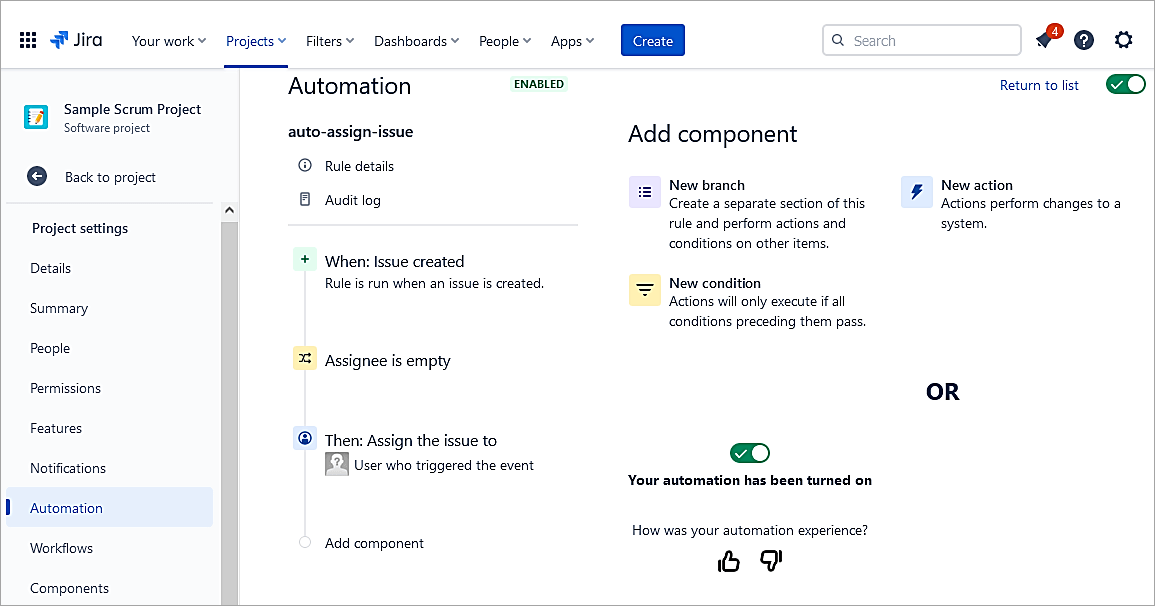
Provide a name to the rule and Turn it on.
Test the rule. Create a new Story issue.
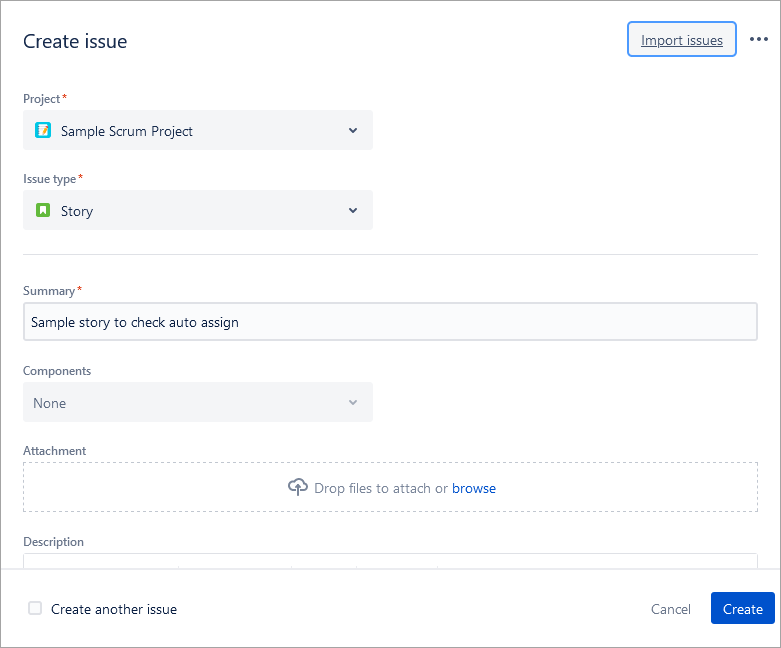
Click on Create. Check the Assignee field.
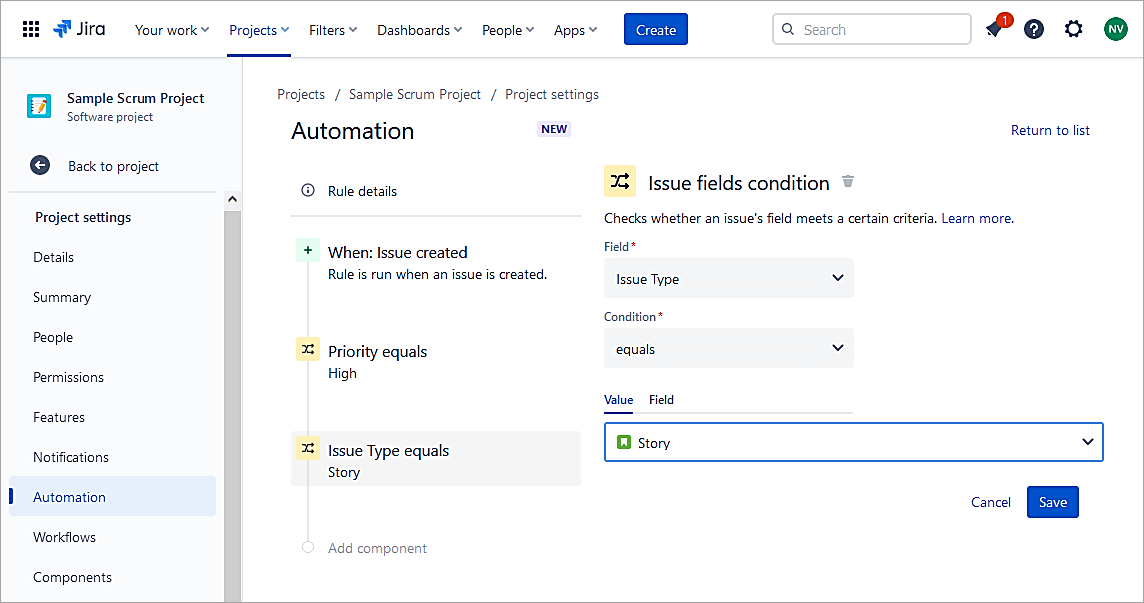
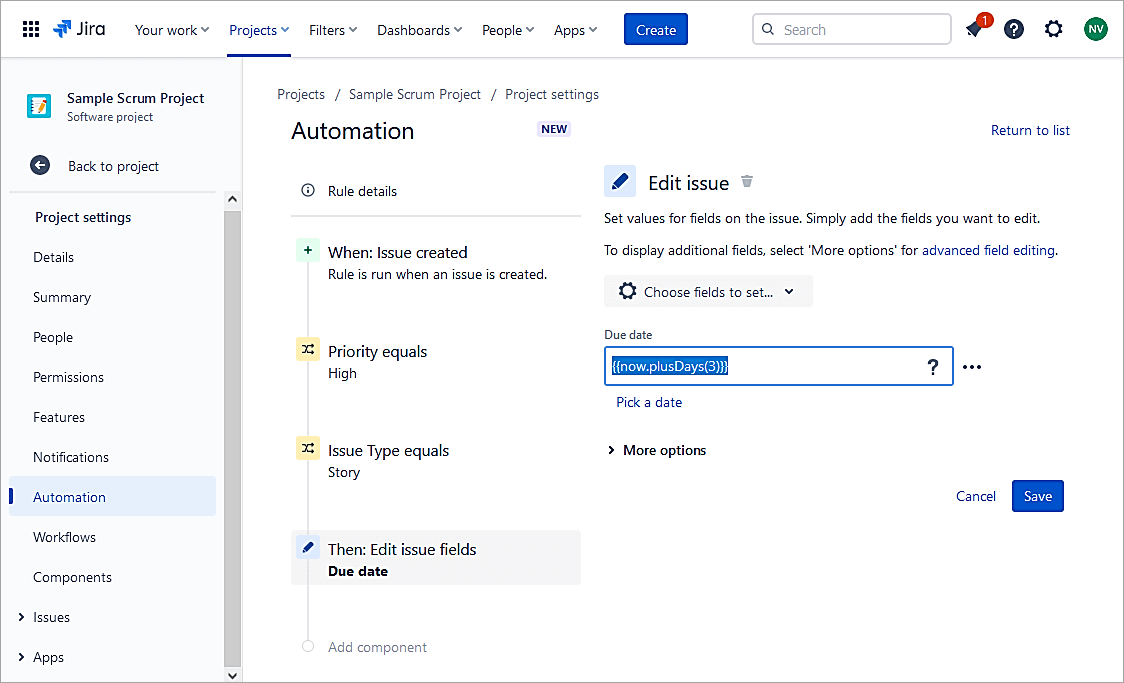
Example #5: Update Due Date for High Priority Issues Created
The automation rule updates the due date of the issue to 3 days from the date of creation.
Create automation rule in the project and select Issue created. Click Save.

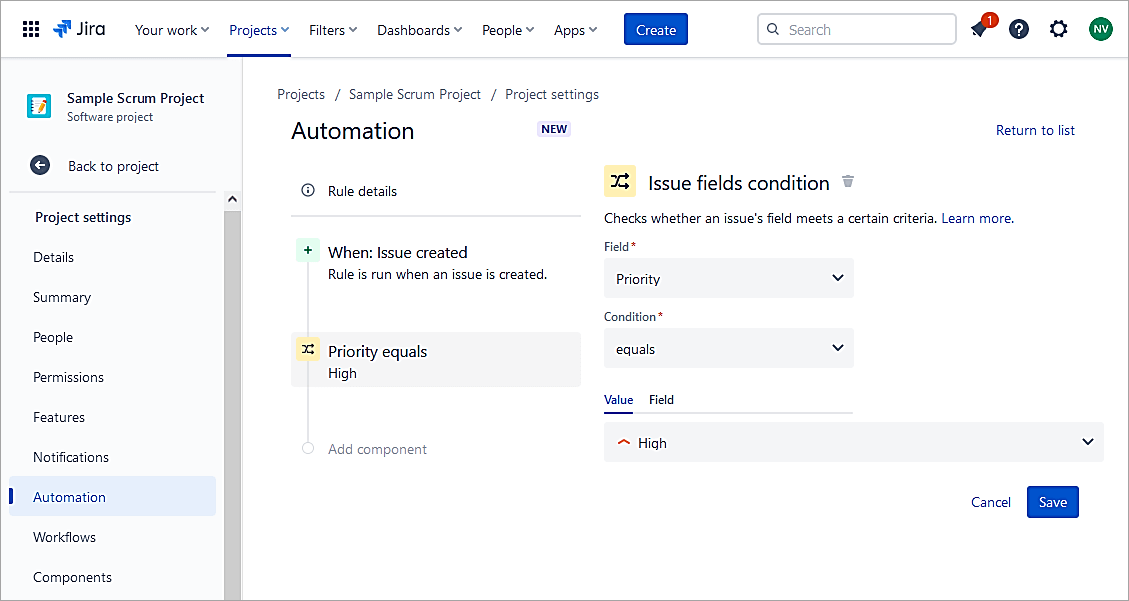
Select New condition,

Select issue fields condition.
Select the field Priority equals High. Click Save.
Add one more condition to run the rule only for Story issues.
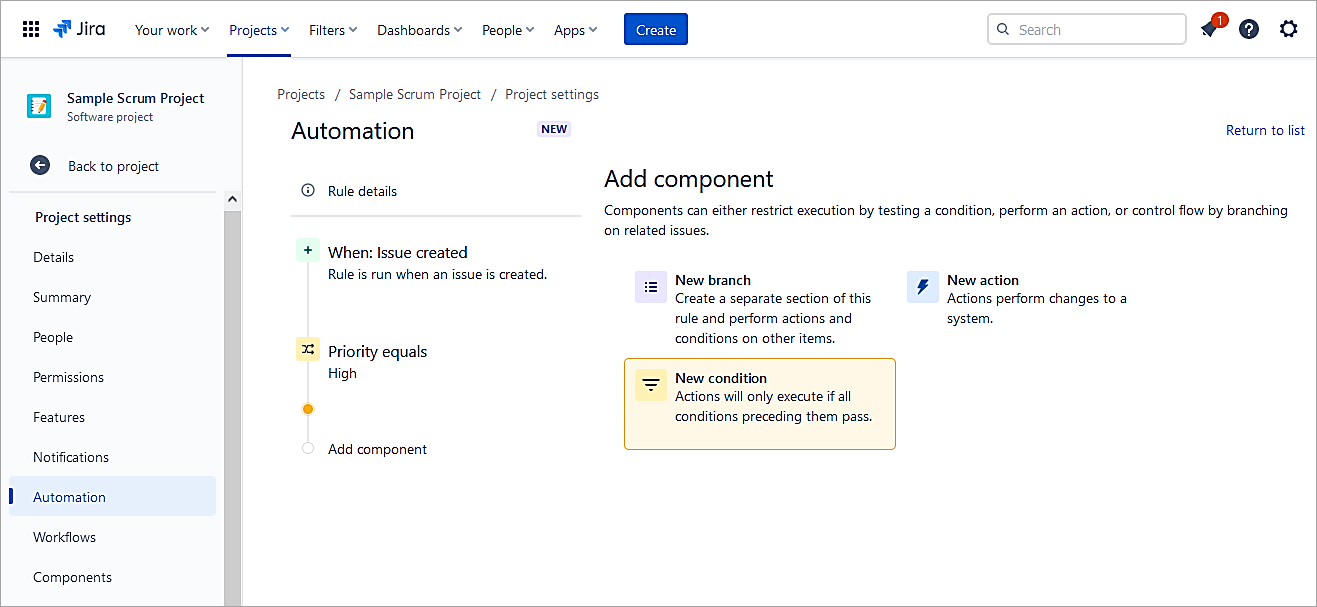
Select the Issue field condition

Select Issue type equals Story. Click on Save.
Select New action.
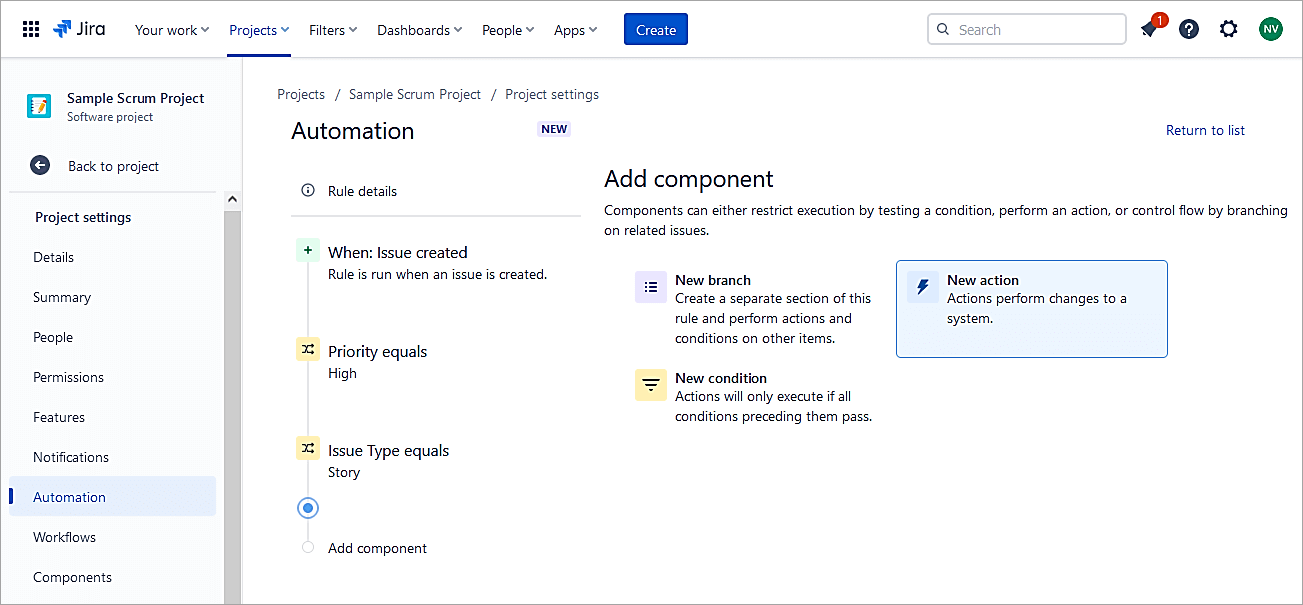
Select Edit issue.
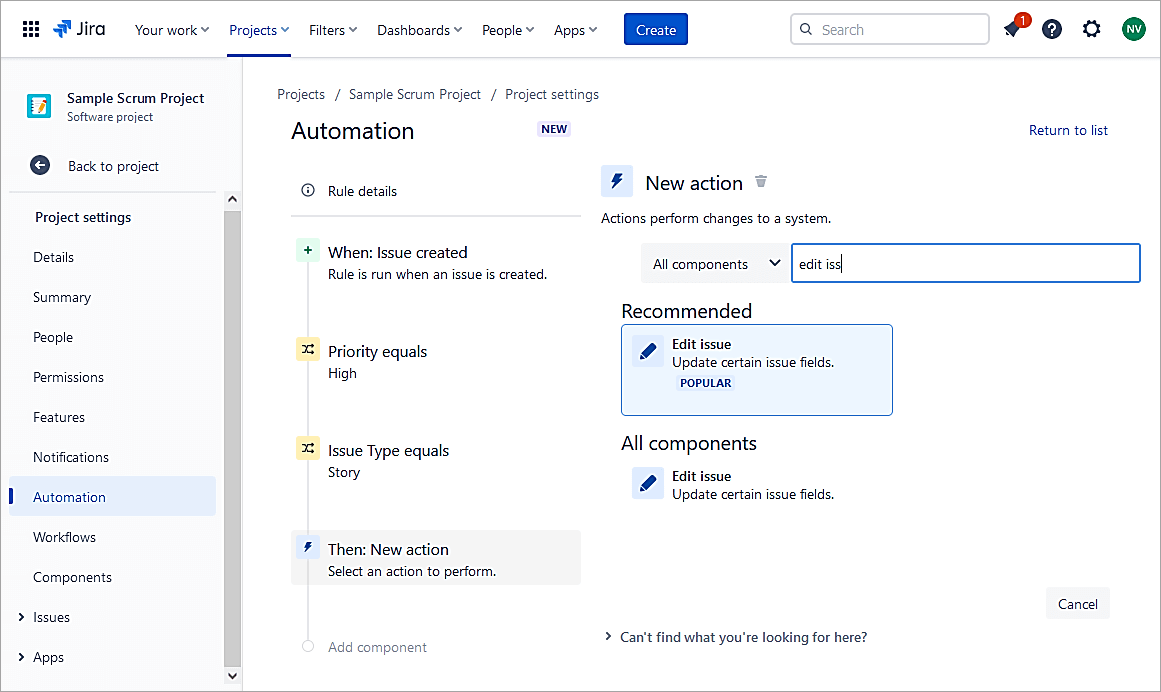
Choose Due date field.
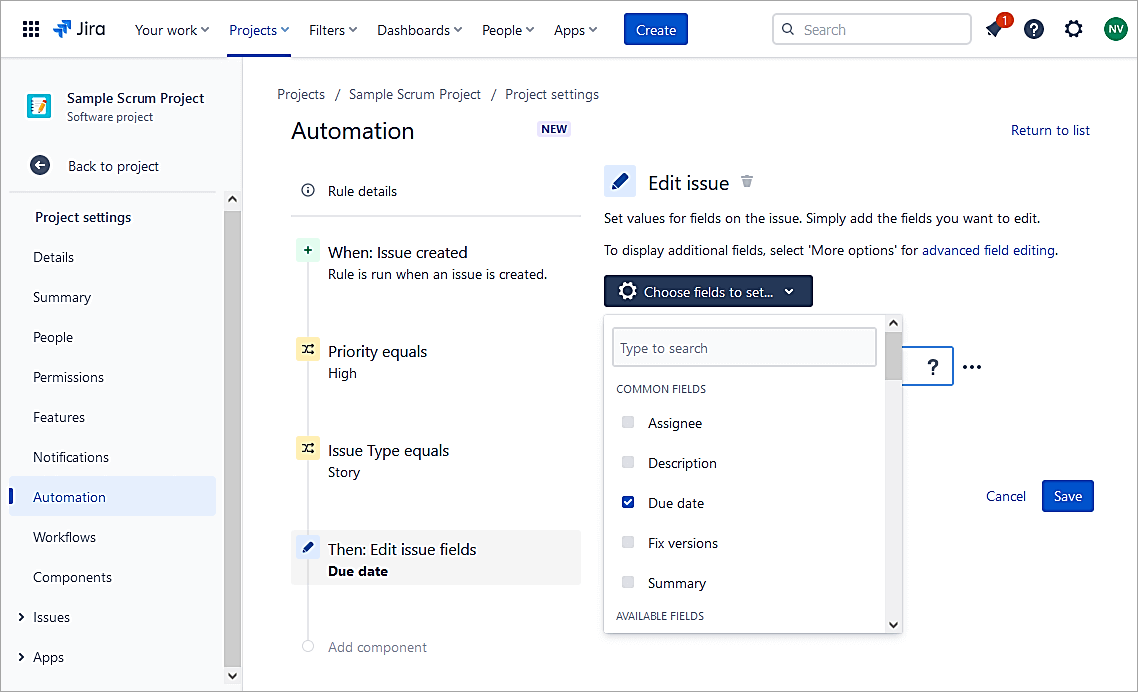
Enter the value of the Due date as {{now.plusDays(3)}}. The documentation for these smart values can be found @ Examples of using smart values with dates | Cloud automation Cloud | Atlassian Support
Click Save.
Add a name and Turn on the rule.
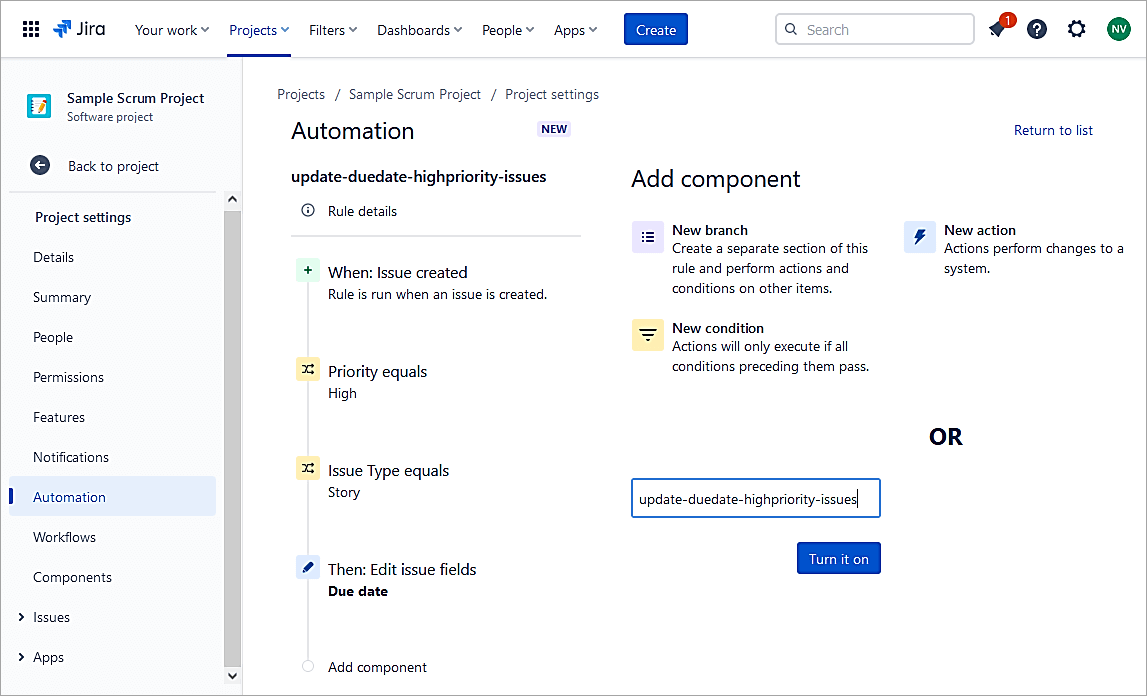
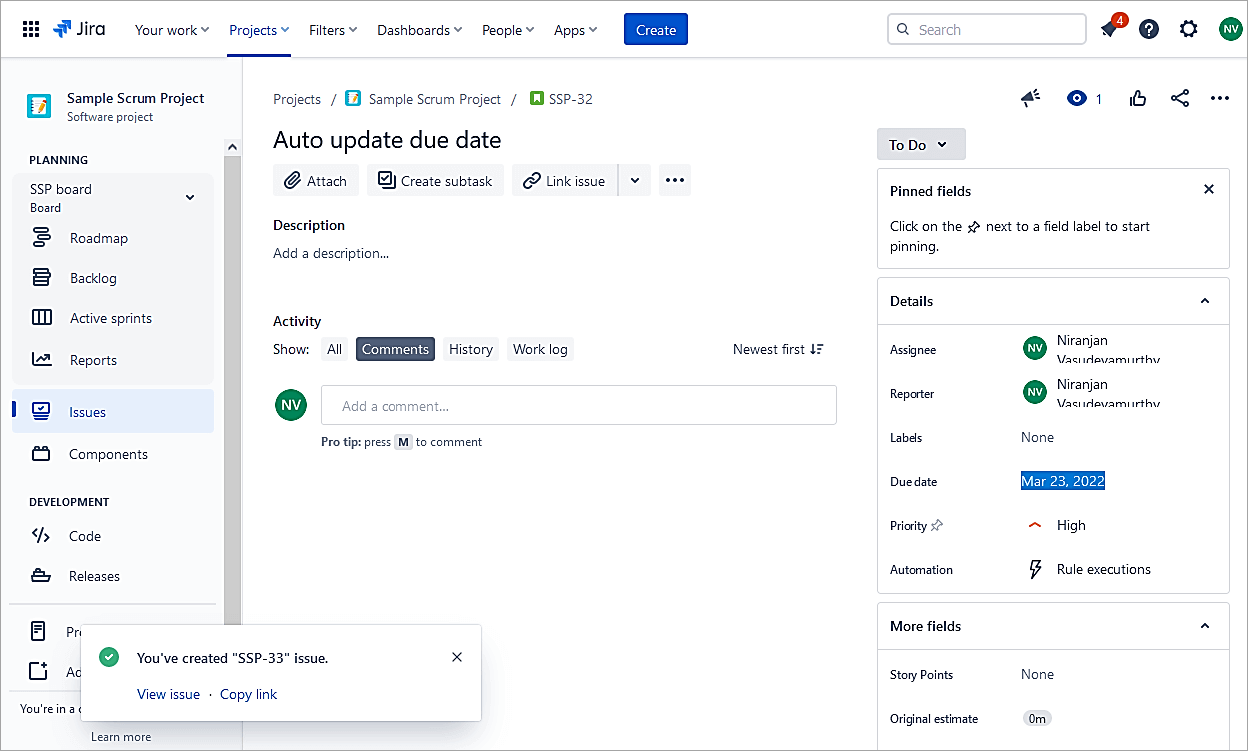
Test the rule. Create a Story and update the Priority to High.
Click Create.
The due date is automatically updated
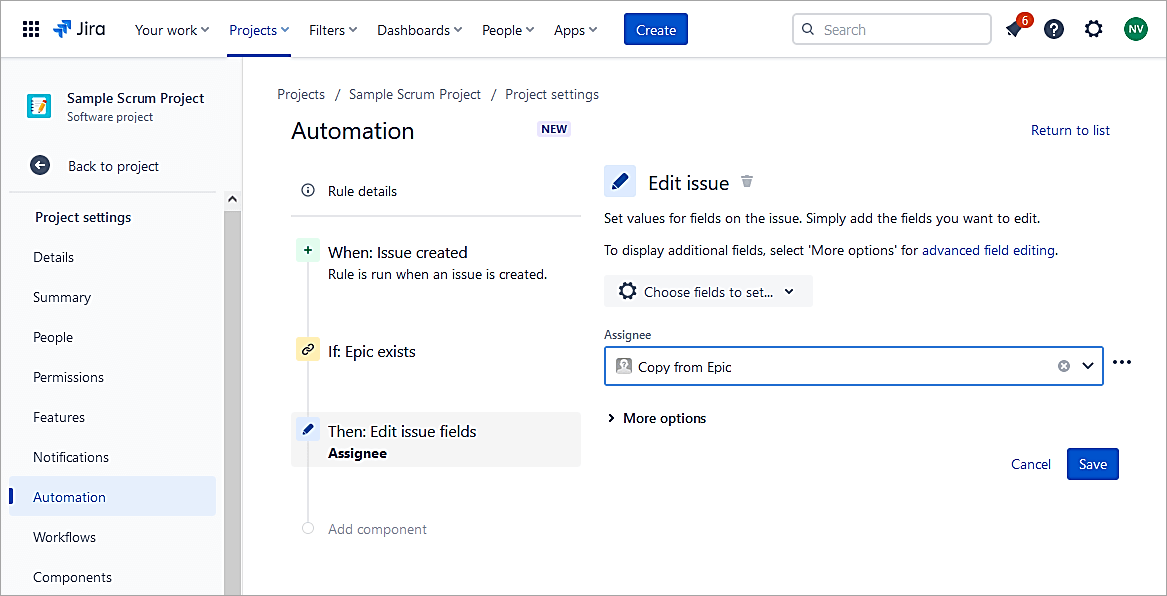
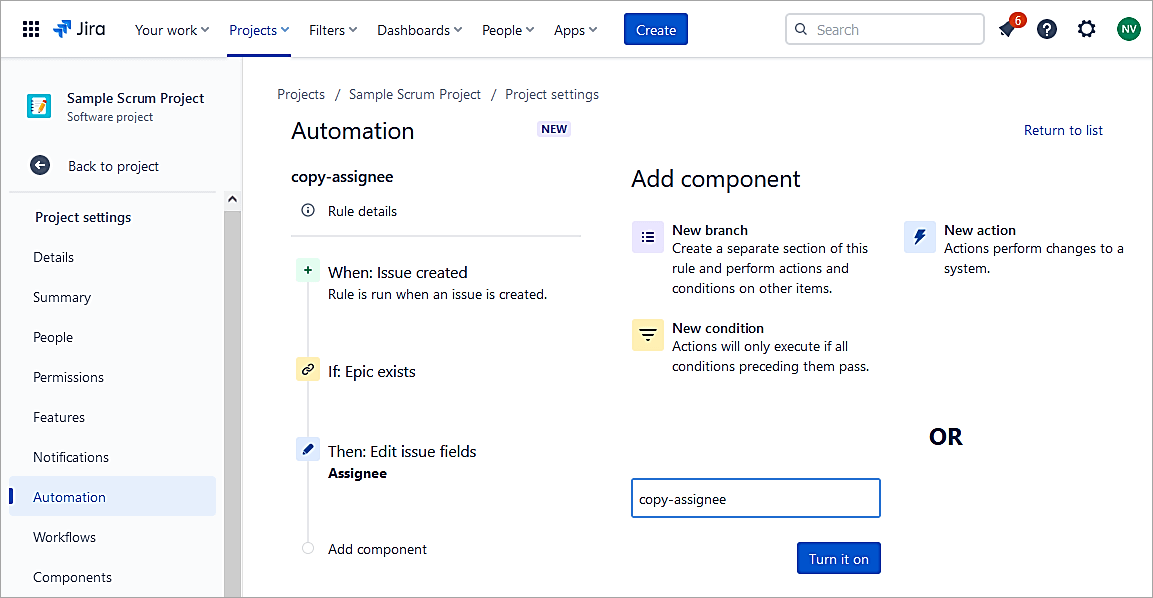
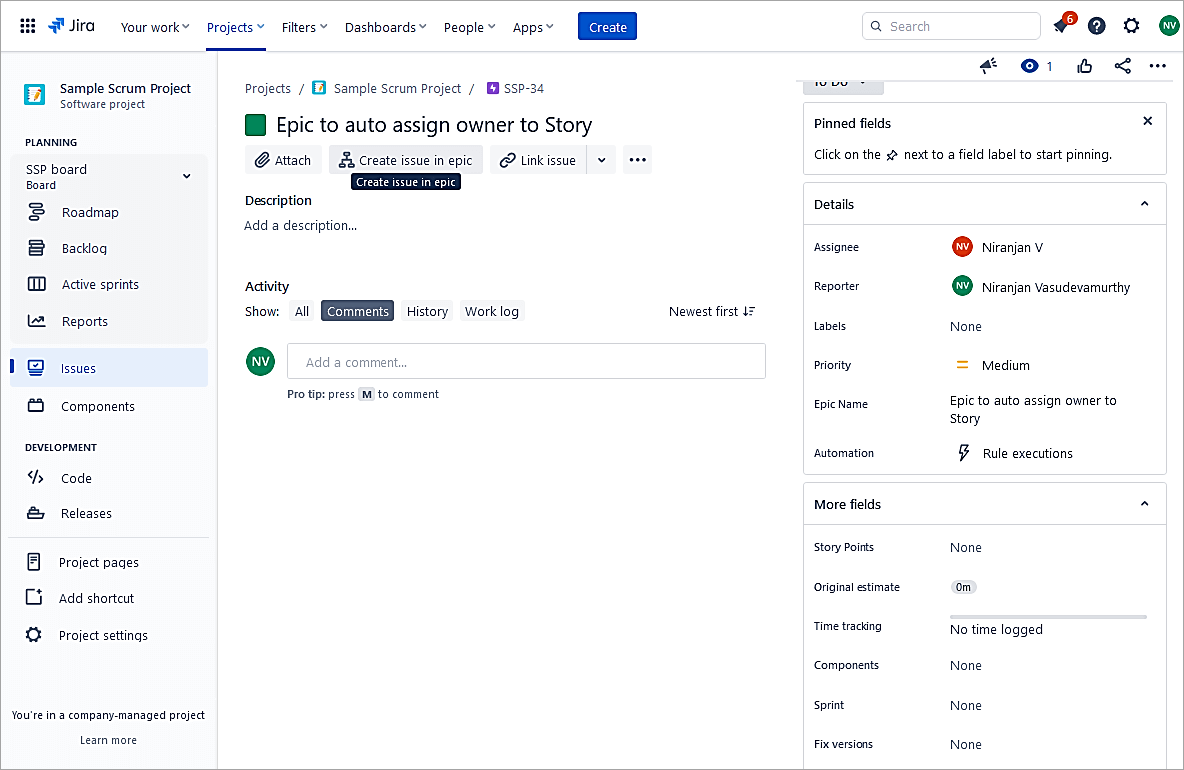
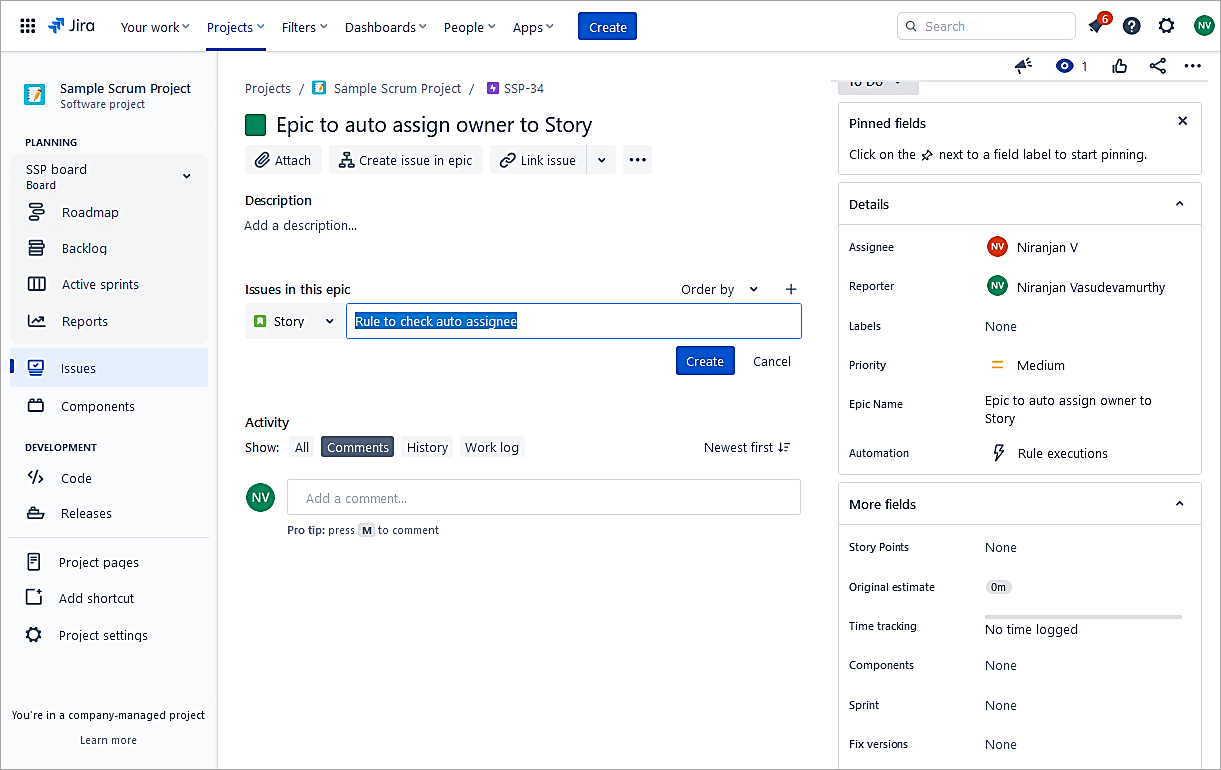
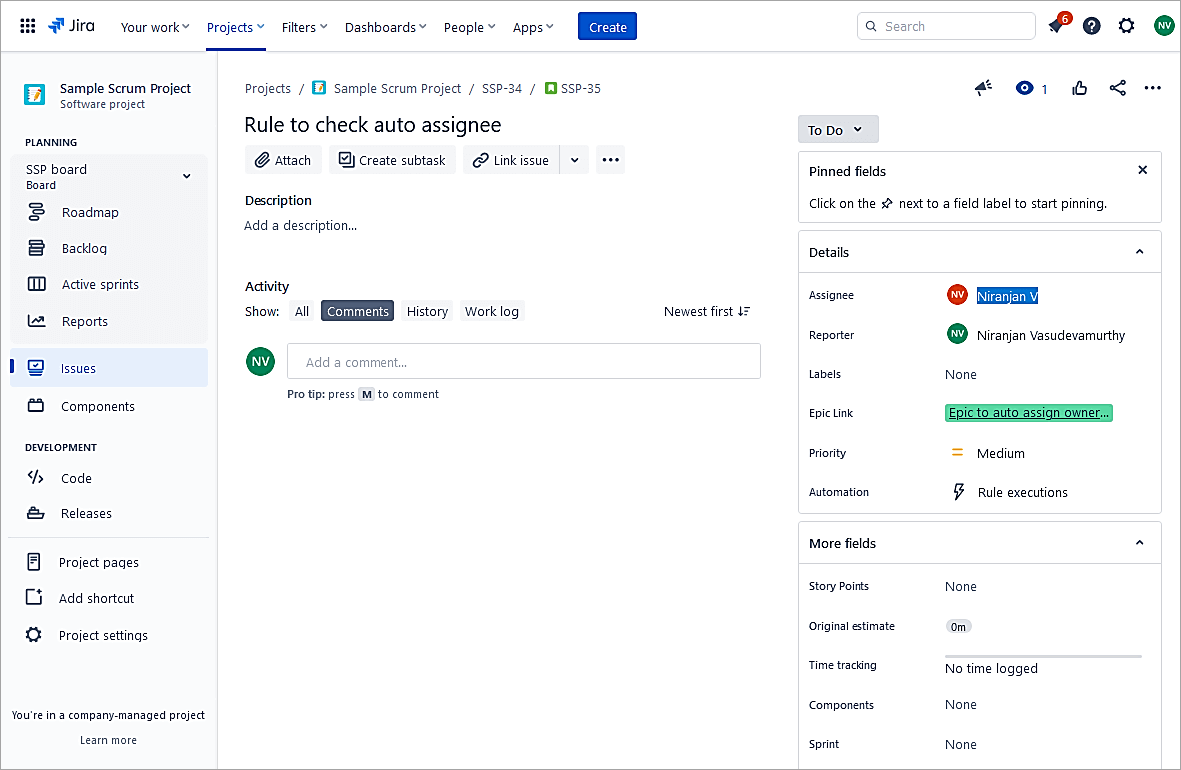
Example #6: Copy the Assignee of Epic to Story
The automation rule copies Epic’s assignee to the linked Story issue.
Create an automation rule in the project select Issue created and click on Save.

Select New condition -> Related issues condition.
Click Save.
Click on New Action.
Select Edit issue.
Select Assignee.
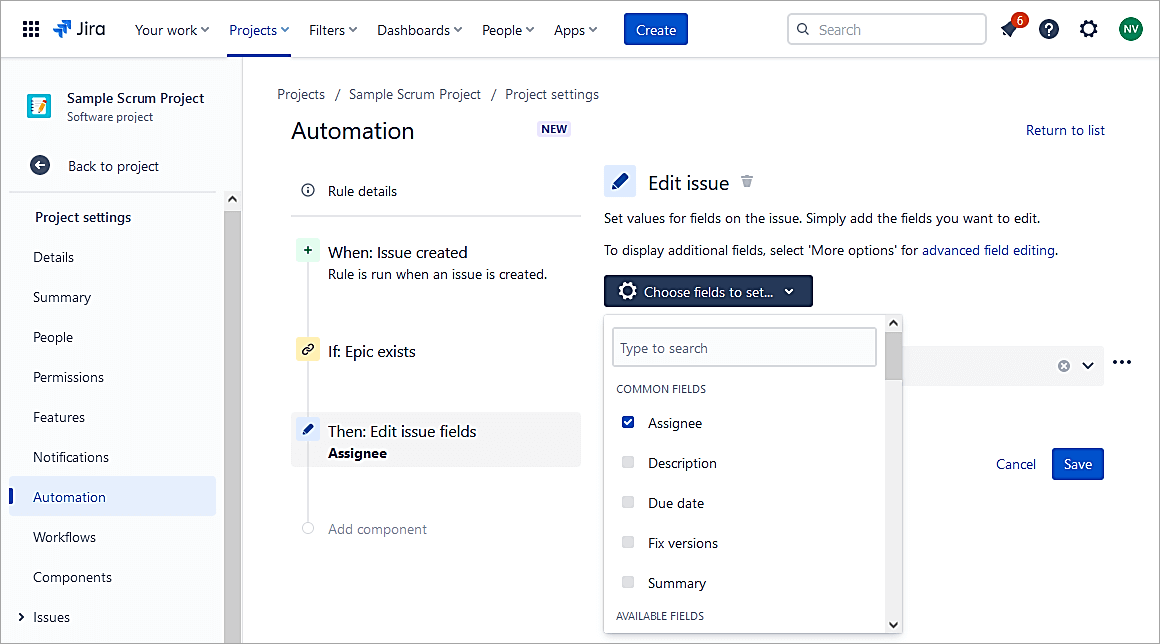
Select value Copy from Epic. Click on Save.
Enter a name for the rule and Turn it on.
Test the rule. Create an Epic, update the Assignee field, and create a linked Story issue.
Epic with the assignee.
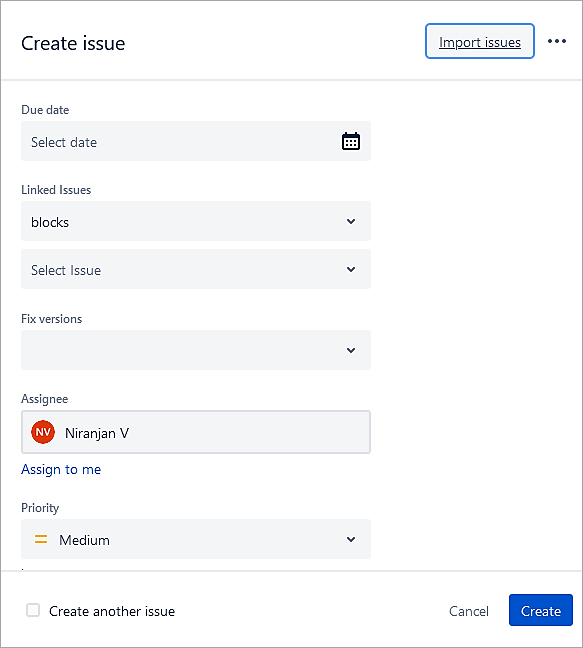
Click on Create an issue in epic.
The assignee in the Story issue is auto-updated.
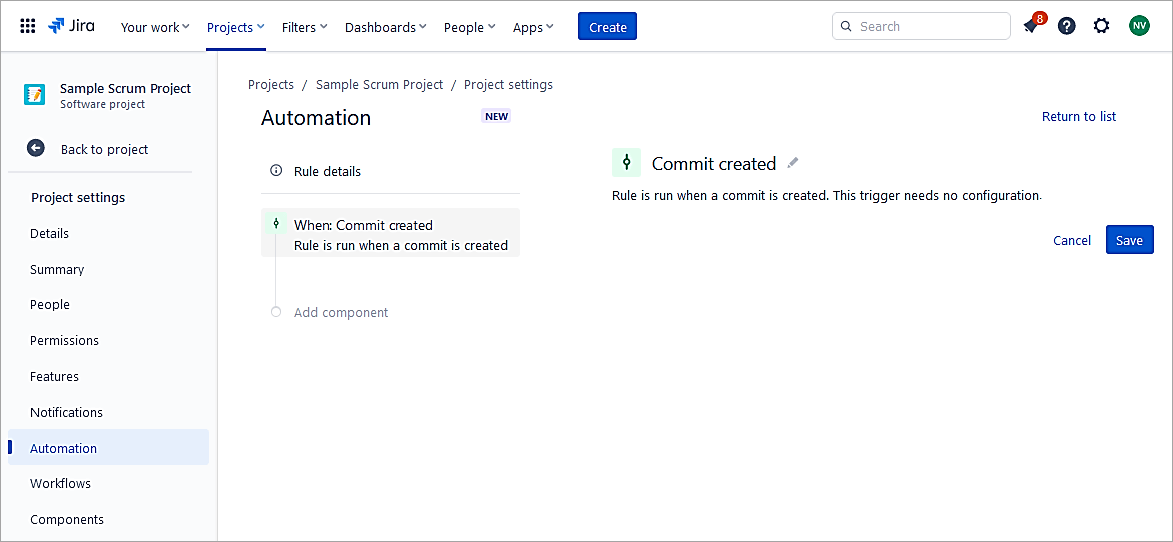
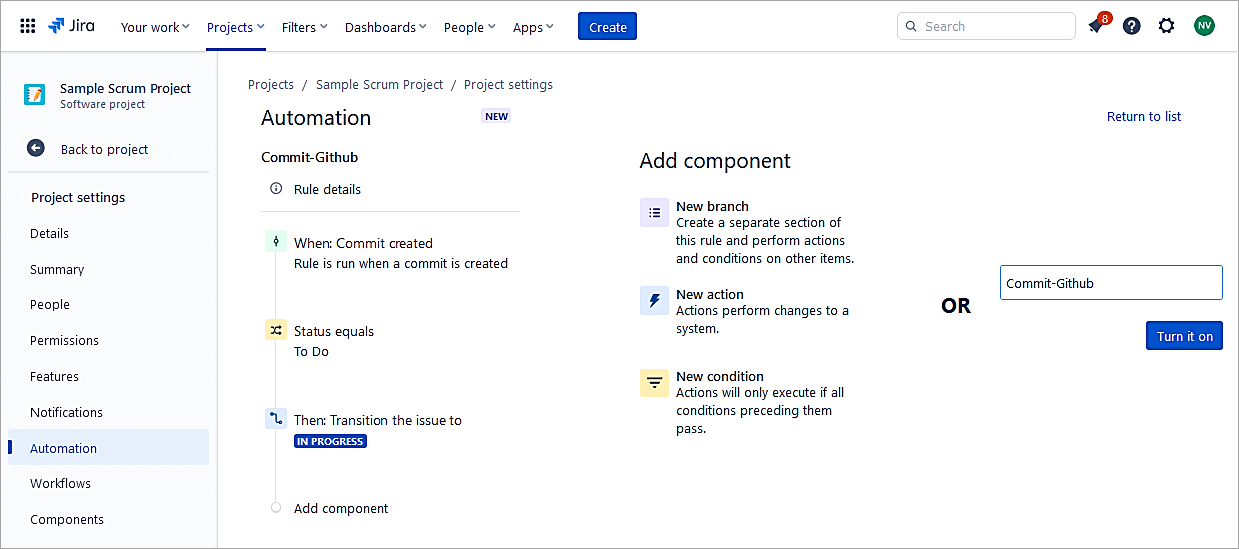
Example #7: Commit in GitHub will Transition the Jira Issue From To Do to In Progress
The example will show when a Commit is done in GitHub will transition the Jira issue from To Do to In Progress.
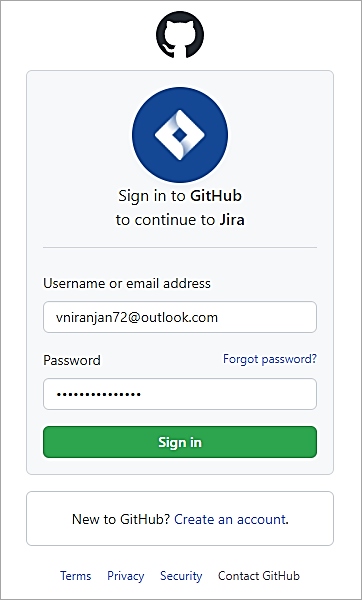
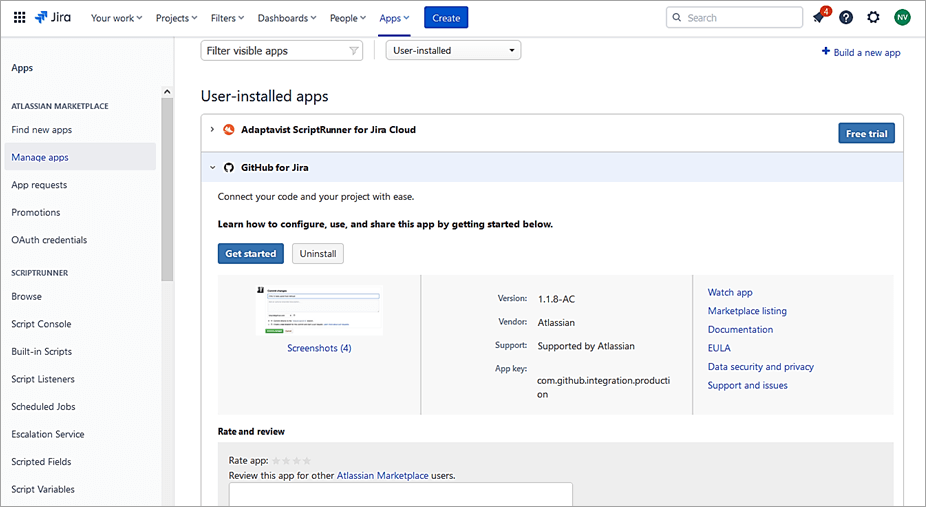
Since I will use connect to GitHub repo, ensure that the GitHub for Jira app is installed.
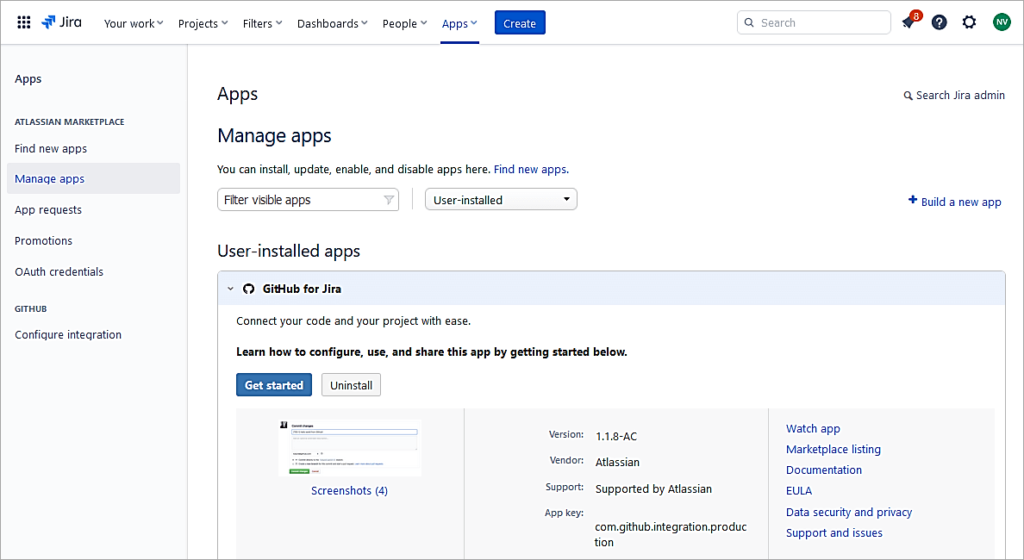
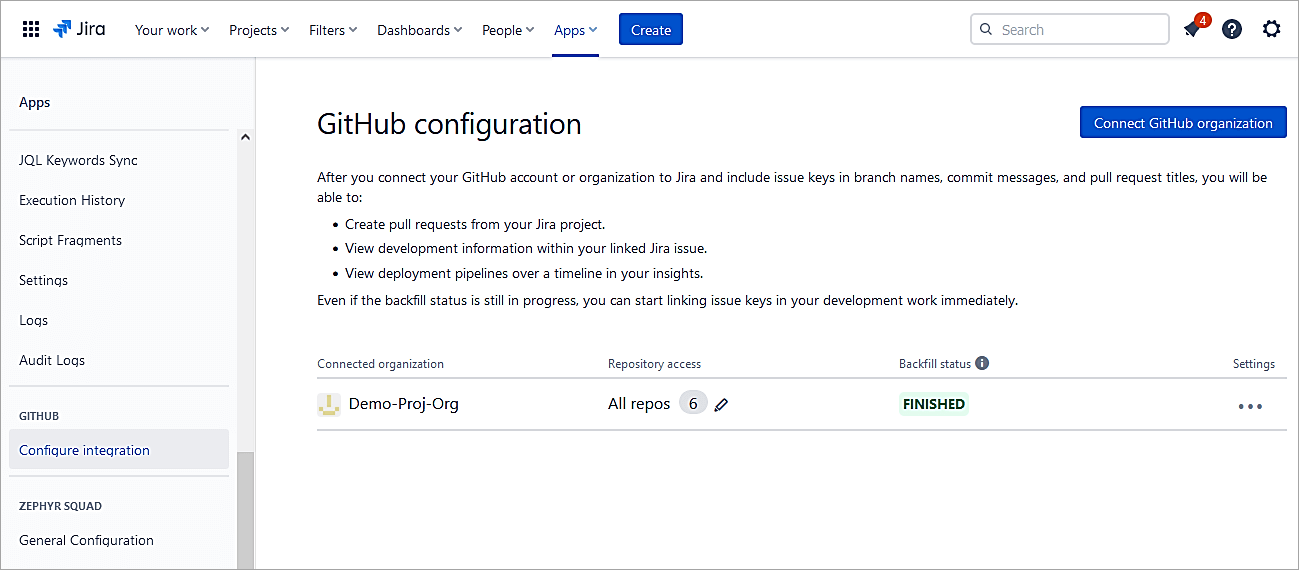
As Jira admin go to System -> Apps

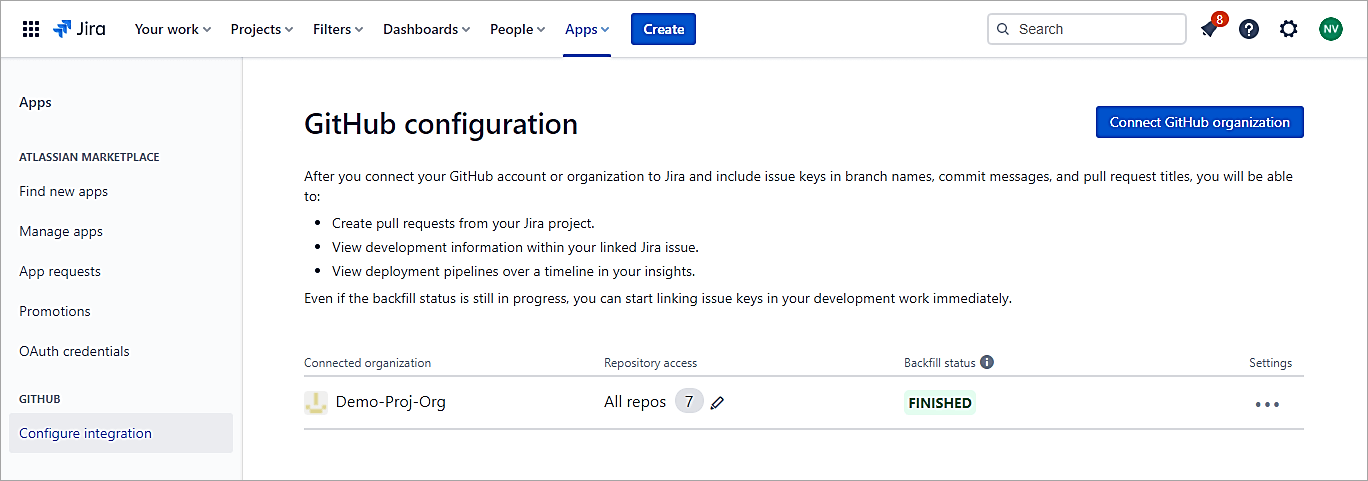
Click on GitHub -> Configure integration -> Connect GitHub organization
Click on the Connect button next to the Org
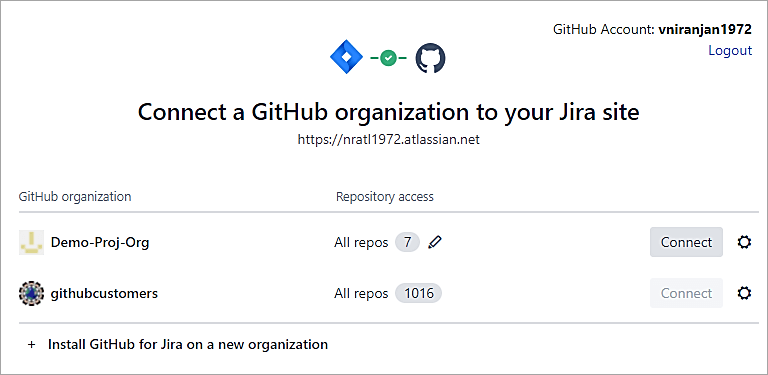
You should see a Finished message.
Create a rule in the project. Select Commit Created and Save.
Select New Condition.

Select Issue fields condition.
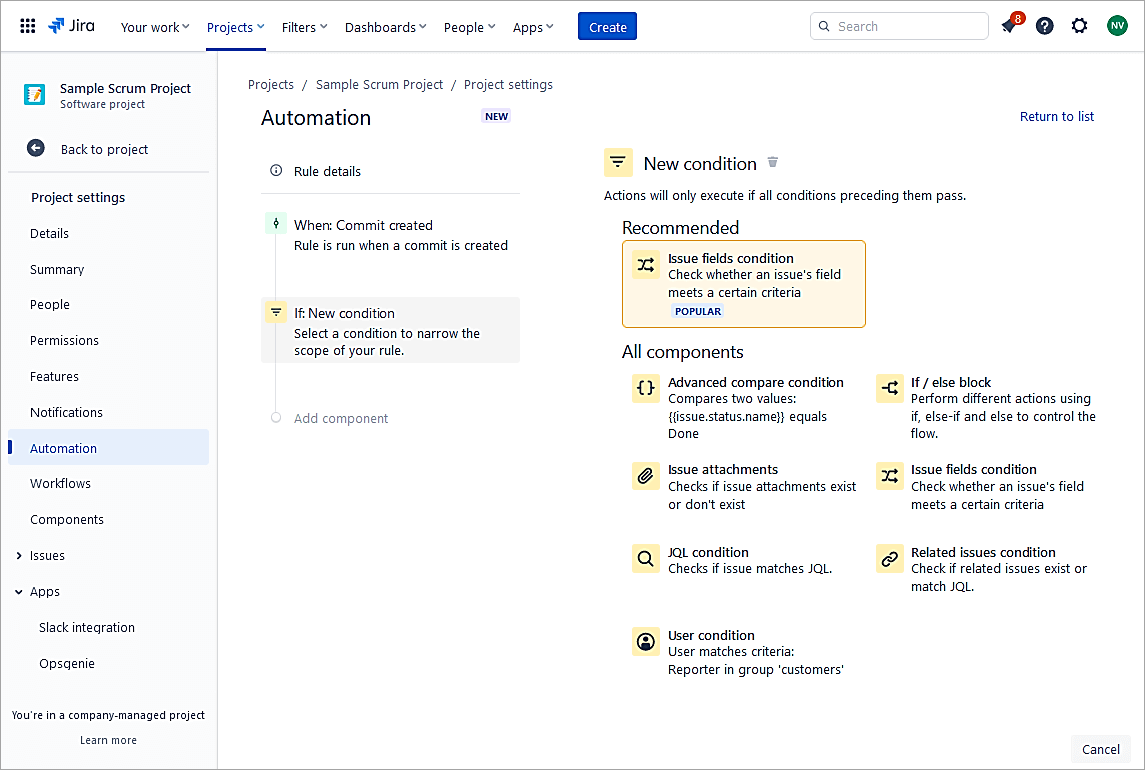
Select Status equals To Do. Click on Save.

Select New action.
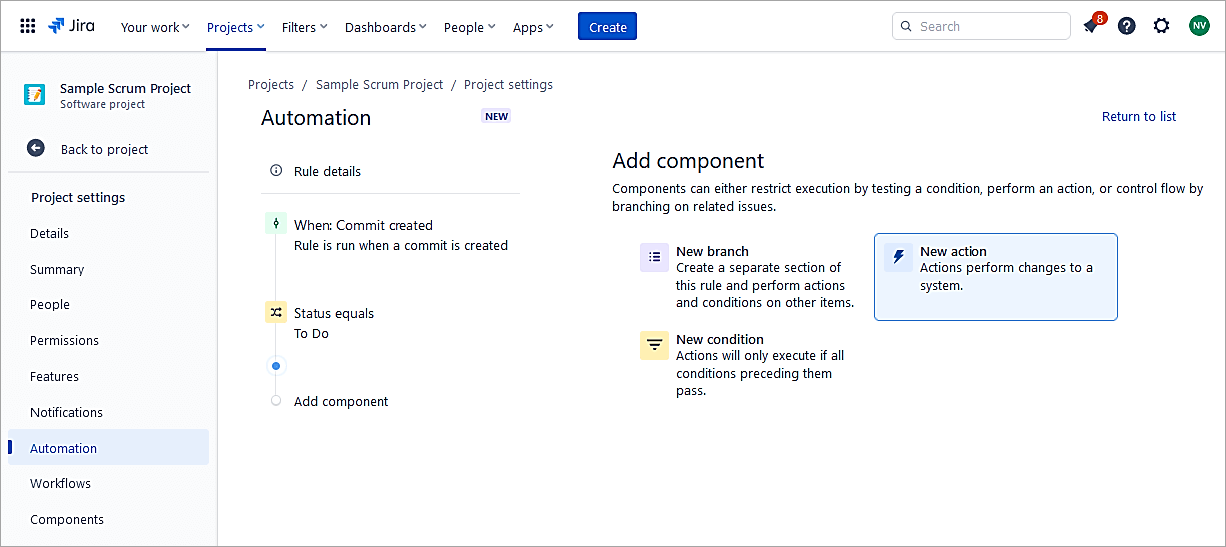
Select Transition issue.
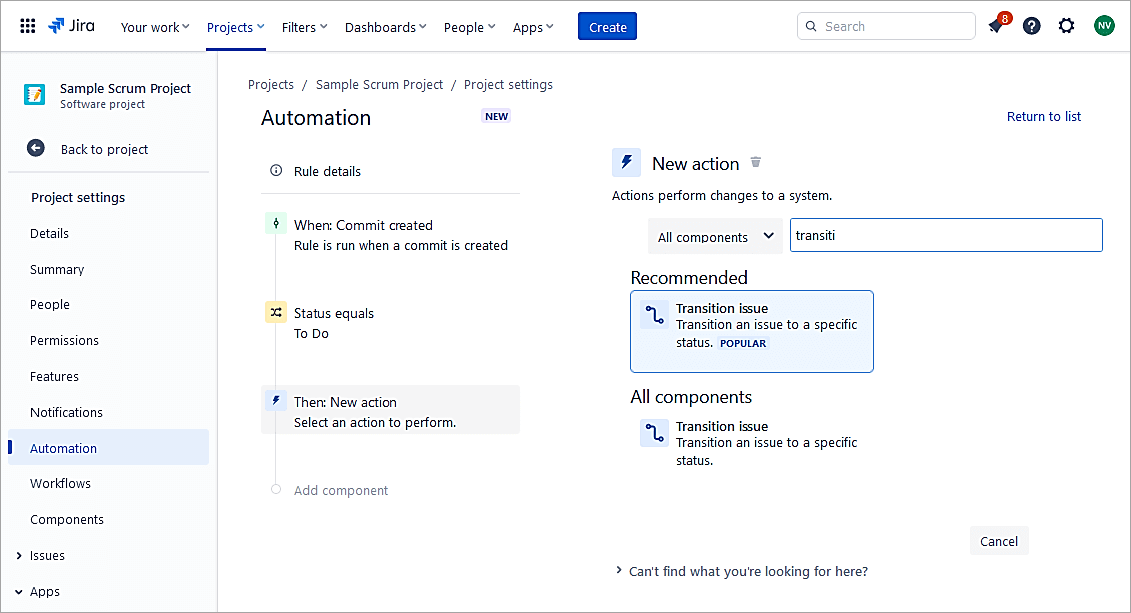
Select Destination status to In Progress. Click on Save.
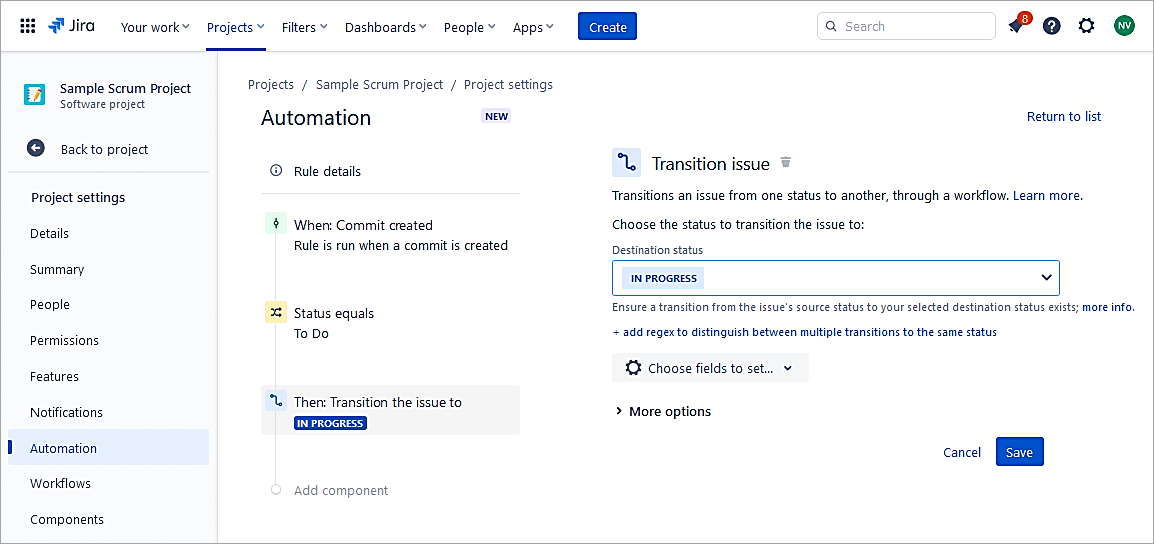
Name the rule and switch it ON.
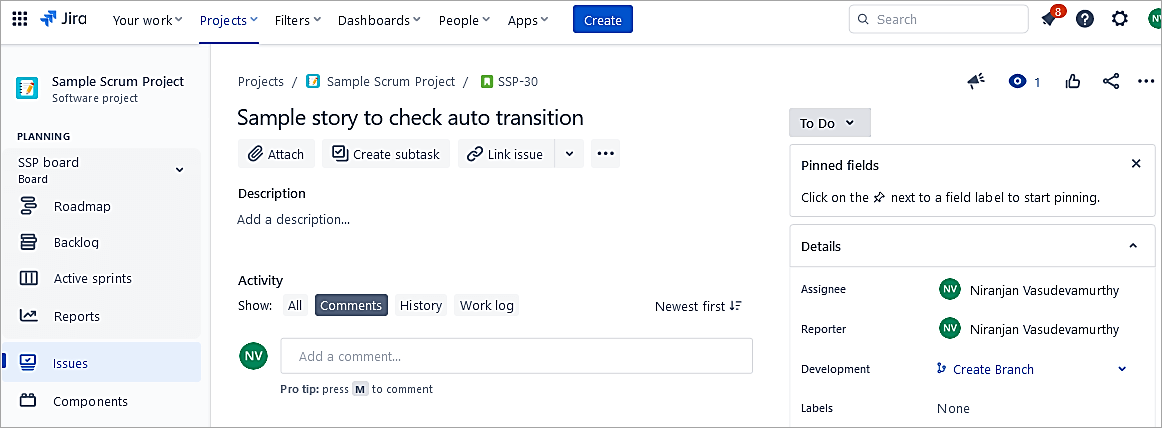
Test the Rule
Sample issue in To-Do status
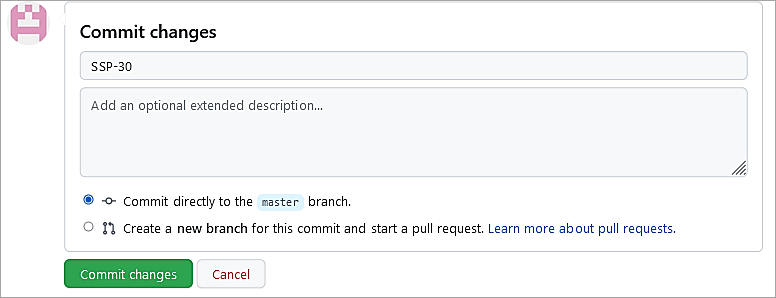
In GitHub perform a commit with the Jira issue id.
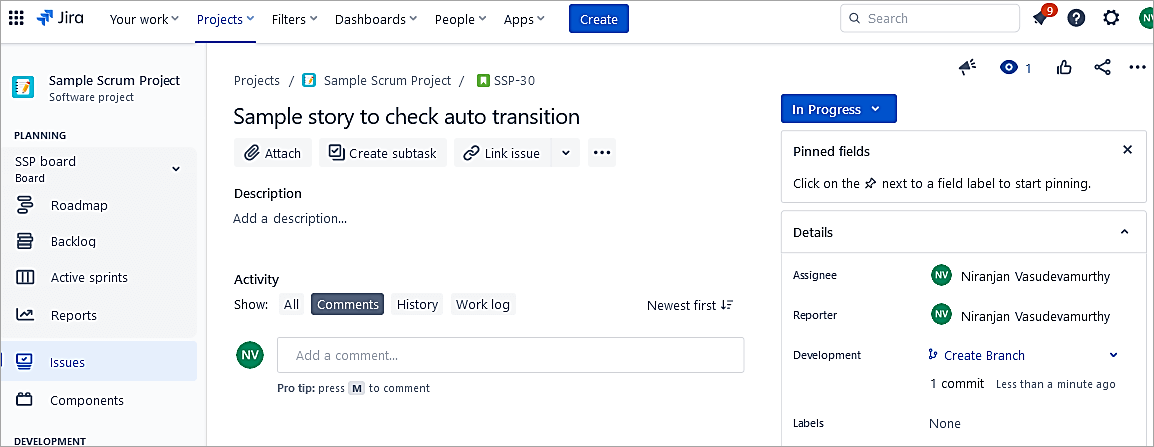
Status changes to In Progress.
Suggested Reading => Open Source and Commercial JIRA Alternatives/Competitor
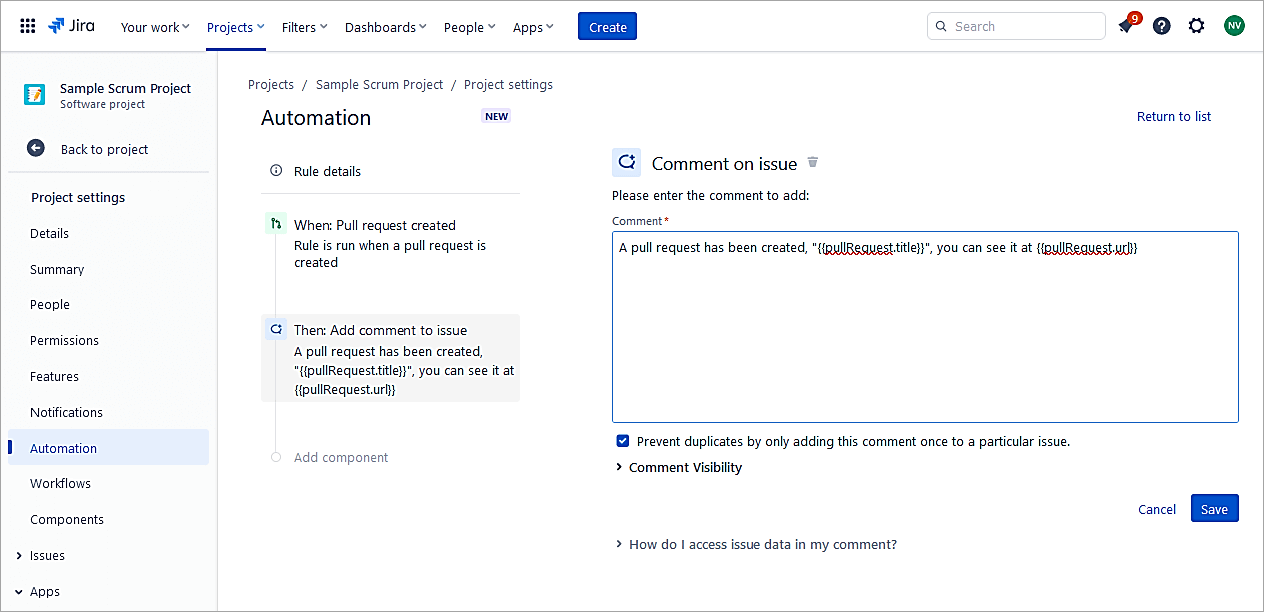
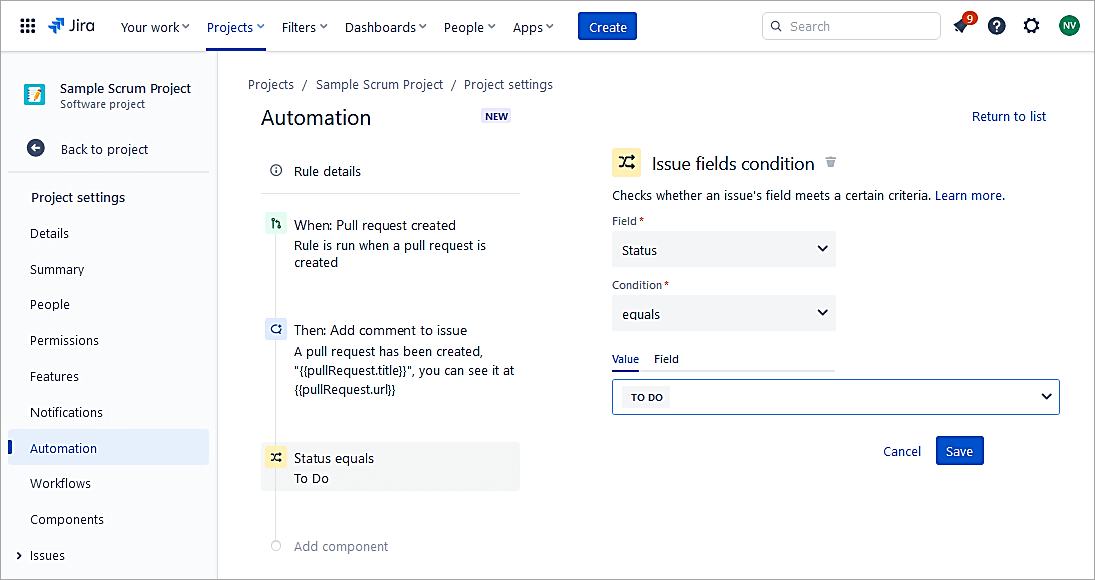
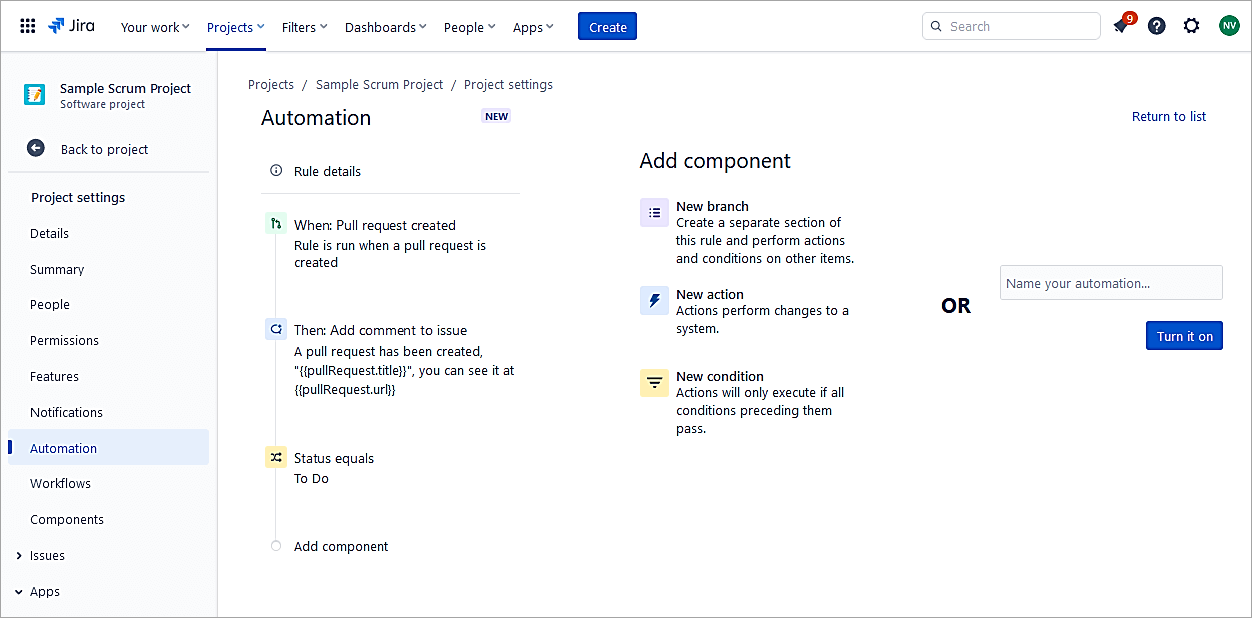
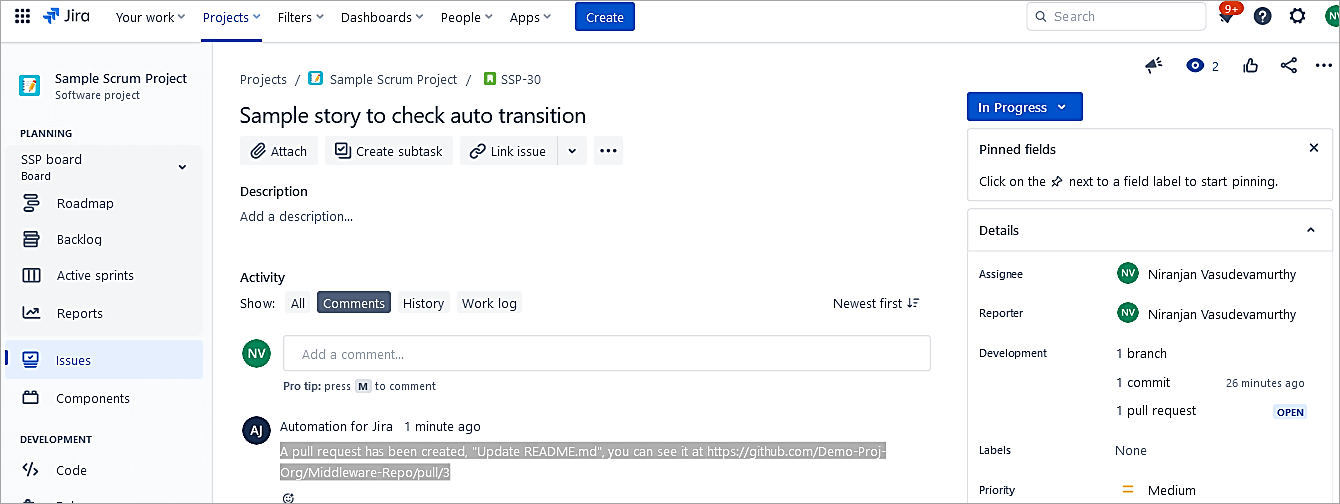
Example #8: PR in GitHub will Transition the Jira Issue From To Do to In Progress and Add a Comment to the Jira Issue
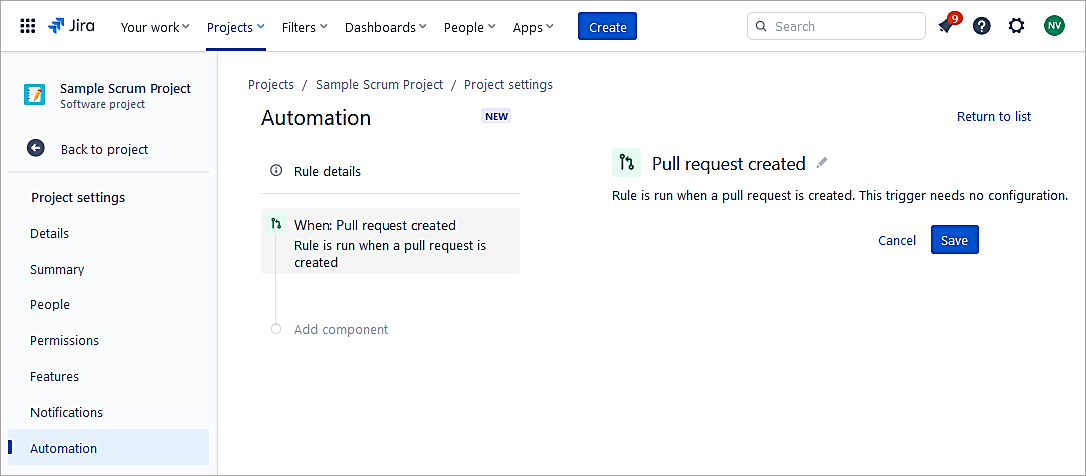
Create a rule in the project and select the Pull request created
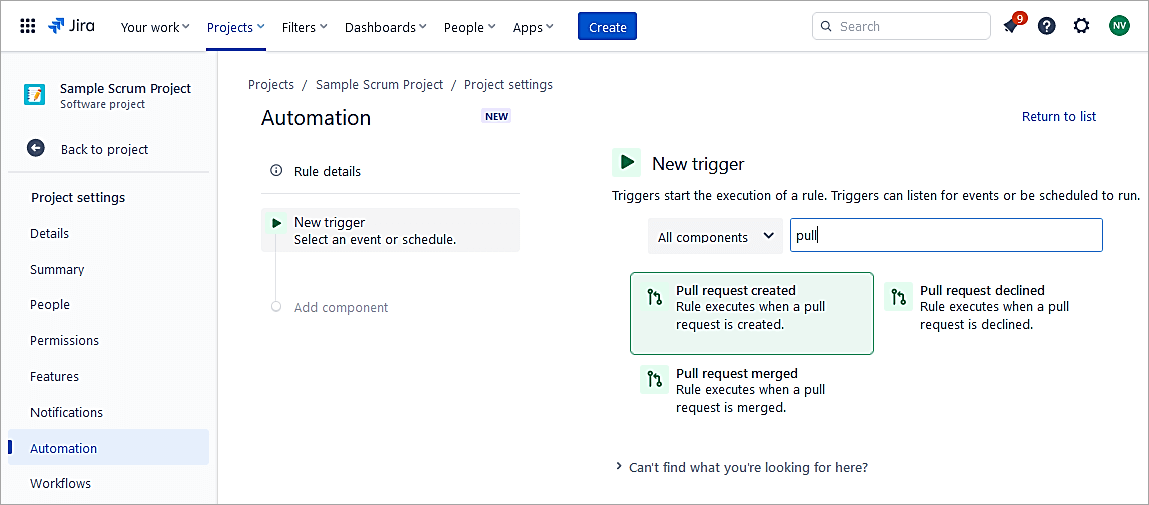
Click on Save.
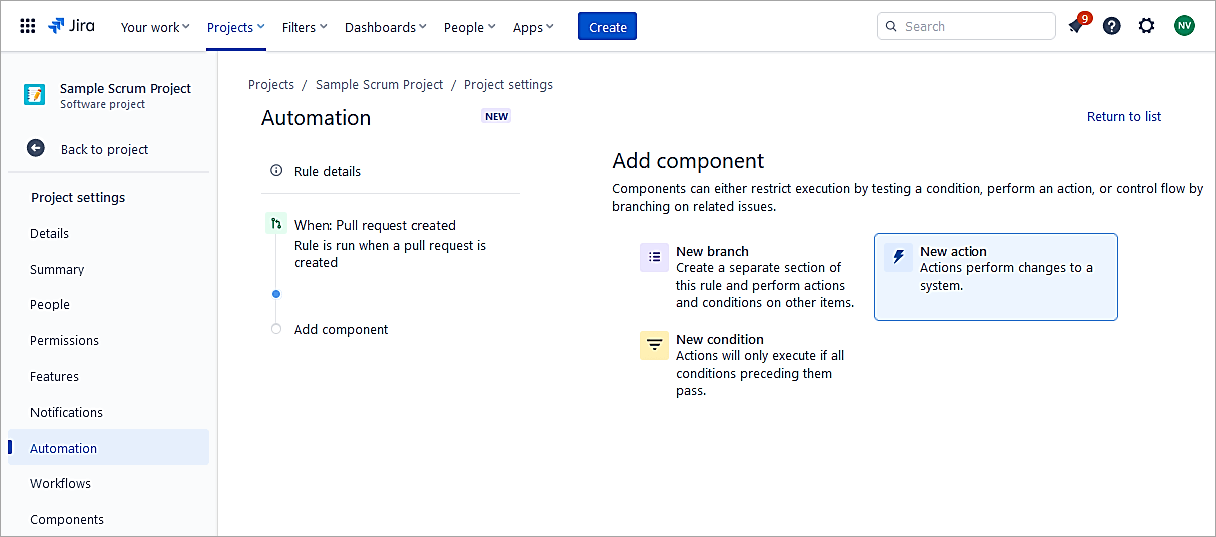
Select New action.
Select Comment on issue.
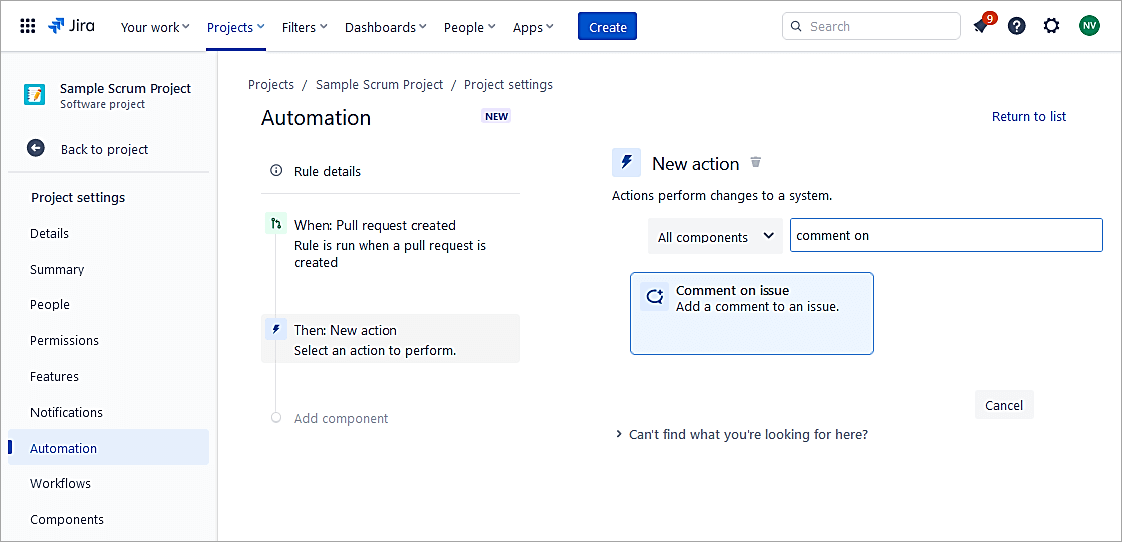
Add the below in the comment box.
A pull request has been created, “{{pullRequest.title}}”, click on the link {{pullRequest.url}}
Click on Save.
Select New condition.
Select Issue fields condition.
Status equals To Do and click on Save.
Click on New action.
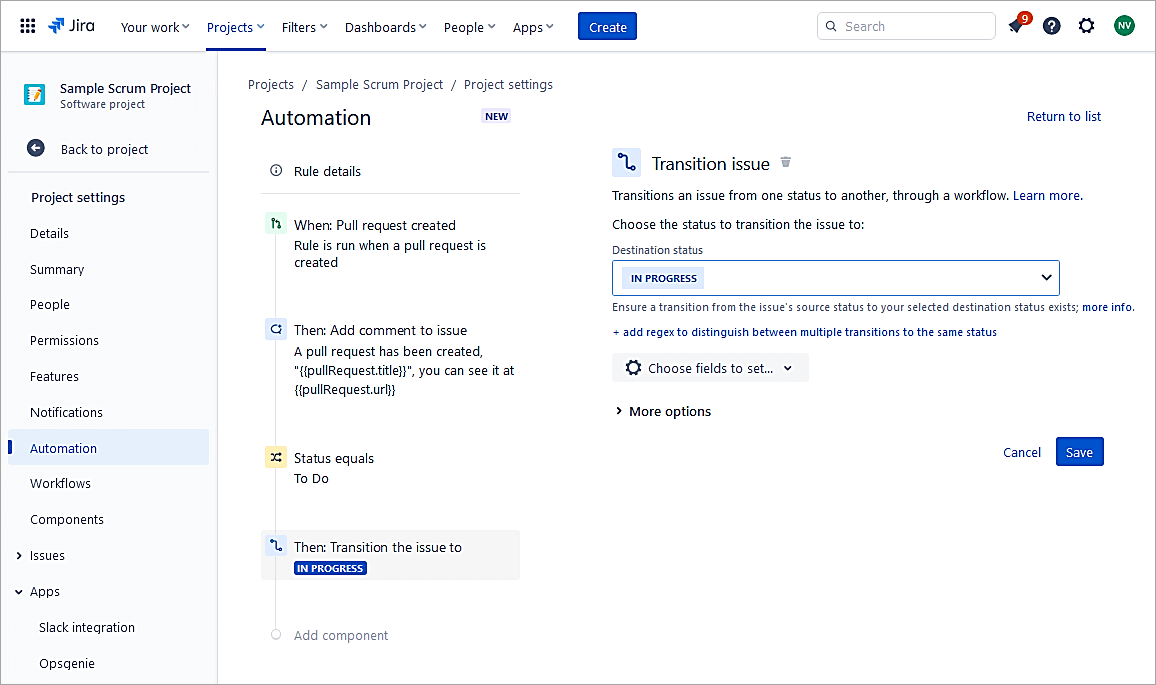
Select Transition issue.
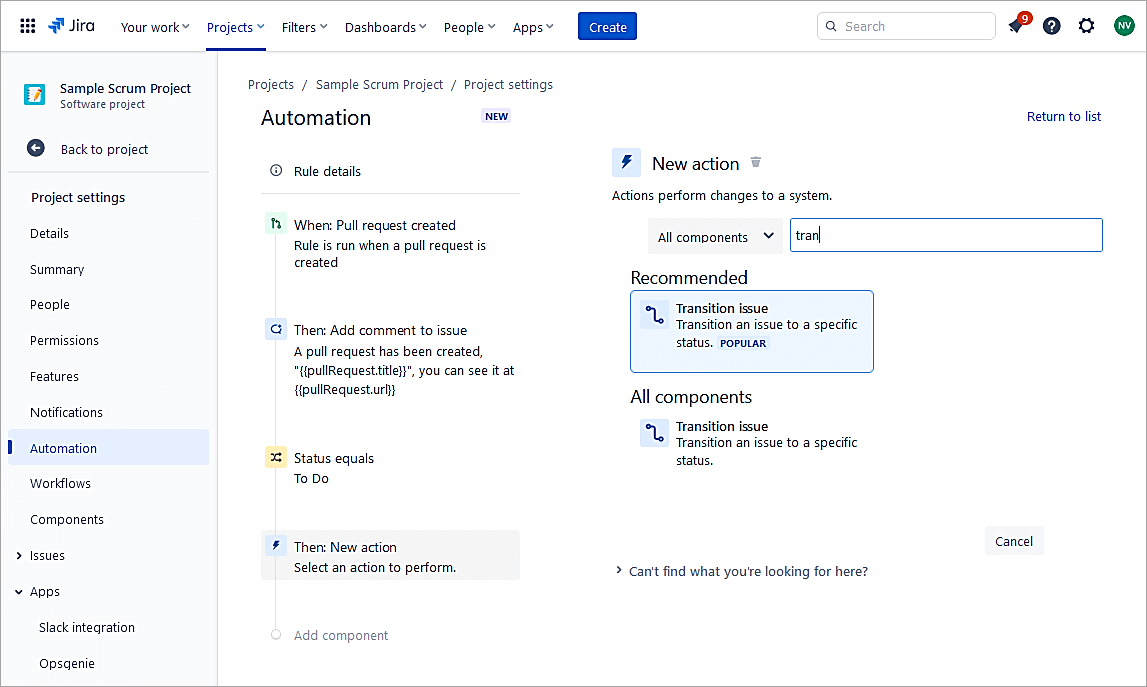
Destination status = In Progress
Click on save.
Name the rule and switch it On.
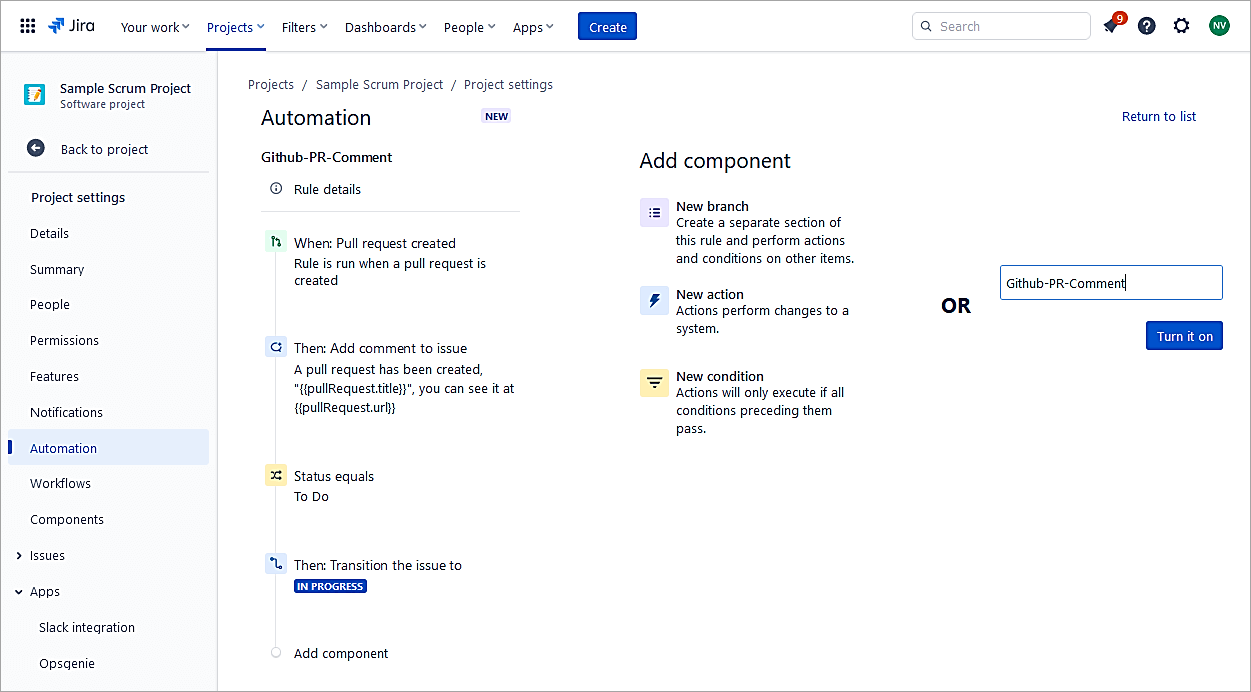
Test the rule.
Sample issue in To-Do status.
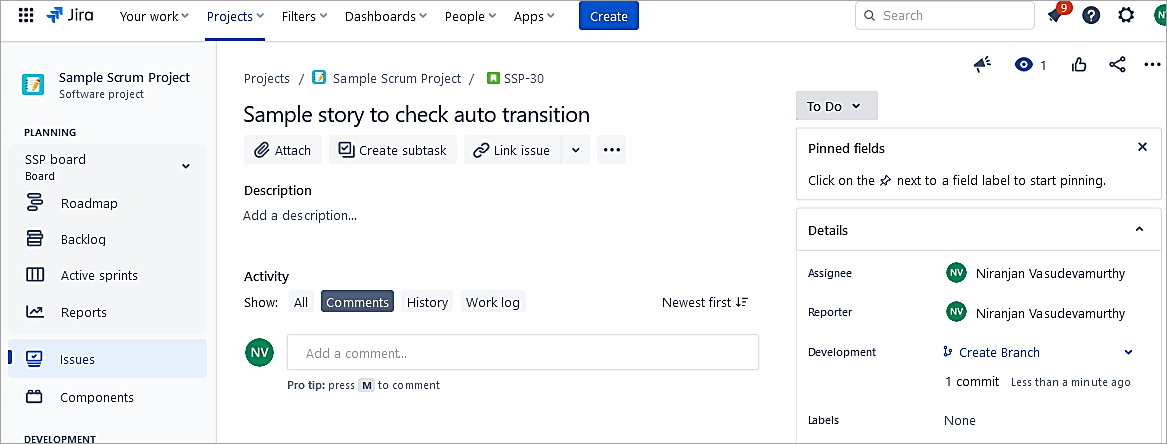
In GitHub raise a PR and, in the description, provide the Jira issue key.
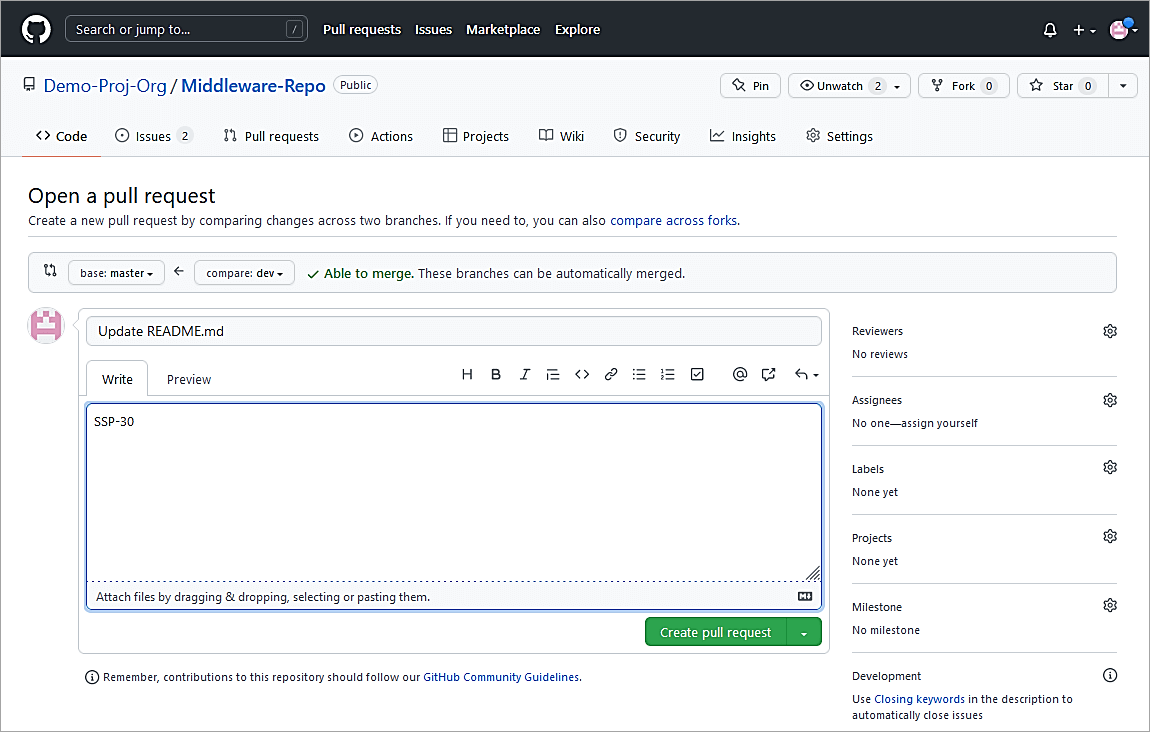
Do not Merge yet. Check the issue in Jira for the comment added and transition status.

Also Read =>> Guide on Jira Cloud Migration Assistant
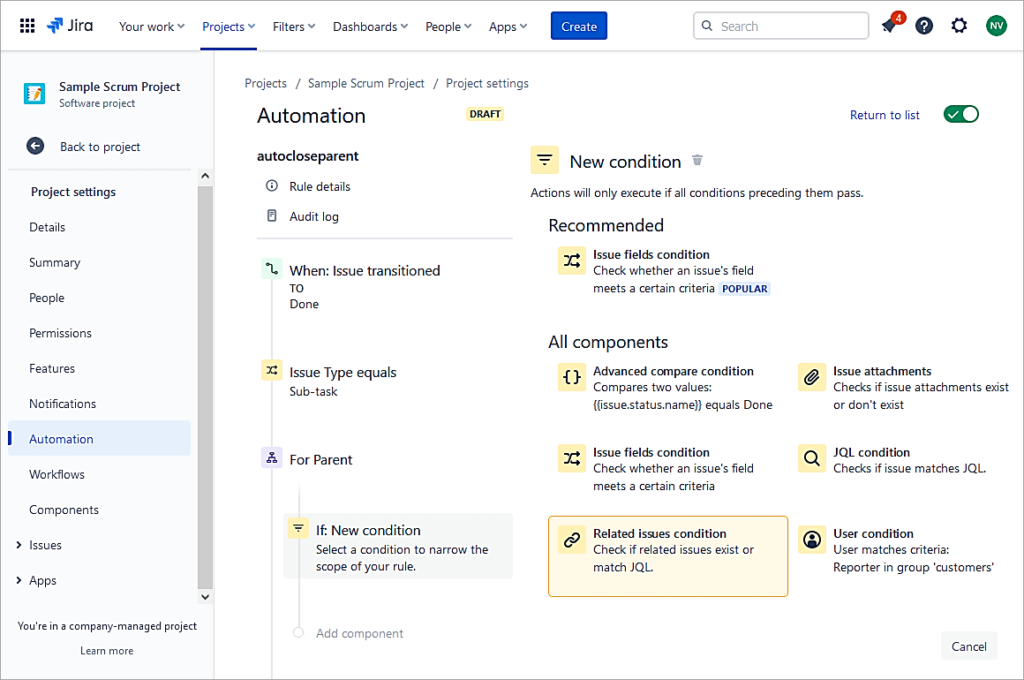
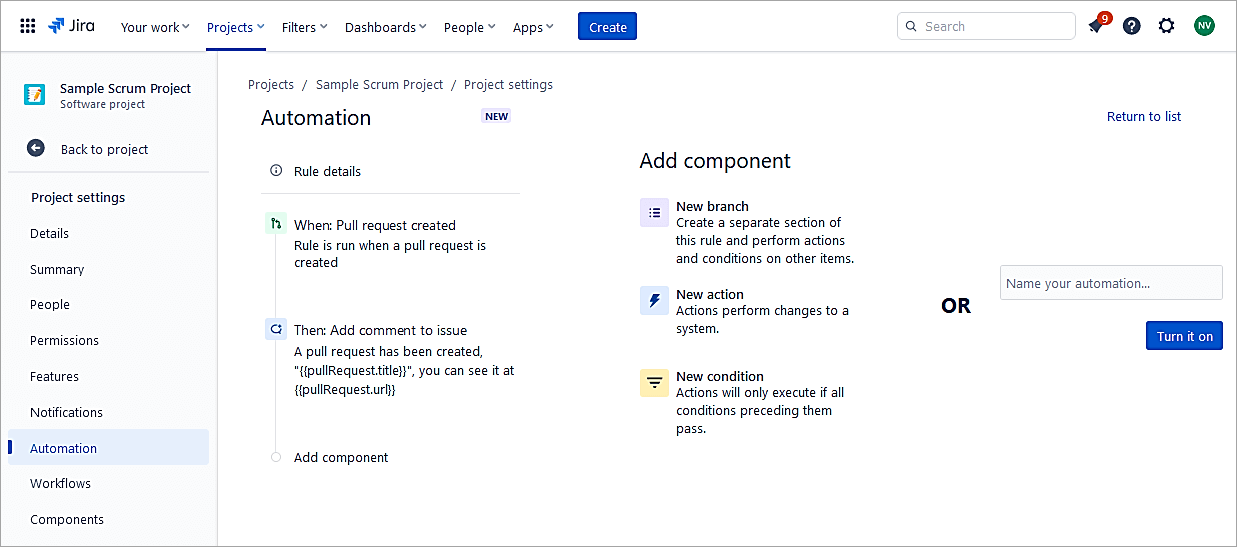
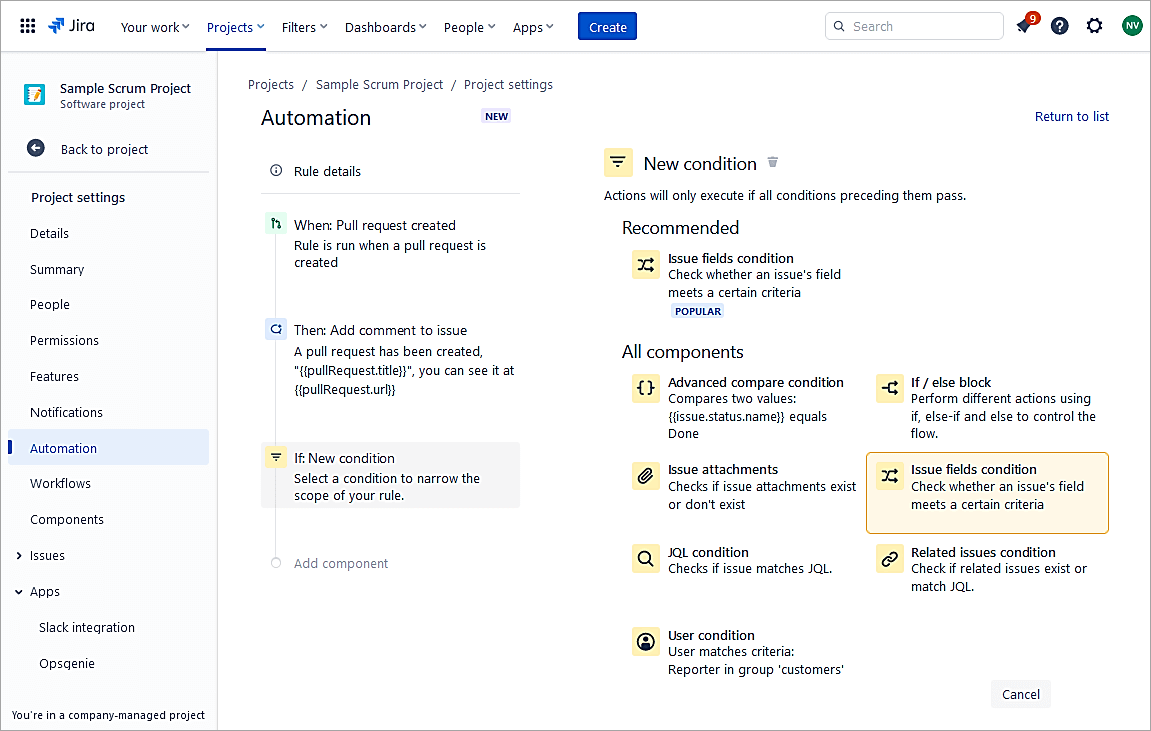
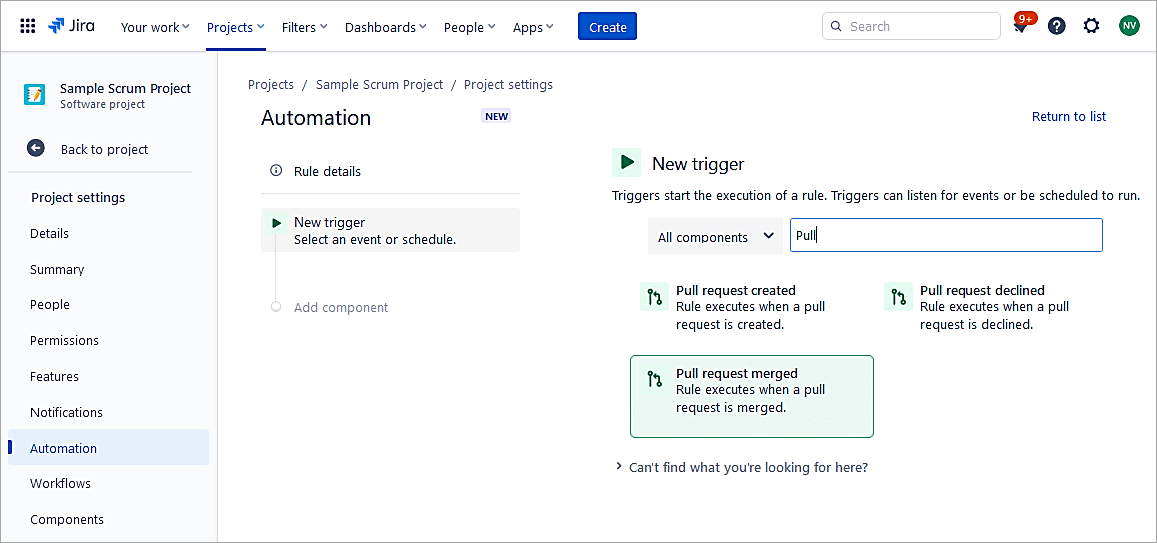
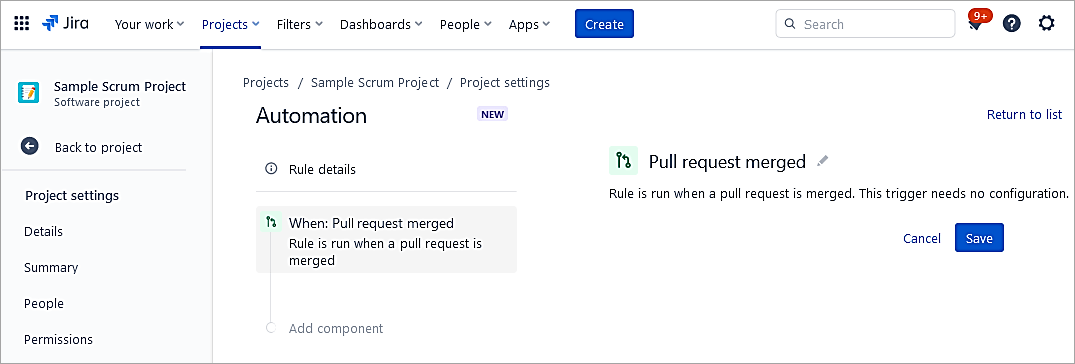
Example #9: PR Merged in GitHub Will Transition the Jira Issue From In Progress to Done
Create a rule in the project and select Pull request merged.
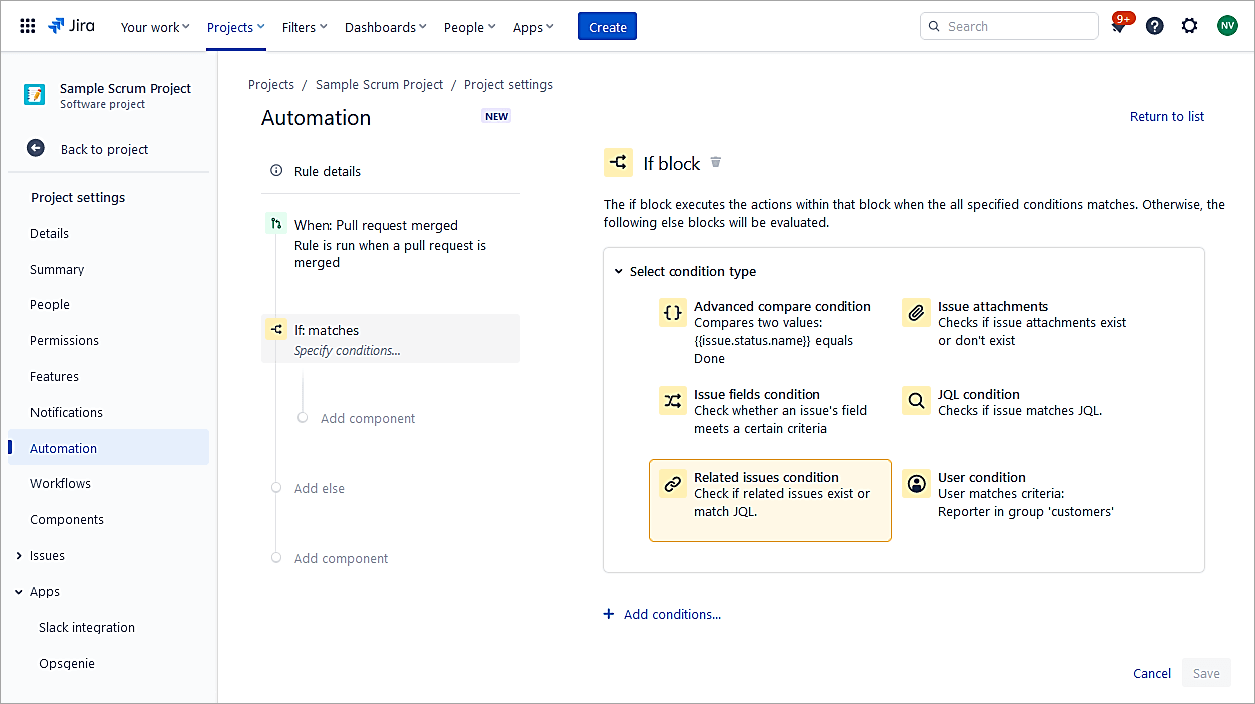
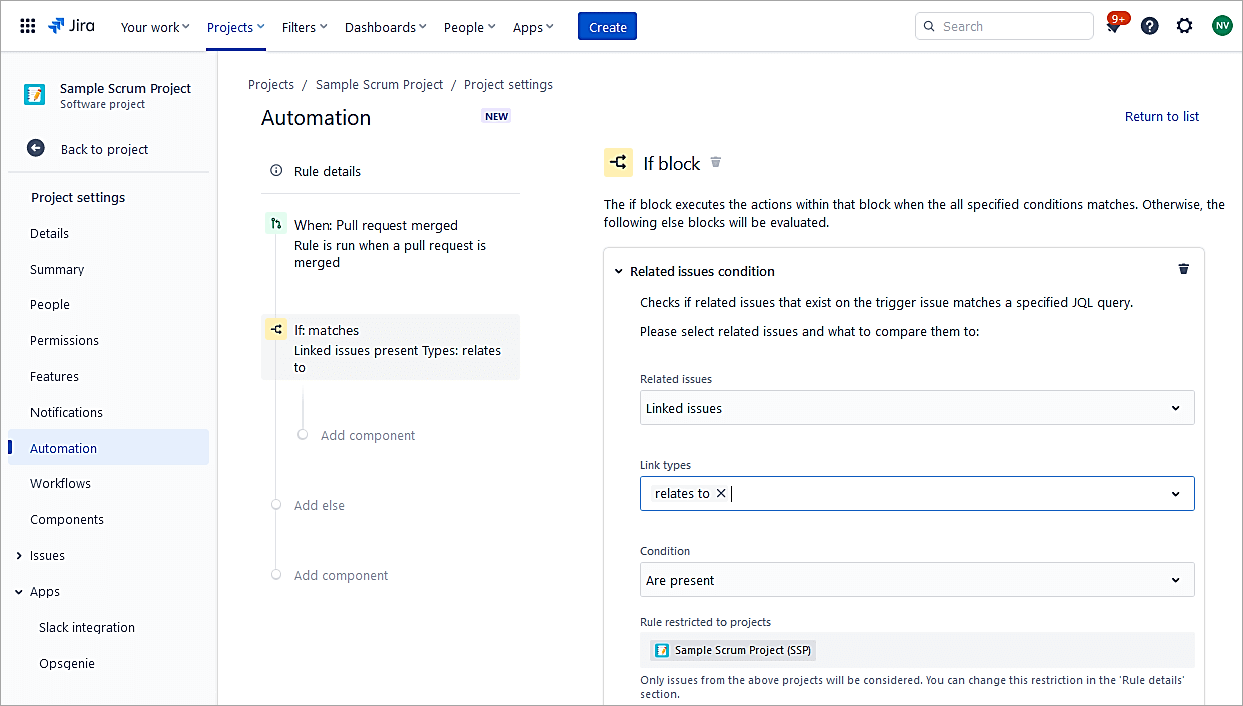
Add New condition -> If / else block
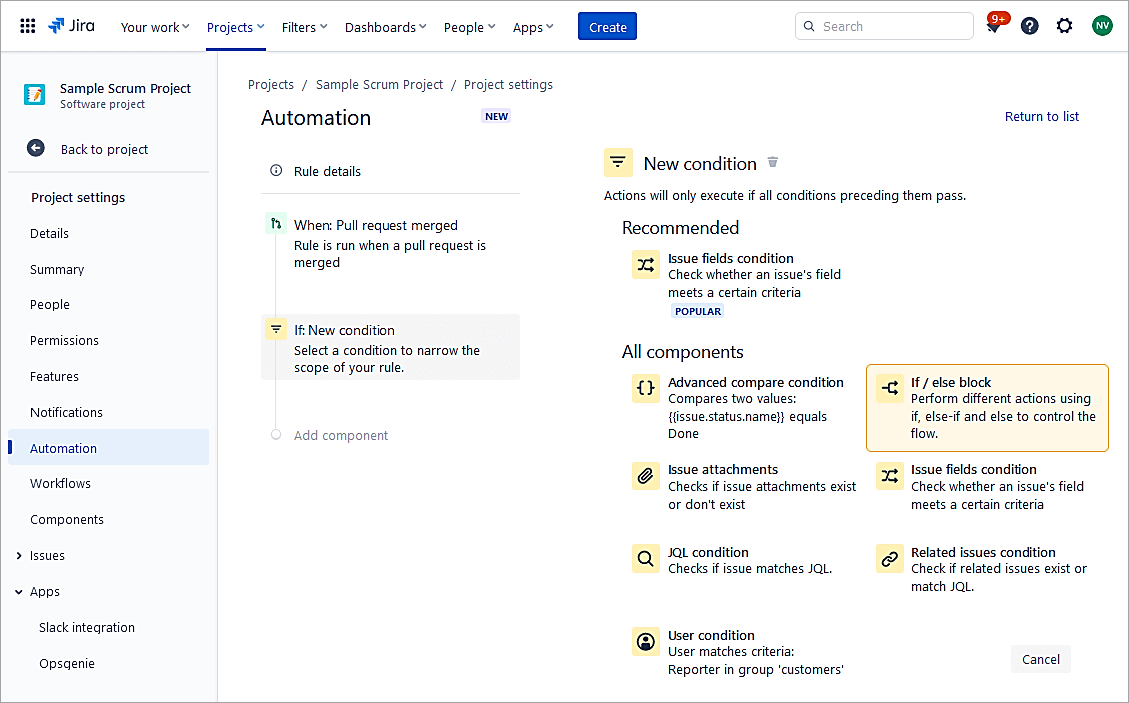
Select Condition type -> Related issues condition
Integrate Jira and GitHub (Cloud)
Integrating Jira and GitHub helps connect your code to the project in Jira. All the updates about code commits, branches, and pull requests can be seen within a Jira issue.
Developers using GitHub can use Smart Commits (https://support.atlassian.com/jira-software-cloud/docs/process-issues-with-smart-commits/ ) to transition issues, add comments to the issues, and also add time tracking information.
To use the integration, install the FREE GitHub app from https://marketplace.atlassian.com/apps/1219592/github-for-jira?tab=overview&hosting=cloud
Configure the integration
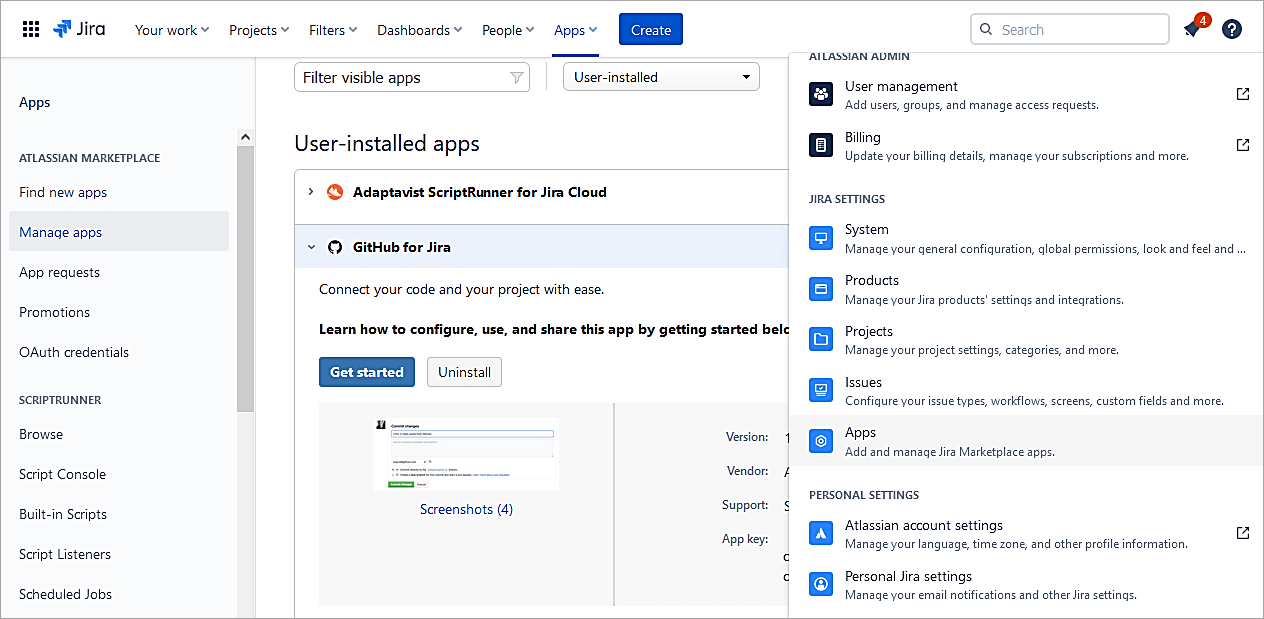
As a Jira administrator go to Settings -> Manage Apps
Click on GitHub->Configure Integration
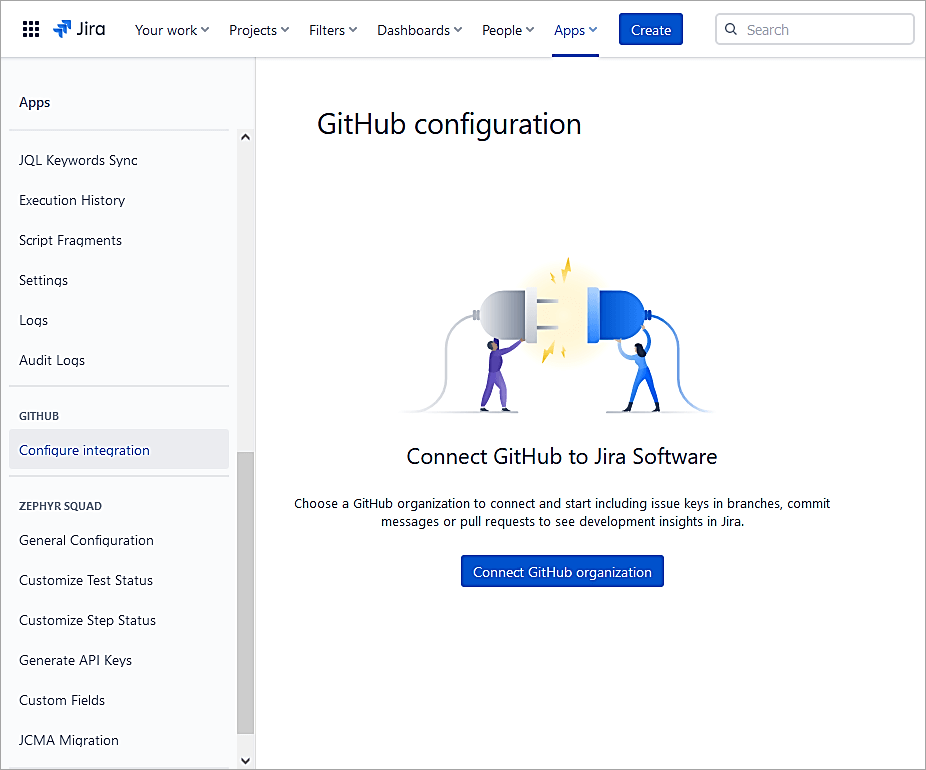
Click on Connect GitHub Organization
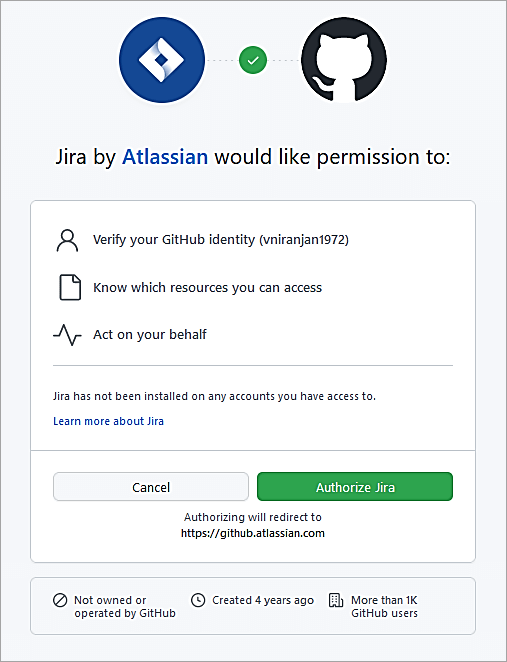
Authorize Jira
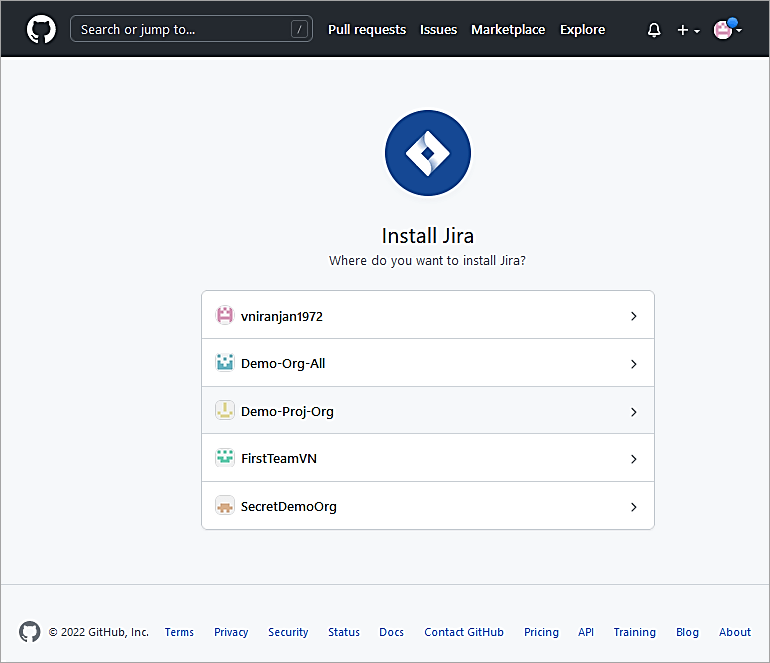
Click on Install GitHub for Jira on a new Organization
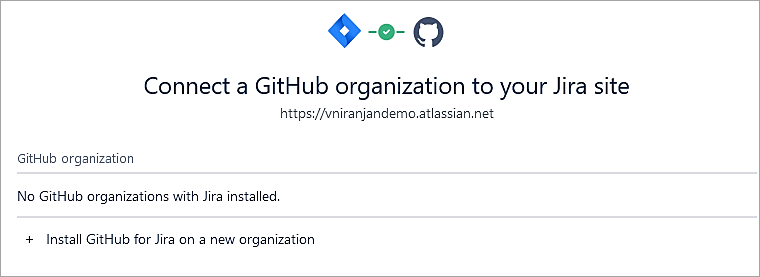
Select the Org
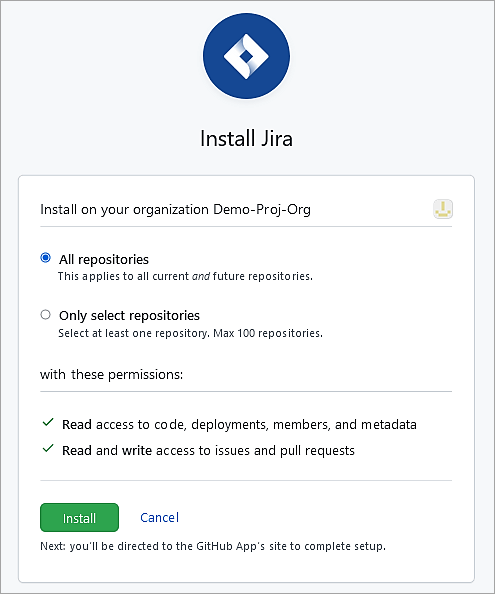
Click Install.
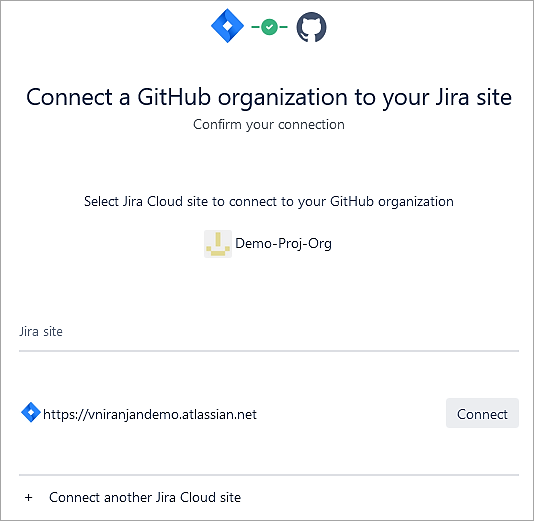
Click Connect.
Refresh the integration screen in Jira and you should see the details as shown.
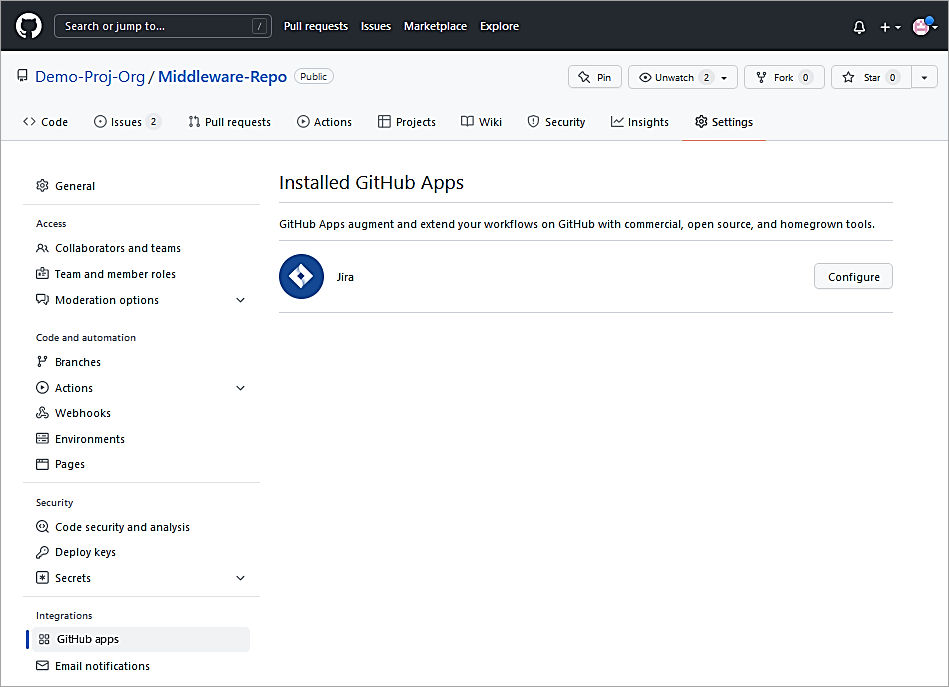
Similarly, in GitHub go to the Settings of the Organization and click on GitHub Apps to view the integration with Jira.
Test the integration
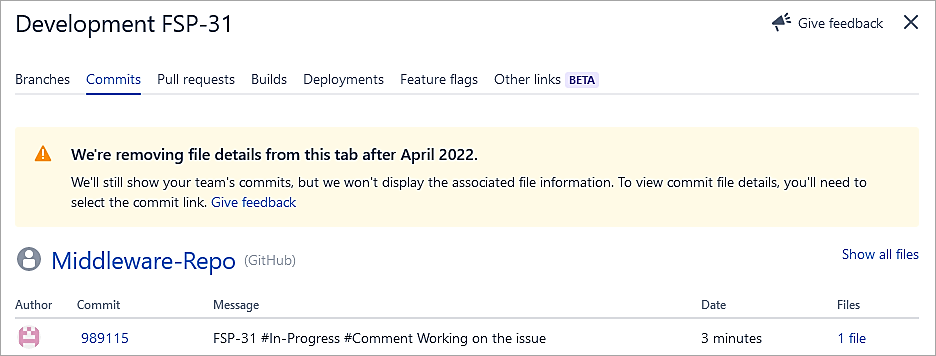
Make changes to the source code and add a Smart Commit as below
FSP-31 #In-Progress #Comment Working on the issue
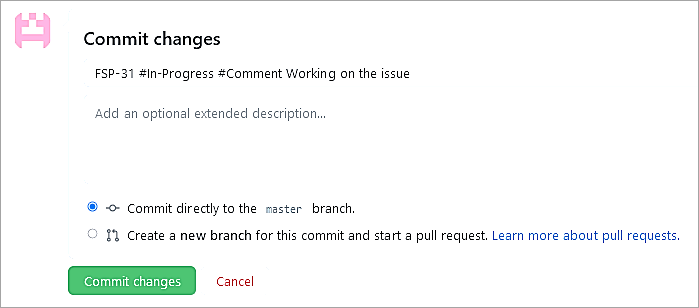
Click on Commit changes.
Go Back to the Jira issue and look at the Status, Comment and Commit details.
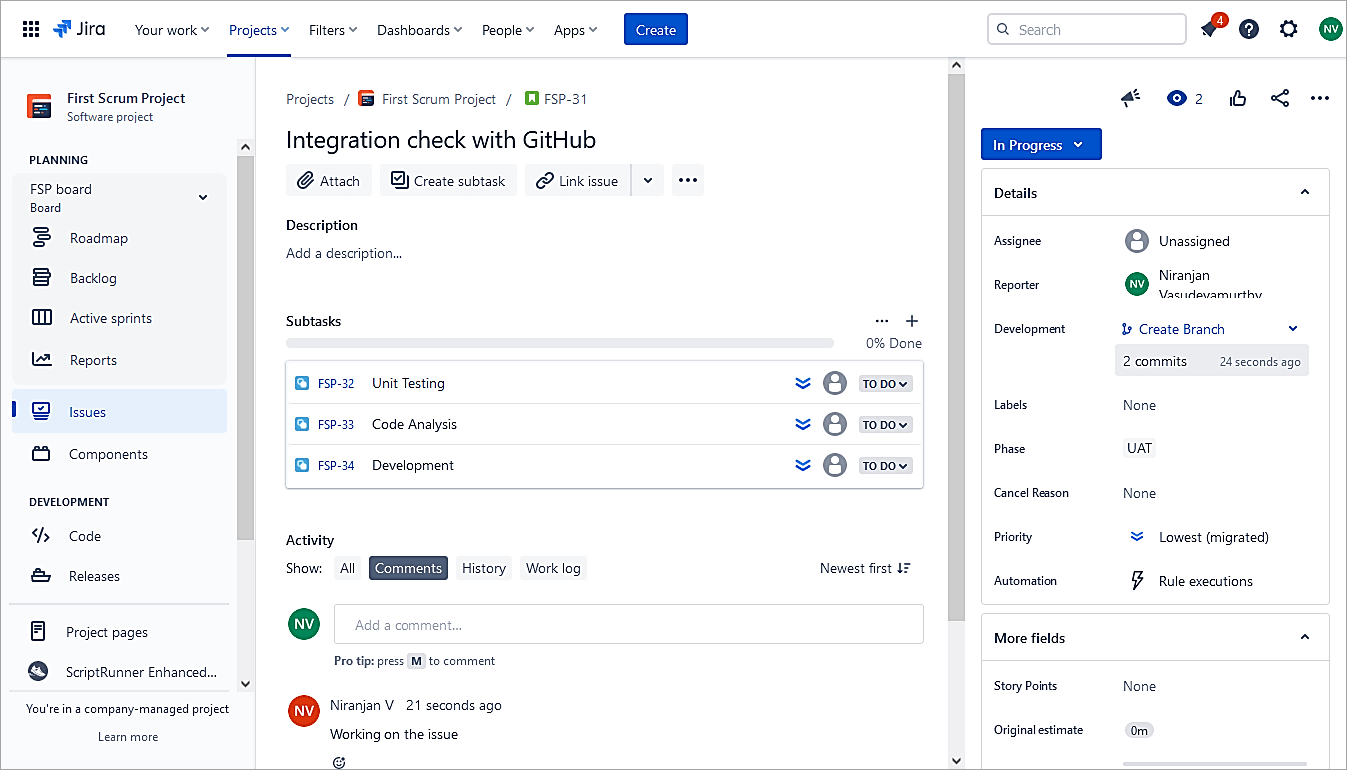
Click on Commits below Development.
Suggested Read => Creating Jira Dashboard Quickly
Jira and Confluence Cloud Integration
Confluence is a web-based collaboration wiki tool where you create and organize work in one place.
In this section, we will look at how Jira and Confluence can be integrated seamlessly. Jira and Confluence work together to keep all of the team’s knowledge in one place which helps to manage agile projects. Specific examples could be creating sprint reports or release notes by including issues created in Jira directly into Confluence.
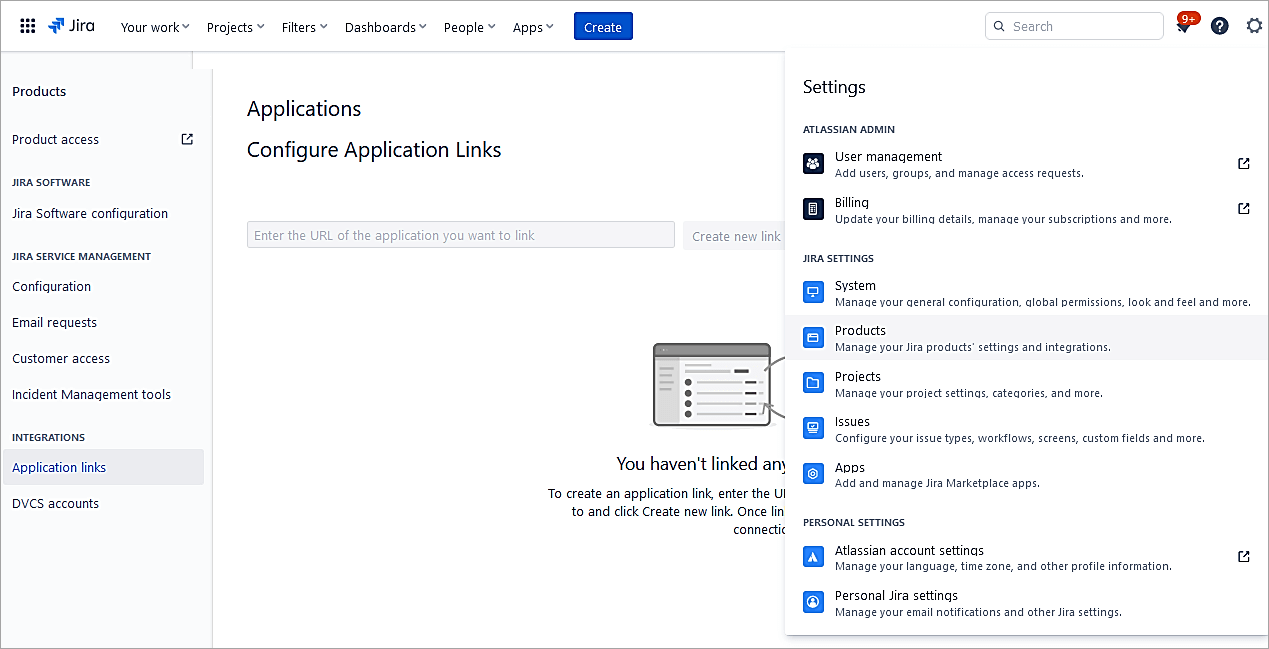
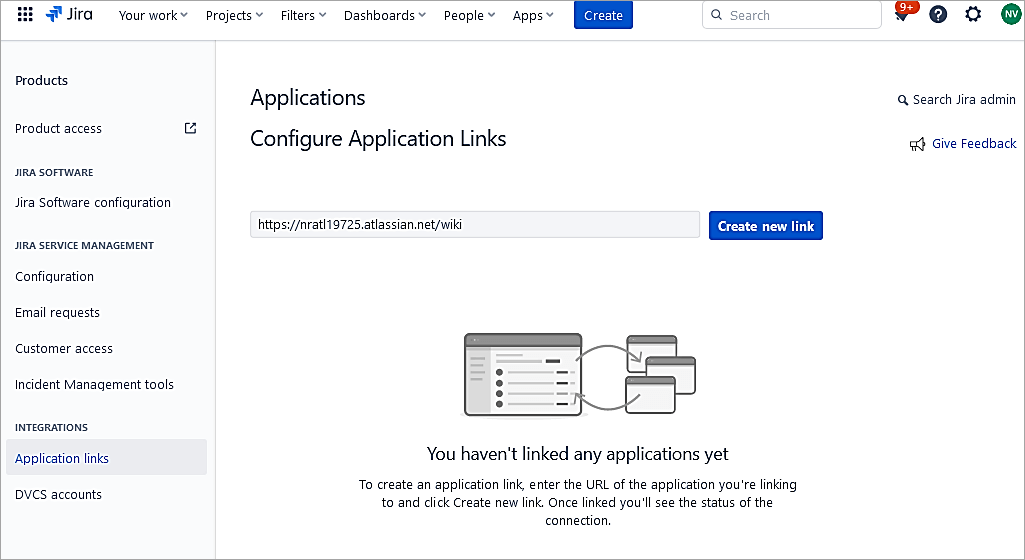
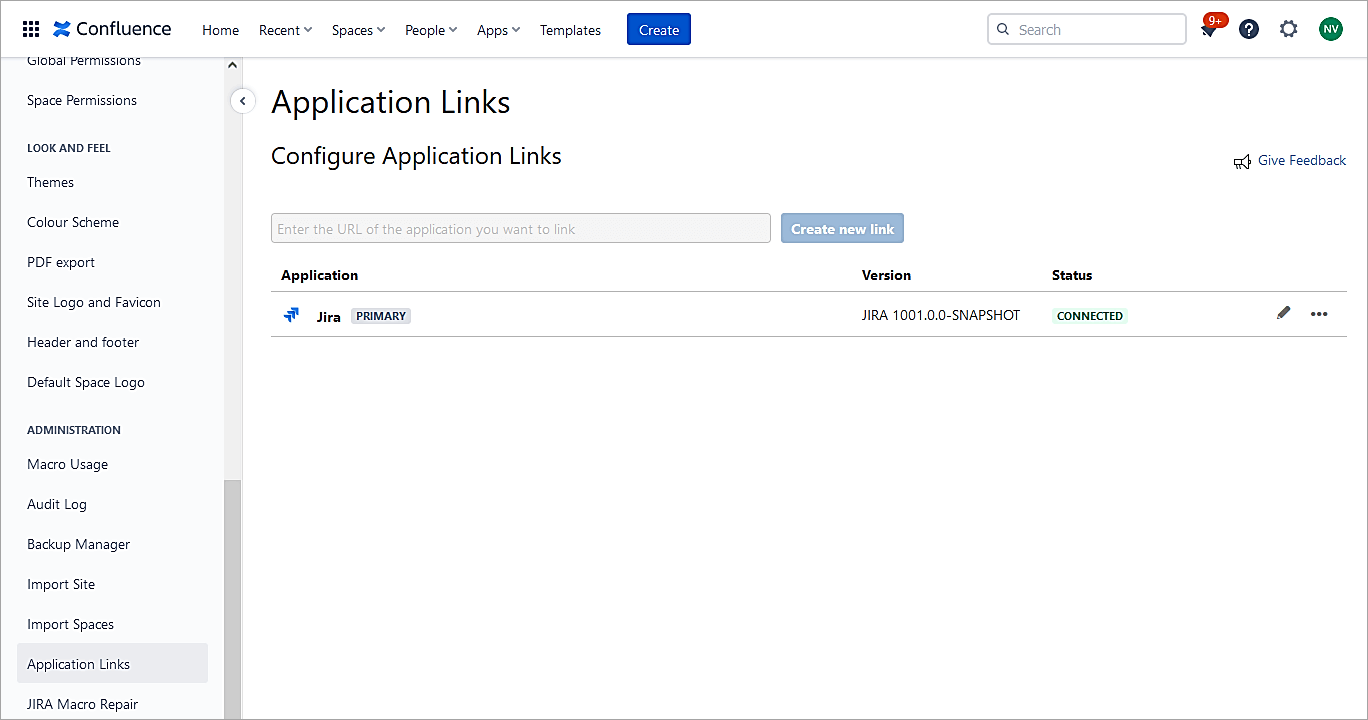
To setup the integration in Jira Cloud go to Settings -> Products -> Application Links
Add the URL of Confluence and Create a new link.
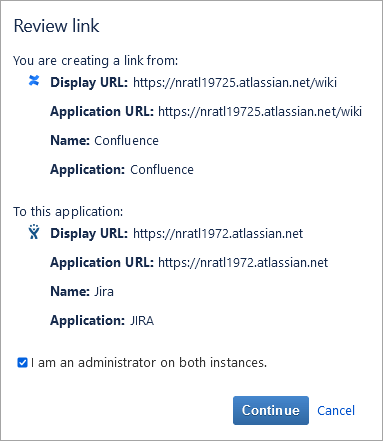
Click on Continue.
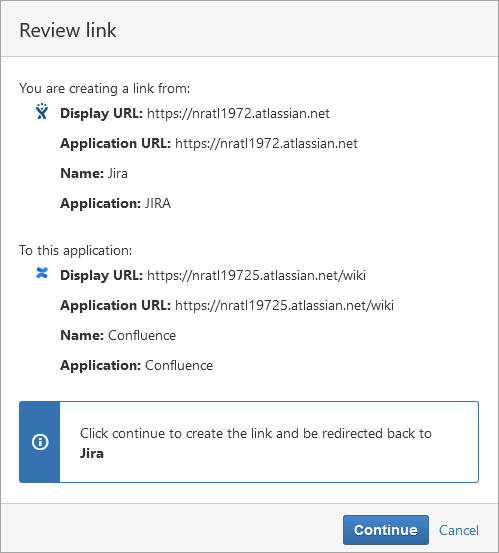
Again, click on Continue.

Vice versa in the Confluence cloud the application link is created as well.
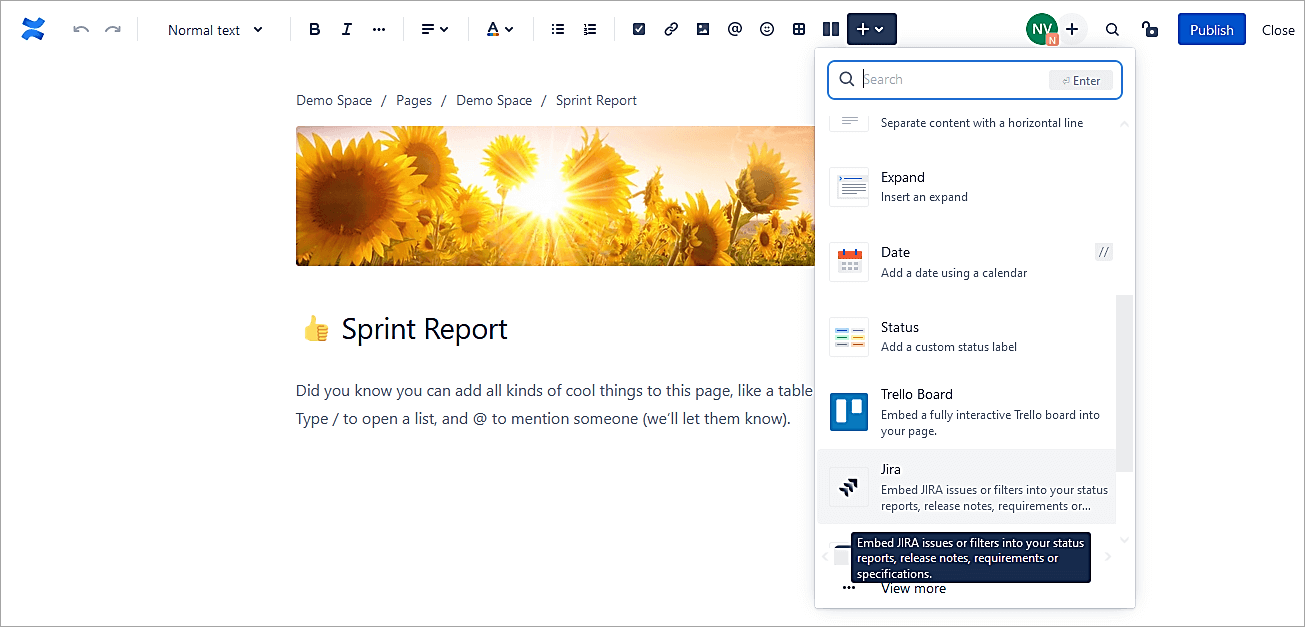
Test the integration to display Jira issues in Confluence.
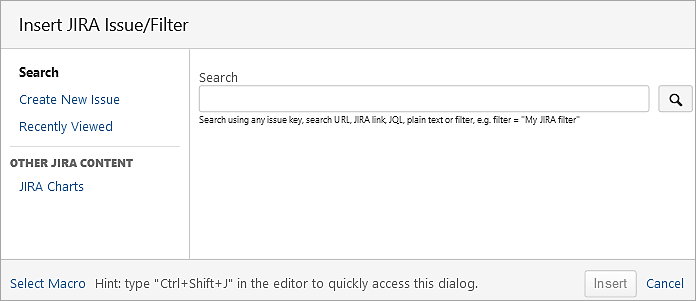
To test the integration in Confluence, create a new page in a space and insert the Jira macro.
Add a simple filter to pull all Story issues and click on Search.
project = SSP and issuetype = Story
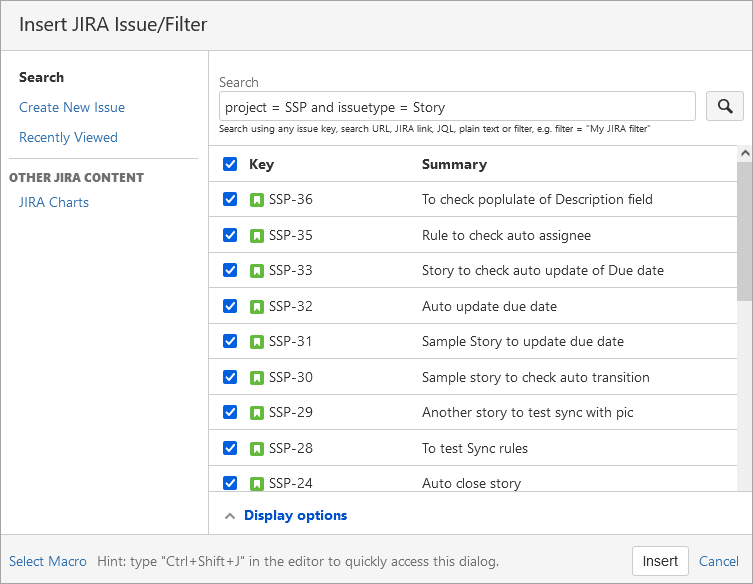
Click on Insert.
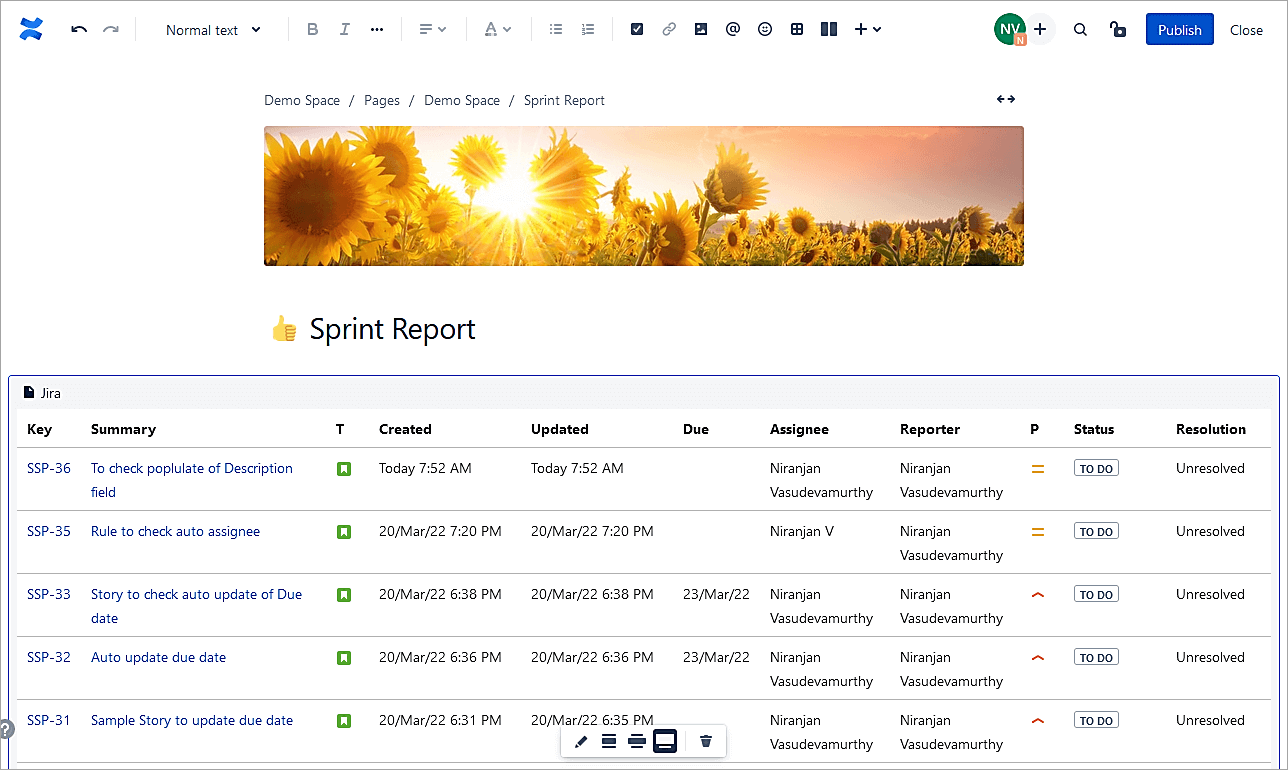
Click on Publish.

Jira Charts
Create a Blank page and insert the Jira macro.
Click on the Jira Charts link
Add a JQL Query and click on Preview. Select the Display options and click on Insert.
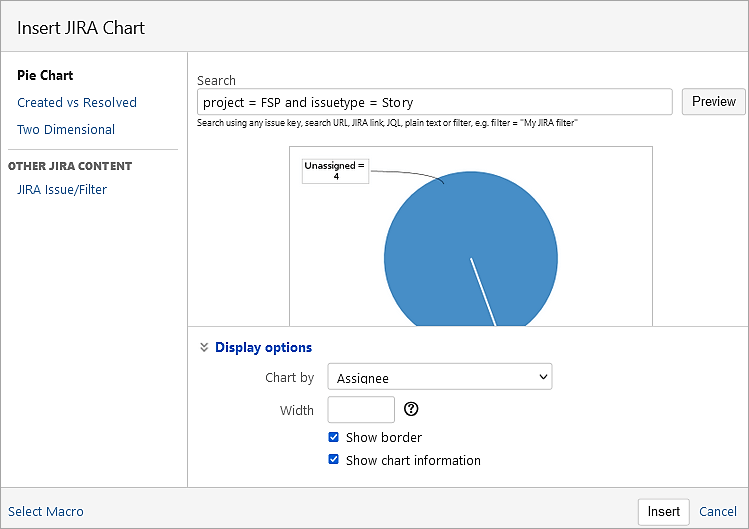
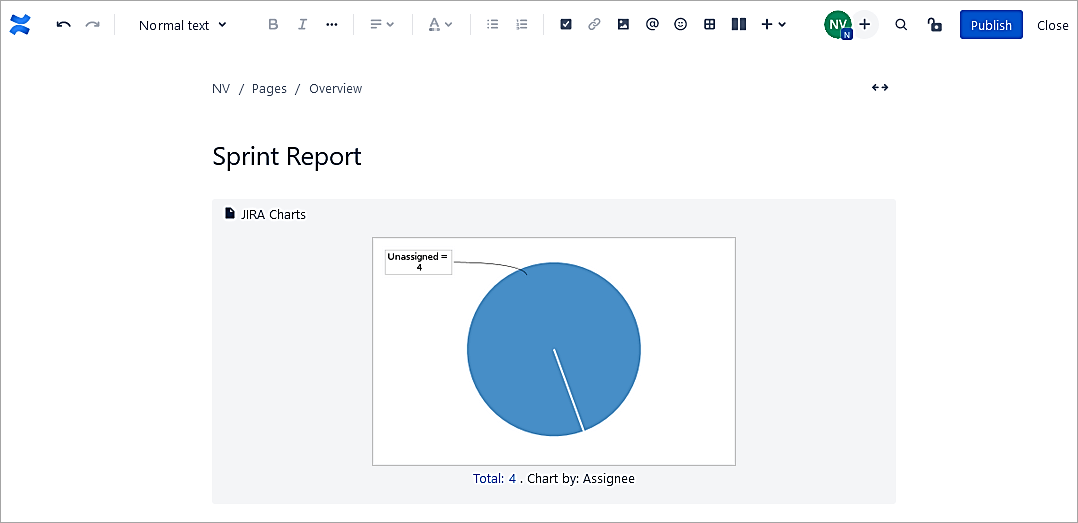
Click on Publish.
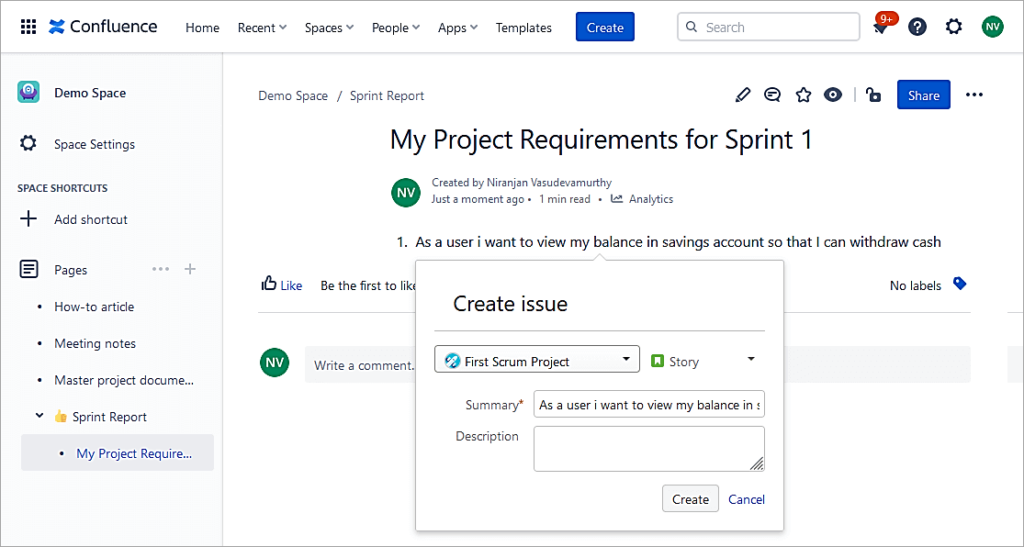
Create Jira issues from Confluence.
The integration also allows you to create Jira issues directly from Confluence. To do so highlight the text and click on + Create issue.
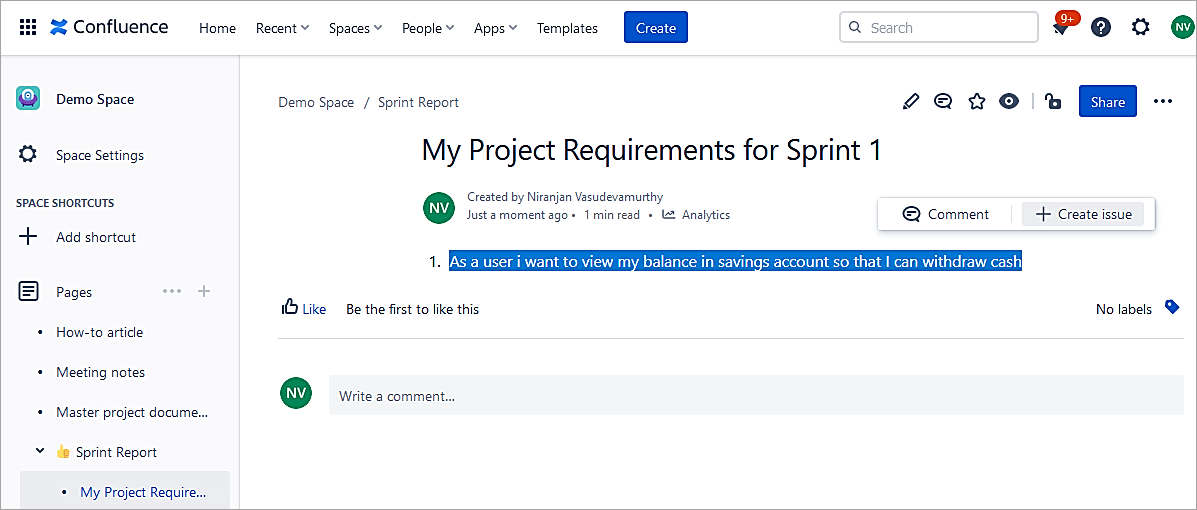
Select the project and issue type. Click on Create.
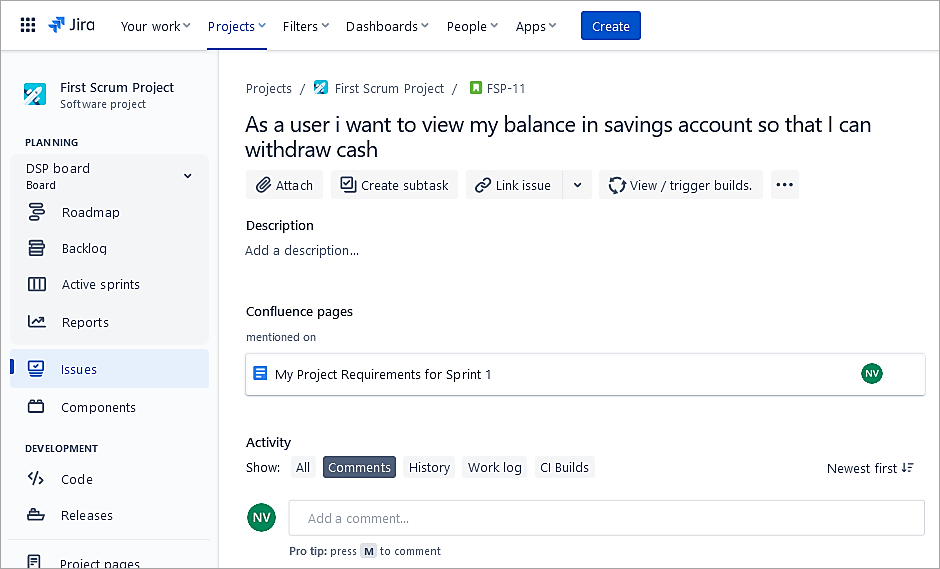
Click on the link [FSP-11] to view the issue in Jira.
![Click on the link [FSP-11] to view the issue in Jira](https://www.softwaretestinghelp.com/wp-content/qa/uploads/Click-on-the-link-FSP-11-to-view-the-issue-in-Jira1.png)
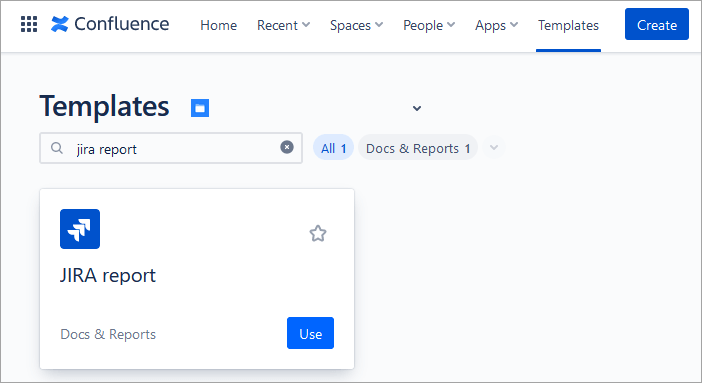
Create charts and reports in Confluence.
Using the integration, we will look at how to create charts and reports in Confluence from Jira issues.
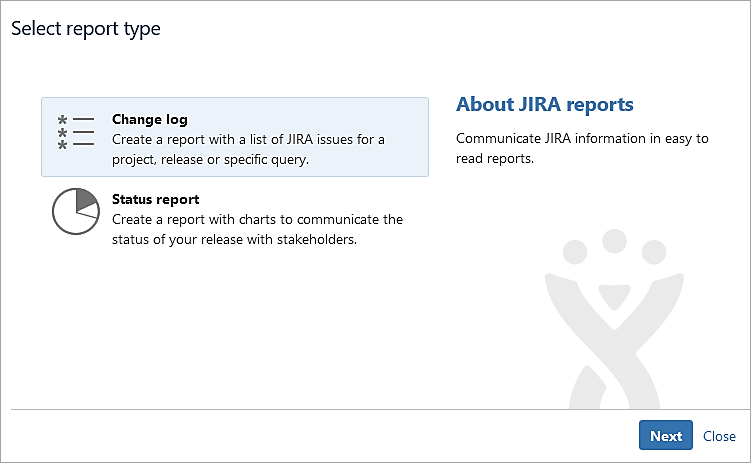
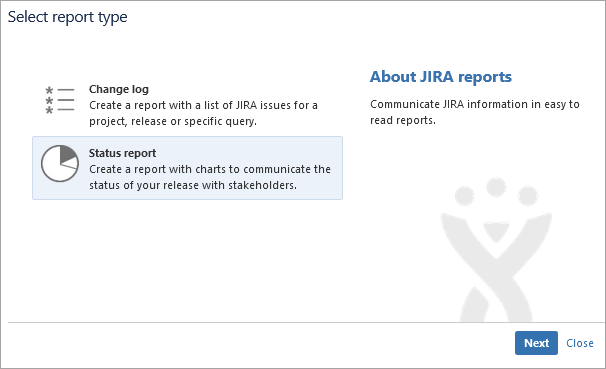
In Confluence click on Templates and select the Jira report. Click on Use.
Let’s select the Change log to list all the Jira issues. Click on Next.
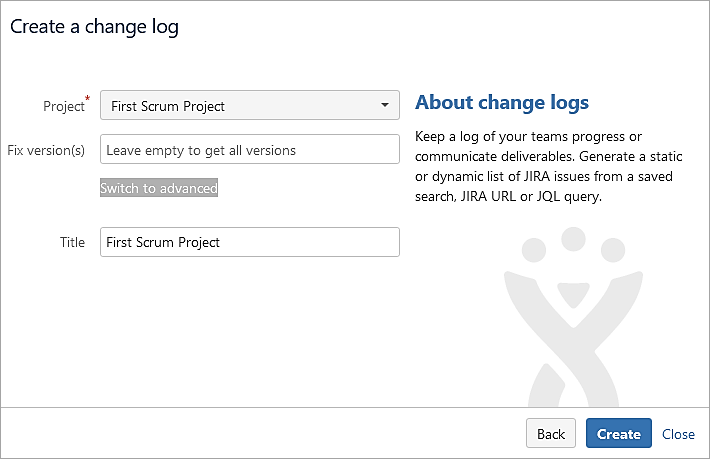
After selecting the project click on Switch to Advanced.
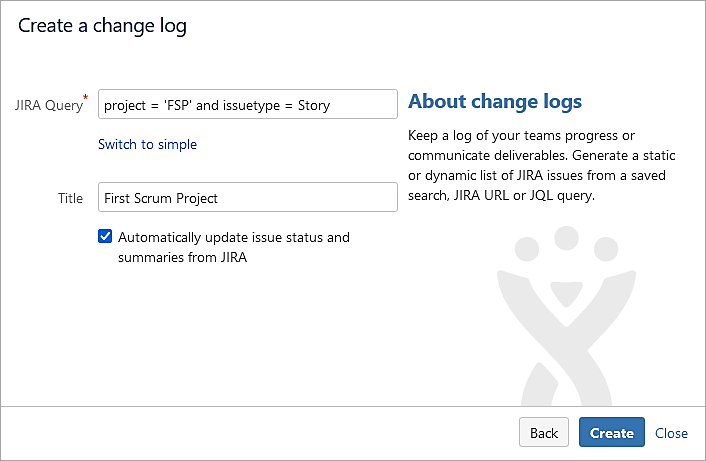
Enter a JQL query and click on Create.
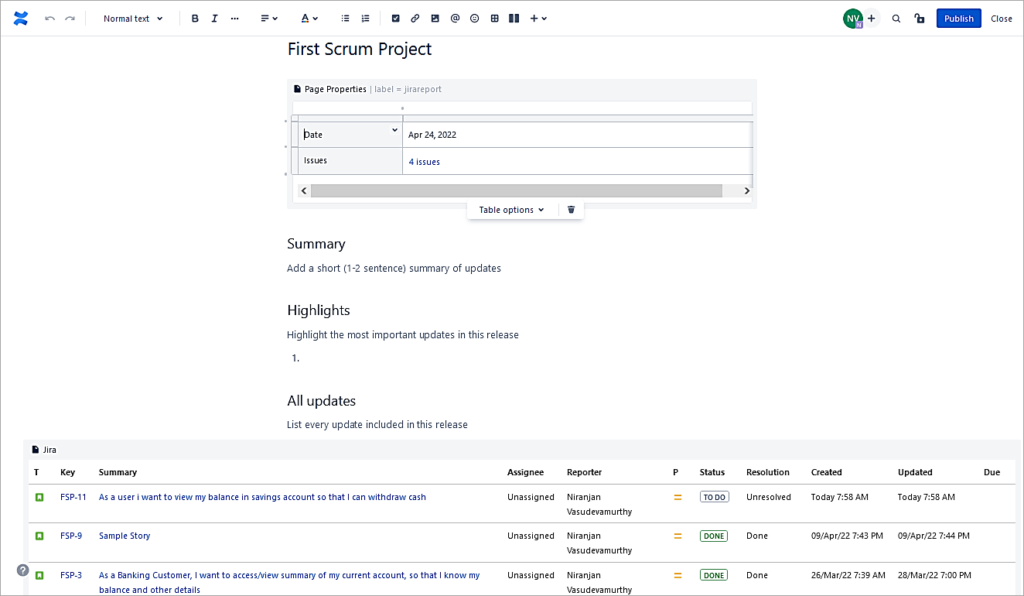
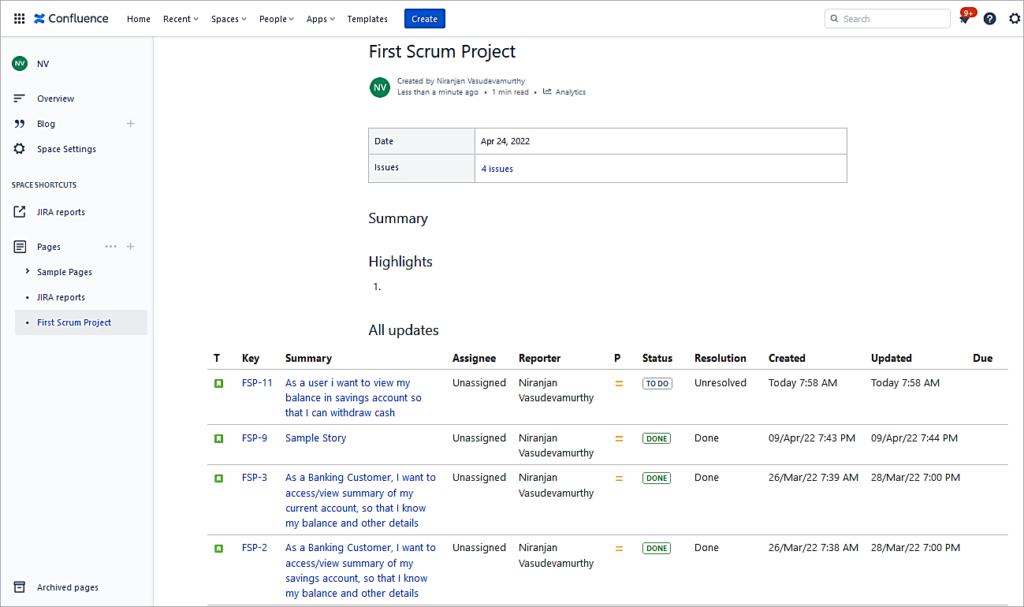
The Jira report page is displayed with the list of Jira issues. Other information like Summary, highlights, etc can be added. Click on Publish.
Published page.
Create Status report
The integration also allows you to create a status report using Pie charts with Status, Component, Priority, and Issue Type.
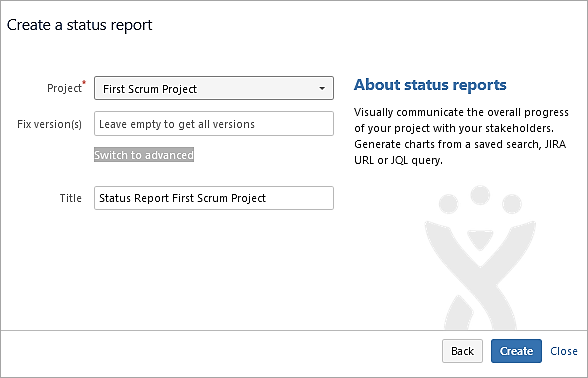
To create a Status report again use the Jira reports template. This time select the Status report. Click on Next.
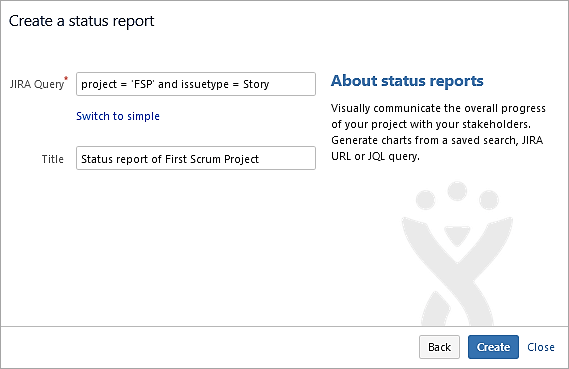
Select the project and click on Switch to advanced.
Enter JQL query to list all Story issues. Click on Create.

Click on Publish.
Conclusion
In this last part of the series, we looked at the most important aspect, which is automation areas to avoid most of the manual activities, which will help every developer to be more productive, and also integration with GitHub and Confluence Cloud.
I hope the four-part series on Jira Cloud Administration has helped you learn and take on tasks effectively in this area.
PREV Tutorial | FIRST Tutorial
Was this helpful?
Recommended Reading
-

We have provided an extensive, step-by-step guide on how to integrate JIRA with QTest for your benefit. Let's get started. Atlassian Confluence has been explained in very simple terms for your understanding in our previous tutorial. At STH, we believe in sharing best practices, tools, techniques, and processes. We also…
-

Learn Jira Admin Aspects: JIRA Administration and User Management Tutorial We learned about the JIRA workflow in detail in our previous tutorial. We are going to learn all about the JIRA Administration today. This is a unique opportunity to learn the admin aspects of a Project/Incident/Test Management tool. Not all…
-
JIRA Agile Tutorial: Agile Project Management Using Jira Our previous tutorial on JIRA Administration explained about JIRA Admin and User Management. Agile methodology for software development has gained immense popularity in recent years. JIRA Tool supports the Agile Software Development methodologies like Scrum and Kanban. Using JIRA Agile boards and…
-
A Step-By-Step Guide to JIRA and Subversion SVN Integration: JIRA is a very powerful issue & project tracking tool and is most popularly known by its use for bug tracking as well. The other tools from the Atlassian suite which cover the ALM approach and that are tightly integrated with…
-

JIRA Bug Tracking: Defect Life Cycle in JIRA Jira Download and Installation was explained in detail in our previous tutorial. Test teams are always apprehensive about picking up JIRAs for Defect Management. Doubts are warranted. This stems from the fact that though JIRA bug tracking tool is applicable to IT businesses,…
-

Top Free Open Source and Commercial JIRA Alternatives/Competitors: Popular JIRA plug-ins were explained in detail in our previous tutorial. Read through our entire range of tutorials in this JIRA series. JIRA is a bug tracking and project management tool for agile teams. It was developed by Atlassian and is currently used…
-
Atlassian Jira and GitLab Integration Tutorial: Installation & Configuration JIRA is a very powerful issue and project tracking tool and is most popularly known by its use for bug tracking as well. The other tools from Atlassian suite which cover the ALM approach and that are tightly integrated with JIRA…
-
A Guide to Managing Issues in JIRA, Creating JIRA Workflow and JIRA Reports: JIRA Sub-task was explained in our previous tutorial from the Series of JIRA Tutorials. We have seen the different kinds of issues and how to create them in our earlier JIRA Tutorials. This is the next JIRA…


