


Delve into the Jira Cloud Advanced Customization process and focus on creating custom issue types, designing screens, establishing permission schemes & mastering the art of importing issues from CSV files:
In the previous tutorial on Jira Cloud Projects, we looked at a few basics of setting up the Jira project, managing users, roles, and field management.
In this tutorial, we will look at the Jira customizations around the creation of custom issue types, screens, permission schemes, and importing issues from CSV files.
Table of Contents:
Jira Cloud Advanced Customizations: In-Depth Study
Also Read => Overview of Jira Download, Installation, and Setup
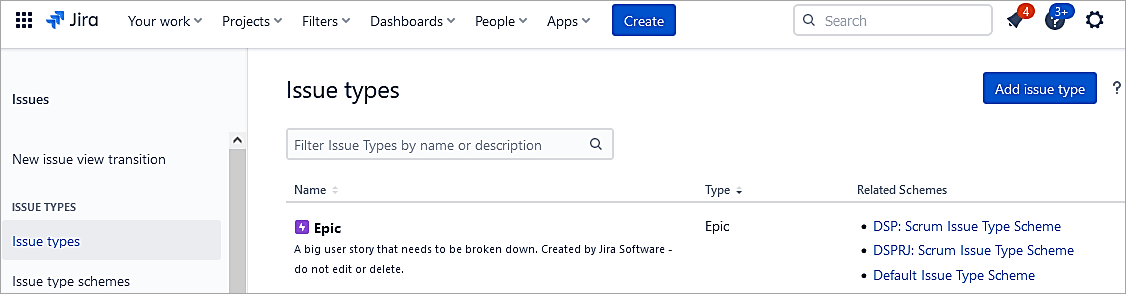
Adding a New Issue Type
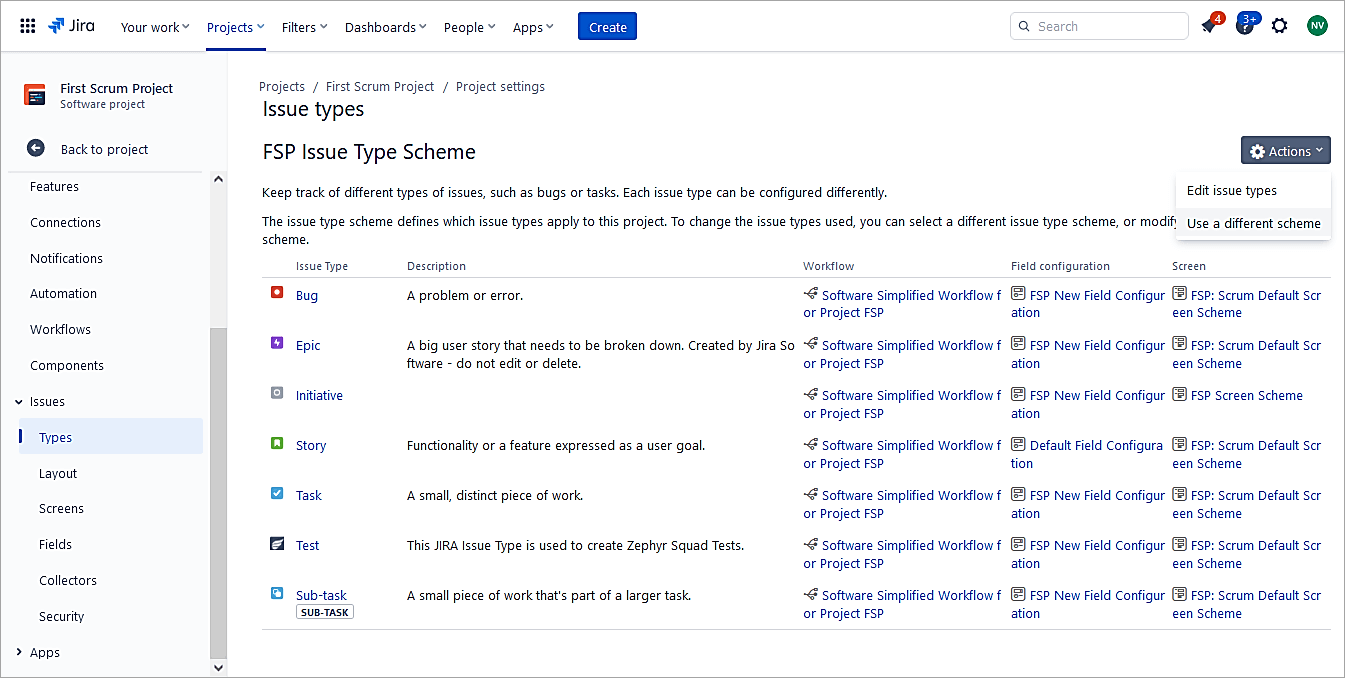
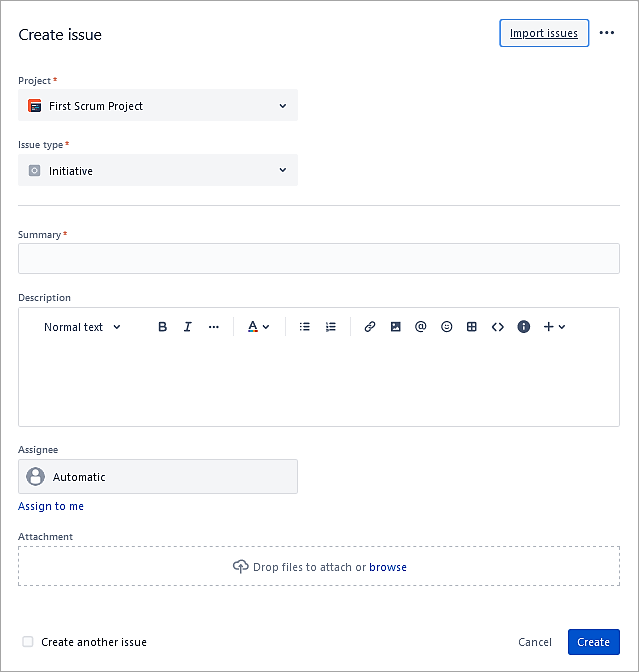
Jira tracks all the work as issues. The available default ones are Epic, Story, Sub-task, and Bug. In this section, we will look at adding a custom issue type called ‘Initiative’.
Go to Settings -> Issue types -> Issue types. Click on Add issue type.
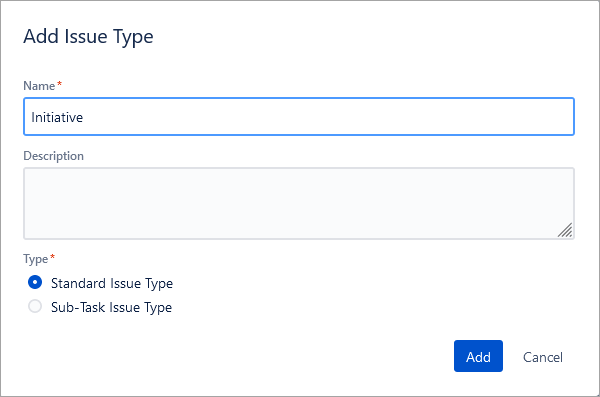
Call it Initiative and click on Add.
Issue type scheme
Add a new Issue type scheme and associate the newly created issue type to be made available to the project.
Click on Add issue type scheme.

Provide a name and Add the appropriate issue type to this scheme. Drag and drop from right to left.
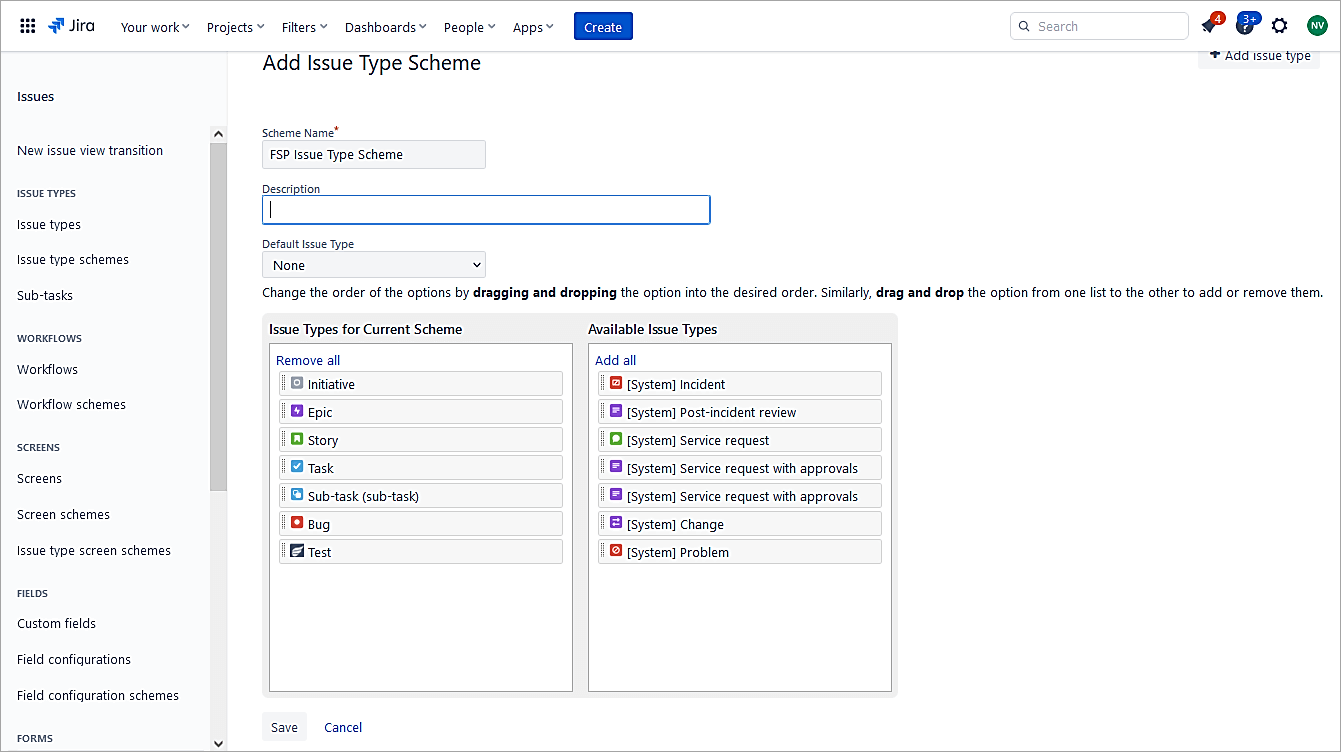
Click on Save.
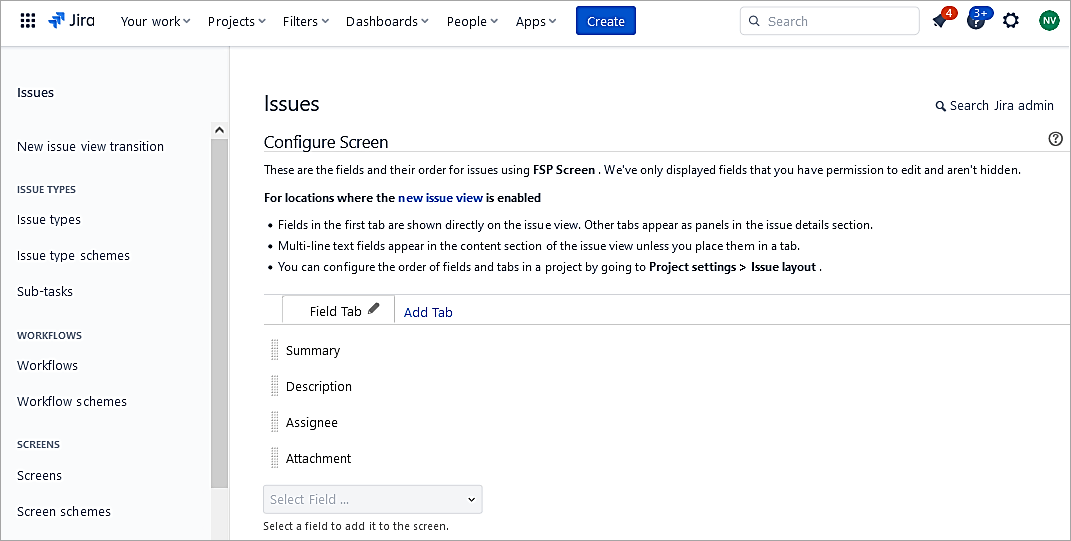
A screen is an arrangement of fields that are displayed when a user creates an issue. The issue type created has not been assigned to any specific screen. So, the default screen is assigned. So, we will need a specific screen for the new Issue Type and not the default one.
Recommended Reading => Guide to Creating Jira Dashboard Quickly
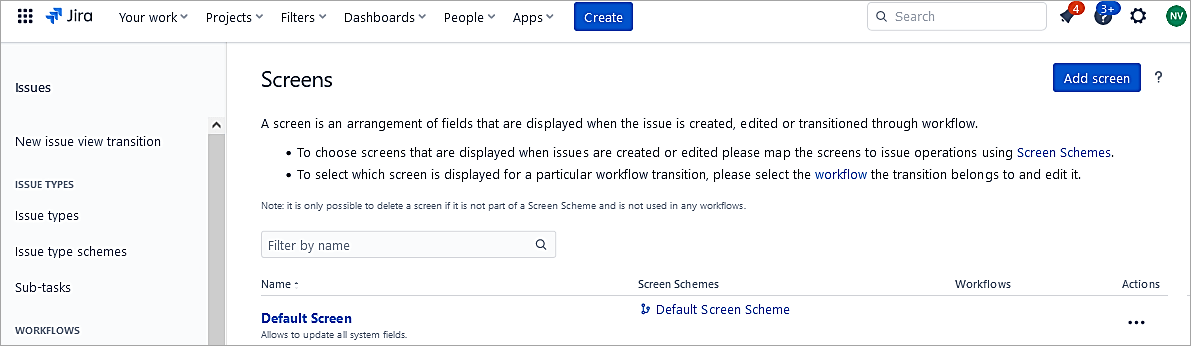
Adding Screens
Screens represent fields in the UI whenever a user creates an issue or even modifies an issue.
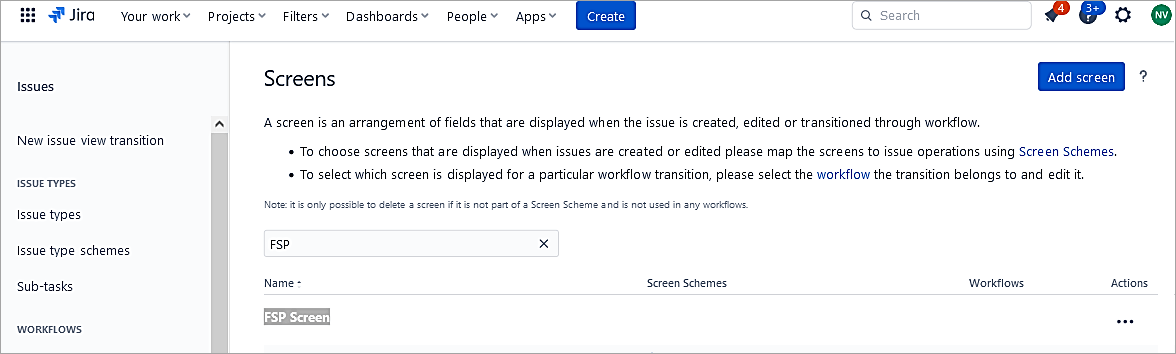
In the Settings, go to the Screens section and Add screen.
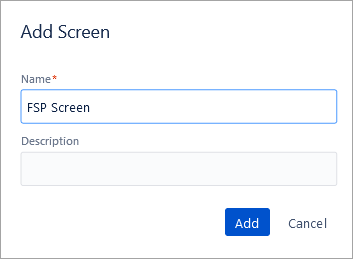
Click on Add
Open the newly created screen.
Add the fields needed for the Initiative issue type which will be assigned later.
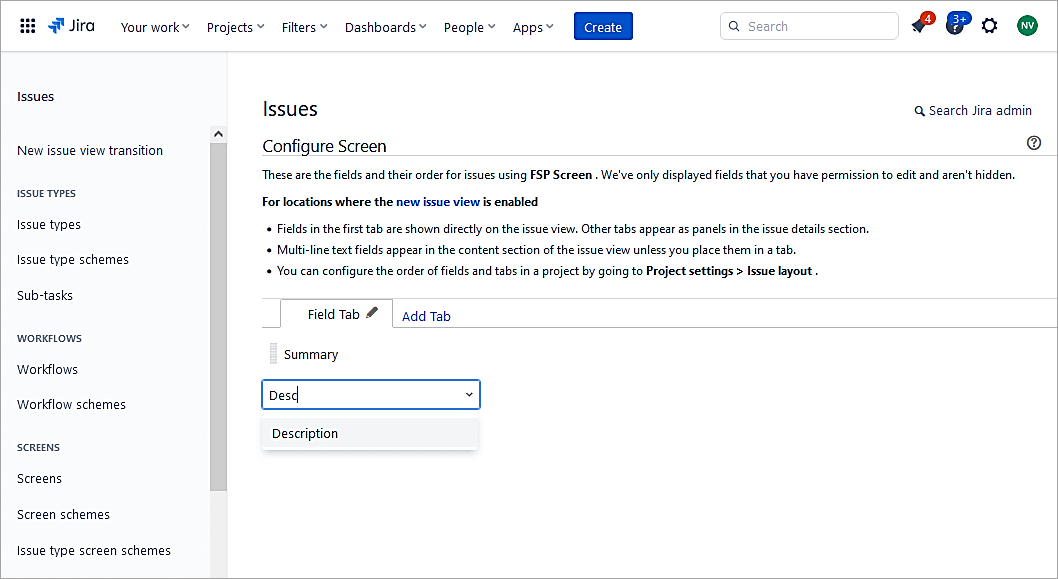
I have added only 4 fields to this new screen.
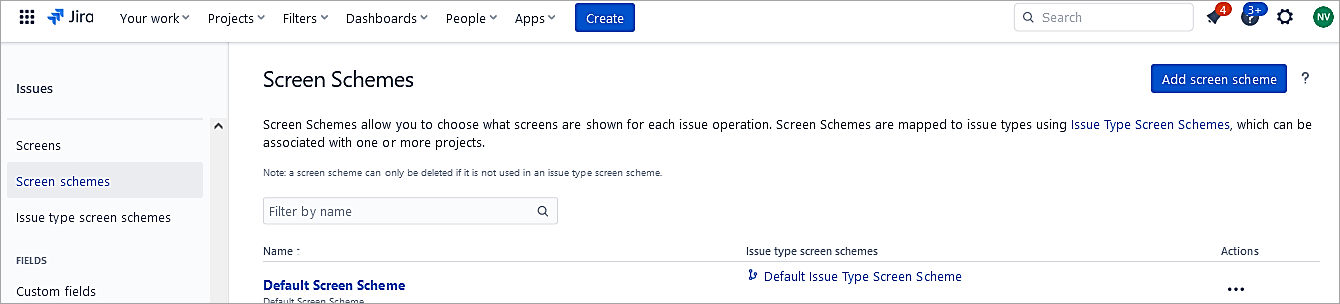
Next, add a Screen scheme. Click on the Add screen scheme and specify which screen is mapped for which issue operation.
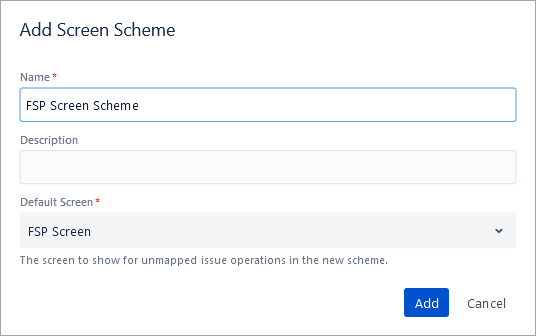
Click on Add.
Next, add an Issue type screen scheme and associate the Initiative issue type
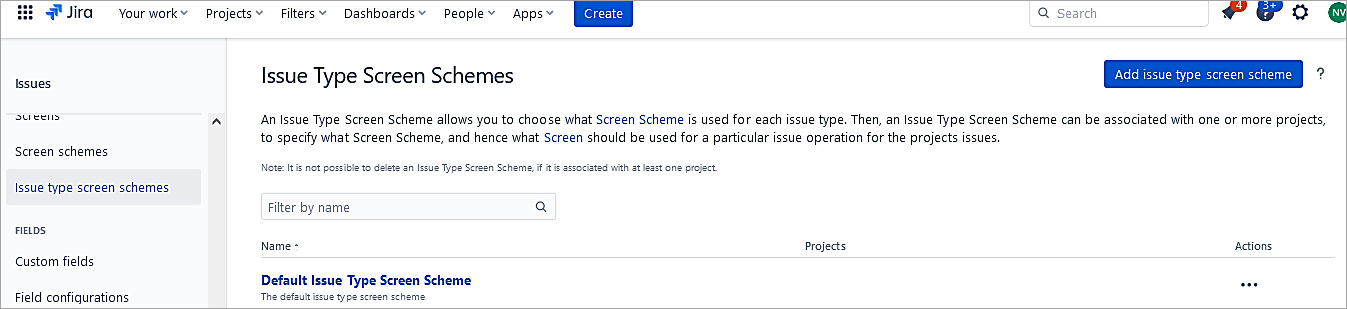
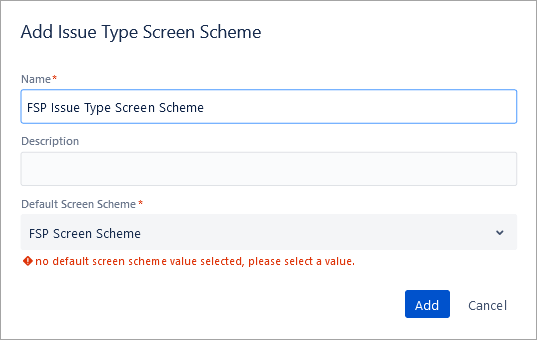
Click on Add.
Click on the newly created Issue type screen scheme.

Update the default issue types using the default Scrum Default Screen Scheme. Click on Edit and update the same.
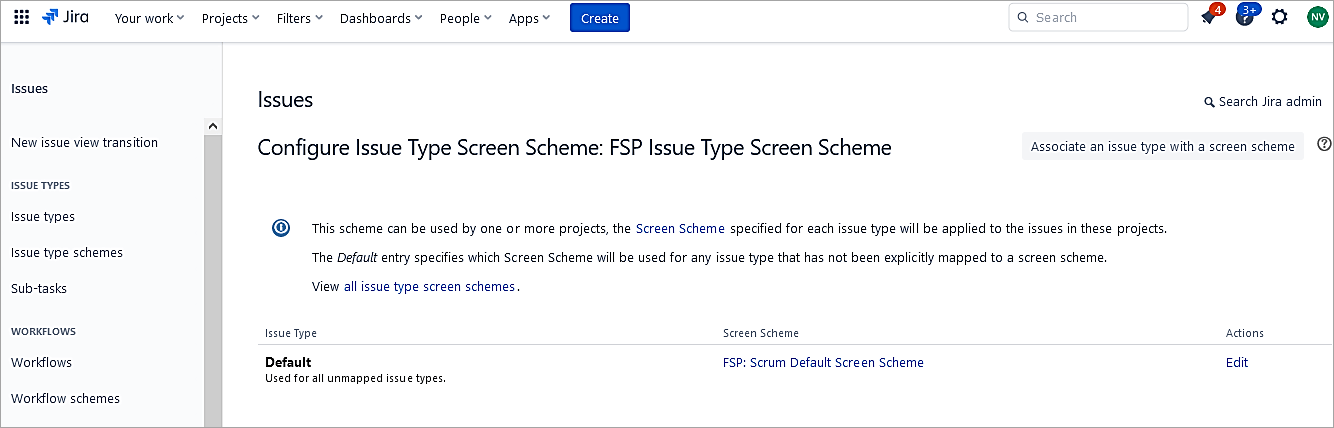
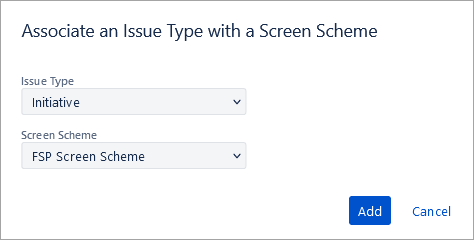
Click on Associate an issue type with a screen scheme.
Select the Initiative and select the new screen scheme created. Click on Add.
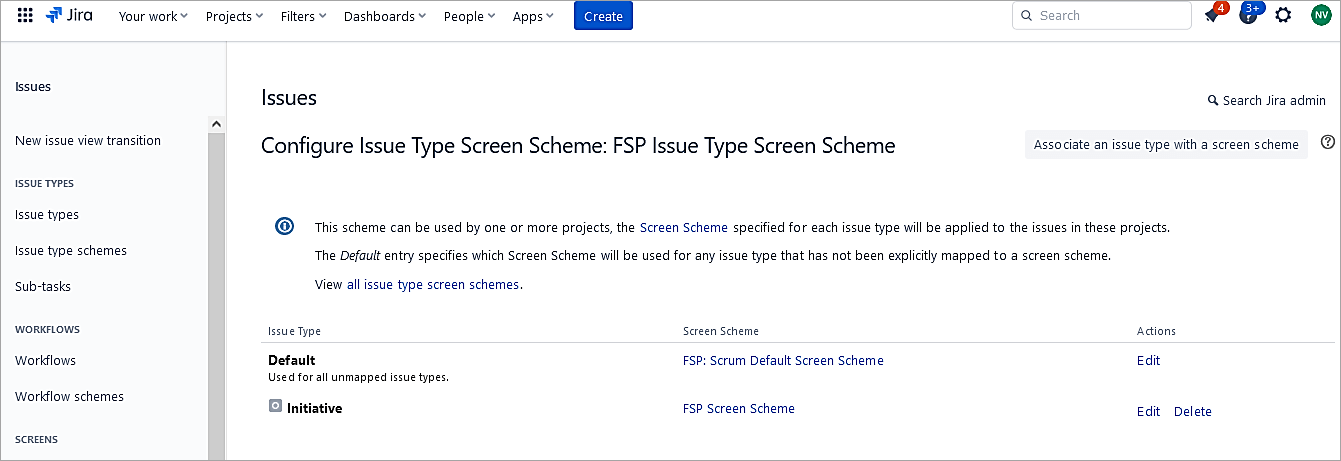
Issue types other than Initiative will use the default screen scheme. Only the Initiative issue type will use the new screen scheme with only the 4 fields.
Ensure the project now uses this new issue-type screen scheme.
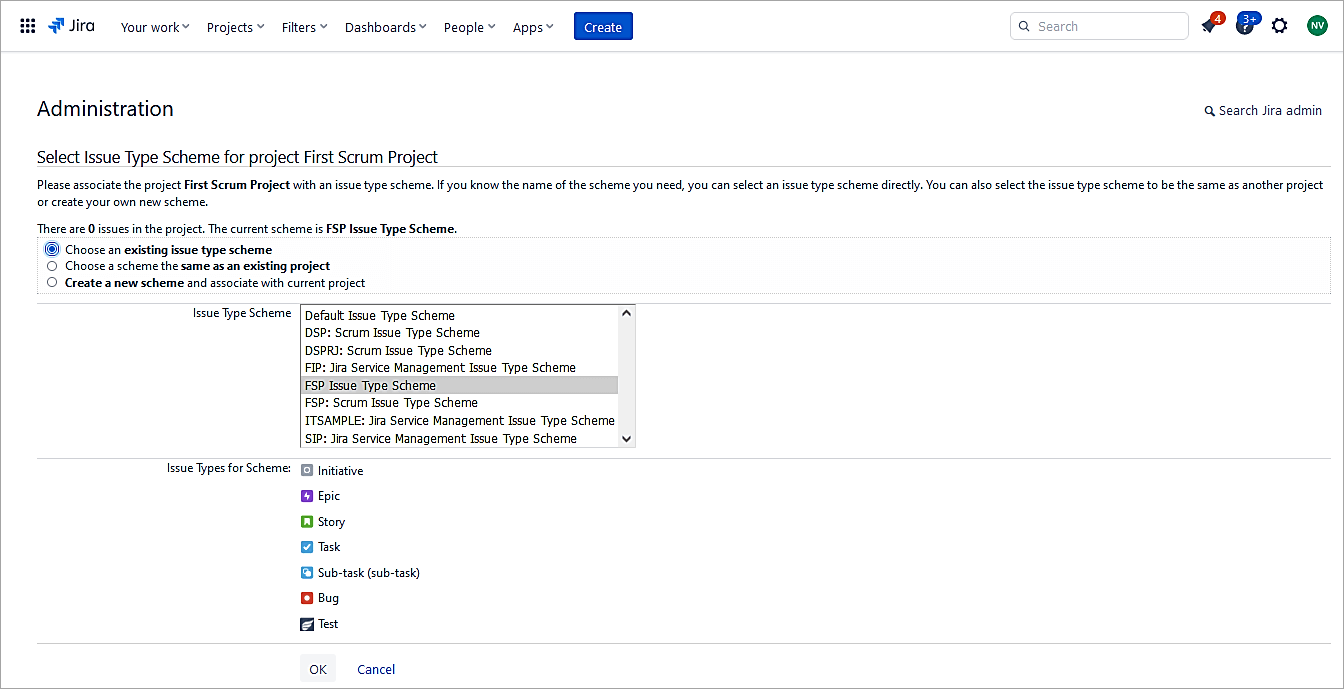
Go to the project Settings -> Issues -> Types
Select the new Issue Type Scheme, which contains the Initiative issue type. Click OK.
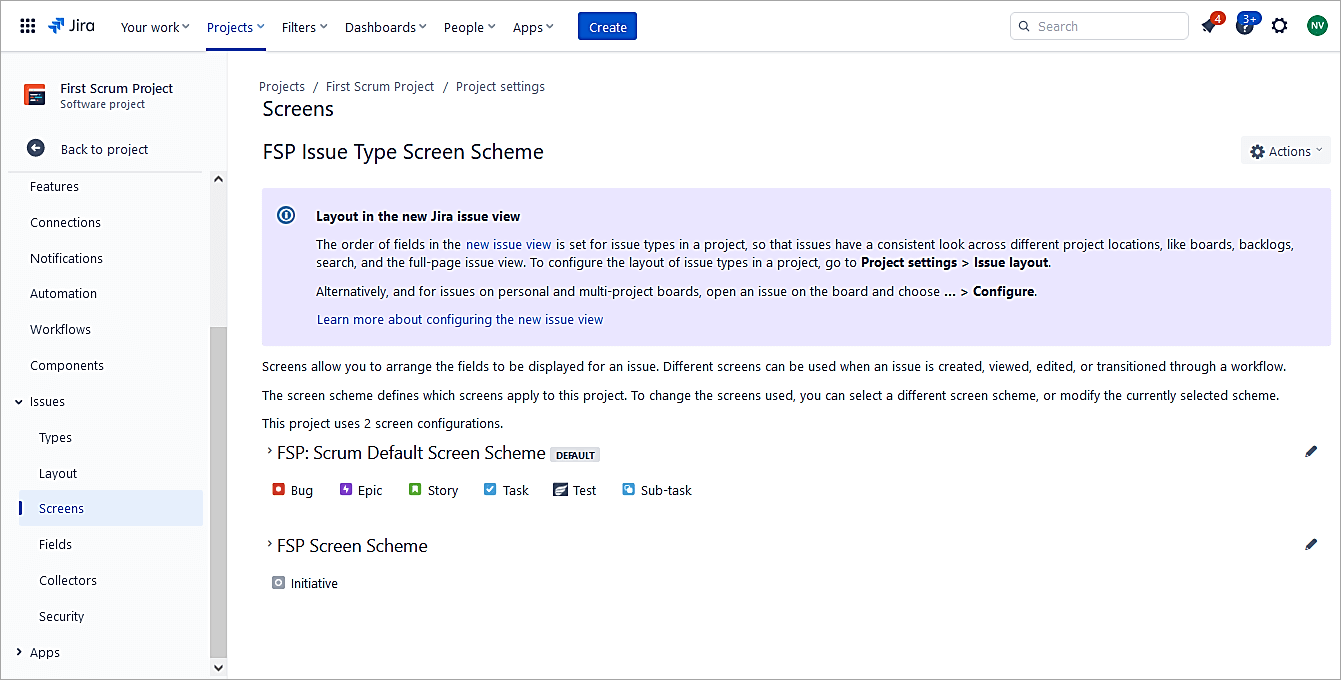
Go to the Project Settings -> Issues -> Screens
Click on Actions -> Use a different scheme
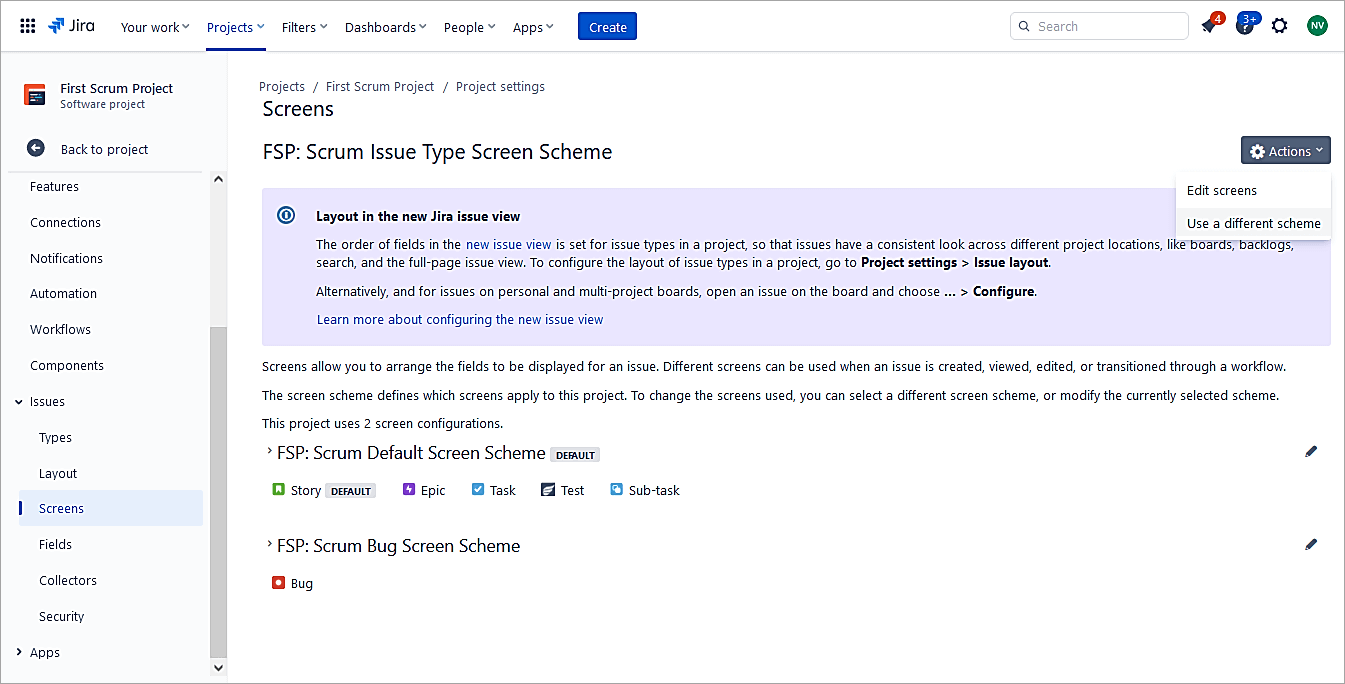
Select the new Issue type screen scheme and click on Associate.

The issue type Initiative is mapped to the newly created Screen Scheme.
Create an issue of type Initiative to test. It contains only the 4 fields as defined on the screen.
Also Read => Guide to JIRA and Subversion SVN Integration
Roles, Permissions, and Permission Scheme
In this section, we will look at settings that control the users and what they can perform. 3 types of permissions can be set.
- Global permissions: Applied to entire instances and not to specific projects.
- Project permissions: Applied to projects using the permission scheme. E.g., who can create, edit issues, and assign users but cannot customize the permission scheme.
- Issue security permissions: Applied to individual issues through security schemes for visibility by either project admins or users.
Permissions can be assigned either to group or project roles or at the issue level.
- Users can belong to Groups that are granted Global Permission. E.g., to provide permission to log in to Jira
- Users can belong to Project Roles, which are granted as Project Permissions. E.g., to decide who can create or edit issues. It is mapped to actions via the permissions scheme and associated with the project.
- Users can belong to the Issue role through the assignee.
Creating roles
As a Jira admin, go to Settings -> System -> Security -> Project Roles
Scroll to the bottom and provide a name to add a role. Click on Add Project Role.
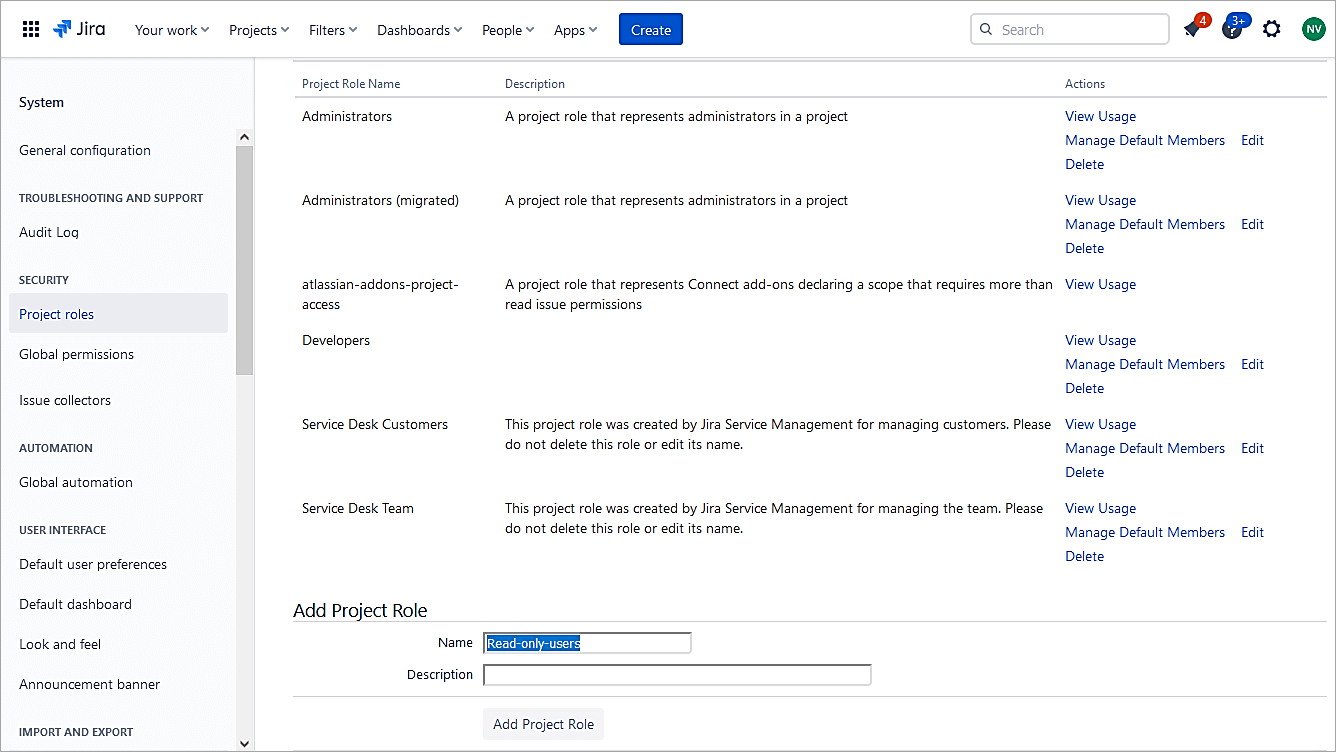
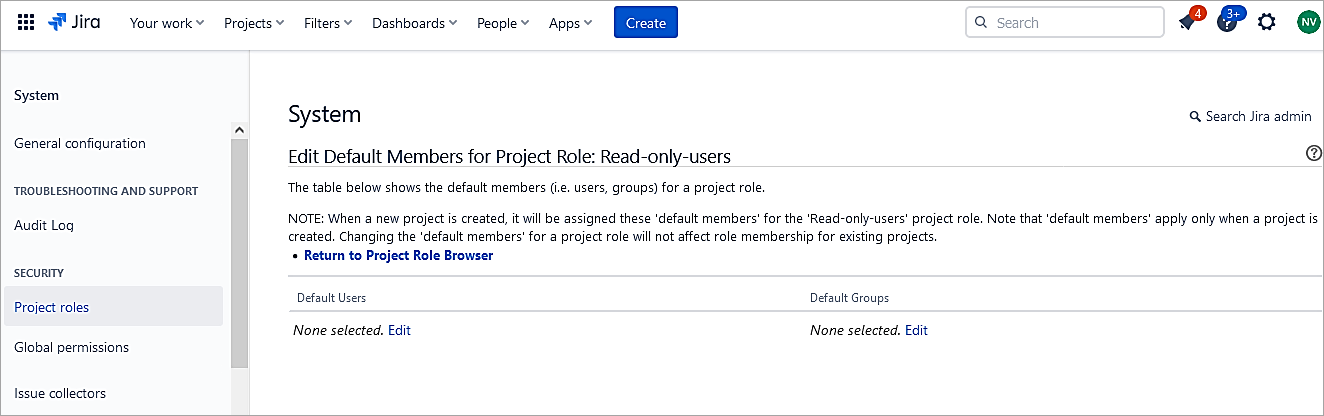
Click on Manage Default Members for the role Read-Only-Users.
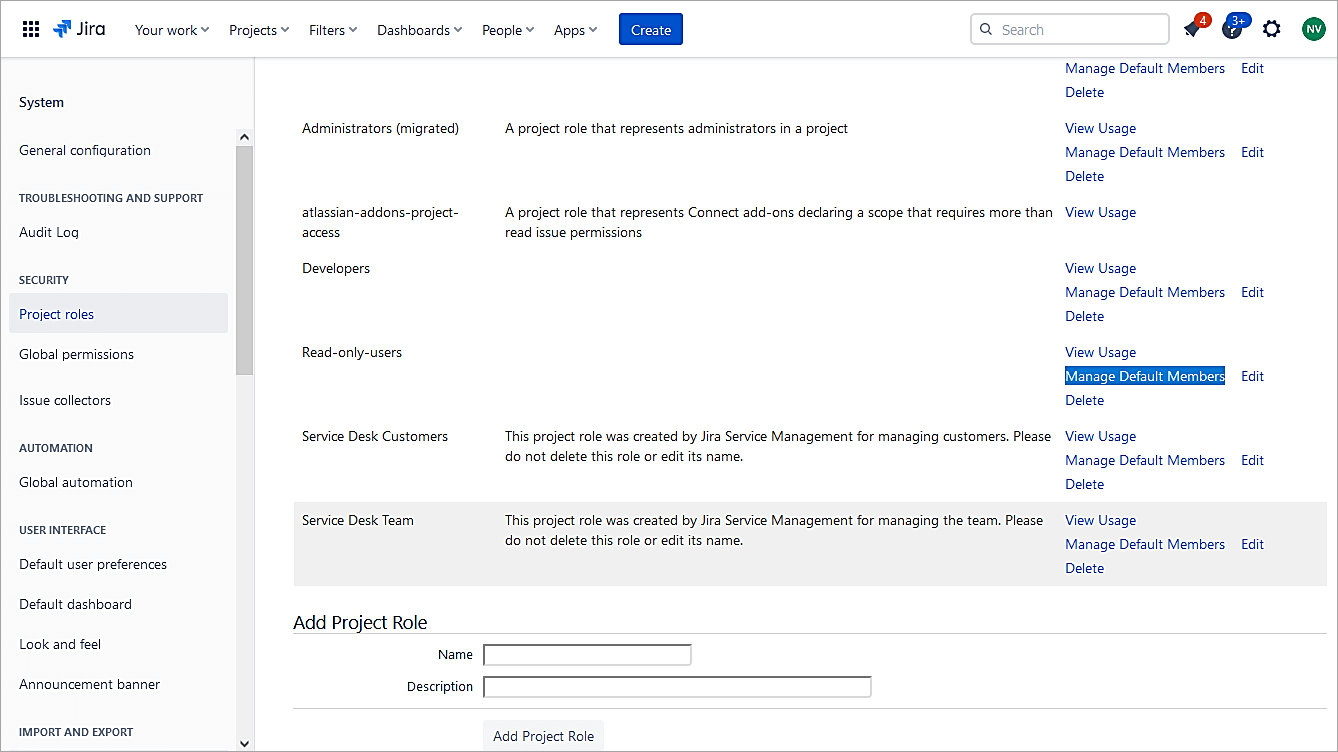
Edit users under Default users and add members. This role will be mapped to an action called Browse users in the permission scheme associated with the project.
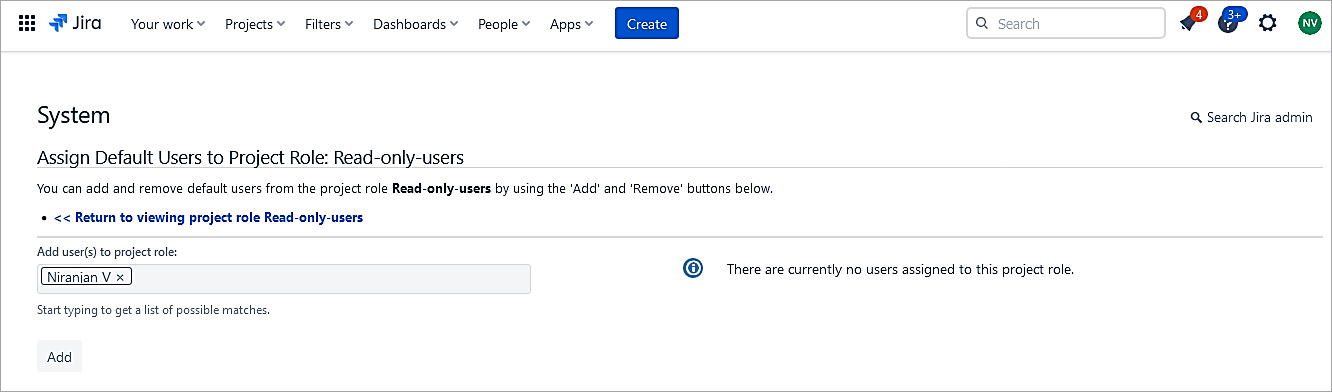
Click on Add.
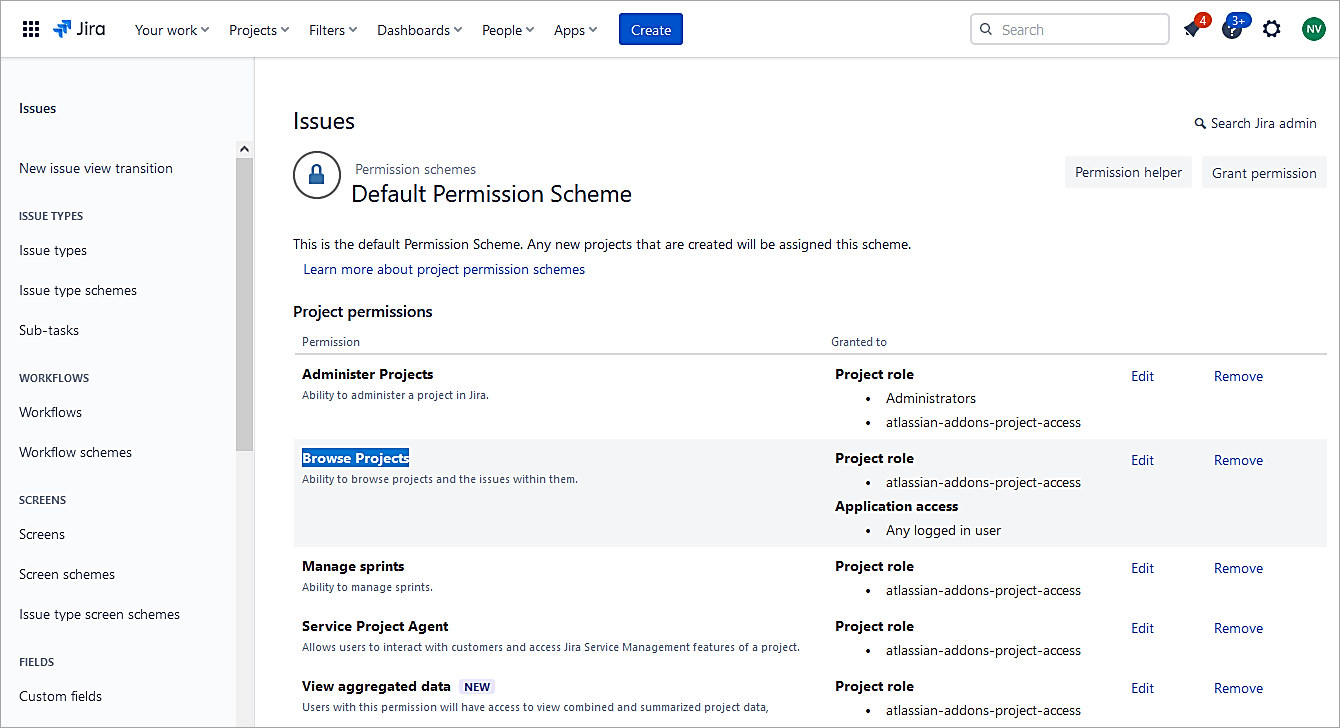
Next, go to Settings -> Issues -> Issue Attributes -> Permission Schemes to map actions to the roles.

Click on the Default Permission Scheme, which is associated with the Project.
Click on Edit next to the Browse Projects action.
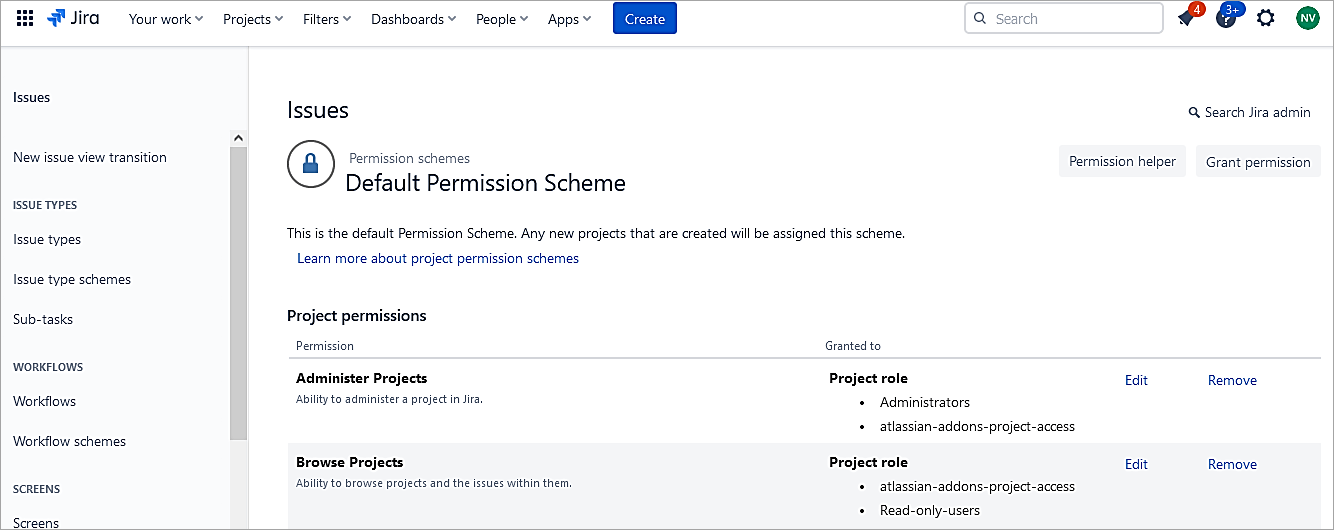
Select the Project role radio button and select the newly created role. So, any user part of the role will be able to only browse the projects and not modify anything in the project.
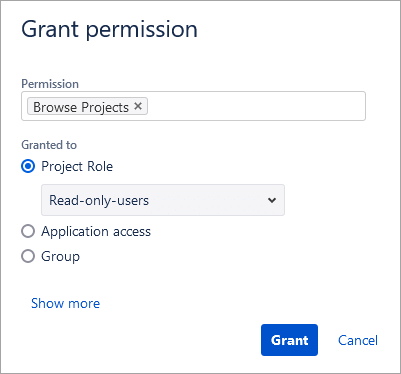
Click on Grant.
Suggested Read => Complete Atlassian JIRA training video course
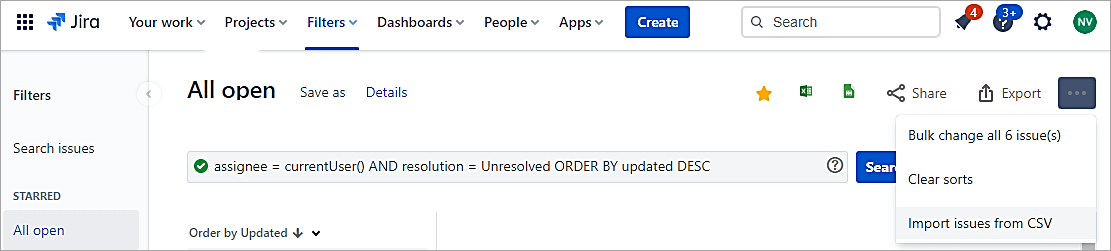
Import Issues from the CSV File
If you have issues stored in a CSV (comma delimited) file and want to import those issues into the Jira project. Follow the steps below:
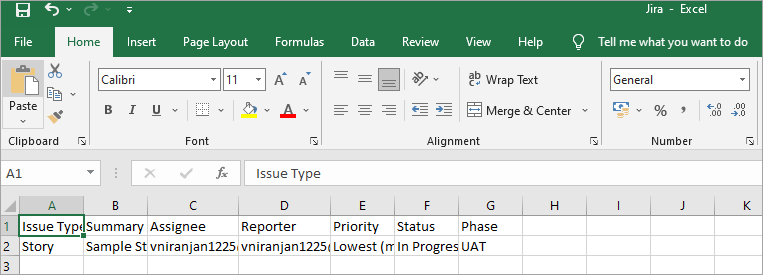
Sample CSV file
On the right-hand side, click on 3 DOTS and select Import issues from CSV.
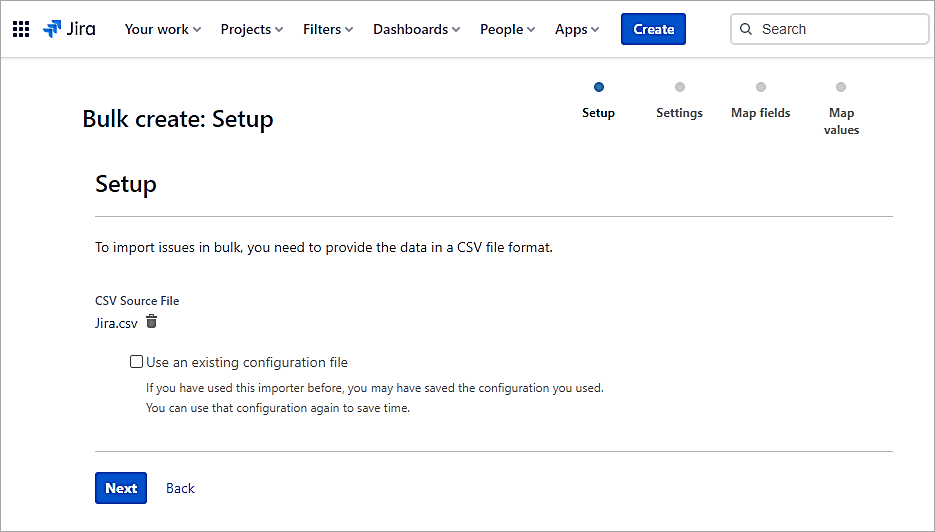
Select the CSV file and click on Next.
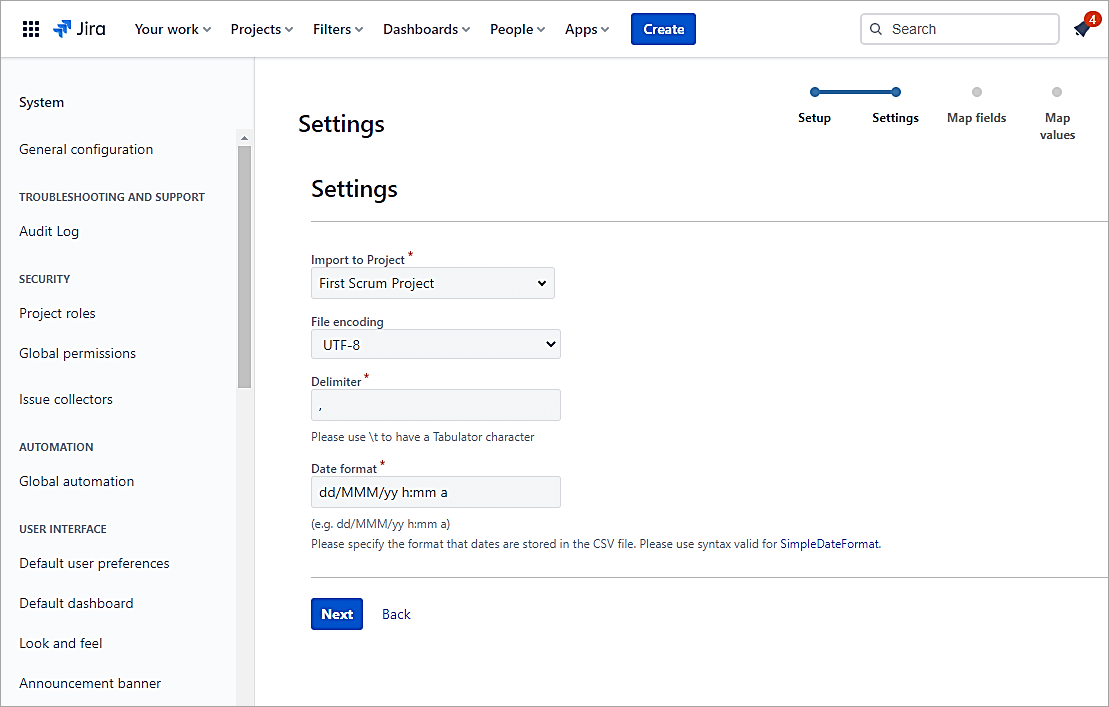
Select the Project and continue.
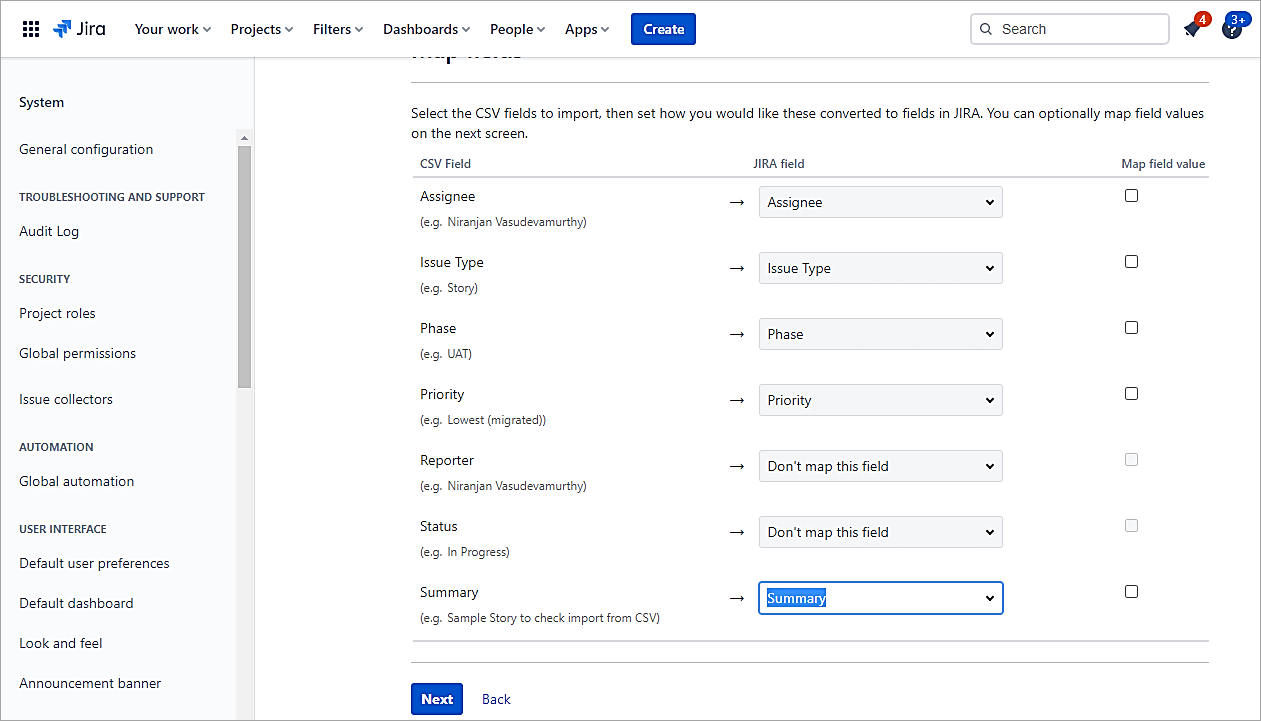
Map the fields and click on Next.
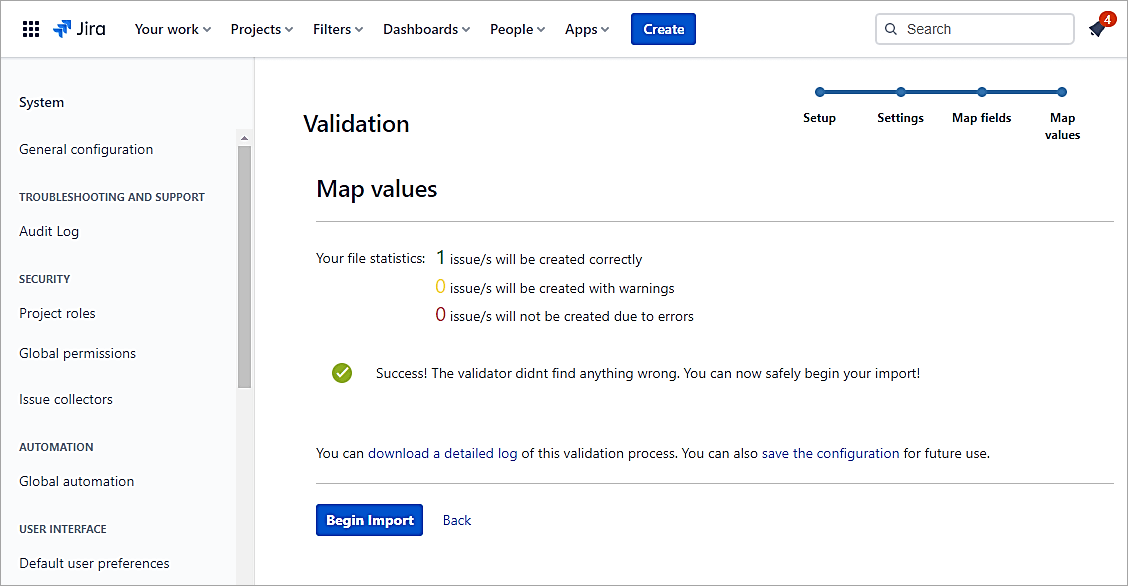
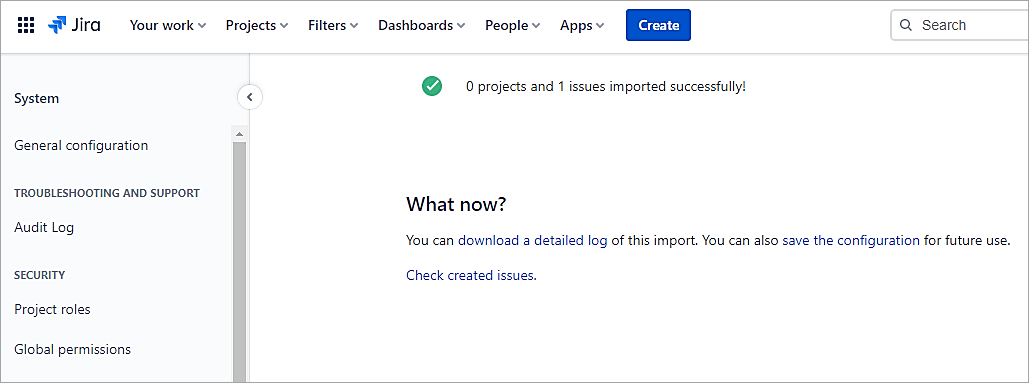
Validate the settings and click on Begin Import.
Also Read => How to Open CSV Files to access your data
Conclusion
In this article, we focused on the issue type-related customization, including importing issues from CSV, which is the most needed feature.
In our next tutorial, we will look at Jira workflows and different scenarios for using the workflows.
Was this helpful?
Recommended Reading
-

A Step-By-Step Guide to JIRA and Subversion SVN Integration: JIRA is a very powerful issue & project tracking tool and is most popularly known by its use for bug tracking as well. The other tools from the Atlassian suite which cover the ALM approach and that are tightly integrated with…
-

JIRA Bug Tracking: Defect Life Cycle in JIRA Jira Download and Installation was explained in detail in our previous tutorial. Test teams are always apprehensive about picking up JIRAs for Defect Management. Doubts are warranted. This stems from the fact that though JIRA bug tracking tool is applicable to IT businesses,…
-
A Complete Overview of Jira Download, Installation and Setup: In this informative JIRA series, we had a brief introduction on JIRA tool in our previous tutorial. We will go through the installation procedure of Jira with a step-by-step guide for Jira download, installation and license setup. Topics covered in this article:…
-
A Detailed Guide to Scrum Handling with Jira: JIRA Scrum Board Tutorial For Managing the Sprint Effectively JIRA Portfolio was explained in detail in our previous tutorial. In this tutorial, explore more about Scrum Handling with JIRA. In Scrum or Kanban environment Jira helps in managing the Sprint effectively and efficiently, with…
-
Atlassian JIRA Tutorial Series of 20+ Hands-on Tutorials: What is JIRA? Atlassian JIRA is an issue and project tracking software to plan, track and manage your projects. JIRA is mainly used by agile development teams to customize your workflows, team collaboration, and release software with confidence. For your convenience we…
-

Top Free Open Source and Commercial JIRA Alternatives/Competitors: Popular JIRA plug-ins were explained in detail in our previous tutorial. Read through our entire range of tutorials in this JIRA series. JIRA is a bug tracking and project management tool for agile teams. It was developed by Atlassian and is currently used…
-
A Guide to Managing Issues in JIRA, Creating JIRA Workflow and JIRA Reports: JIRA Sub-task was explained in our previous tutorial from the Series of JIRA Tutorials. We have seen the different kinds of issues and how to create them in our earlier JIRA Tutorials. This is the next JIRA…
-
JIRA Agile Tutorial: Agile Project Management Using Jira Our previous tutorial on JIRA Administration explained about JIRA Admin and User Management. Agile methodology for software development has gained immense popularity in recent years. JIRA Tool supports the Agile Software Development methodologies like Scrum and Kanban. Using JIRA Agile boards and…


