Learn how to split screen on Chromebook in just a few clicks with our ultimate Chromebook Split Screen Guide.
Would you like to open two apps simultaneously on your Chromebook? Split screen mode is your best option for multi-tasking while attending classes online, viewing different documents at once, watching videos while you work, or even handling multiple browser windows.
This post explains how to split screen on Chromebook using various approaches, including keyboard shortcuts, drag-and-drop method, tablet mode gestures, and ChromeOS advanced multi-tasking tools.
Table of Contents:
- How Do You Split Screen on Chromebook?
- Chromebook Split Screen: Step-by-Step Guide
- What is Split Screen on Chromebook Devices?
- Why Use Split Screen?
- How to Split Screen on Chromebook (on All Models)
- Split Screen Glitches on Chromebook
- Chromebook Split Screen Not Working? Try These Fixes
- Split Screen: Expert Tips on How to use and How Not to use
- FAQs
- Conclusion
How Do You Split Screen on Chromebook?
To split screen on a Chromebook:
- Step 1: Open two different applications/windows that you want to split
- Step 2: Hold upper part of one window (title bar) and drag it to the left side of the screen.
- Step 3: Hold upper part of second window (title bar) and drag it to the right side of the screen.
- Step 4: Alternatively use following keyboard shortcuts:
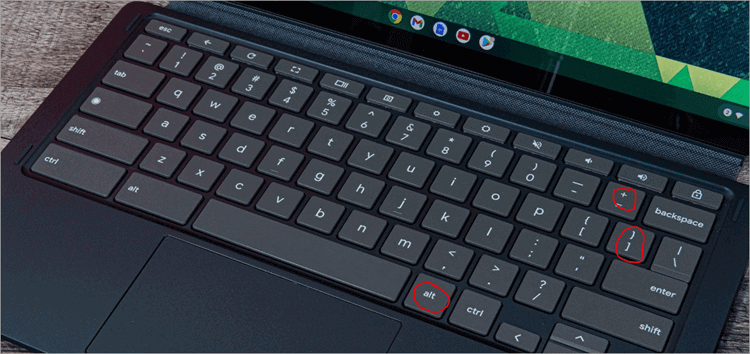
- For Left split use keys simultaneously: Alt + [
- For Right split use keys simultaneously: Alt + ]
- Step 5: Using Mouse/Trackpad – Simply hover your cursor over any window’s Maximize button (▢) in the top-right corner. A layout pop-up menu will appear, click the left or right side of the split-screen template to snap the window instantly.
Chromebook Split Screen: Step-by-Step Guide
Split screen is useful whether you are writing a paper with reference to research, taking notes on a video call, or comparing spreadsheets because you can use it as a productivity powerhouse on Chromebooks.
It is a simple but efficient device that simplifies the process of multitasking, accelerates it to a lesser extent, and makes it a much less stressful experience.
Here is the video guide on how to split screen on a Chromebook:
What is Split Screen on Chromebook Devices?
The split-screen feature in ChromeOS, available on Chromebooks, lets users arrange two apps or browser windows adjacent. It is possible to resize them, float a single window, or even do partial splits to customize the layout.
In contrast to traditional tab switching, split screen provides a dual workspace in which tasks do not conflict with each other. It is similar to Windows Snap Layouts and Snap View in macOS, and a simple and fast solution in ChromeOS.
About convertible Chromebooks, split screen is also available in tablet mode, which means that it can be used in various hardware designs.
Why Use Split Screen?
Split screen is not only convenient, but it is also a question of productivity that can be measured. Research indicates that multitasking devices, such as split screens, have the potential to increase productivity by up to 30 percent in an online work setting.
According to the surveys, many people now use the split screen feature on Chromebooks every day at school, the office, or for creative activities. Layouts such as Split, Partial, and Float allow one to customize the workspace according to his/her needs; be it coding, video conferencing, or research.
Split-screen enables users to be smarter at work, concentrate longer, and achieve more within the same time because it makes switching between apps less challenging.
How to Split Screen on Chromebook (on All Models)
#1) Clamshell-designed Standard Chromebooks
They are conventional laptops like Chromebooks that have an integrated keyboard and display.
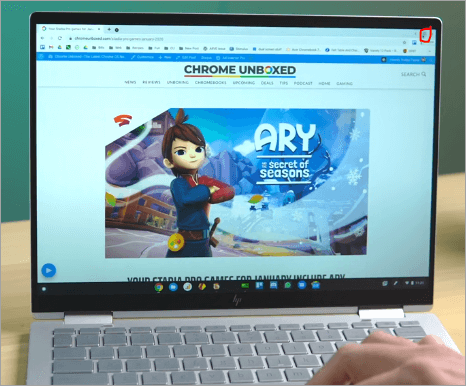
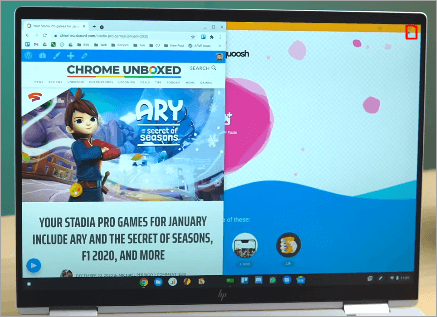
The drag and drop method involves:
Step 1: Click and press the title bar of the window as shown below.
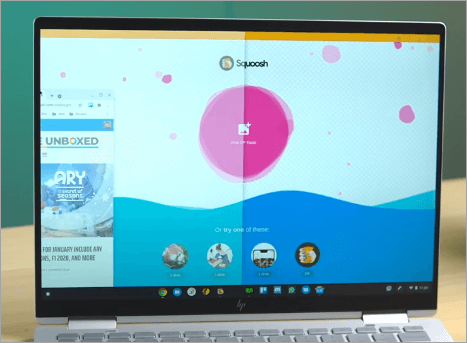
Step 2: Drag to the left or right side of the screen until you get a transparent outline.
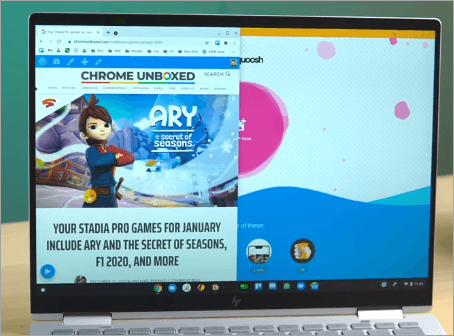
Step 3: Release, and the window will pop into position as shown below.
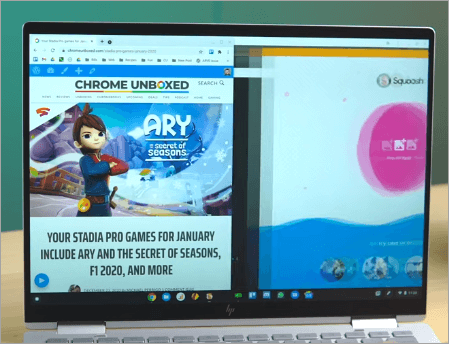
Step 4: Repeat using the other window across.
This is an intuitive way and can be more effective when you do not need to memorize shortcuts and have to have fast control.
Keyboard Shortcuts:
Step 1: Press [ +alt to pin a window to the left as shown below.
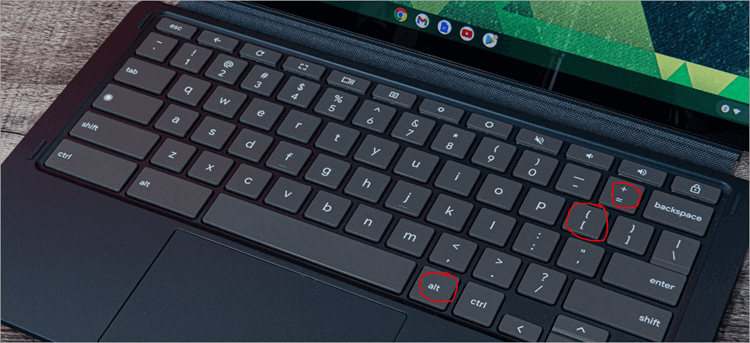
Step 2: Press Alt + ] to pin a window to the right as shown below.
Step 3: These quick-cuts are super-fast among power users in life who do not want to drag.
Maximize Button Hover involves:
Step 1: Hover your cursor over the maximize button as shown below (the square icon on the top-right corner).
Step 2: A pop-up menu appears, and it can be split left or right.
Step 3: Click your selection, and the window automatically comes into line.
This comes in handy, particularly to novices who might be ignorant of the shortcuts.
With convertible Chromebooks (2-in-1 models with tablet mode), these Chromebooks can be folded into tablets, which makes multitasking touch-enabled.
Touch Gestures:
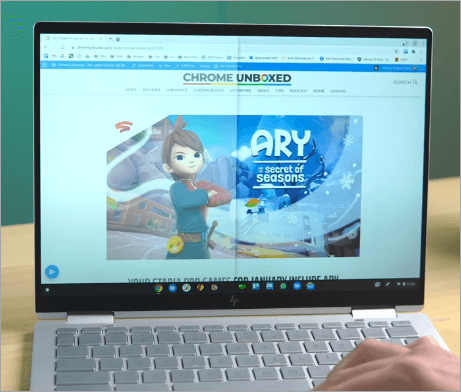
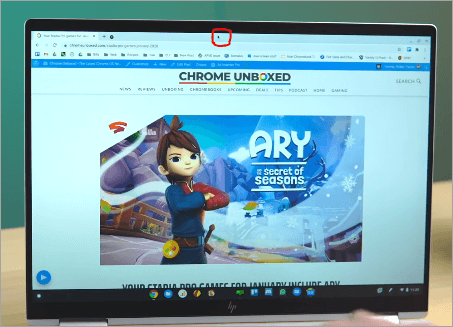
Step 1: Select an app, and then with your finger, press and hold the top bar of the app as shown below.
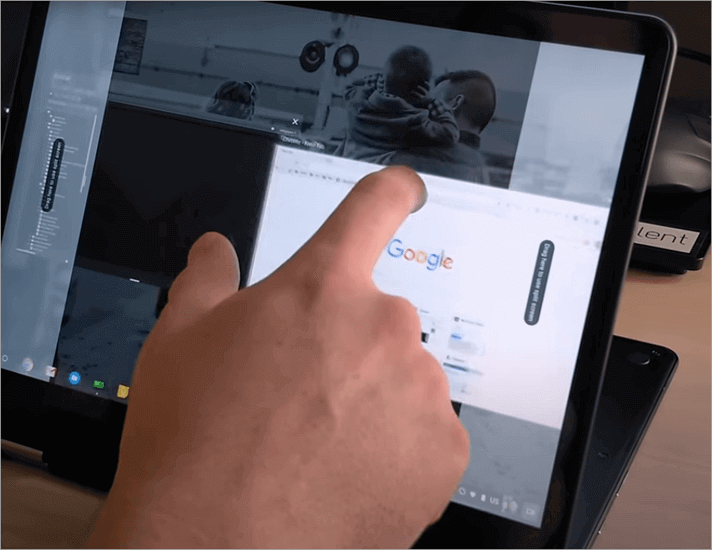
Step 2: Slide it to the right or to the left side.
Step 3: Use another app and move it to the other side, as in the image below.

The gesture-based approach is easy in the tablet mode, which resembles mobile multitasking.
Overview Mode:
Swipe (or slide upwards) on the touchpad with three fingers (or slide down on tablets).
Step 1: All the open windows are in a grid.
Step 2: Drag a window to the left and another one to the right.
Step 3: This is the ideal mode when trying to balance the use of multiple applications and when choosing two to use.
#2) Chromebooks With Current ChromeOS Updates (Partial Split Feature)
More recent versions of ChromeOS added Partial Split and Float Window, which provide the user with increased flexibility.
Partial Split Layouts:
Step 1: Click on the maximize button.
Step 2: Select disparate split layouts such as 1/3 – 2/3 or 2/3 – 1/3.
Best to focus on a single application (such as Zoom or Google Meet) but have another smaller window with notes.
Float Window:
Click the float option to maintain one window floating above another window.
Step 1: Good to have a chat or calculator somewhere open and to refer to it as you work on a primary document.
Custom Resizing:
Step 2: Drag the line between windows to resize both windows at the same time.
Step 3: This will enable you to design your own workspace based on what you are doing.
#3) Older Chromebooks (Without Advanced ChromeOS Features)
- Partially split or float is not supported with some older models.
- The most common ones are Basic Drag and Drop and Keyboard Shortcuts.
- To use more recent split-screen functionality, the user may have to update ChromeOS.
- The basic split screen can also be used to do side-by-side multitasking, though it does not require sophisticated layouts.
#4) Only Touchscreen Chromebooks (Uncommon Models)
When a Chromebook doesn’t come with a physical keyboard:
Step 1: The predominant method is Touch Gestures.
Step 2: Multitasking on Android is simulated by dragging the apps to the edges of the screen.
Step 3: To resize, it is only necessary to drag the divider line with your finger.
Split Screen Glitches on Chromebook
Enlisted below are some of the split-screen glitches on Chromebook:
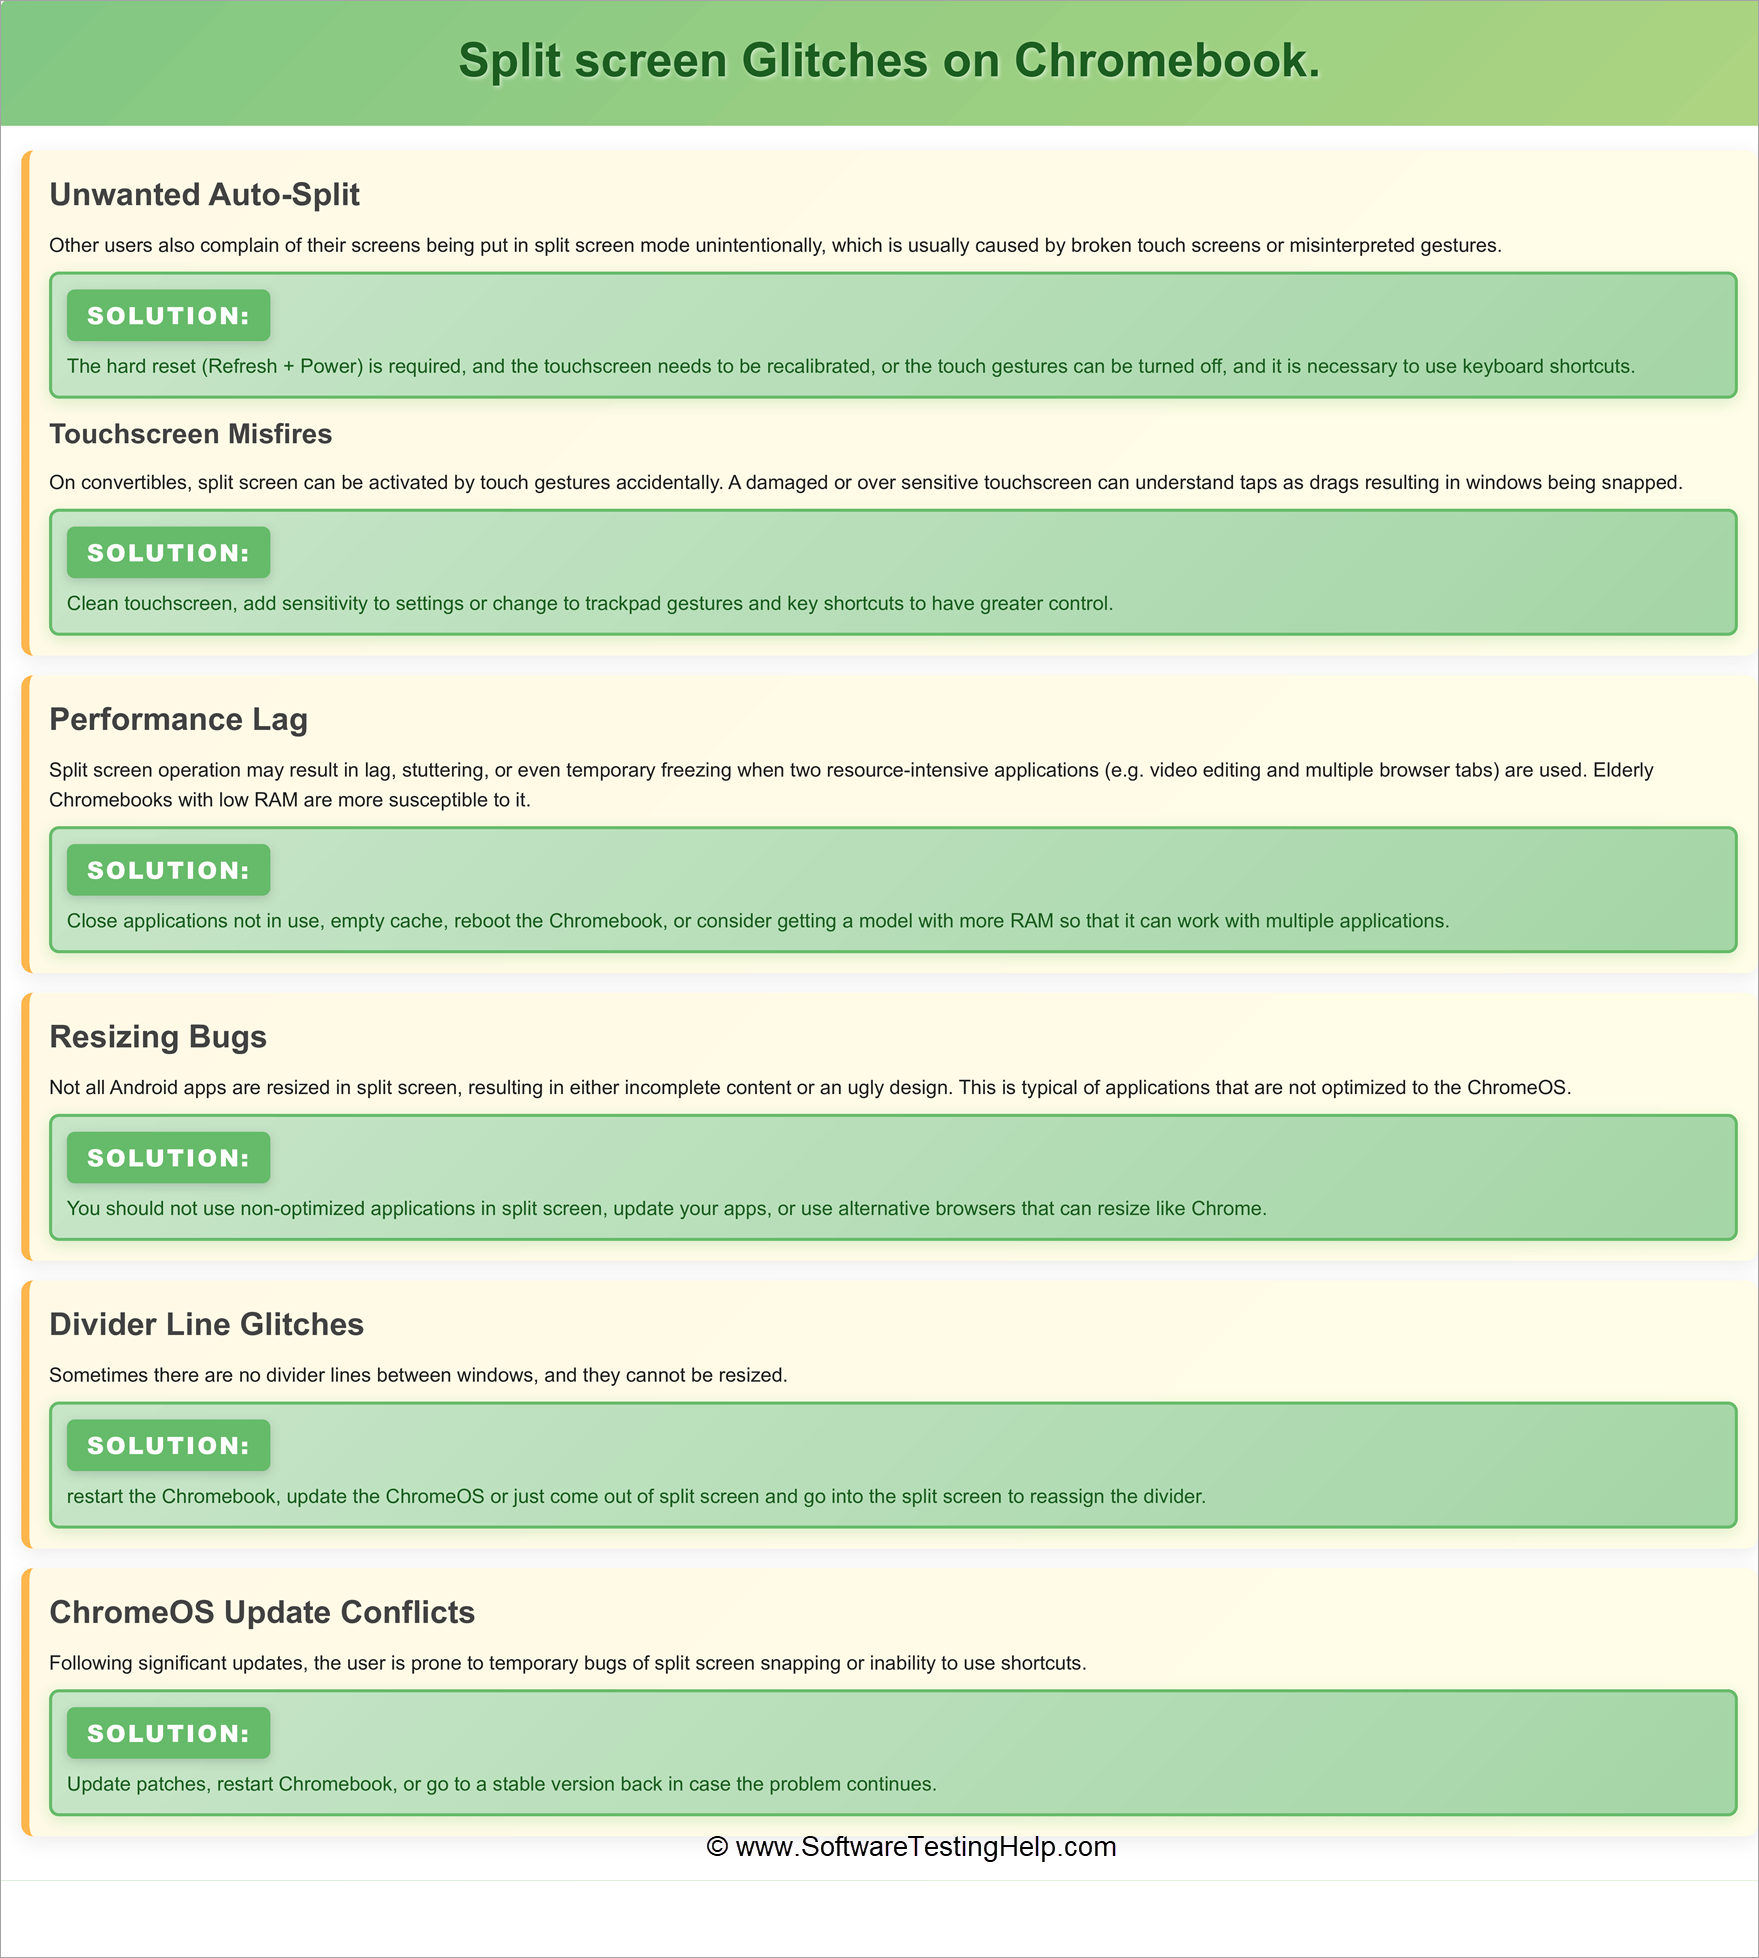
#1) Unwanted Auto-Split
Other users also complain of their screens being put in split-screen mode unintentionally, which is usually caused by broken touch screens or misinterpreted gestures.
Solution: You must perform a hard reset (Refresh + Power) and recalibrate the touchscreen, or you can turn off touch gestures and use keyboard shortcuts.
#2) Touchscreen Misfires
On convertibles, split screen can be activated by touch gestures accidentally. A damaged or oversensitive touchscreen can understand taps as drags, resulting in windows being snapped.
Solution: Clean the touchscreen, add sensitivity to settings, or change to trackpad gestures and key shortcuts to have greater control.
Split-screen operation may result in lag, stuttering, or even temporary freezing when two resource-intensive applications (e.g., video editing and multiple browser tabs) are used. Elderly Chromebooks with low RAM are more susceptible to it.
Solution: Close applications not in use, empty the cache, reboot the Chromebook, or consider getting a model with more RAM so that it can work with multiple applications.
Not all Android apps are resized in split screen, resulting in either incomplete content or an ugly design. This is typical of applications that are not optimized for ChromeOS.
Solution: You should not use non-optimized applications in split screen. Update your apps, or use alternative browsers that can resize like Chrome.
Sometimes there are no divider lines between windows, and they cannot be resized.
Solution: Restart the Chromebook, update the ChromeOS, or just come out of split screen and go into the split screen to reassign the divider.
After major updates, users may experience temporary bugs like issues with split-screen snapping or non-functional shortcuts.
Solution: Update patches, restart Chromebook, or go to a stable version in case the problem continues.
Chromebook Split Screen Not Working? Try These Fixes
When your Chromebook fails to operate the split screen feature, chances are that the reasons behind it include technical problems, an old version of ChromeOS, conflicting applications, or full screen limitations.
Fortunately, the majority of these problems can easily be solved with the help of basic troubleshooting techniques.
- How to restart ChromeOS
By restarting ChromeOS, you can remove any possible system malfunctions that interfere with the proper functioning of the split screen.
Steps:
• Click Time (bottom-right corner)
• Choose Power Icon → Restart
Try split screen after restarting.
2) Update Your Chromebook
Outdated versions of ChromeOS could result in problems with split-screen functions.
Here are the steps involved in updating your device:
• Go to settings
• Go to “About ChromeOS”
• Press “Check for updates”
• Install the latest update if there is one.
3) Disable Fullscreen Apps
Certain apps that use the fullscreen mode may interfere with the use of split screen mode.
Solution:
• Escape from the fullscreen mode by pressing the F4 key (or square button)
• Pull the window out of the fullscreen mode
• Attempt to snap windows again
Fullscreen apps don’t allow you to snap windows side by side.
4) Check Split Screen Compatibility
It’s not true that any application can work on Chrome OS in split screen mode.
List of incompatibilities:
• Android applications with limited resize capability
• Some video streaming applications
• Legacy web applications not designed for Chrome OS
Use Chrome web browser windows as an alternative.
5) Resetting Chrome Browser Settings
The experimental flag settings in Chrome browser can cause issues for window management.
Steps to reset:
• Launch the Chrome browser and enter the following address: chrome://flags
• Select “Reset all to default”
• Reboot your Chromebook
Split Screen: Expert Tips on How to use and How Not to use
| What to Use | What to Avoid |
| Pair Complementary Apps: Pair complementary apps that inherently perform well with others, such as Google Docs and Chrome browser to conduct research, or Zoom and Google Keep to take notes. | Don’t Multitask: ChromeOS can only open two windows side by side, and beyond that, it is impossible to focus on multitasking with many apps open. |
| Use Keyboard Shortcuts: Learn Alt + [ and Alt + ] to make windows instantly snap, it is more time-saving than dragging. | Do Not Use Intensive Apps Simultaneously: There are resource-intensive apps (such as video editing software and multiple browser tabs) that should not be used in split screen because they slow down performance. |
| Resize Windows Intelligently: To maximize the space in an app that you are currently using, such as spread sheets or design programs, drag the dividing line. | Split Screen: Do Not Divide: Do not use productivity applications with entertainment applications (such as YouTube or games) this will only kill productivity. |
| Partial Split with Focus: On more recent ChromeOS, one should use 1/3 -2/3 layouts to prioritize one application (such as video conferencing) and have another one visible so that it can be accessed quickly. | Do Not overruled Updates: ChromeOS versions before 95 do not support the split features on the partial window; update its version to access more convenient multitasking applications. |
| Touch Gestures Tablet Mode: On a convertible Chromebook, finger drag is used to open apps, and it is quicker and more natural. | Remember to leave Split Screen: When you are finished, maximize one of the windows to get back to the full screen focus otherwise you will also feel narrow. |
| Overview Mode of Organization: Swipe up with three fingers to view all the open apps, and then drag the two most urgently needed to split view. | Pairing Big and Small Apps: Do not separate screen apps that do not resize well (not all Android apps are planned to be used big or small). |
FAQs
How do I split two screens in Chrome?
In order to separate two screens on Chrome, you should open two windows, drag the first one to the left of your screen until it sticks there, and then drag the other window to the right side. You may use various combinations of keys such as Alt + [ and Alt + ] on Chromebook.
How do I split my screen into two tabs?
Google Chrome does not separate its tabs inside a window, but you can:
• Right click on the tab → Select Move to new window
• And then split screen two windows
• Or alternatively, use the Chromebook snap feature
What does Ctrl + Alt + Z do on a Chromebook?
The combination of Ctrl + Alt + Z on most Chromebooks activates ChromeVox (built-in screen reader). This key does not work to control split screen functionality on the Chromebook. It is basically used to turn off or turn on voice commands.
How to split your screen on a Chromebook with keyboard?
Split your screen with keyboard shortcuts:
• Alt + [ : Snaps window to the left side of the screen
• Alt + ] : Snaps window to the right side of the screen
• Overview + arrow keys (in some devices)
This is the quickest method of multi-tasking on ChromeOS.
How to show two tabs side by side in Chrome?
To arrange two tabs side by side:
1. First open both tabs
2. Then drag one of the tabs to form a new window
3. Arrange both windows side by side using the split screen feature.
It helps you in comparing any content or doing multiple tasks together.
How to split screen on Chromebook Lenovo or Dell?
There is no difference while using the split-screen function on different Chromebooks, for instance, Lenovo Chromebook, Dell, HP, or Acer:
• Dragging the window to either left or right sides
• Using the Alt+ [ / Alt + ] keyboard shortcut
• Maximize button → Split view option
How to split screen on Chrome Windows 11?
For Chrome on windows 11 split screen will work by making use of the following:
• Moving your window to the edge of the screen
• Use Windows Key+Left/Right Arrow keys
• Also, you can try using Snap layouts by hovering maximize button
The above method works for all tabs or apps opened in Chrome.
Chromebook split screen not working solution?
What to do when your Chromebook isn’t splitting your screen correctly:
• Restart chromeOS
• Update Chromebook
• Exit from fullscreen
• Appropriate apps
• Chrome flags reset (chrome://flags)
Conclusion
Split screen on Chromebook is not just a cool feature; it is a productivity monster. It will empower students, professionals, and everyday users to be more efficient by reducing the effort needed to move between different programs.
Having several options to choose between on the different models of Chromebooks, either through keyboard shortcuts or by touching screens, it is a flexible tool that can conform to your working process. ChromeOS has a feature that’s not widely recognized, and you’re missing out if you don’t try it.
Research Process: Approximately 48 hours were spent on comprehensive research, evaluation, verification, and final preparation to ensure accurate and reliable information about Split screen on Chromebook.
For more screen-related guides, you can explore our range of screen tutorials below:
- Top 10 Screen Capture Software Tools for Better Snapshots
- The 14 BEST FREE Green Screen Software
- Top 11 Screen Sharing Software For Web Conferencing
- Top 10 Screen Recording Software for Windows and Mac Users
- 10 Best Screen Mirroring Apps for iPhone & Android
Was this helpful?
Recommended Reading
-

Here is a comprehensive guide that will help you understand the difference between Chromebook Vs. Laptop and understand their pros and cons: Whether you're a student, a professional, or simply someone looking to purchase a new computer, choosing between a Chromebook and a laptop can be challenging. Both devices offer…
-

Quickly access emojis on Chromebook with simple emoji keyboard shortcuts. Learn how to get Emojis on a Chromebook and express yourself with colorful emotions to enhance your Chromebook communication: Chromebooks run on the Chrome operating system, which Google built. Introducing Chromebooks has made it easy for everyone to afford a…
-
This tutorial includes various stepwise methods to explain How to Open Task Manager on Windows, Mac, and Chromebook: Everyone using a computer opens the task manager every now and then. Your PC is slow, you want to close a program that has stopped responding; you want to optimize your system,…
-
A complete step-by-step guide to clearly understand how to Share Screen on FaceTime using iPhone, iPad, or Mac without any difficulties or hassle. With FaceTime’s screen sharing feature, you can share your iPhone, iPad, or Mac screen with someone you are making a FaceTime call with. This is a great…