


In this tutorial, you will see how to use properties in SoapUI Groovy Script. Let’s get started.
Properties are the central repository for temporarily storing information. They can contain login information like username and password, session data like session ID, page context, header information, and so on.
This is the 7th tutorial in our SoapUI free online training series.
Let’s see how to add property test steps. Then, we will discuss assigning values to the property and showing them in the log.
How to Use Properties in SoapUI Groovy Script
Here are the steps.
- Right-click on the Test step node
- Click the Add Step and Properties option from the context menu
- Enter the property name as desired and click OK
- On the properties screen, click
 the icon to add a property
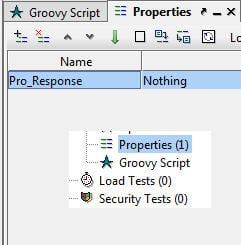
 - Enter your desired property name and click the OK button. For example, let me enter Pro_Response
- Type any default value for the property if you wish. For example, I enter “Nothing”
- Then add a Groovy Script test step next to the property step. Refer screenshot below.
We can transfer the property data across the test steps during the test execution. For this, SoapUI Pro will provide the Property Transfer test steps. Look at the screenshot below:

In the groovy script, add the following script. The script will assign a string text to the property and then it will show in the log after executing the test case.
String testString = "TestString"
testRunner.testCase.setPropertyValue( "Pro_Response", testString )
def getLocalPropValue = testRunner.testCase.getPropertyValue("Pro_Response")
log.info(getLocalPropValue)
- Once the above script is written in the editor, double-click on the test case name step.
- Run the test case by clicking on the icon
 and the see the results in the script log tab.
Accessing property
There are several ways to access test cases, test suite and project properties for setting and getting their data through the script. Here are the samples to retrieve the property data.
def getTestCasePropertyValue =
testRunner.testCase.getPropertyValue( "LocalPropertyName" )
def getTestSuitePropertyValue =
testRunner.testCase.testSuite.getPropertyValue
( " LocalPropertyName " )
def getProjectPropertyValue =
testRunner.testCase.testSuite.project.getPropertyValue
( " LocalPropertyName " )
To access global property, here is the script:
def getGlobalPropertyValue =
com.eviware.soapui.SoapUI.globalProperties.getPropertyValue
( "GlobalPropertyName" )
These script lines are used to set value to local and global property.
testRunner.testCase.setPropertyValue( " LocalPropertyName ", someValue )
testRunner.testCase.testSuite.setPropertyValue( " LocalPropertyName ", someValue )
testRunner.testCase.testSuite.project.setPropertyValue( " LocalPropertyName ", someValue )
com.eviware.soapui.SoapUI.globalProperties.setPropertyValue
( " GlobalPropertyName ", someValue )
Here in these scripts, testRunner is a common object which might be test suites, test cases or projects. setPropertyValue and getPropertyValue are the methods or functions.
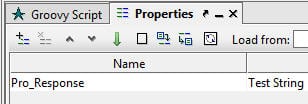
As mentioned in the above script, we can assign data to the properties.
testRunner.testCase.testSteps[“Properties”].setPropertyValue( “Pro_Response”, testString )
After executing the above script, the property will get updated in the property test step. Refer to the following screenshot.
Receiving response data
Now let’s discuss how to get the response data through the script. In order to do this,
- Execute the service request once and verify the result
- Go to Groovy Script Editor and then right click on the editor as shown in the below screenshot

SoapUI Pro now generates the script below after specifying the property name.
def response = context.expand( ‘${ServiceRequest#Response}’ )
As we know, “def” is a groovy script keyword that represents defining properties/objects. By default, SoapUI Pro has the property name as “response” in the Get Property popup. If you want you can change the name. The remaining portions of the script are auto-generated.
Please merge the above script with our earlier discussed script. Here’s what you will see:
def response = context.expand( '${ServiceRequest#Response}' )
testRunner.testCase.setPropertyValue( "Pro_Response", response )
def getLocalPropValue = testRunner.testCase.getPropertyValue("Pro_Response")
log.info(getLocalPropValue)
If we execute the above script separately, it will log the entire response data in the log section. Even when executing this along with the test case, it will show the same output in the script log.
Creating properties from the navigator pane
There is another way to create properties locally through the property panel which will appear when we click on the nodes under the project tree. Let’s see how:
- Add currency converter service request and a groovy script test step under the test suite ConversionTestSuite.
- Click on the TestSuite name under the project (i.e. ConversionTestSuite)
- At the bottom of the Navigation panel, you’ll see a Property panel. It contains TestSuite Properties and Custom Properties tabs.
- Go to the Custom Properties tab by clicking on it
- Then click on the plus ( + ) icon to add the property as shown below:

- Enter the property name and provide the default input value as shown in the above screenshot.
- Now execute the currency converter service request once. Only then can we get the property information when right-clicking on the editor.
- Enter the following script in the editor
def getPropValue = context.testCase.NetSuite.getPropertyValue(“FromCurrencyValue”)
- Click on the Run icon
This script gets the property value and assigns it to the variable “getProValue”. To print the value of the property, we can write the following script :
Log.info (getPropValue);
Global Properties
Now let’s discuss global properties. These properties are defined in one place and we can access them across the project components like test suite, test case, test steps etc.
Here are the scripts for writing data for global properties.
com.eviware.soapui.SoapUI.globalProperties.setPropertyValue
( "prjFromCurrency", "USD" )
com.eviware.soapui.SoapUI.globalProperties.setPropertyValue
( "prjToCurrency", "INR" )
Once we execute the above test step script, the mentioned properties will be created and the respective values will be assigned to those properties. Let us see how we can verify it.
- Click on the File menu
- Then, choose the Preferences option
- On the left side, click on the Global Properties tab.
- Verify the properties in the property sheet on the right side. Refer to the screenshot given below:

Conclusion:
Properties are helpful for transferring data between test steps such as test suites, test steps and test cases. Property can be defined through a groovy script. We can also assign and retrieve data from the properties through the script. Also, just like other test steps, you can rename, delete, or disable the property test step by right clicking and then choosing the respective options from the context menu.
In the next tutorial, we will learn more features about properties like passing properties in the input request and retrieve from global properties, property transfer test step and so on.
Please stay with us and let us know in the comments section in case of any questions or doubts. We would love to hear from you.
Was this helpful?
Recommended Reading
-

In this tutorial, we will learn how to write basic groovy script in SoapUI. We will learn about different types of operators that can be used in Groovy scripts in SoapUI. Let’s begin with groovy scripting and how we can use it in SoapUI Pro. This is the 6th tutorial…
-

In this SoapUI tutorial, we will look at how to handle exception in SoapUI Groovy scripts. Let's get started. Handling runtime exceptions in groovy is similar to Java as the Java libraries are integrated. However, we will discuss the basic concepts in SoapUI and go into the details of exception…
-

In this tutorial, we will learn in detail about advanced SoapUI Groovy Scripting Concepts. Let's get started. The previous SoapUI tutorials have been an introduction to SoapUI and its programming concepts. We will now move into more advanced Groovy scripting concepts. Let us do this with Conditional flow statements -…
-

This tutorial is all about working with SoapUI properties. Let's get started. In the last SoapUI tutorial we saw how to add properties in Groovy script. The property in SoapUI is similar to a variable/ parameter and in this tutorial, we will talk about how to use one in a…


I was wondering how would i use the groovy script to skip between steps in a test suite for example say i wanted to go from step 1 to step 4 and to do so i needed a value from the xml code in step one how would i get that value inside the groovy script in order to go to step four
Hi
Thank you Vijay
The “8 soap tutorial” page is successfully opened.
What is the difference between context and testRunner. where we use these. In which case we use context and testRunner. I ran the below script. The output is same .
def getPropValue = testRunner.testCase.testSuite.getPropertyValue(“suite”)
log.info “using test tunner “+getPropValue
def getPropValue1=context.testCase.testSuite.getPropertyValue(“suite”)
log.info “using context”+getPropValue1
Hi,
I need to insert in each Field, All possible Data, suggested on use case with SoapUI
How can i Do it with Groovy and SoapUI
Hi all.
The “Error establishing a database connection” database error message on the white screen is displayed when opening this page
Softwaretestinghelp.com/soapui-tutorial-8-working-with-soapui-properties/
Hi
Thanks for reporting it. It may be a temporary refresh. Can you please try and let us know if the issue still persist? You can try other pages as well.
@hemantvarhekar
please try this one
String testString = “TestString”
testRunner.testCase.setPropertyValue(“Pro_Response”, testString)
def getLocalPropValue = testRunner.testCase.getPropertyValue(“Pro_Response”)
log.info(getLocalPropValue)
There was extra space in the ( “Pro_Response”, testString )
When first adding the property transfer, there is no screen shot of how this is set up. I have attempted to insert the correct source & target details but when I execute that, the Groovy Script is overwritten by the property value. Can anyone help fix this?
Is it possible to set integer values to set in properties ?
Do property supports only datatype : String ?
Hi
Thanks for sharing.
Can you explain how to randomize datasource?
Hi,
I want to set assertion SLA for all the apis in my project.How can i do that?
Hello
This tutorial is very helpful…:) Thanku so much
But i am getting an error : unexpected char: ‘#’ @ line 1
Can you please resolve this?
Got solution for my query as below
String sMethod = (testStep.getTestRequest().getMethod())
@Sushma: Thanks for reading..
Randomizing the data source will be discussed in the data driven testing article.
How/Where shall I set -Dsoapui.redirect.limit property ?
Any luck with this?
thank you for the write up.
in “receiving response data” section on right click am not getting get data option. am using soapui5.2.1
plz revert on the above
How to get METHOD from a testStep/testCase/testSuite, basically from any one.
I am interested to access only GET APIs/testSteps among all type of APIs.
Thanks!
Cool one! Thanks you very much!
runner.testSuite.testCaseList.each(){
for (testStep in it.testStepList)
testStep.setPropertyValue(“Username”, “dpshud1”)
}
Hi,
I tried this sample where Upon execution of below groovi scripts:
String testString = “TestString”
testRunner.testCase.setPropertyValue( “Pro_Response”, testString )
def getLocalPropValue = testRunner.testCase.getPropertyValue(“Pro_Response”)
log.info(getLocalPropValue)
I was expecting the value of Pro_Response should be set to TestString but this is not happening.
can you suggest
this was a great tutorial and an important step to pass on data between various componeneys in a test case
Thanks for sharing it
1) Some problem which can be corrected is :- Space should not be there below
testRunner.testCase.testSuite.getPropertyValue( ” LocalPropertyName ” )
2) Can’t we see properties in a table like we see custom properties,, I was not able to see properties defined inside groovy scipt in the form of table in navigation bar on left side
Keep up the good work.