


Installing a Blink Camera is not rocket science anymore. Learn how to set up a Blink Camera like an expert and get it running in minutes to restore your home security instantly:
Blink cameras are less expensive security and extremely high-end watch-gadgets. Besides, Blink has struck a pleasant balance of capability and extended battery life, so you will know you have a reliable solution that will help boost security at your premises.
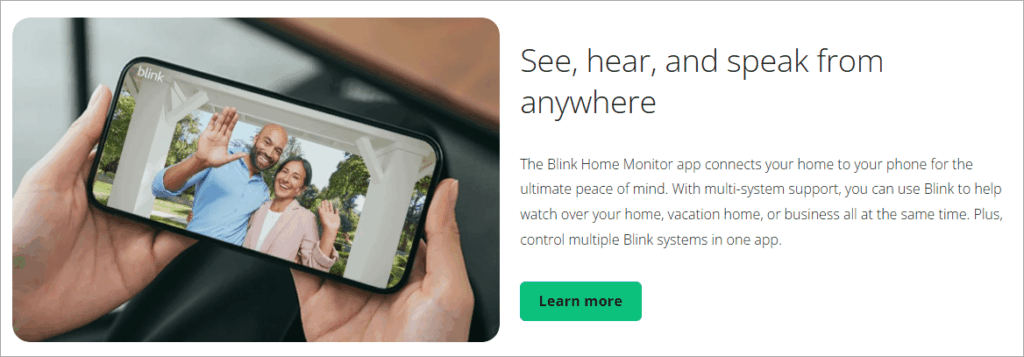
Blink puts an emphasis on HD day/night video, two-way audio, motion-detection alerts, and easy smartphone control with the help of the Blink Home Monitor app.
Table of Contents:
- How to Install A Blink Camera Like a Pro: Step-by-Step Guide
- Best Camera Models/Variants of Blink Cameras
- Comparing Camera Variants of Blink Cameras
- Basic Requirements Before Setting a Blink Camera
- How to Set Up a Blink Camera: Pre-setup Procedures
- Top Blink Cameras With Quick Steps to Setup
- Top Recommendations to Optimize Blink Camera Performance
- Frequently Asked Questions (FAQ)
- Conclusion
How to Install A Blink Camera Like a Pro: Step-by-Step Guide
Blink cameras not only feature long life for the non-rechargeable lithium battery but also are much more affordable, can be controlled wirelessly, such as from a phone, and feature voice assistants such as Alexa.
With that said, the compromise could be the lack of ultra-advanced features in relation to high-end brands, but to many households, Blink is a lot of bang for the buck.

[Via blinkforhome]
This tutorial is about how to install different variants of Blink cameras, precautions on the same, and the device options that exist.
Check the video guide below to set up a Blink Mini 2 camera:
Best Camera Models/Variants of Blink Cameras
Here are some of the top models or variants of Blink Cameras:
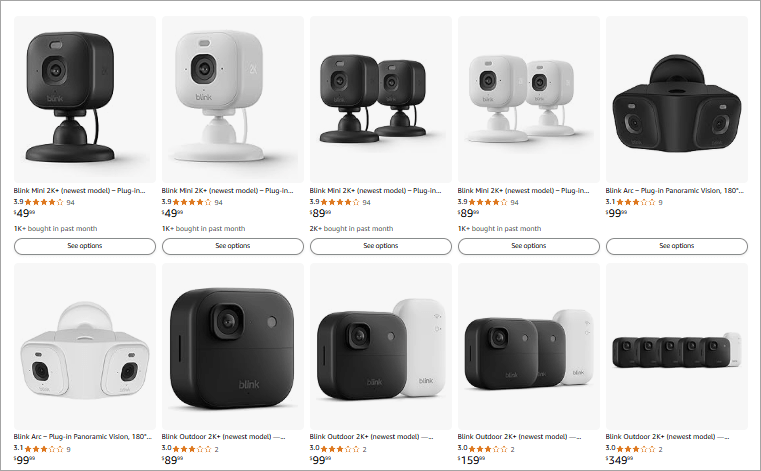
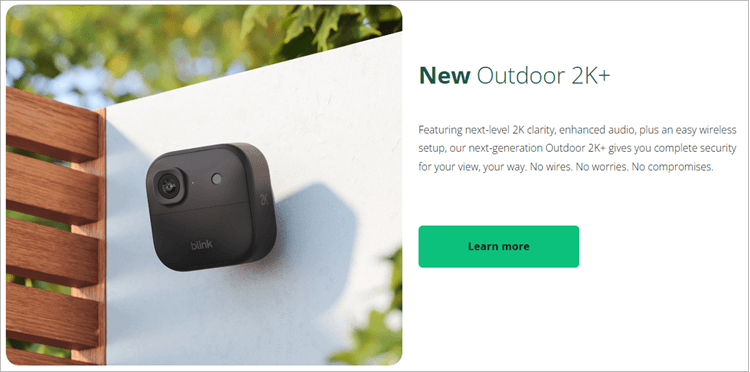
#1) Blink Outdoor (wireless, battery-operated, outdoor/indoor): These generation versions are named Outdoor 2K+, etc.
#2) Blink Indoor (3rd): These are indoor battery-powered outdoor-rated versions.
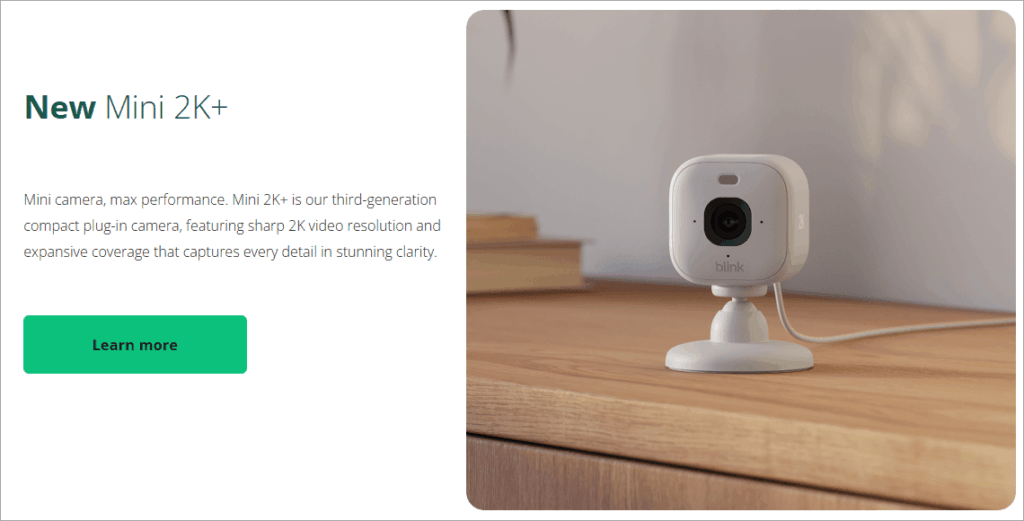
#3) Blink Mini (plug-in indoor camera): They are Mini, Mini 2, Mini 2K+, etc.
#4) Blink Mini Pan-Tilt: They are pan and tilt motion security cameras (plug-in indoors).
#5) Blink Video Doorbell (2nd-gen): Doorbell-camera with a battery life that lasts up to two years.
#6) Blink Outdoor 4 / Outdoor 4 Floodlight Camera: An older outdoor camera that has floodlight/LED, etc. (not discussed initially, but is listed in price tables).
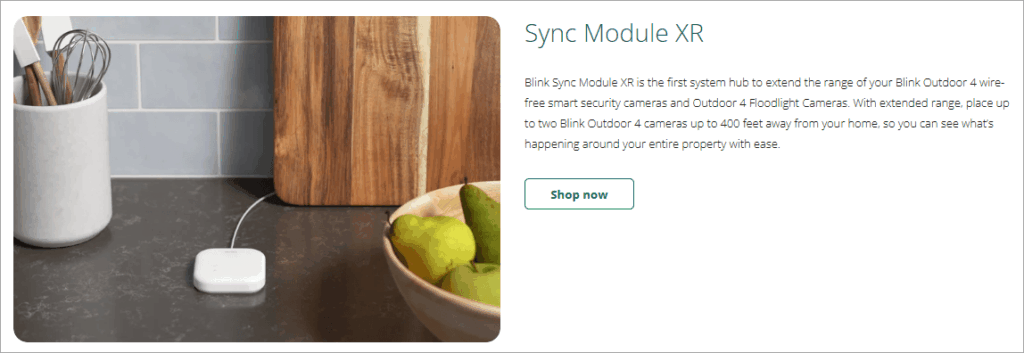
#7) Sync Modules (Core, 2, XR): These are accessories/hubs that are optional/needed based on model.

Comparing Camera Variants of Blink Cameras
| Model (Variant) | Approx Price* | Resolution / Key Feature | Power / Mounting | Notes & Highlights |
|---|---|---|---|---|
| Mini (plug-in) | ~$39.99 (U.S.) | Up to 1080p HD | Plug-in (USB) | Indoor use, simplest form. |
| Mini Pan-Tilt | ~$39.99 (or similar) | 1080p HD, pan/tilt ~350°/125° | Plug-in | More flexibility in view angle; indoor. |
| Indoor / Indoor (3rd Gen) | ~ similar to outdoor models or mid-tier | Up to 1080p | Battery or wired | Indoor dedicated, or indoor/outdoor variant. |
| Outdoor (wire-free) – Older Gen (e.g., XT2) | Varies, older price higher; example specs | 1080p, 110° FOV | 2 × AA lithium non-rechargeable batteries | Outdoor rating, up to two years battery life, requires Sync Module. |
| Outdoor 2K+ (newer) | ~$99.99 U.S. | 2K (2560×1440) resolution, 4× digital zoom, improved audio | Battery (two AA) | Next-gen outdoor; higher resolution/zoom. |
| Video Doorbell (2nd gen) | ~$69.99 U.S. starting point | Head-to-toe HD video, up to two years battery life (3 AA) | Battery or existing doorbell wiring | Door-mounted use, outdoor-rated, two-way audio. |
| Outdoor 4 / Floodlight Versions | ~$79.99–$129.99 depending on kit | 1080p or higher, wide viewing angle, floodlight illumination | Battery (wire-free) or wired | More powerful outdoor option for large area coverage. |
Basic Requirements Before Setting a Blink Camera
Enlisted below are some of the basic as well as essential requirements that need to be implemented before setting up a Blink Camera.
#1) A smartphone or tablet apparatus with an iOS (iPhone/iPad) or Android operating system and the application of Blink Home Monitor installed. This will be used to install, operate, and monitor the camera.
#2) Wi-Fi network – 2.4 GHz Wi-Fi network (at present, only 2.4GHz is supported by most cameras in the Blink lineup, though not 5GHz).
#3) Power source/batteries
#4) In plug-in models (those with Mini, Pan-Tilt): a USB power adapter and an electrical outlet. (E.g., Mini spec: power 5 V /1 A USB-Micro)
#5) AA 1.5 V lithium non-rechargeable batteries (or three in doorbell) as supplied/specified.
#6) Existing doorbell wiring or power source + mounting hardware.
#7) Mounting hardware, e.g., screws, anchors, and mount.
#8) Sync Module (where necessary): The Sync Module hub is required for some Blink models.
#9) Cloud storage/local storage plan choice.
#10) Mount location/signal strength test.
#11) Preparation of accounts and apps: Prepare a Blink account (email + phone number) and download/upgrade the Blink Home Monitor app on your smartphone (iOS/Android).
#12) Firmware/app update readiness.
#13) Add such optional accessories as solar panel mount (outdoor battery model), additional USB flash drive (local storage using Sync Module 2), and weather-resistant adapter (indoor model used outside).
How to Set Up a Blink Camera: Pre-setup Procedures
This section deals with basic and general pre-setup procedures to be followed in a step-by-step format for your easy understanding.
General Re-setup (in All Devices)
Step 1: Install the Blink Home Monitor app on your smartphone from the iOS App Store or the Android Play Store.
Step 2: Register your Blink account on the app.
Step 3: Connect the smartphone to the 2.4 GHz Wi-Fi network.
Step 4: Determine the areas to mount. Check Wi-Fi or signal strength in those areas (a phone’s Wi-Fi signal indicator or a Wi-Fi analyzer app may be required).
Put batteries in if required, or connect to an outlet where required, and for in-doorbell or wired models, switch the power at the breaker.
Pre-set up of Devices That Need Sync Module
In the case of Blink models that need a Sync Module (i.e., older Outdoor/Indoor models like XT/XT2), the following should be done:
Step 1: Unbox the Sync Module and insert it into the power source beside the Wi-Fi router (or power source).
Step 2: Add a device. In the Blink app, tap – add Sync Module, scan the QR code, or enter the serial number.
Step 3: Your phone will be needed to connect to the temporary Wi-Fi network (e.g., “BLINK-XXXX”) that the Sync Module will be broadcasting, which will then allow the module to be connected to your local WiFi. The app guides you through it.
Step 4: When the Sync Module has been connected to your Wi-Fi, you will observe a green light in the Blink app/home screen indicating that it is online. Make sure it is operational and then move on.
(Optional) In case you desire local storage, you can be able to add a USB flash drive to the Sync Module (provided the module does not block this option) to allow event clips to be saved locally. The spec of Sync Module 2 states that the USB port supports a 1 GB to 256 GB drive.
Step 5: After the Sync Module is installed and the connections are made correctly, it is now possible to add the cameras to that system.
Top Blink Cameras With Quick Steps to Setup
The section below includes the instruction manual to follow for each model/make of the camera.
#1) Outdoor Wire-Free Devices That Use Batteries
Some examples of Outdoor Wire-Free Cameras that use batteries are Outdoor 2K+, Outdoor older, XT2, Outdoor 4, etc.
Key Features:
- Long battery life (up to two years on AA lithium batteries with many of the models) and is weatherproof.
- Better audio and digital zoom on the more recent Outdoor 2K+ include 2K resolution.
How to Set up Outdoor Wire-Free Blink Cameras on Android & iOS
#1) Pre-assembly/Insertion
Step 1: Take the camera out of the box and attach the batteries (two AA non-rechargeable lithium ones).
Step 2: Take off and install the bracket or mount riser provided (as with the XT2 box, there is a mount riser provided).
Step 3: Attach the mount to the place you have chosen and screw it in. Use anchors with masonry.
Step 4: Attach the camera to the mount and roughly focus the angle. Fine-tuning will be permitted in the app.
#2) Adding the Camera to App
Step 5: Open the Blink Home Monitor and make sure that you are logged in.
Step 6: Tap the + (Add Device) button and choose either the model of the camera (or a specific model on the list provided).
Step 7: Enter the serial number on the back of the camera in a QR scan (or enter manually) when requested to do so. Follow the steps to permit camera access and other permissions.
Step 8: Type the WiFi password, wait till connected. To connect an outdoor wireless model to the Sync Module (temporary): in temporary Wi-Fi, join the Sync Module, and join your local Wi-Fi.
Step 9: Once you have connected, the application will request you to give the camera a name (e.g., Back-Porch) and choose a thumbnail (desired). In the case of XT2, we can change names, etc.
#3) Camerawork: Quality and Alerts
Step 10: After opening the app, you will find the three horizontal hamburger dots that you now tap to access some settings. (More) of that camera – Video and Photo Settings. Manifestation Resolution (when necessary), field of view, areas of activity, motion sensitivity. Advanced Activity Zones are an example of a reference in the XT2 manual.
Step 11: In Notifications and alerts, check motion alerts, Schedule/ quiet hours, and check which users/ devices receive push notifications.
#4) Installation/Locating the Final Location
Step 12: Close to live view, check signal strength, and view the area. Space the angle and position it in such a way that it captures the area you need (it works best when the subject is walking across the field of view as opposed to walking to the camera because you can see them better). This is described in the XT2 manual.
Step 13: Secure the mount, ensure it is firm, and ensure that the camera is weather-proofed (press in cover screw hole where necessary, position and orientation marking, etc.).
#5) Testing & Verifying
Step 14: Access Live View within the app. Then, verify the video and any two-way audio quality.
Step 15: Movement in the picture (pass by, to hand over a box) and have an alert (to cloud or USB/local), and make sure the clip is recorded (to cloud or USB/local).
#2) Mini (Mini Pan-Tilt) Plug-in Indoor Models
How to set up Mini (Mini Pan-Tilt) plug-in Indoor models on Android & iOS
#1) Pre-assembly / Plug-in
Step 1: Install the camera where there is a WiFi connection and attach the USB cable to the camera and the power adapter to an outlet.
Step 2: (On Pan-Tilt version) Mount the pan-tilt base or put it on a shelf, attach the camera to the mount, and make sure the base has a free space for rotation.
#2) Add in the App
Step 3: Open the Blink app and sign in.
Step 4: Tap + (Add Device) and choose the model (e.g., “Mini” or “Mini Pan-Tilt”).
Step 5: Get the scan of the QR code or serial.
Step 6: Turn on the Wi-Fi, find a network, and connect the camera using the password (2.4 GHz).
Label the camera in the app and place it in a location/room, should you wish to.
#3) Configure Settings
Step 7: Under the device settings – Video/Photo settings: set the resolution (most of the Mini models can go as high as 1080p), set the motion sensitivity/zone masks. With Pan-Tilt, you can pre-set patrol routes or pre-set angles (when available).
Step 8: Under Notifications and Alerts, turn on motion alerts, and set quiet hours (when necessary).
#4) Placement/Mounting
- To be Used Inside: It should be at eye level or a little higher, with the main purpose being to cover the entry of the room or the focal point. Do not focus the direct light upon the lens; do not point the lenses at the sunset windows (to minimize glare).
- On Pan-Tilt: After turning on and connecting, open Live View and rotate/tilt with the app and ensure that the entire room is covered, and turn on any preset positions (e.g., corner to door).
#5) Testing the Camera
Step 9: Make a move (pacing the room), check that the phone is on.
Step 10: Check live view, two-way talk (audio) functions, and night-vision are enabled by switching off the lights and checking.
#3) Video Doorbell (2nd Generation)

How to set up Video Doorbell (2nd Generation) on Android & iOS
#1) Pre-installation
Step 1: First, if you are wiring into an existing doorbell, use the breaker to cut off the power. Then, remove the existing doorbell. Ensure the wiring (typically two wires) and the wall box are standard size.
Step 2: In case of wireless only: make sure that the wall is a mounting surface, the doorbell site has WiFi connectivity, and the batteries are powered in (3 AA lithium). Within the package, they have the batteries, USB-C cable, and indoor power adapter.
#2) Add in the App
Step 3: Open the Blink app and sign in.
Step 4: Select + (Add Device) – select Video Doorbell.
Step 5: Select QR or type the serial number.
Step 6: Select between Wireless and Wired installation. Should your system be wired, do what the apps ask you to do; that is, connect to existing wiring, and select to chime with your existing doorbell. If wireless, skip the wiring.
Step 7: Connect to WiFi (2.4 GHz).
Step 8: Label the doorbell of the app (e.g., Front Door) and determine the homeowner’s location.
#3) Mounting
Step 9: Install the bracket on the wall at the normal height (approximately 48-54 in. above the ground), and ensure that the doorbell is tilted to cover the package drop zone. The application corner mount option should be used.
Step 10: Install the doorbell unit on the mount bracket and screw it on. Restore power if wired.
#4) Configure Settings & Alerts
Step 11: Video and Photo settings: Go to device settings and adjust field of view, night vision, etc. As an example, doorbell spec refers to a head-to-toe view and night vision, IR.
Under the category of Notifications and Alerts: Turn on doorbell press notifications, motion alerts, and can be set to only see people (when subscribing to this).
Step 12: In Live View, test two-way talk, check that an alert is given when the button is due, and motion detection action can be performed when a person walks to a door.
#5) Testing
Step 13: Go closer to the door, press the doorbell, check if you receive the notification on your phone, and if live view is open, you can speak through it.
#6) Low-light Night Test to determine IR Night vision
Step 14: In case of battery version, check the estimated battery life in the application; in case of wired version, check that the doorbell chime works.
Top Recommendations to Optimize Blink Camera Performance
Here are recommendations on how you can optimize performance and settings on your Blink camera devices:
- Cover up any areas that are not important to you.
- Tune motion sensitivity to be sensitive enough that people are picked up, but not to detect little pets or swinging trees.
- With outdoor cameras, position the camera so that subjects move across the frame (side to side) and do not face the camera, as this makes motion detection more effective. This is suggested in the XT2 guide.
- Periodically check the battery level in the app for battery models.
- In plug-in models that are left outside (only when given the opportunity): Use a weather-proofing adapter and make sure that the power cord is clearly laid out and covered.
- In case you have more than one system/camera with Blink, there is no need to create more than one Sync Module unless you must do so; many cameras have a single Sync Module. The Mini 2 and Wired Floodlight do not require a Sync Module, as the review indicates; several standalone cameras will overload Wi-Fi.
Frequently Asked Questions (FAQ)
1. Is it possible to use a Blink plug-in model outdoors?
Most indoor models, such as Mini, are only used indoors (not weather-resistant). Other versions (e.g., Mini 2) can be used outdoors with a weather-resistant accessory.
Example review: Mini line can be applied outdoors, where it can be weather-resistant. A manufacturer should always check the environmental rating of the product before using it outdoors.
2. What is the duration of the battery of Blink battery-powered cameras?
This is dependent on usage, temperature, motion events, and signal strength. Most Blink battery models claim a maximum of two years on two AA lithium batteries with default settings and normal usage.
As is the case, the Outdoor spec displays 2 years on AA batteries. You will have shortened battery life in case of constant motion, a weak signal, or extreme temperatures.
3. What is the best way to install a Blink camera so that it can be viewed optimally?
Blink installations recommend mounting them at a height of about 7-9 feet (outdoor porches) or at eye level (indoor), so their viewing area encompasses the entrance/footpath.
In motion detection, it works better when a person is walking through the area under the camera as opposed to walking directly toward the camera. Sample: The XT2 guide recommended this.
4. I am not recording to the USB drive/loop; there is something wrong with my camera.
In case you have a Sync Module 2 with a USB drive, the drive must be formatted and must have enough free space (375 MB free and more), and should be properly connected. Make sure you turn on local storage in the Blink app. Also, check the firmware version on the module. (Specific details USB capacities)
5. Is it possible to have more than one Sync Module that will have several Blink cameras?
One Sync Module can be used with several cameras. The review points out that it is advisable to have one module used to have many cameras rather than many modules that are redundant.
Conclusion
Overall, to install a Blink camera, you are likely to do so: download and install the app and an account, use it to connect the camera (or Sync Module) to your Wi-Fi, position the device, set up your settings (video quality, motion alerts, naming), test live, and motion alerts, and optimize the placements and settings.
Due to the number of models (indoor plug-in, outdoor battery, doorbell) that you can choose to use, you can select the model that suits your needs most (regarding battery life (wire-free models) and solid value price), coupled with the following Blink advantages, including long battery life, smartphone-based monitoring, and easy installation.
Research Process: The total time involved to complete and publish this article is approximately 48 hours. This content was created through a structured research approach to ensure accuracy and reliability.
For more Camera-related guides, check our range of tutorials below:
- The 10 Top Mirrorless Cameras Photographer’s Choice
- The 10 Top PoE Security Camera Systems
- The Best Video Conference Cameras for Your Conference Room
- The 12 Best Security Cameras for Small Businesses
- BEST Wireless Outdoor Security Cameras (Best-Sellers)
Was this helpful?
Recommended Reading
-

Are you struggling to get some clear images at night using your DJI Osmo or GoPro? If yes, then you need to get your hands on a good action camera flashlight. You know that even the best action cameras out there can be notorious for offering poor image quality due…
-
Thinking about upgrading your home security systems? Switching over to an NVR Security Camera System might give you the ideal solution for monitoring and providing great security abilities: Having the best NVR camera system will provide a complete solution for recording! An NVR security camera is a network video recorder…
-
The flexibility of Wireless Outdoor Security Cameras is on the rise, but with more options getting introduced every week, it has become a difficult choice for users to pick the best one. If you are confused, this guide is for you! If you are looking for the best security camera,…
-

Are you thinking of taking amazing photos and videos while snorkeling? Read this tutorial for the Best Waterproof Cameras along with features, technical specifications, and comparisons: Is the current camera you possess not permitting you to get the right shots underwater? It's time to switch over to the best Waterproof…


